

- How to Make a Burlap Wreath – 3 Easy Styles! - May 30, 2022
- How to Revive Wilted Hydrangeas – Guaranteed! - July 28, 2021
- Easy Canvas Painting Ideas – 30+ DIYs for Beginners - June 16, 2021
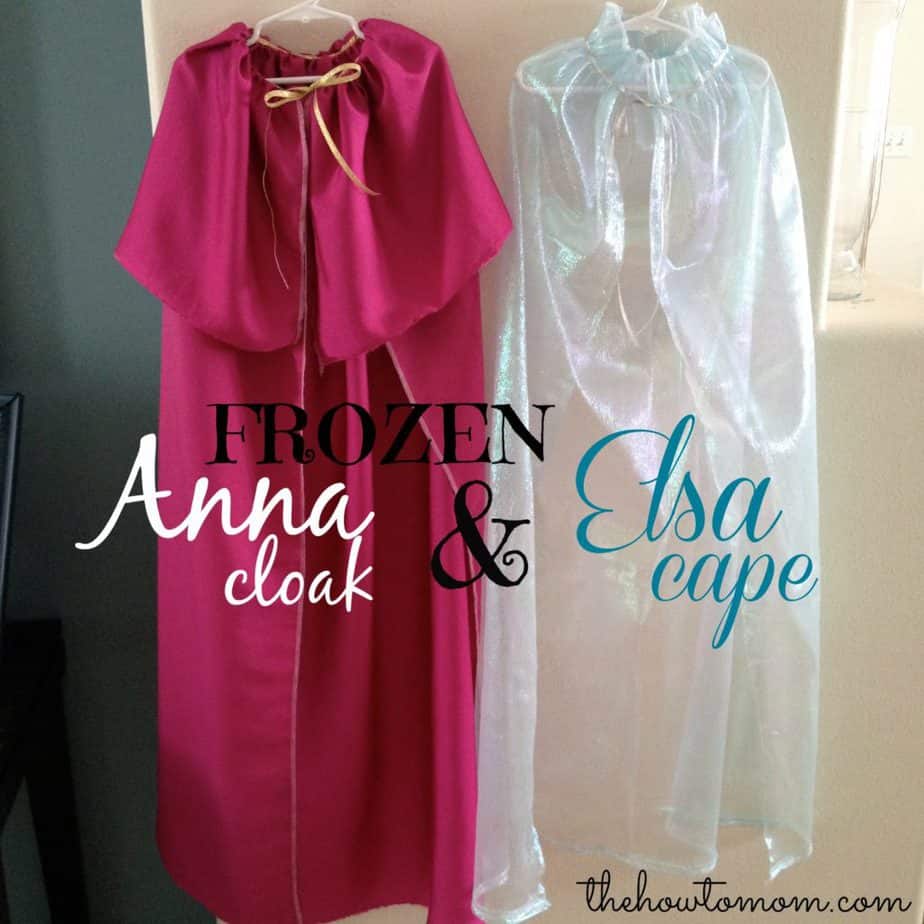
Quickly whip up an easy Elsa cape and/or Anna cloak with these simple step by step instructions. Perfect for little Frozen fans!
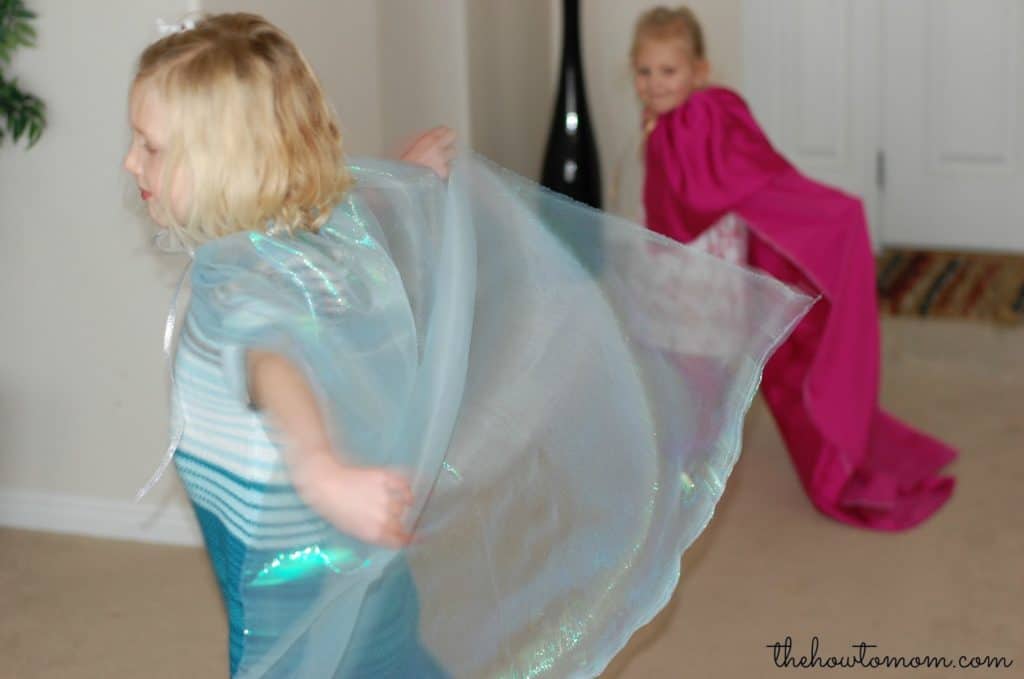
On a scale of one to ten, my girls love Disney’s FROZEN an 11.
Maybe even 12. It just so works out that my oldest has white blond hair,
and youngest has more strawberry blonde. My own little Elsa and Anna!
They play FROZEN all the time, and ask me to play the “Do You Want to
Build A Snowman” song from the soundtrack so they can act it out,
complete with knocking on the door and laying on the floor, pretend
crying during the sad part. Its quite entertaining.
Last weekend we went on a bit of a FROZEN shopping spree and bought an Anna and Elsa doll, along with some fabric. I thought maybe a flowing Anna cloak and shimmery Elsa cape for my girls to wear would make playing pretend even more fun.
And I was right! They love them. Yeah, they aren’t exactly like the ones in the movie, but hey … I made them in like 15 minutes. A fair trade, I’d say!
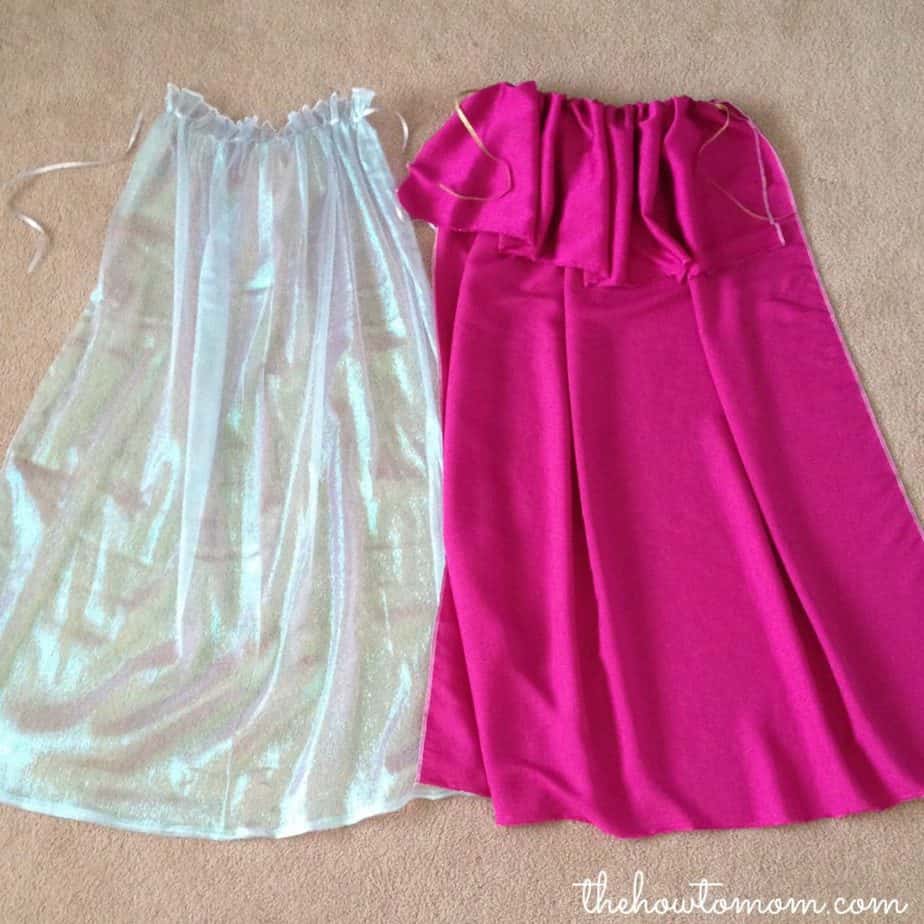
Supplies needed to make each Cloak/Cape
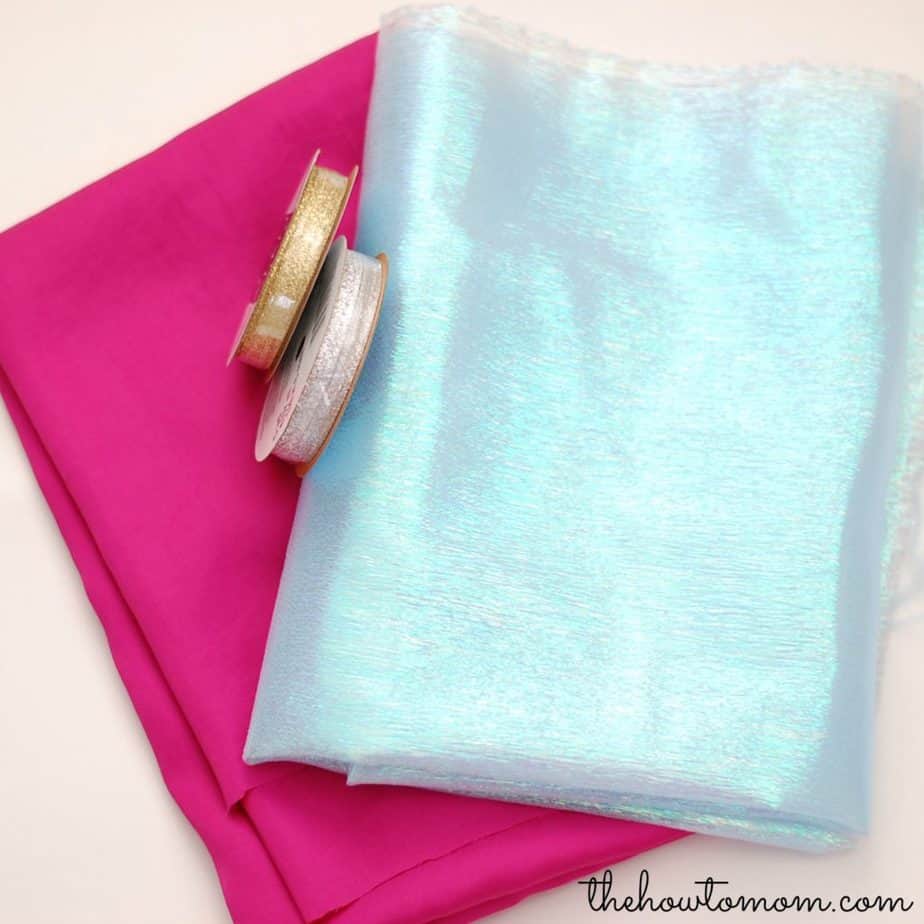
You’ll need about 1 1/4 yard of each fabric (1 yard if its 60″). I found these fabrics at Walmart, the shimmery blue (for Elsa) was around $4/yd, and the raspberry (for Anna) was on clearance for $1.50/yd. The silver and gold 5/8in ribbons were also at Walmart. They were exactly what I had in mind!
How to make an Elsa Cape and/or Anna Cloak
I made Elsa’s cape with a shimmery sheer teal organza/polyester/not sure exactly what its called. But it can be tricky to work with if you’re a perfectionist… which I am definitely not! lol
Since these are just for dress-up, I wanted them to be as simple as possible. I took short cuts and focused on getting it done, not getting it perfect.
The instructions are pretty much the same for Elsa as they are for Anna. The only difference is that with Anna, I gathered the neckline further down to give a fair amount of fabric room to fold over to make the “cloak” part.
Instructions For Elsa’s Cape

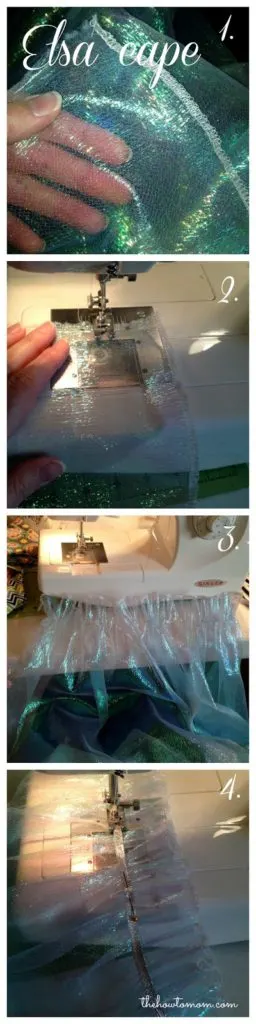
1. To finish the edges of the fabric, I left the selvage edges (the factory finished edges) as they were and then just serged the two raw edges to control fraying. The shimmery blue didn’t hold the serge very well (since its so thinly woven), so I ended up hemming them as well. You could hem them if you don’t have a serger. But if your friend has one, maybe you could ask her pretty please to serge it real quick for you, it helps control the fraying.
2. Then I ran a gathering stitch (longest stitch length) along the top to gather the cape. For the shimmery blue (Elsa), I gathered it close to the top.
3. Then I gathered it to the right neck-size for my girls (about 12 inches), tied the threads on the ends so it would stay the right length.
4. Lastly, I pinned the ribbon on top of the gathered seam and sewed it down with a zig-zag stitch. Make sure you back-stitch and secure the ends really well. And make sure to leave enough ribbon on the ends to tie it!
Instructions For Anna’s Cloak

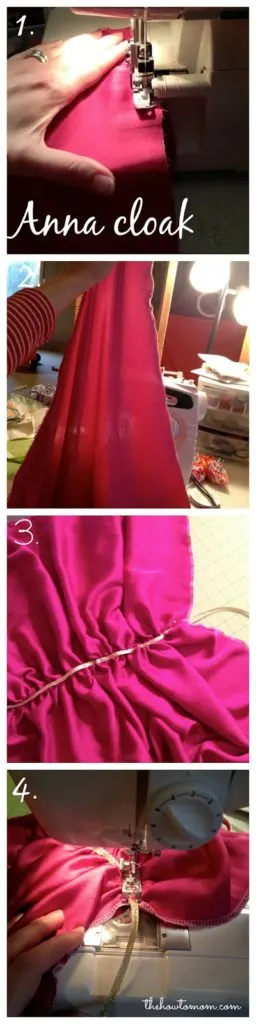
- Anna’s cloak is made similar to Elsa’s. I started by hemming or serging the edges of the rectangle.
- For the Anna, I wanted about 8-10 inches to fold over to make it look more like the real cloak from the movie, so I measured down from the top 8-10 inches and did my gathering seam there.
- Then I gathered that seam to about the size of my girls neck (about 12 inches).
- Lastly, I pinned the gold ribbon on top of the gathered seam, and zig zag stitched the ribbon down. Make sure to leave enough ribbon to tie it!
Super easy!
I love easy sewing projects like this. Yes, I could have gone with a more intricate style and tried to make it look more polished and professional. But kids don’t care. And maybe when its a loose interpretation, it encourages kids to use their imaginations more!
Then the best part: Watching them twirl around, singing along with “Let it Go”!

You can find the Elsa and Anna dolls here and here.
My friend, Tia at Events to Celebrate has some super cute FROZEN party ideas if you’re little Anna or Elsa has a birthday coming up!
Make Your Own Beautiful Living Succulent Wreath Centerpiece! Complete video course by Jeannine Romero now available through Skillshare.
Angel
Friday 2nd of September 2016
Hey.. that's an Amazing idea.. very well explained.. I m going to make the Elsa one soon for my princess Ziana's 5th Frozen birthday celebration.. wish I do it well.. thanku once again god bless ??
Clara Larribeau Wade
Thursday 28th of August 2014
Thanks for sharing this brilliant cape tutorial! I made one to finish off my daughter's Anna party costume and it's great! I wrote about it on my blog, and linked to yours, here:
http://bigtreelittlemoose.blogspot.co.uk/2014/08/diy-princess-anna-frozen-costume.html
I can see myself making many more of these in the future!
Stacia Williams
Wednesday 16th of July 2014
The shimmery fabric can be melted with a candle instead of sewing it to prevent fraying. ***If it is like the material I used*** I recommend trying on a scrap! It also gives it a wavy look when melted.
Bella Salsabiila
Saturday 12th of July 2014
amazing, so cute i love it... frozen
Anonymous
Tuesday 27th of May 2014
Thank you heaps for that, I'm in AU, and have been trying to buy an Elsa outfit for 2 weeks now, could only find the outfit, but no cape, & as we are going to the Disney on Ice Performance on the week end ,my 8 year old said she is not wearing the outfit without the cape, so guess what mum will be doing this week. Thanks for the bright idea. Eleanore