


She enjoys all aspects of home DIY- from simple crafts to complete home remodels.
- Clay Moon Phase Wall Hanging - July 4, 2023
- What To Do When a Toddler Won’t Keep Their Blanket On - June 10, 2023
- How Do Child Locks Work in Cars? (And When To Use Them!) - June 10, 2023
If you’re like us, you love anything reminiscent of fall. Autumn is full of comfy clothes, warm spices, and nights by the fire or candlelight; what’s not to love? In terms of decor, fall has so many fun things to offer that will spruce up your home and make it cozy and inviting for the season.
One thing that often comes to mind when thinking of fall is that bright orange gourd we all know and love; the pumpkin. This tutorial will walk you through how to make your own stuffed cloth pumpkins to add a cute and seasonal touch to anywhere in your home, using old shirts you may already have lying around!

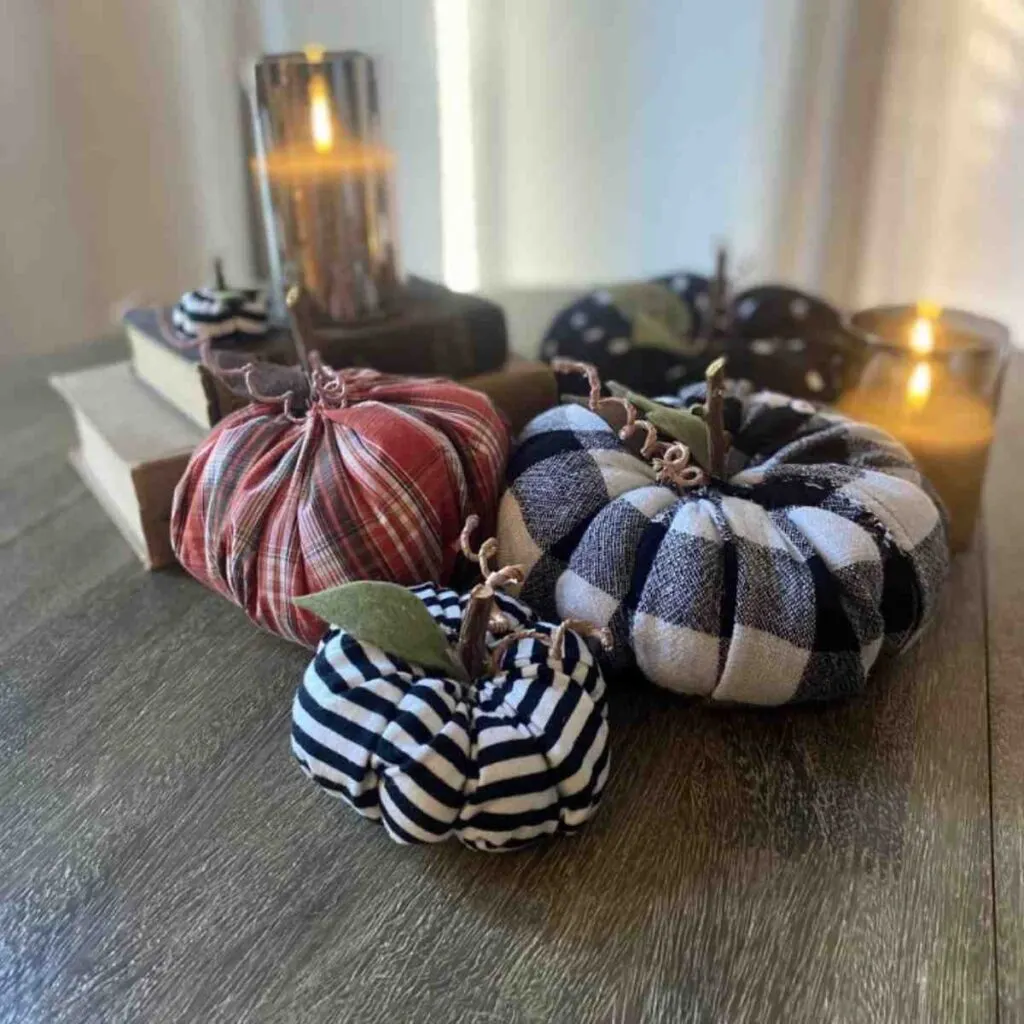
Children’s/toddler’s shirts tend to work best for this project because of their smaller sizes. The best part? If you have some sentimental clothes from your kiddos that you can’t get rid of but don’t know what to do with, this is a perfect way to preserve them in decor that you’ll use year after year.
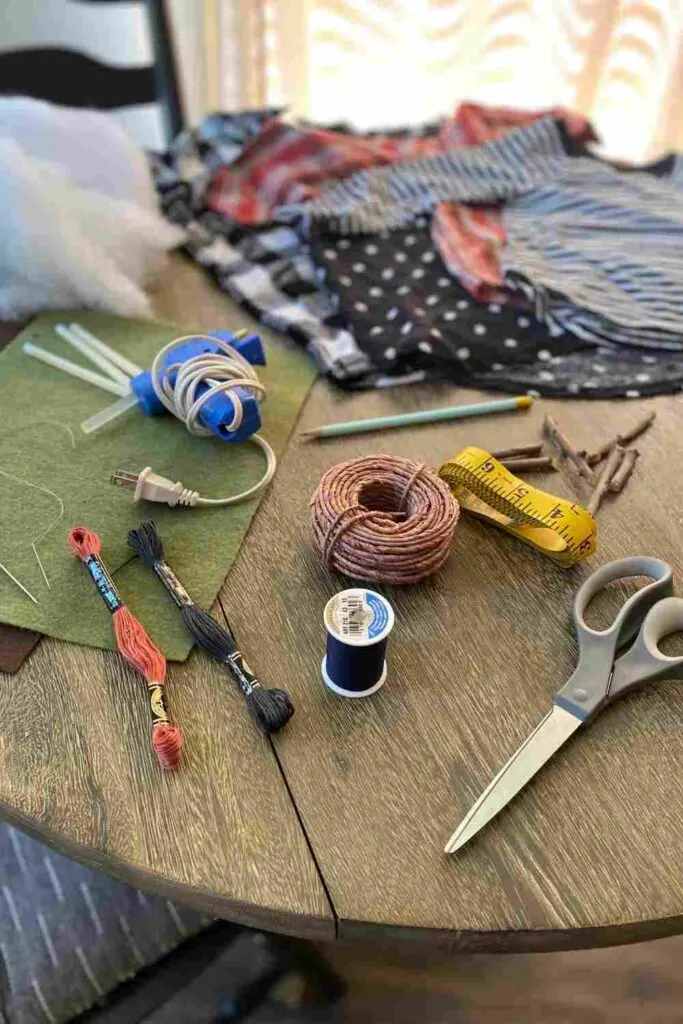
Supplies Needed:
- Old shirts (make sure you like the pattern!)
- Stuffing (we found a bag of buffalo snow lying around, but you can use Poly-Fil or stuffing from an old pillow; get creative!)
- Measuring tape or a ruler
- A Pencil
- A hot glue gun and sticks (link to Amazon)
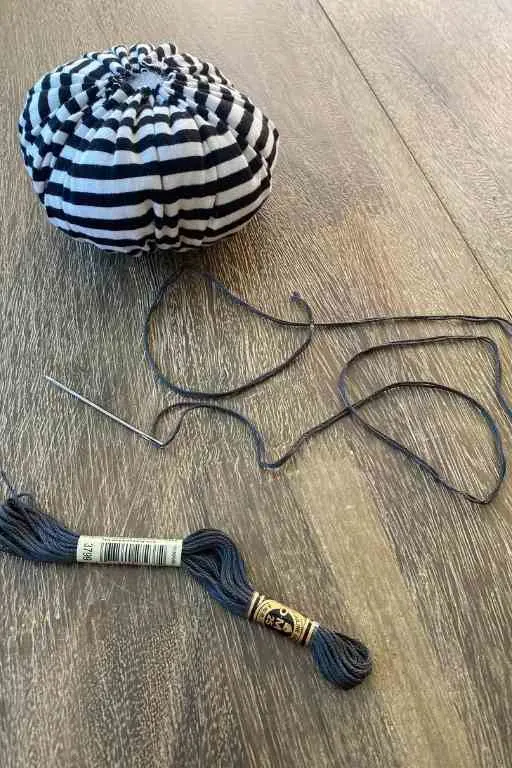
- A needle
- Thread
- Twigs/branches/Wooden dowels
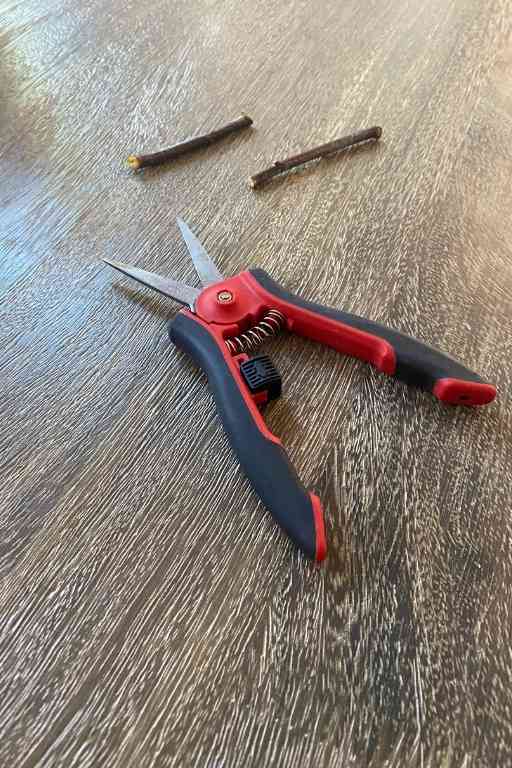
- Scissors
- Garden shears (scissors will work for thinner twigs)
- Embroidery floss (optional)
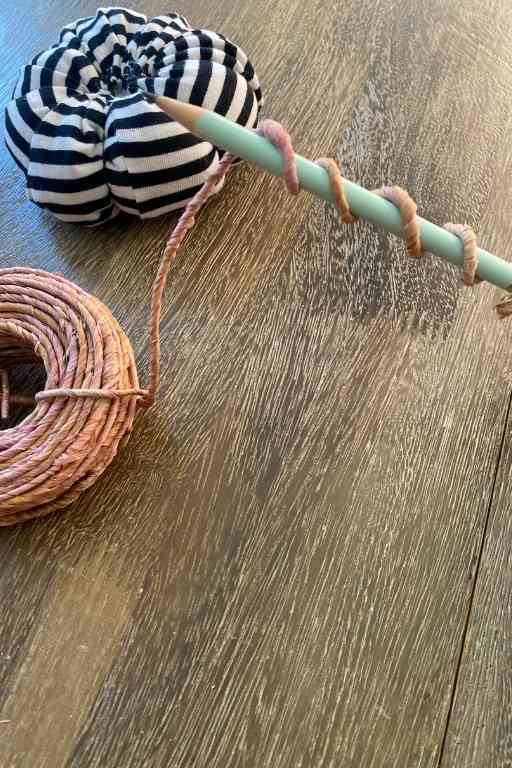
- Wrapped wire (optional)
- Felt (optional)

Step 1:
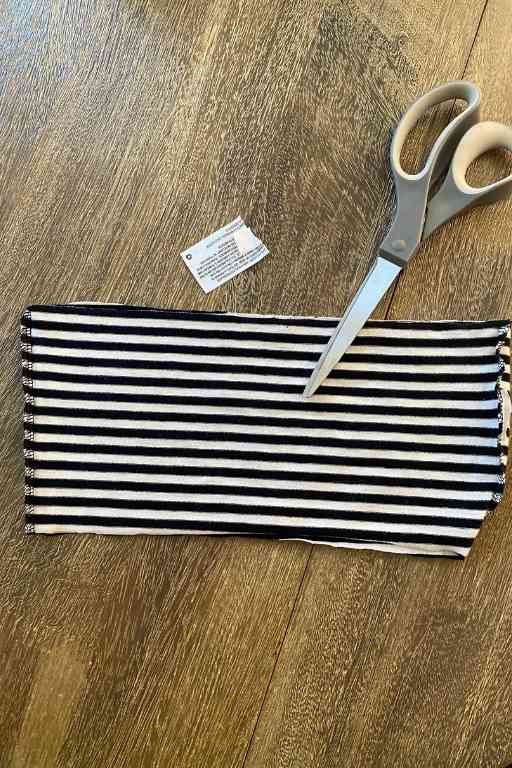
Lay your shirt on a flat surface and cut the fabric into a rectangle that is roughly twice as wide as it is tall.
The size of your pumpkin will depend on the size of your shirt; we found that children’s shirts are best for medium-to-small-sized pumpkins, and thrift stores are a great place to look if you don’t have any lying around!
You can use your ruler or measuring tape along the front of the shirt (measured from one side of the shirt to the other while the shirt is flat) to gauge how long the short sides of the rectangle should be before cutting.
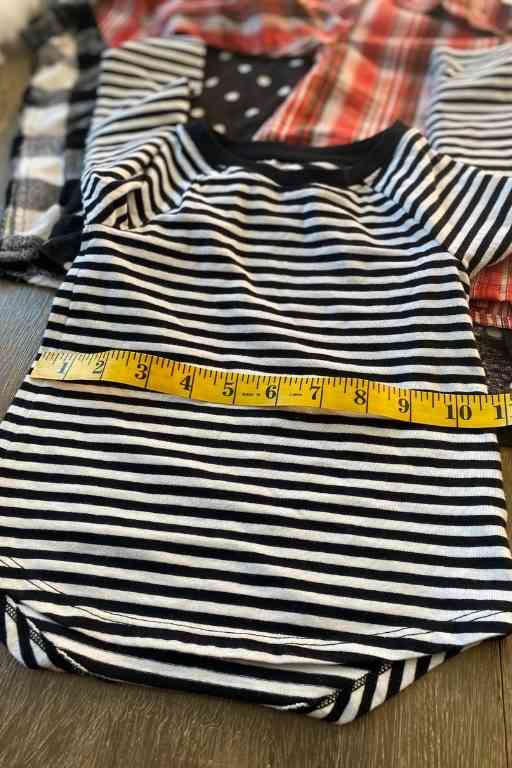
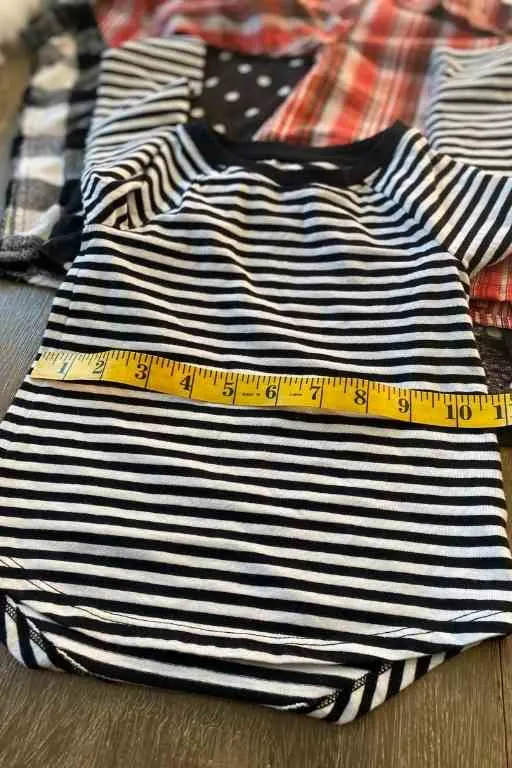
Simply take that measurement, divide it in half, and that will be the length of the short sides of your rectangle (our small black-and-white-striped pumpkin was 11 inches by 5.5 inches).
Use your pencil to mark roughly where you want to cut, and cut all the way across the shirt. The finished result should be a rectangle that can be turned inside out.
Note: IF USING A BUTTON-UP SHIRT: you will need to sew, hot glue, or fabric glue the spaces between the buttons closed before completing the other steps. Otherwise, the spaces between buttons will gape when you go to stuff your pumpkin.
Step 2:
Turn your fabric inside out so that the front of the shirt is now on the inside. Make sure to cut off any tags that are sticking out.

Step 3:
Take your thread and thread it through the eye of the needle, making sure to use plenty so that you have enough to sew the long side of the rectangle twice. Once you’ve threaded your needle, you’re going to sew what’s called a gathering stitch.
Take your needle to one side of the long edge of your rectangle (don’t put the needle through both layers of fabric; we are not sewing the sides together) and put your needle in and out through the fabric in large stitches.

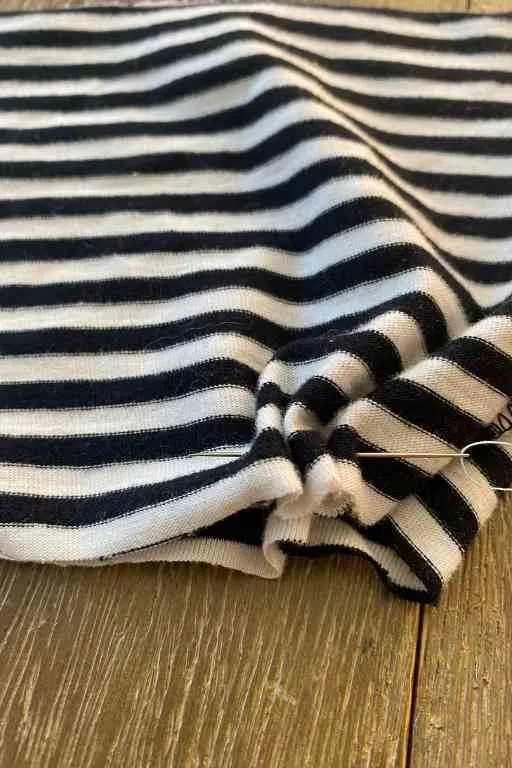
You can make this a bit easier by bunching the fabric as you go along your needle (as shown). You will repeat this process until the rectangle has large stitches all the way around both layers of one long side of the rectangle, but do not tie off the stitch yet.
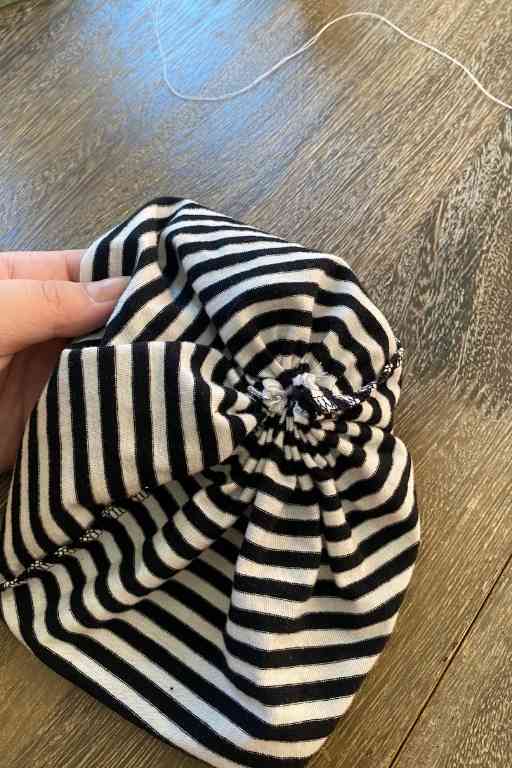
First, pull with your needle and thread until the fabric you’ve just stitched comes together completely into an O shape.
Pull it tight enough so that your stuffing will not fall through this hole, then close the stitch by tying it off in a couple of knots with your needle. This will be the bottom of your pumpkin.
Step 4:
Now that one side of your rectangle has been gathered together to form the bottom of the pumpkin, turn your fabric right side out again.


From here, you will repeat the same process that you just did on the open side of the pumpkin, stitching large stitches all the way around. Don’t pull this side taut yet.
Step 5:
Now, you can begin stuffing your pumpkin with whatever filling you choose. You can use buffalo snow, Poly-Fil, or any soft and fluffy material that you have lying around, even pillow stuffing from an unwanted pillow!


Stuff your pumpkin to your liking, however plush you prefer it. Once you have enough stuffing, you can pull the thread to close the top.
This time, make sure to leave a small opening for your stem (and optional leaves and vines) before tying it off and cutting the excess thread.
Step 6:
Using scissors or garden shears, cut a twig or a branch into the length you want your stem to be. Make sure to plug your hot glue gun in at this point as well.

Step 7: (optional)
Now, you are going to create the segmented sections of your pumpkin.
Thread a needle with embroidery floss (thread can work here but the floss is thicker and easier to use for this purpose).

Using your needle at the bottom of the pumpkin, sew through the fabric of the bottom gathered hole, up through the center of your stuffing, and around the pumpkin to the bottom again, pulling tightly so that the embroidery floss disappears into the fold of the fabric.

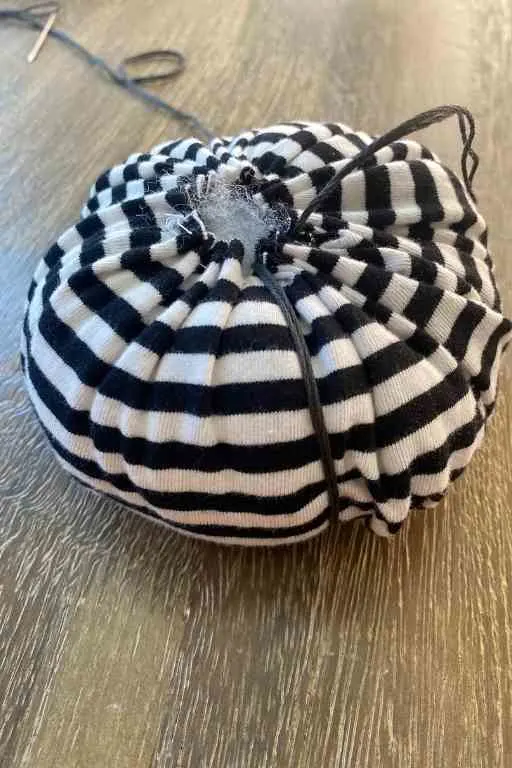
Do this several times to create the sections of your pumpkin, then tie it off with your needle at the bottom of the pumpkin once you have the desired amount of segments.
Step 8: (optional)
Wrap your chosen wire around the pencil several times to make the curly “vines” that you will put with your stems.

Step 9: (optional)
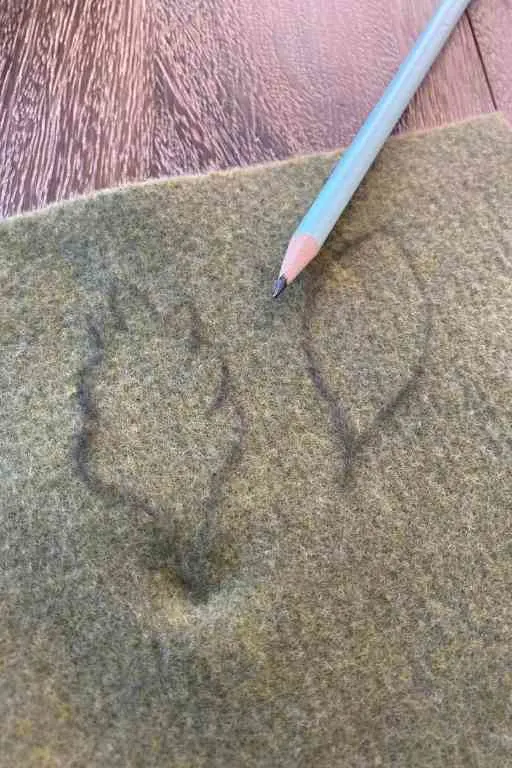
Using your pencil, trace leaf shapes on the back of the felt or other material you’ve chosen for the leaves. Cut the leaves out.

Step 10:
Using your hot glue gun, apply glue to the leaves and the stem if you have them, and glue them into the center of your pumpkin.

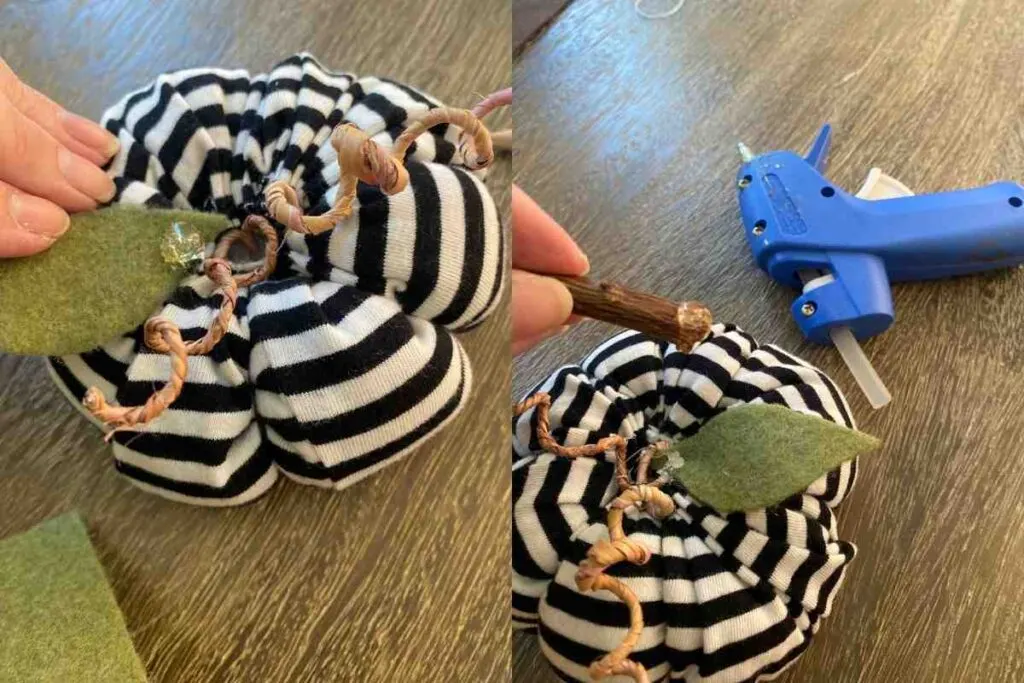
Apply more hot glue generously around the bottom of your stem, and place it into the center of your pumpkin. Set aside to let the glue cool and dry.
Step 11:
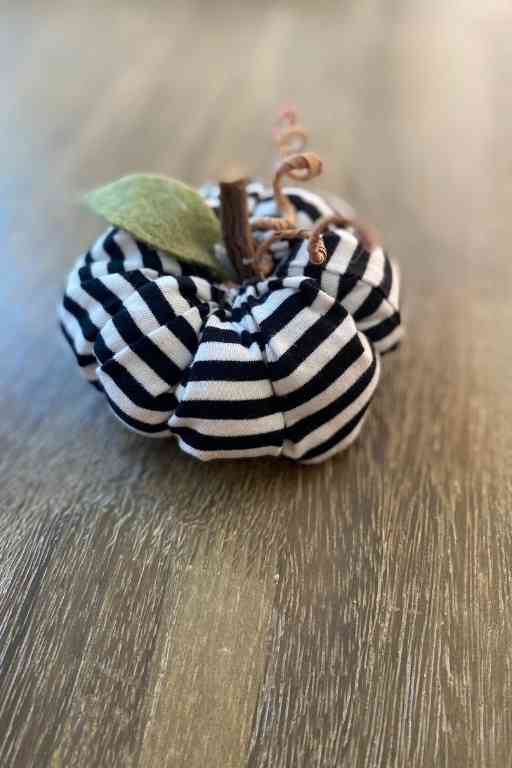
Enjoy your adorable cloth pumpkin! These can be placed anywhere in the home, and add a festive fall touch to any area (just make sure not to place them too close to candles!).

Recommended Reading:
- How to Make a Fall Rainbow Wreath – Easy!
- Gorgeous Wreaths for Fall – 20+ Easy DIYs
- How to Make a Bow for a Wreath – Easy!
Make Your Own Beautiful Living Succulent Wreath Centerpiece! Complete video course by Jeannine Romero now available through Skillshare.