

She enjoys all aspects of home DIY- from simple crafts to complete home remodels.
- Clay Moon Phase Wall Hanging - July 4, 2023
- What To Do When a Toddler Won’t Keep Their Blanket On - June 10, 2023
- How Do Child Locks Work in Cars? (And When To Use Them!) - June 10, 2023
Wreaths are great for any time of year, any season. The fun in making wreaths is often foraging for supplies to make them with, and a good walk through nature will usually yield some fun items to add.
In autumn, there are twigs, leaves, pinecones, acorns, dried grasses, and a plethora of other neat things to grab. (Keep in mind that some of these things are more fragile when dried, and you want to check things like pinecones for critters before using them!)


This is a great way to get the family out in nature and to get your kiddos excited to go for a walk! You can turn it into a game to see who can find the most items for your project. It becomes a treasure hunt; what unique fall finds will you discover?
You can also find a lot of great items at craft stores like Michaels. These stores often run sales on fall items at the end of summer and the beginning of fall. This is less cost-effective but will yield some beautiful items that you may not be able to find in nature where you live.
This tutorial has a fun twist that sets it apart from traditional wreaths; it’s made using an old frame! The best places to find frames are usually garage sales and thrift stores. You can use an old frame from a painting or a mirror; really any frame will work for this, as long as you like it!
We prefer oval-shaped or round frames to keep with the round shape of traditional wreaths, but other shapes will work, too. It all depends on your preference and the space you’re making the wreath for!
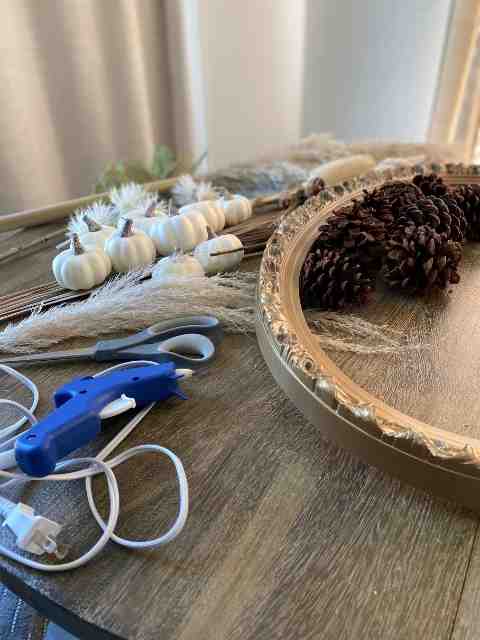

Supplies Needed:
- A frame
- A hot glue gun and hot glue sticks (link to Amazon)
- Grasses, leaves, pinecones, acorns, etc.
- Scissors
- Wire
- Spray paint (optional)
- Ribbon (optional)
Step One:
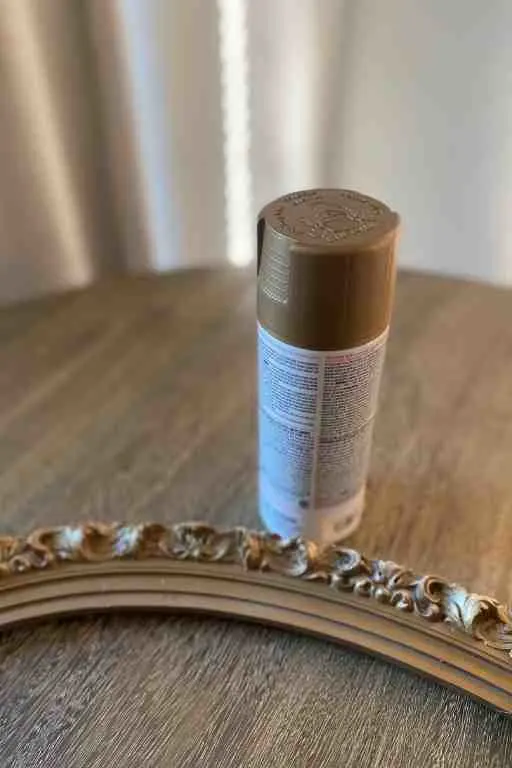
The first step for this is to get your frame ready. Make sure to dust it off with a dry rag before beginning (especially if your frame has been sitting in your garage like ours was!). If you want your frame to be a different color, go ahead and spray paint it. We picked a larger frame, and sprayed it gold to match the warmth of our natural items.

Step Two:
Plug in your hot glue gun so that it begins to heat up. While you are letting it heat, you can begin to prepare your supplies to be applied to the frame.
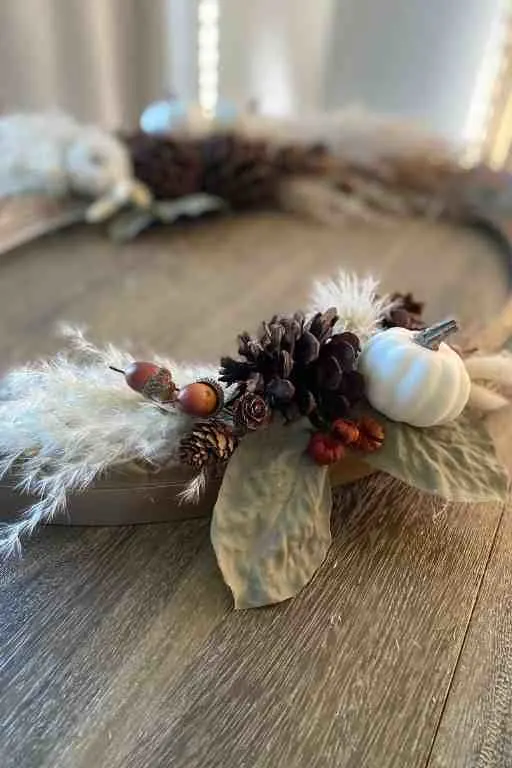
For this wreath, we prefer not to have a lot of greenery. Most leaves and plants turn lovely shades of brown, amber, red, orange, and other warm tones in the fall.
Too much greenery tends to make the wreath look more spring-like (this wreath can be made in the spring, too!) This is the time to cut off any stems you don’t want showing and cut your grasses to the lengths you’d like.
Step Three:
Before applying anything else, you will need to wire down any thick grasses to the frame. This will be the base for the other items, so you want to make sure that they’re secure, and wire is the best way to do this.
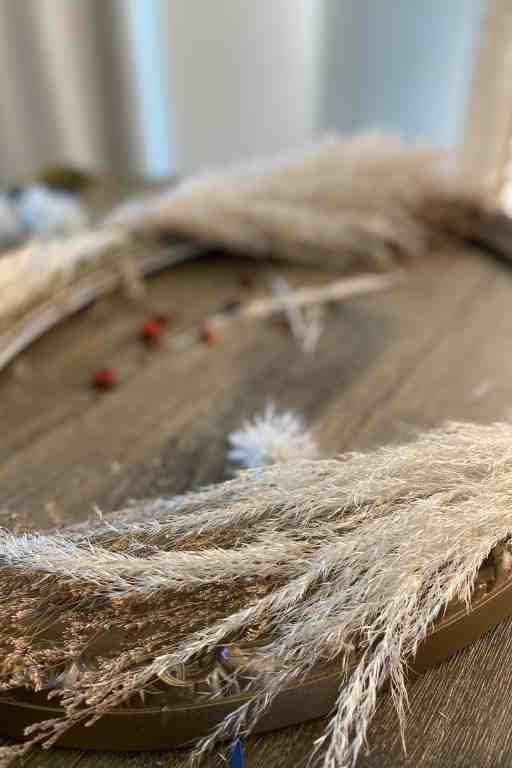

Don’t worry about the wire showing; we will be covering it up with the other items we’ve found.
Step Four:
In this step, we will apply our natural items to the frame. We like to sort of “stage” our items around the wreath to get an idea of where the different pieces look best before beginning.
You can either cover certain parts of the wreath (like two opposite corners, just the bottom or top, etc.) or you can choose to cover the whole frame.

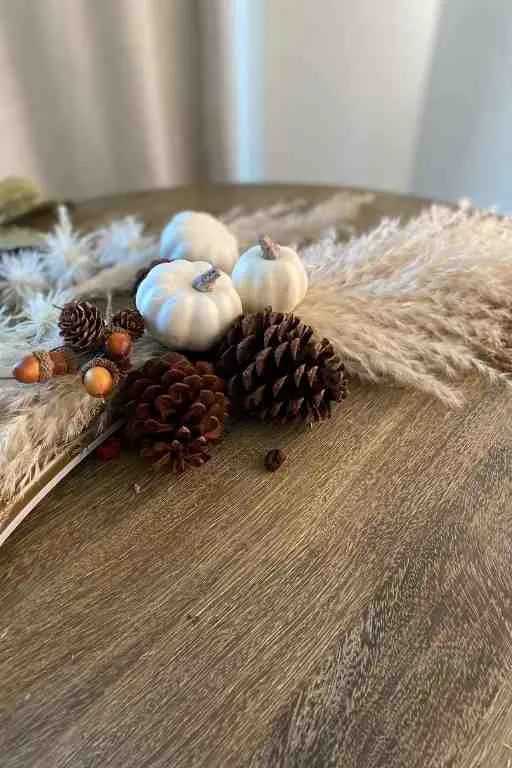
We chose to leave some of the frame bare to accentuate the designs of the frame and draw attention to it since our frame is what makes this wreath so unique! Once you have an idea of how you’d like to place your items on the frame, you can start applying them.
The wire is a great way to attach some things that have odd angles and sides, like pinecones. For other pieces, apply glue generously to each item, gluing them on as you go.
Step Five:
When all of your items are fastened on, it’s a good idea to take a step back and make sure there aren’t any gaps where your pieces are glued or any areas with hot glue or wire showing that need to be covered.
Gaps can expose the hot glue and tend to stick out. You can use any leftover grasses or fronds to fill gaps that stick out to you or simply add more pieces of nature. Set your wreath frame aside to cool and dry.

Step Six:
Hang your wreath wherever you like it, and enjoy your beautiful fall frame wreath! (Make sure not to place it close to open flames; these items are dried and therefore flammable.) Happy autumn!
Recommended Reading:
- Make DIY Pumpkins From Old Shirts (Fall Decorations)
- How to Make a Fall Rainbow Wreath – Easy!
- Gorgeous Wreaths for Fall – 20+ Easy DIYs
Make Your Own Beautiful Living Succulent Wreath Centerpiece! Complete video course by Jeannine Romero now available through Skillshare.