

- How to Make a Burlap Wreath – 3 Easy Styles! - May 30, 2022
- How to Revive Wilted Hydrangeas – Guaranteed! - July 28, 2021
- Easy Canvas Painting Ideas – 30+ DIYs for Beginners - June 16, 2021
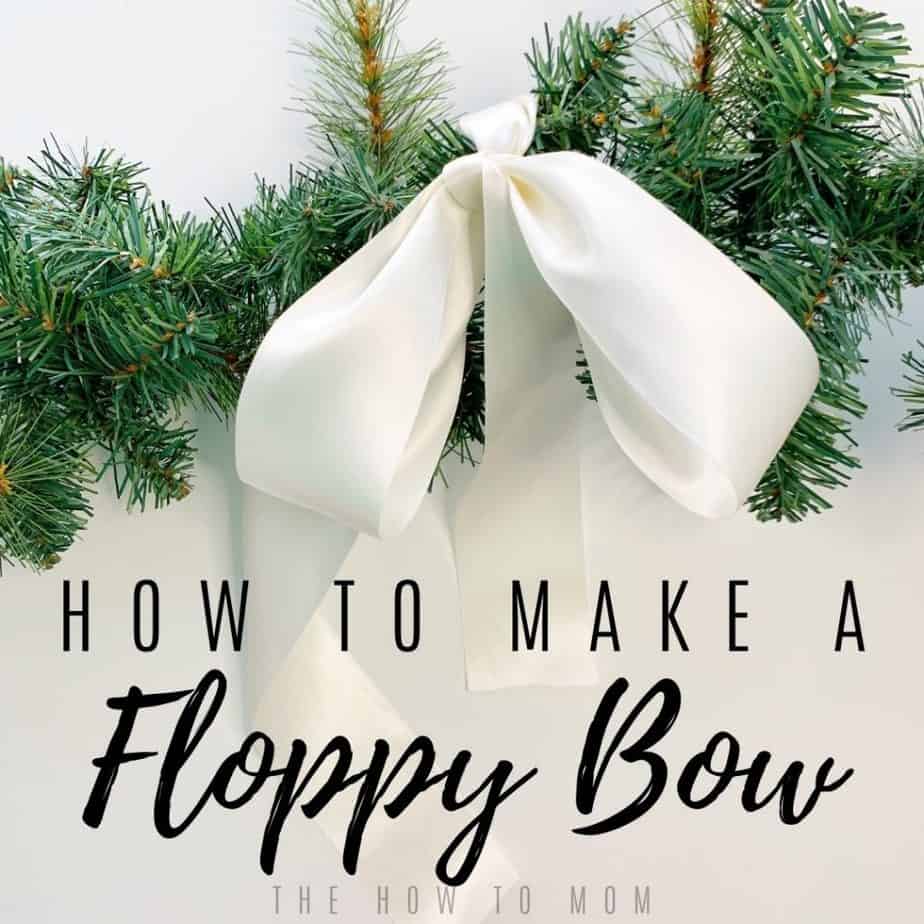
Different projects call for different bows! If you want a simple, soft classic bow, I can show you how to make a floppy bow, easy! Its so easy, I’m pretty sure you’ll say “oh duh!” when you see how to do it. 😉
I used this bow technique on my minimalist eucalyptus wreath DIY. It adds the perfect amount of warmth and compliments the simplicity of the wreath.

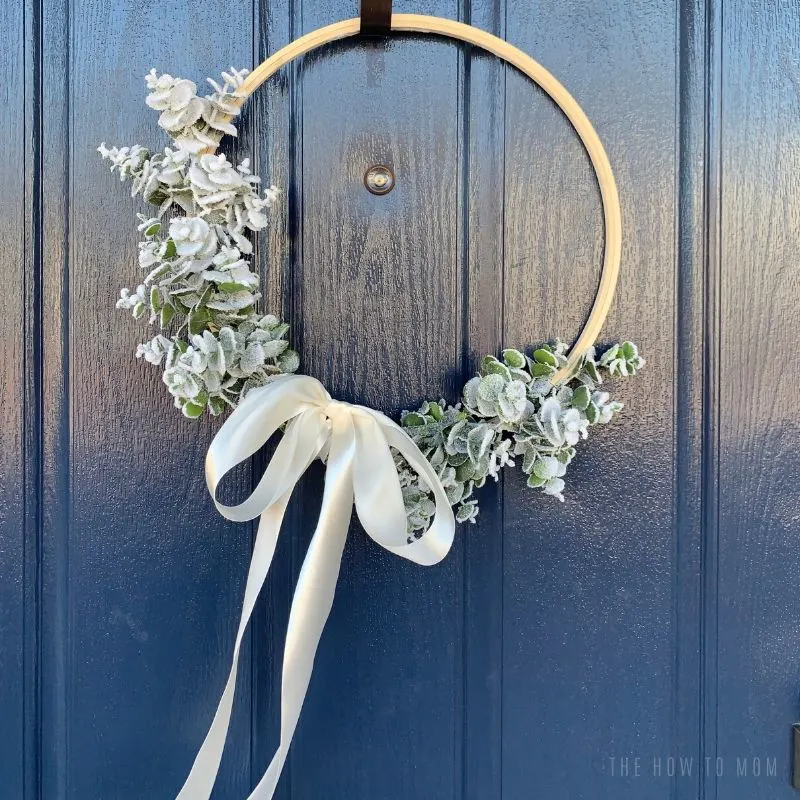
I think it would also look lovely on my faux boxwood or pinecone wreath. It especially looks nice on garland, and gives it a casual, rich look. I’m no bow history buff, but it kind of reminds me of the Victorian era. I can imagine swooped garland, tied with droopy red or ivory satin ribbon.
This would also make a pretty hair bow as well, a very classic look. I’m thinking of Sara Crewe in the movie “The Little Princess.” Sweet and simple.

How to make a bow look “floppy”
Type of ribbon
The secret to making the bow “floppy” is in the type of ribbon you choose. Some types of ribbon that will give a nice, romantic swoopy flop are:
-
Satin (especially double satin)
Organza
Soft grosgrain
I like to use a nice and wide satin ribbon, preferably “double satin” which means that its satiny on both sides of the ribbon. Its soft and slippery and perfect for floppy bows. Satin has that nice shimmery sheen to it, and lends itself nicely to a romantic, droopy bow.
Some grosgrain ribbons can also make a nice floppy bow, as long as they’re a softer material. Sometimes sheer ribbons, like organza work well too, again, as long as they’re soft.
You can also use a wired ribbon to make a floppy bow. The wire helps you hold whatever shape you’d like, so you can just bend the loops down to get the same effect. Honestly though, if I had wire ribbon, I’d probably just use my classic and easy wreath bow tutorial and modify it to have much longer loops instead. But if you use this technique below, you’ll likely be fiddling with the length and shape and having to re-tie it a few times to get it right. Wire ribbon is a bit harder to “tie.”

Ribbon that won’t be floppy
If you want a true, natural “flop” I’d stay away from really stiff, thick ribbon. Like a stiff burlap or a printed, thick grosgrain probably wouldn’t give you the results you want. It just won’t bend and flop (which reminds me of “bend…and snap!” for my fellow Legally Blonde fans, haha).
If you have a stiffer ribbon, I’d definitely recommend my easy wreath bow style instead.
What width of ribbon do you need for a floppy bow
In theory, you can use any width you’d like!
When I am making a floppy bow for a wreath or garland, I like to use at least 2 1/4 inch wide ribbon, or wider if I can find it. With a simple bow like this, it can definitely handle a nice wide ribbon.
For a smaller project, you can absolutely use more narrow ribbon. With a more narrow ribbon, you’ll also use a shorter piece of ribbon, for some mathematical reason, something about scale and proportions…haha.
How much ribbon will you need for a floppy bow
There isn’t a perfect answer for this, because it will depend on:
what size bow you want
what width of ribbon you’re using
how long do you want the tails
But I know that answer probably isn’t what you want to hear. So I’ll try to help you figure it out!
For a bow for a wreath, I like to use at least 2 1/4 inch wide ribbon, and I use about 2 yards of ribbon. I figure its easier to start with a longer piece, and then trim the tails shorter if needed.
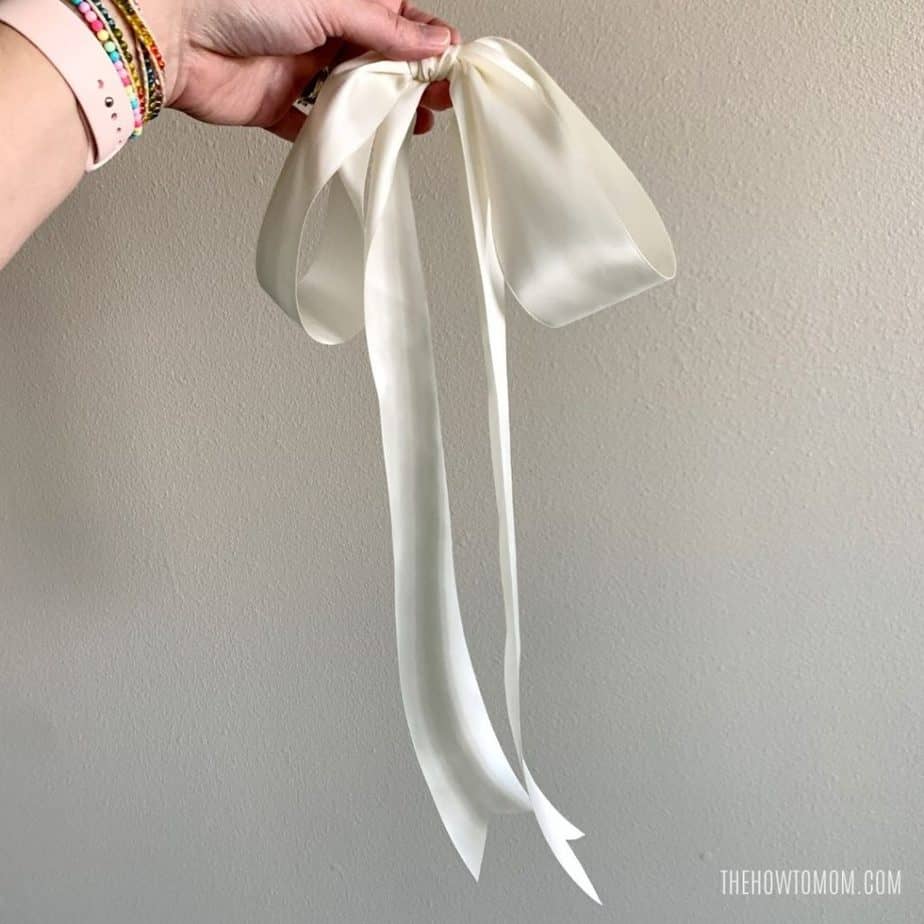
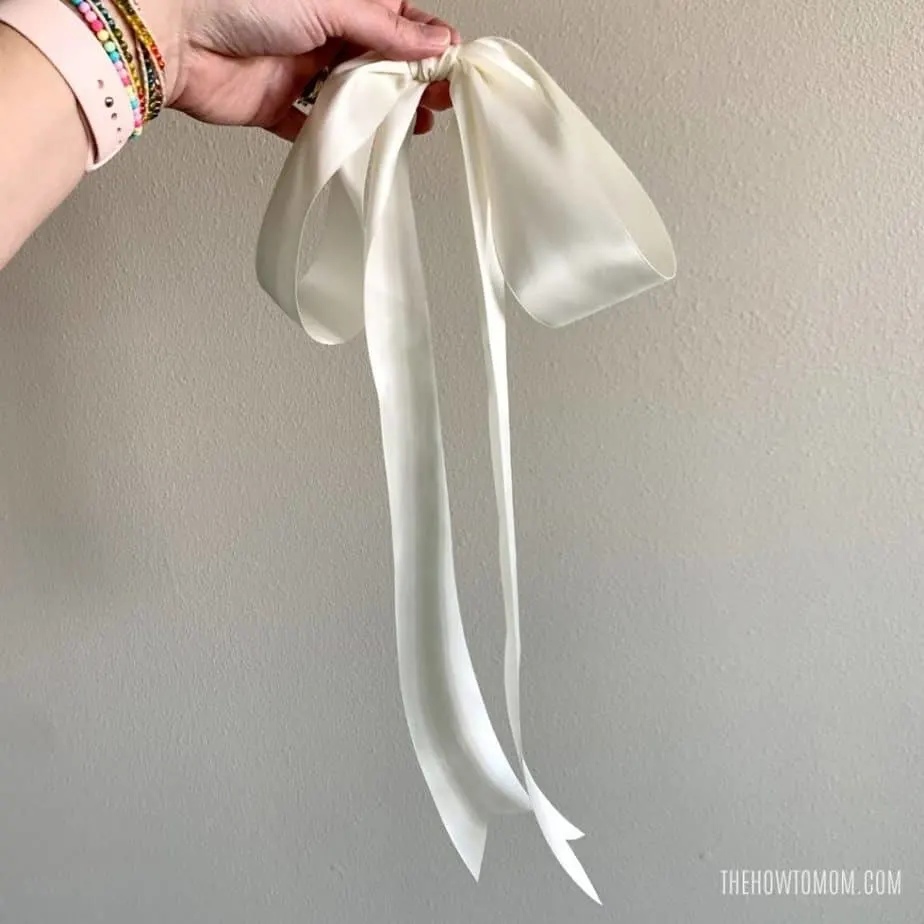
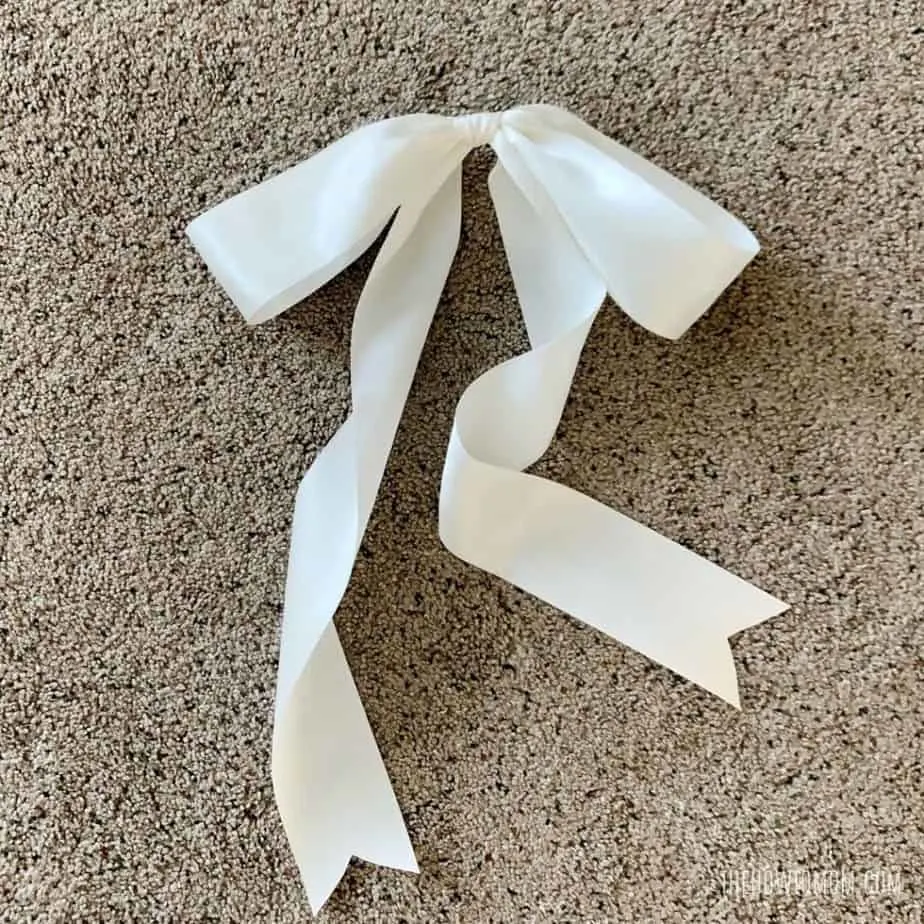
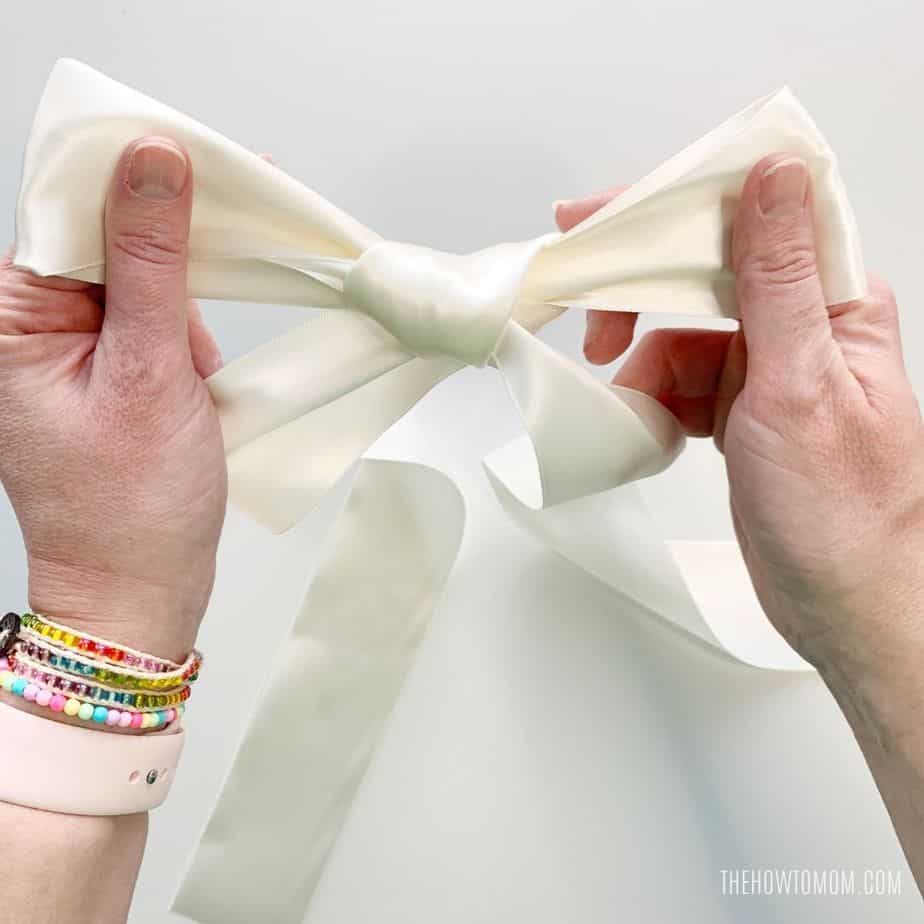
For this exact bow, I used a little less than 2 yards, and the bow ends up being about 14 inches across (if you flatten/stretch the loops out) with about 18 inch tails.
So much of this is personal preference. Sometimes I’ll make a bow and love it, and then when I go to put it on the wreath, it looks weird and I have to re-make it bigger or smaller. Sometimes fiddling is half the fun of crafting!
Are you ready to make your floppy bow? Lets do it!
How to Make a Floppy Bow - Easy!


No need to be intimidated, making a lovely floppy bow is as easy as tying your shoes!
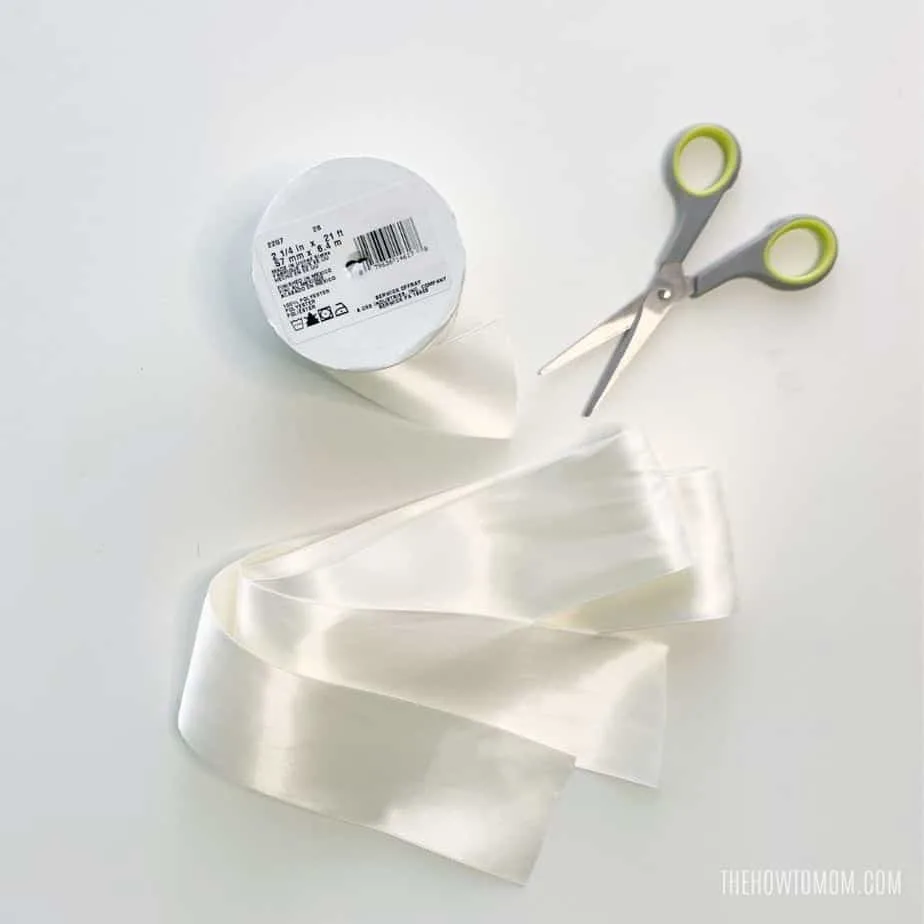
Materials
- Satin Ribbon
- scissors
Instructions
- Cut your ribbon (see note for suggested types) into one 1.5 to 2 yd (54-72 inches) length piece (see note for suggested types of ribbon and lengths)

- Fold in half and then place your hands about 1/3 down from the fold (this will be about the size of the loops)

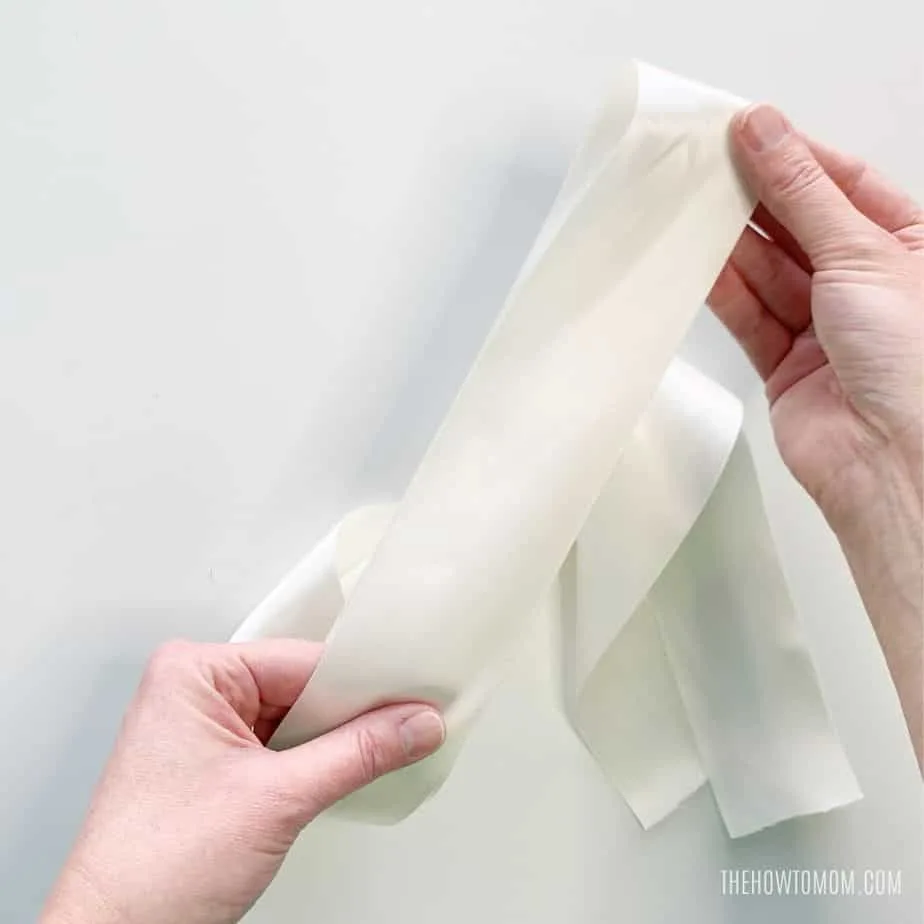
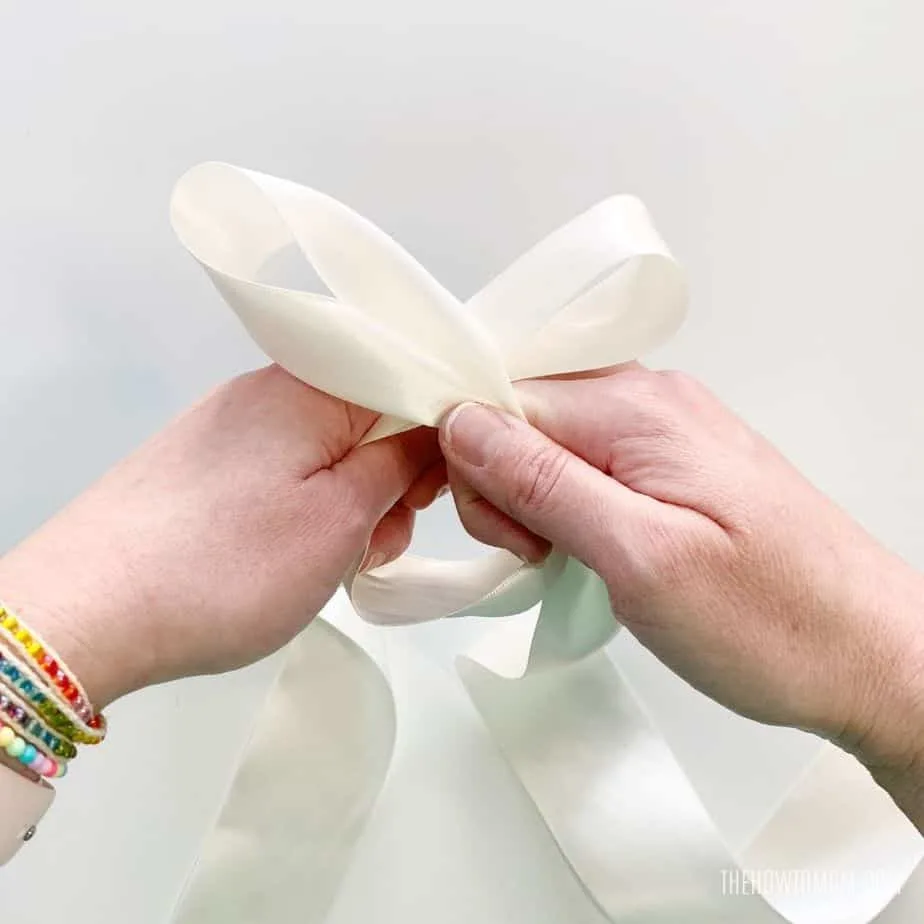
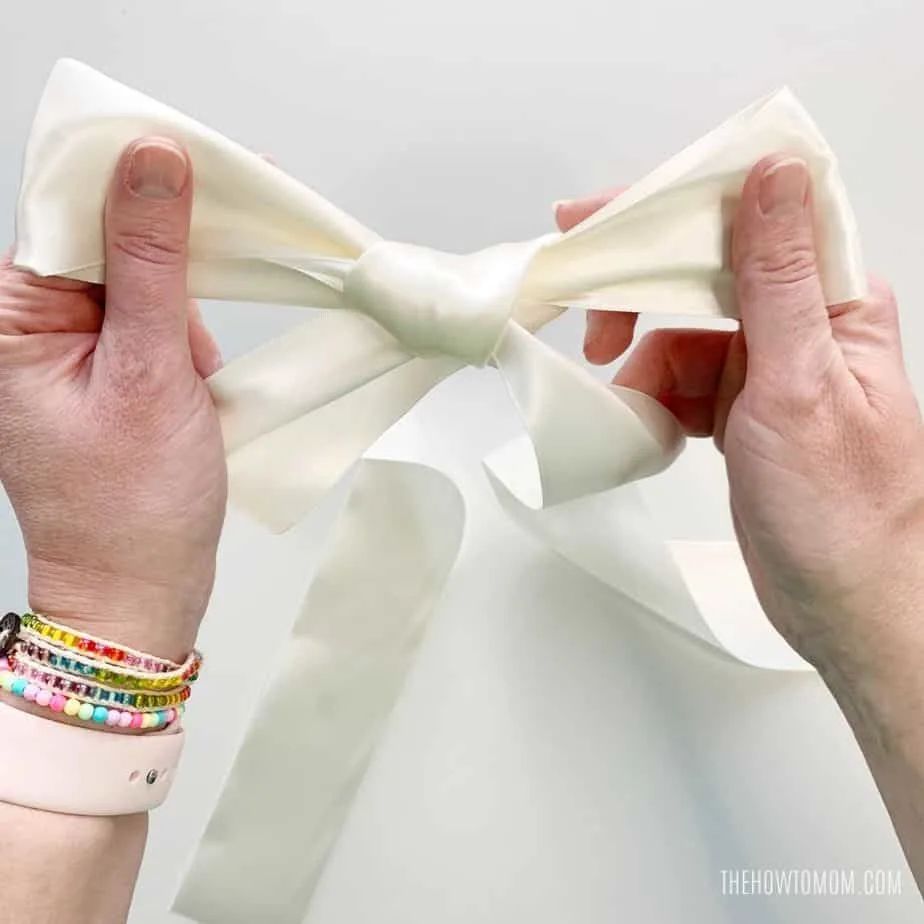
- Make two loops with the ribbon, like "bunny ears".
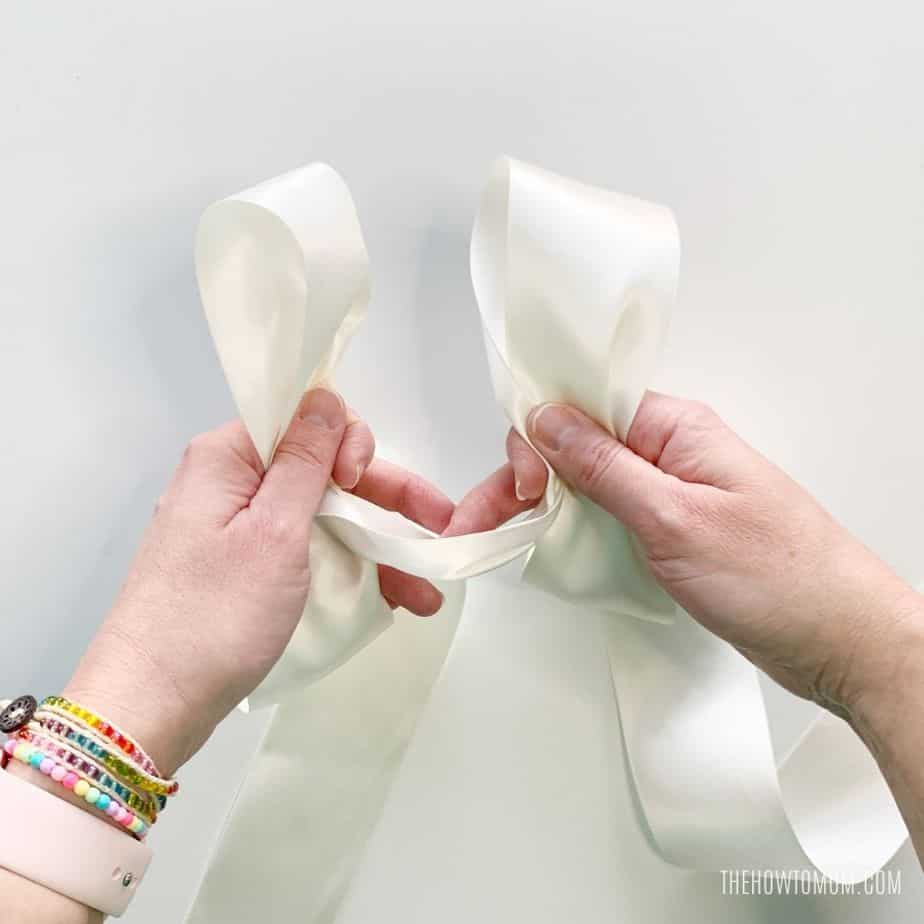

- Cross the ribbon loops.

- Tuck the top ribbon behind and around rear ribbon, creating a round hole.

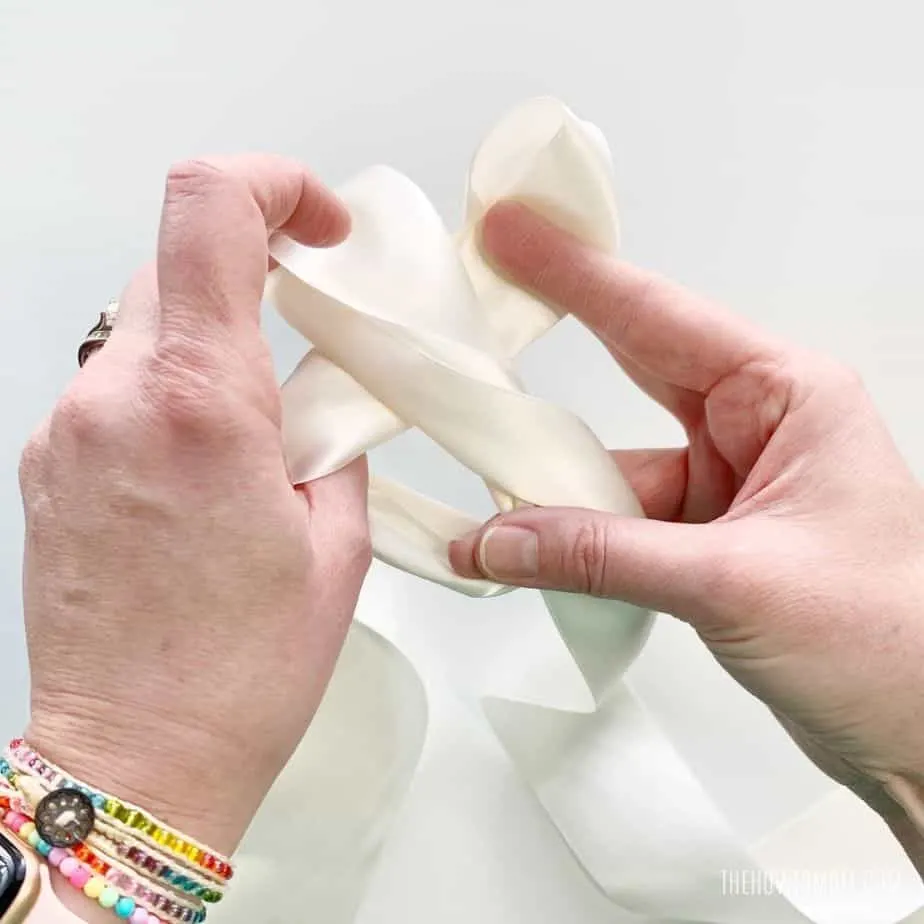
- Push the top ribbon through the hole.
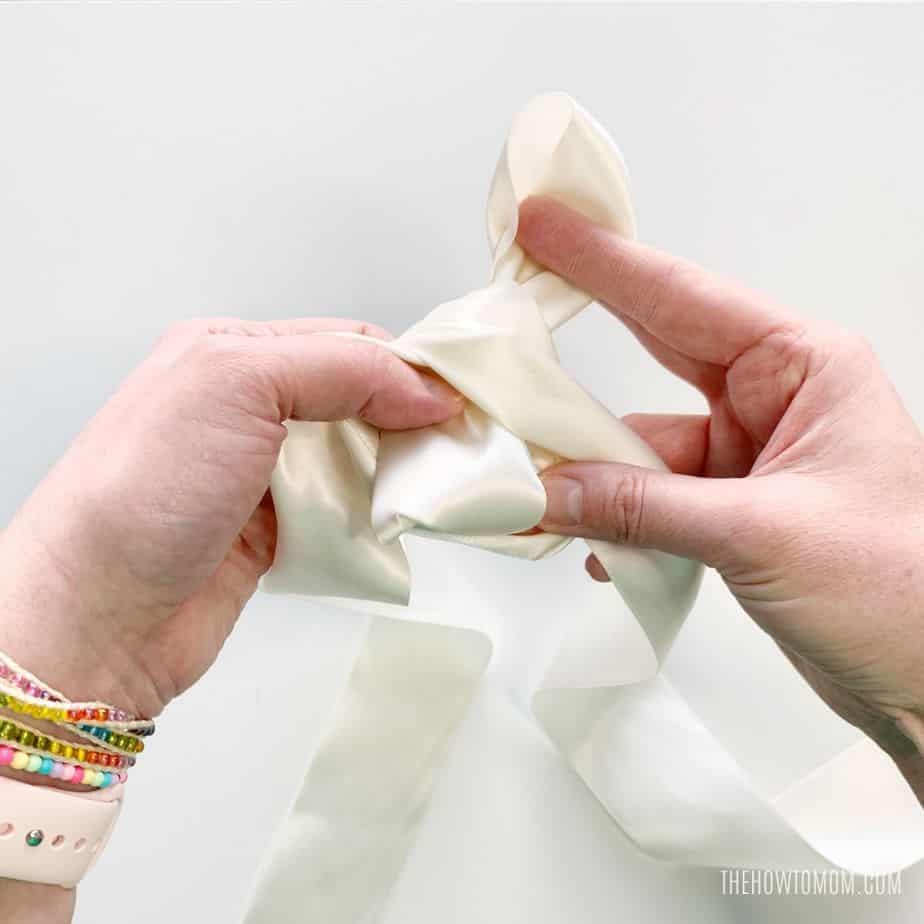

- Pull loops and adjust tails and loops as needed.
Notes
Suggested ribbon types include satin, organza, and other soft types.
Length of ribbon will be determined by the desired finished size, and length of tails.
Recommended Products
As an Amazon Associate and member of other affiliate programs, I earn from qualifying purchases.


Its basically like tying your shoes! If I’m trying to make a stand-alone bow, I use the bunny ears method. If I am tying the bow onto something, I’ll use the classic shoe-tying method.
Make Your Own Beautiful Living Succulent Wreath Centerpiece! Complete video course by Jeannine Romero now available through Skillshare.