

- How to Make a Burlap Wreath – 3 Easy Styles! - May 30, 2022
- How to Revive Wilted Hydrangeas – Guaranteed! - July 28, 2021
- Easy Canvas Painting Ideas – 30+ DIYs for Beginners - June 16, 2021
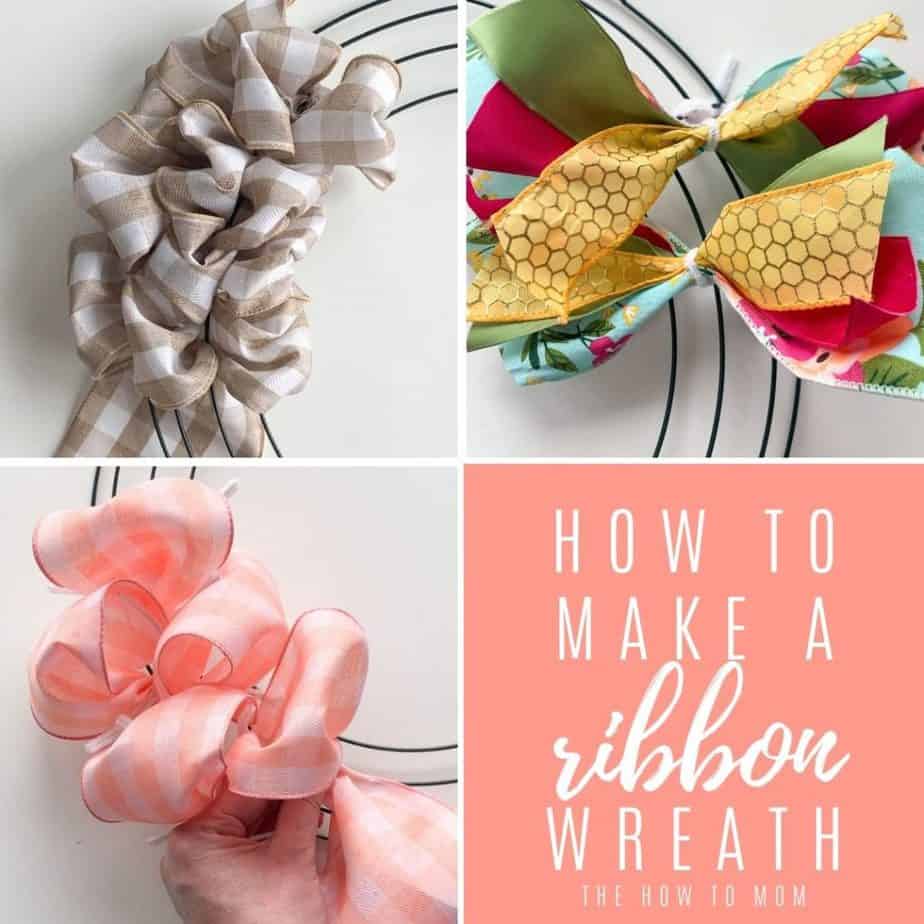
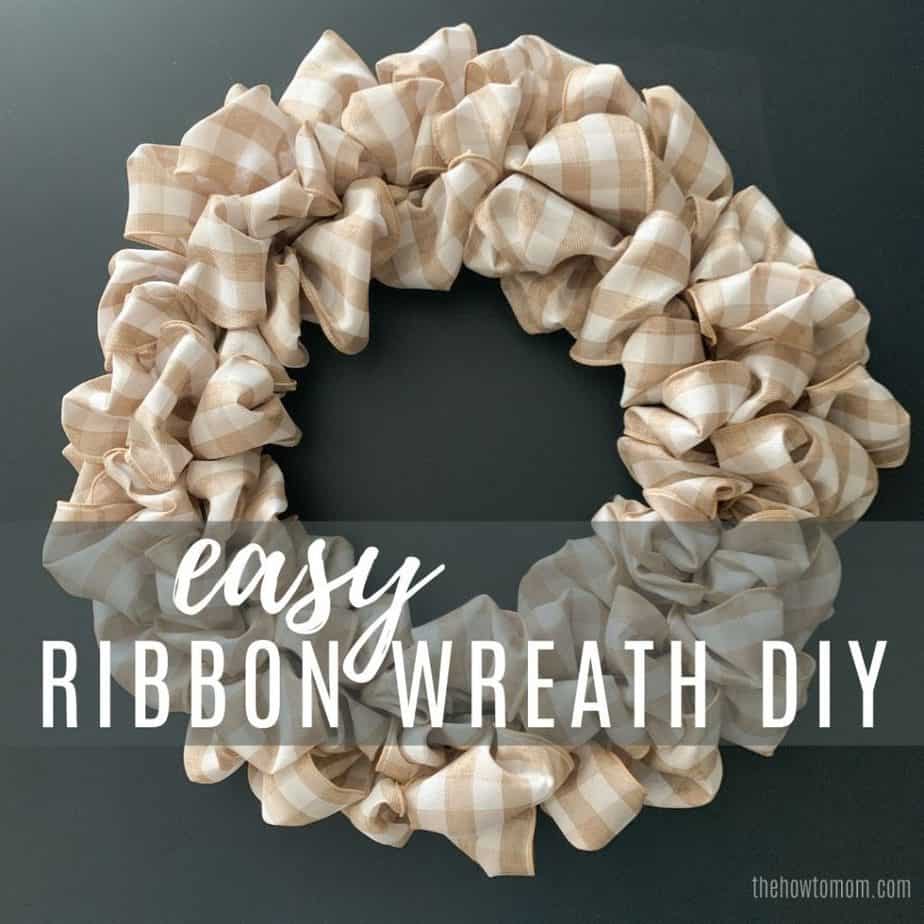
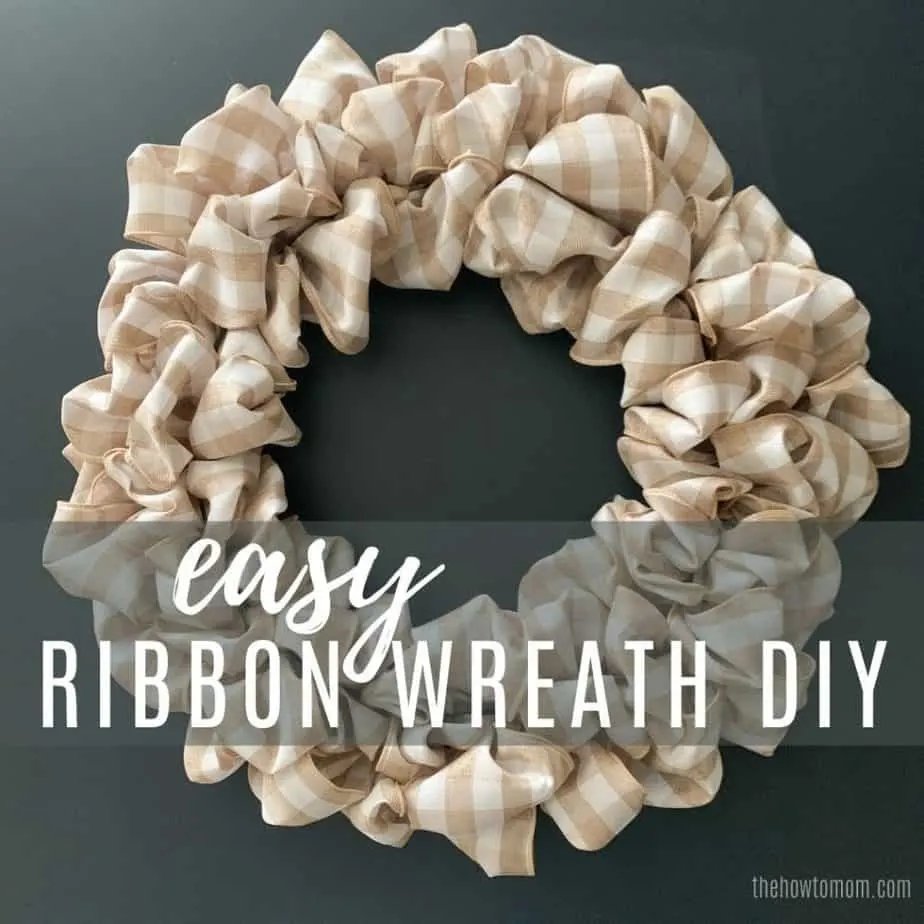
Make an easy and beautiful ribbon wreath with simple step by step instructions. Perfect DIY wreath project for any skill level!
Ribbon wreaths (similar to deco mesh wreaths or burlap wreaths) are a fun way to make holiday wreaths in pretty much any color combination imaginable.
I’m sure you’ve seen these wire wreath frames at Dollar Tree or at craft stores, and maybe you’ve wondered how people can turn one of those and a few spools of ribbon into a fun and festive holiday wreath… Well, I’m here to show you the easiest ribbon wreath DIY!

The base of these wreaths is always a wire wreath frame, which I have used many times, but almost always with flowers and/or greenery. My favorite Wire wreath project is hands down my Rainbow Hydrangea Wreath. Swoooon.
I’m not going to lie, I underestimated what it takes to turn a few spools of wired ribbon into a lovely ribbon wreath. I’m a fairly proficient wreath maker, so I tried just playing around with the ribbon and frame, and after a few missed attempts, I decided it was time to nerd out and do some wreath research.
As I’ve dived into this world of ribbon/mesh/burlap wreaths, I’m noticing that there are three basic techniques for adding the ribbons to the wire frame. As there isn’t some wreath governing body to define the terms and techniques, I kind of came up with my own:
- Bubble Method
- Push Up and Twist Method
- Cut and Bunch Method
Each method has its pros and cons, some require more steps and/or supplies than the others. And depending on what type of ribbon you want to use, or how much ribbon you have, some techniques will lend themselves better to one or the other.
These ribbon wreaths require a bit of playing around with the ribbons you have, to see what looks best or works best. And fair warning, you may be taking it apart and starting over a few times before it starts coming together for you. NBD.
This post may contain affiliate links. I may receive a small commission of you choose to purchase through my links. Thanks, friends!
Ribbon Wreath DIY
Until this year, I have pretty much avoided Deco Mesh Wreaths, Burlap Wreaths and Ribbon Wreaths completely. They just weren’t quite my style. I like modern and simple. A lot of times mesh/burlap/ribbon end up kinda… busy.
So never one to shy away from a challenge, I decided it was time to try to make a simple ribbon wreath. A lot of the ribbon wreath DIYs that are out there have lots going on, and are a bit crazy for my taste. I decided I wanted to just show how to make a nice basic ribbon wreath, that can easily be added upon for different holidays or decor styles.
Did you know you can use one wreath year round, dressing it up for different holidays? You totally can! Check out my Year Round Wreath post to see how.
The ribbon wreaths in my examples below are definitely more on the “plain” side, but that’s mostly to just teach you the techniques, and then you can embellish with flowers or bows or little signs or whatever you’d like!
Supplies needed for making a ribbon wreath
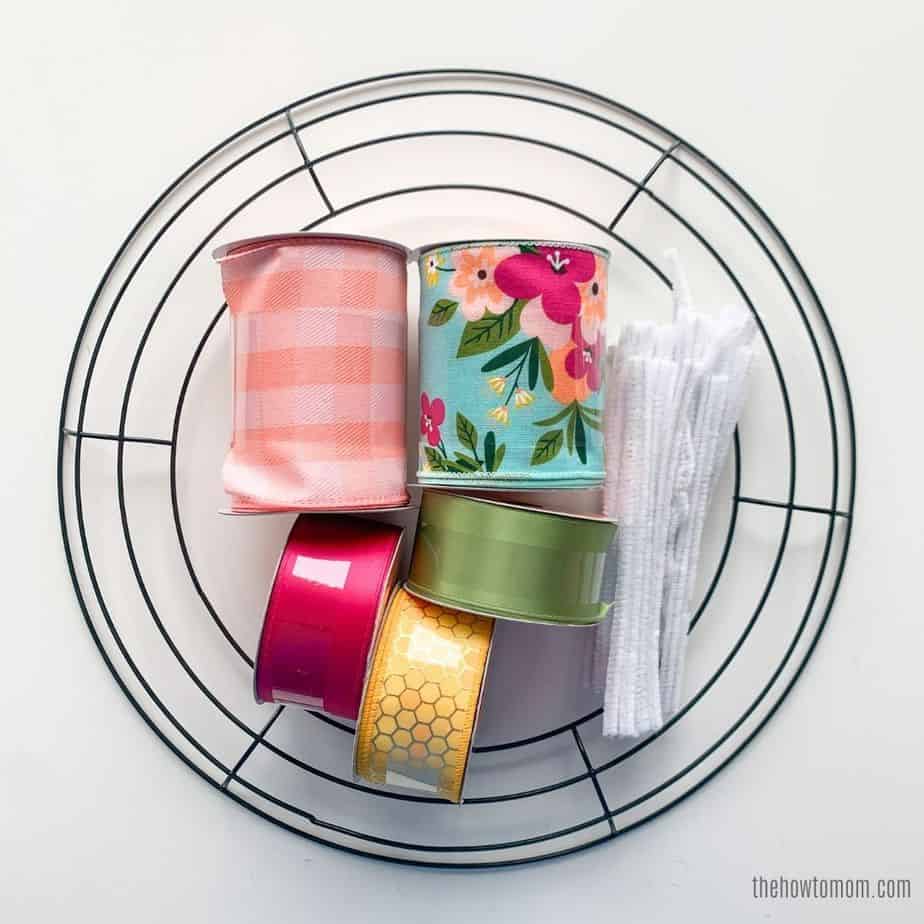

To make a ribbon wreath, you’ll need:
- a wire frame (I like to buy these at the Dollar Tree, but you can also find them at craft stores.)
- Ribbon, of course! Probably around 12 yards (see FAQs near the end of this post)
- Pipe cleaners, wire, or zip ties (optional)
- Scissors
Ok, here we go, lets learn how to make some wreaths!
Three Types of Ribbon Wreath Techniques:
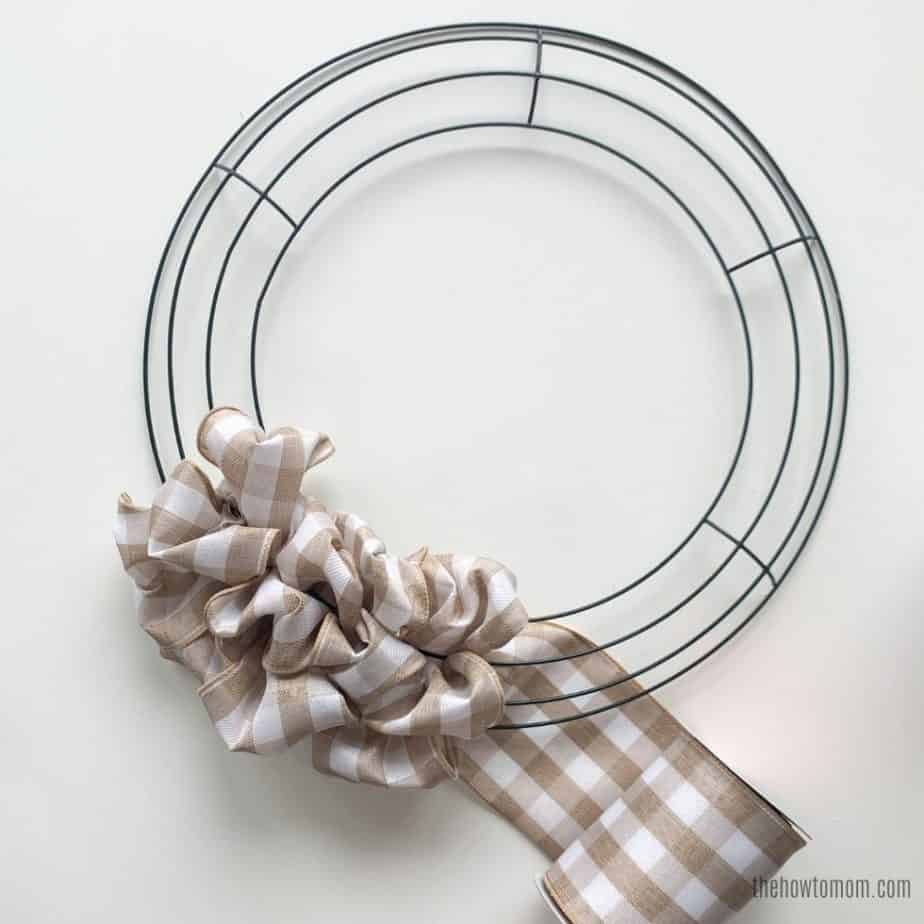
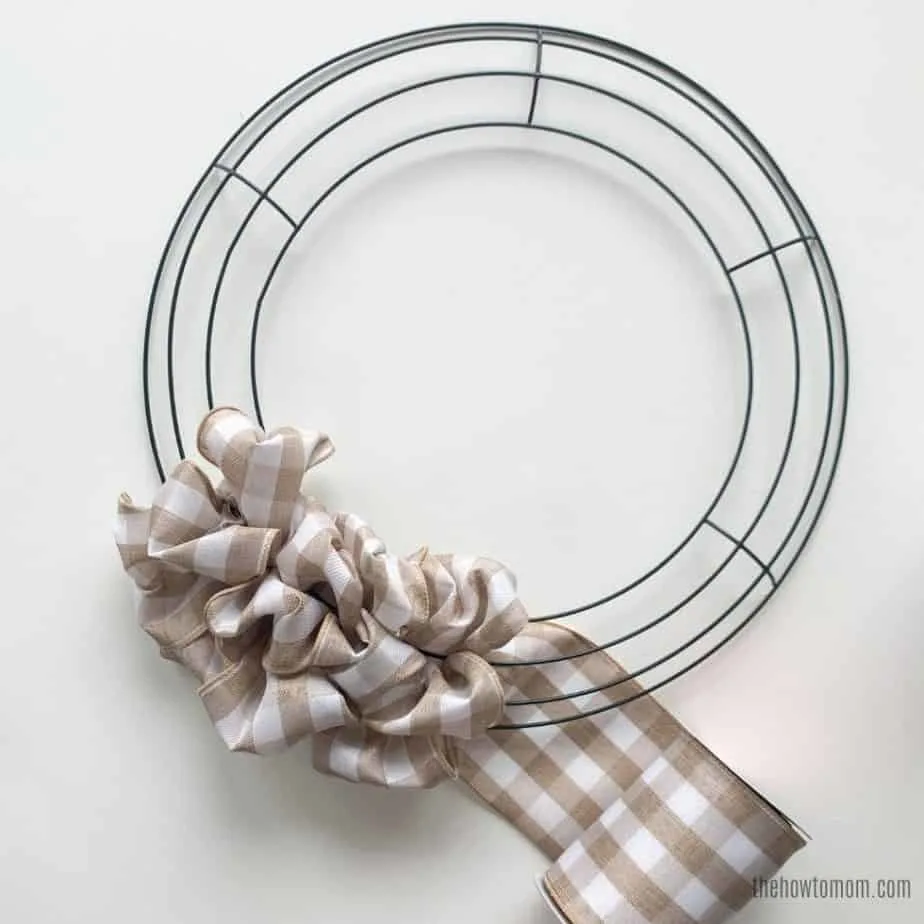
Bubble Method
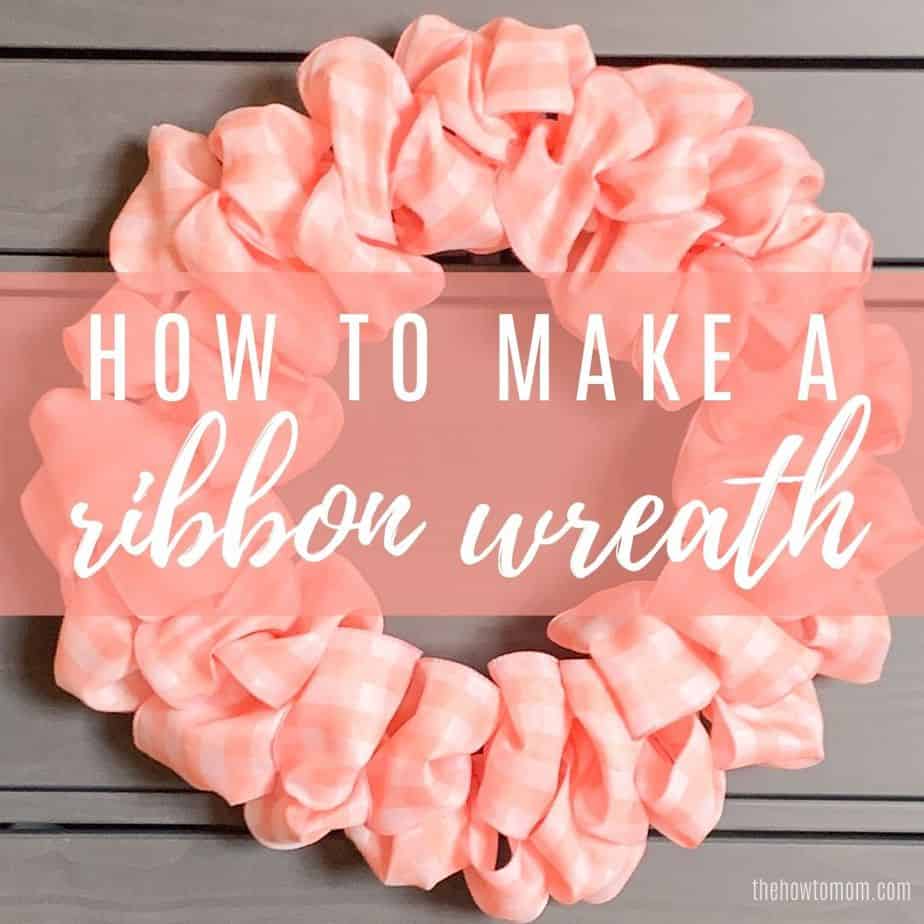
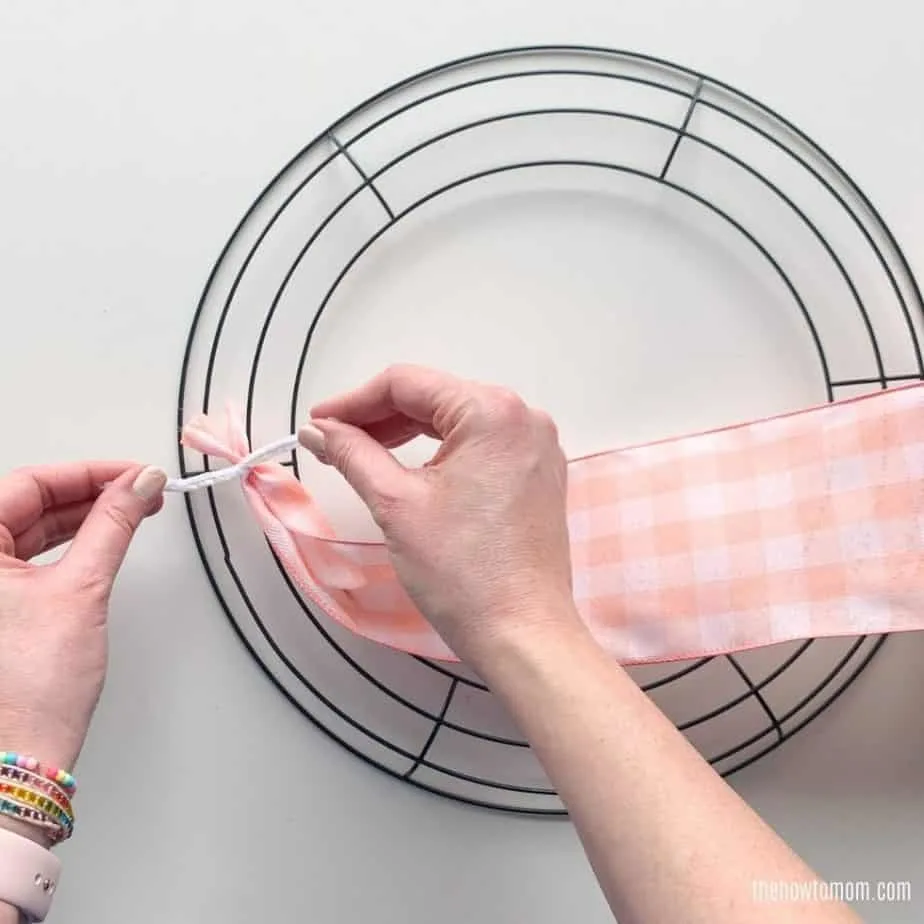
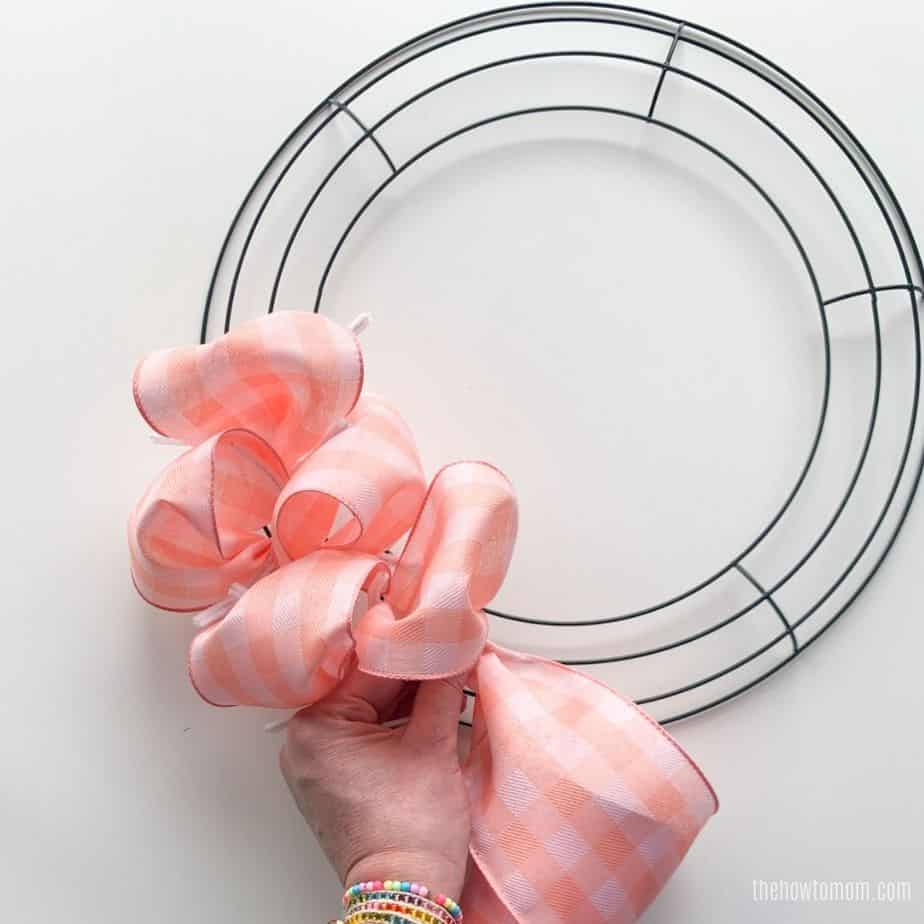
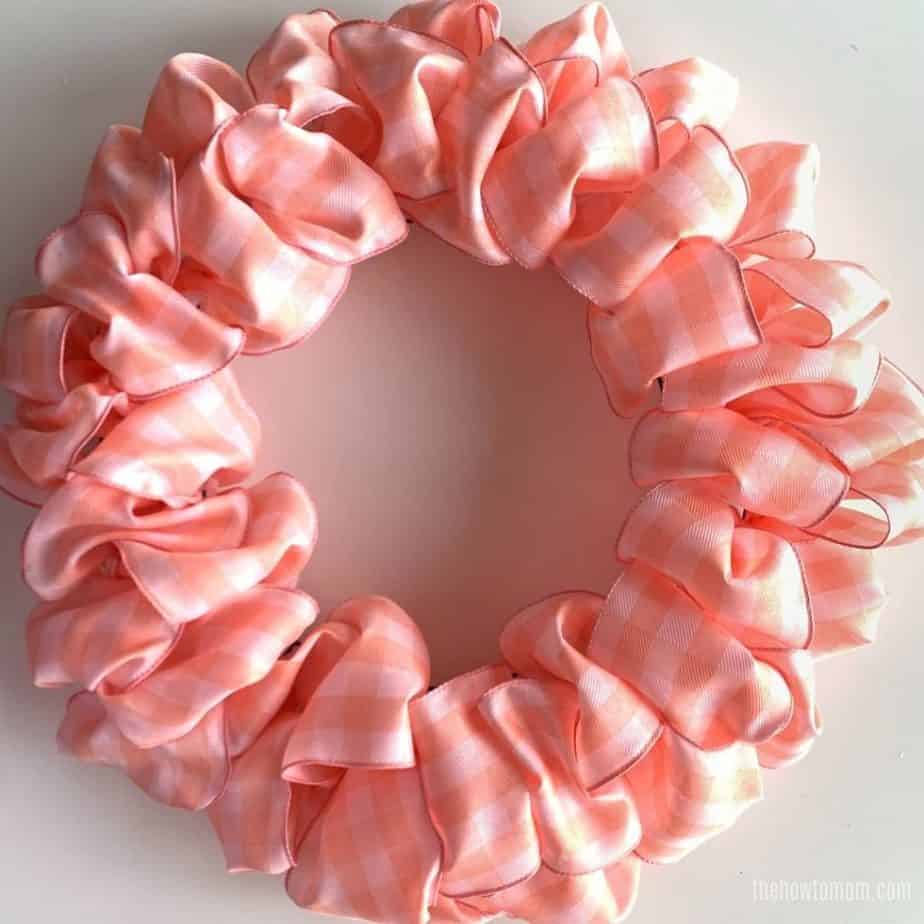
The first technique I tried is the bubble method. The result is a poofy, bubbly effect with the ribbons. It works best with wider ribbons (so you can cover more of the wire frame when you fluff the bubbles out).
The exact ribbon I used for this method is this darling 4″ wide peach gingham ribbon from Michaels.
You need to have pipe cleaners, wire or zip ties for this method, as you’ll be attaching each “bubble” to the wire wreath.
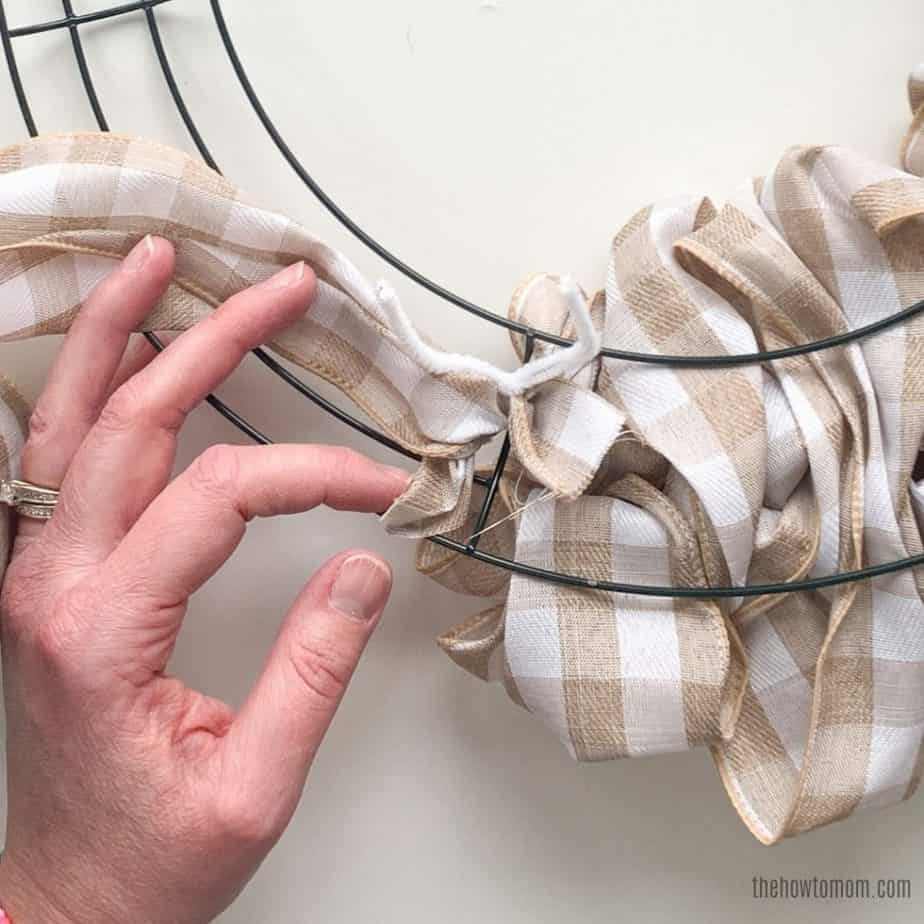
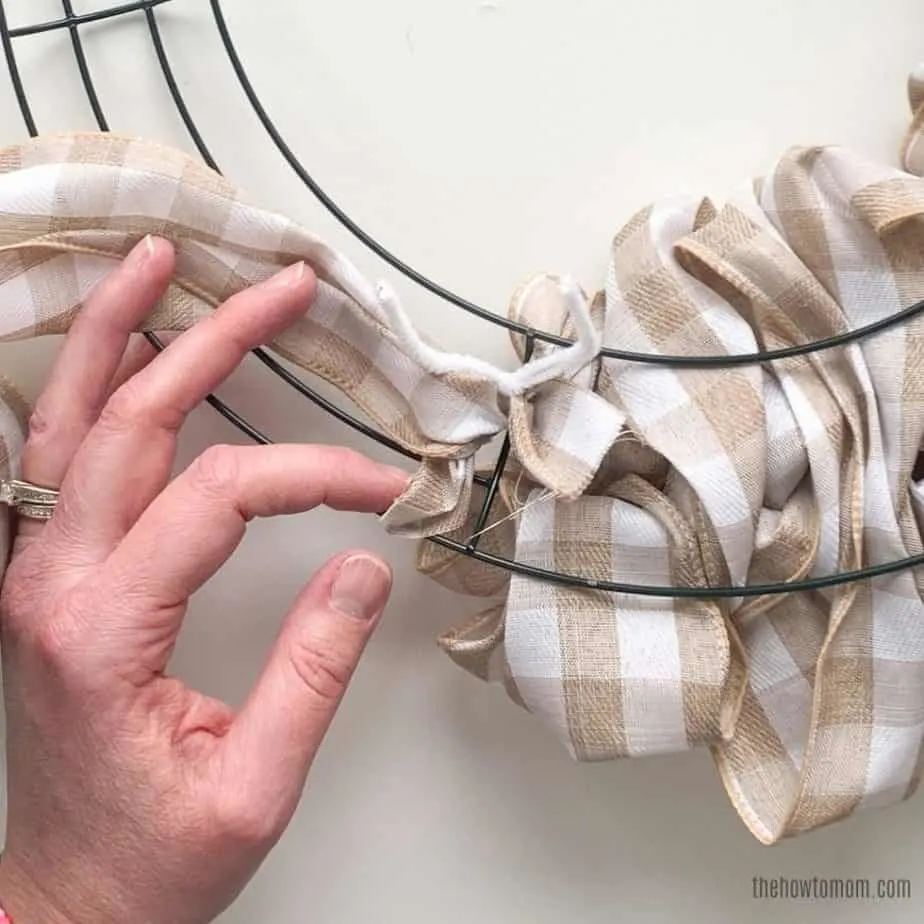
To create this look, you start by bunching the end of the ribbon up and attaching it to the wire frame with a piece of pipe cleaner, wire or zip tie.

Then you stretch the ribbon out a determined length, so the “bubbles” are a consistent size. You can choose a number of inches, or I like using the width of my hand to measure the ribbon.
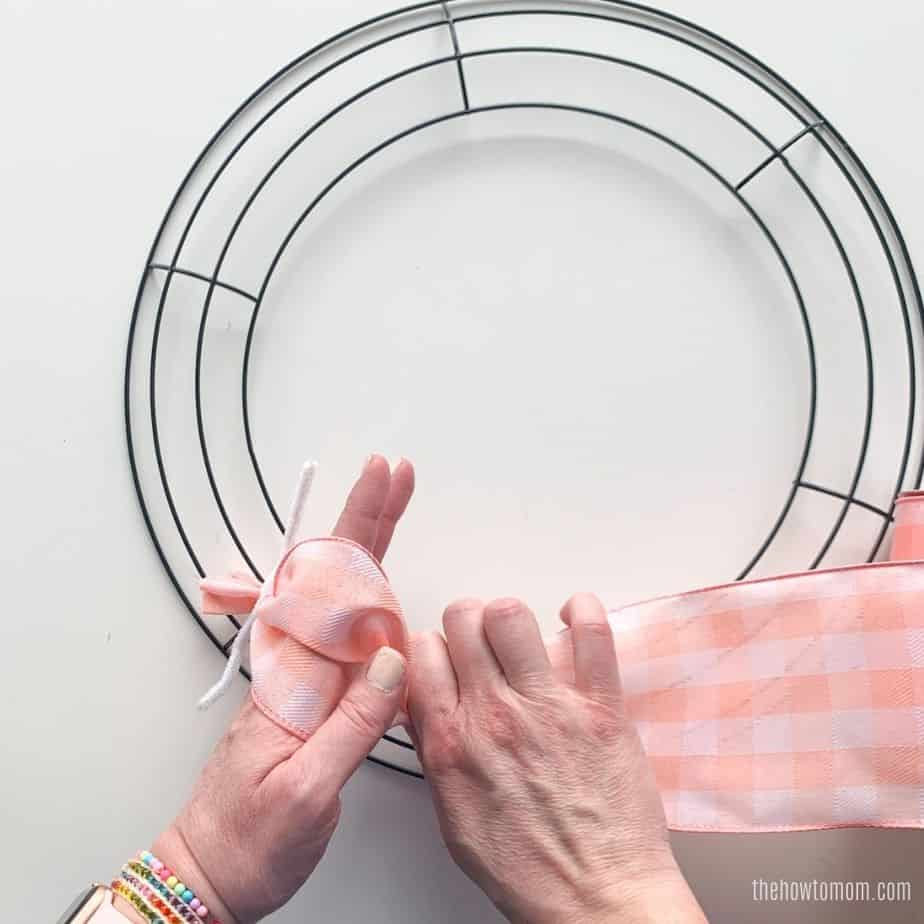
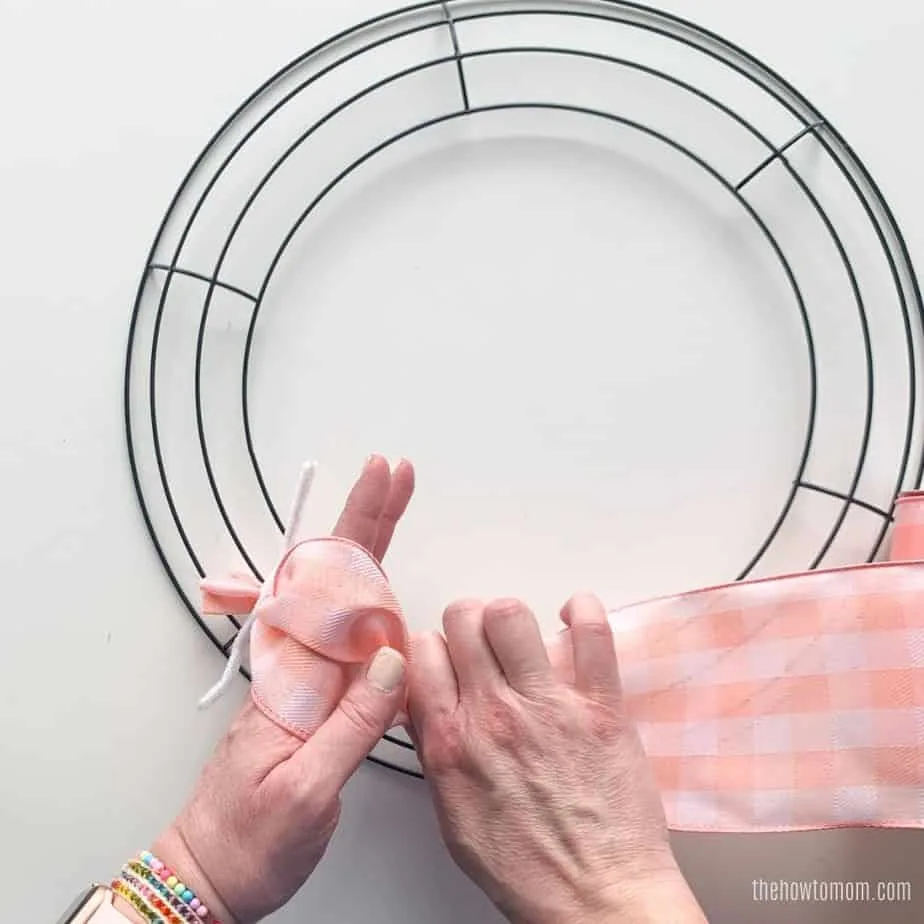
Then scrunch the ribbon together at that point and attach it to the wire frame. As you will notice, most wire frames have four wires that run around the perimeter of the wreath. You have a few options for where to attach each “bubble”.
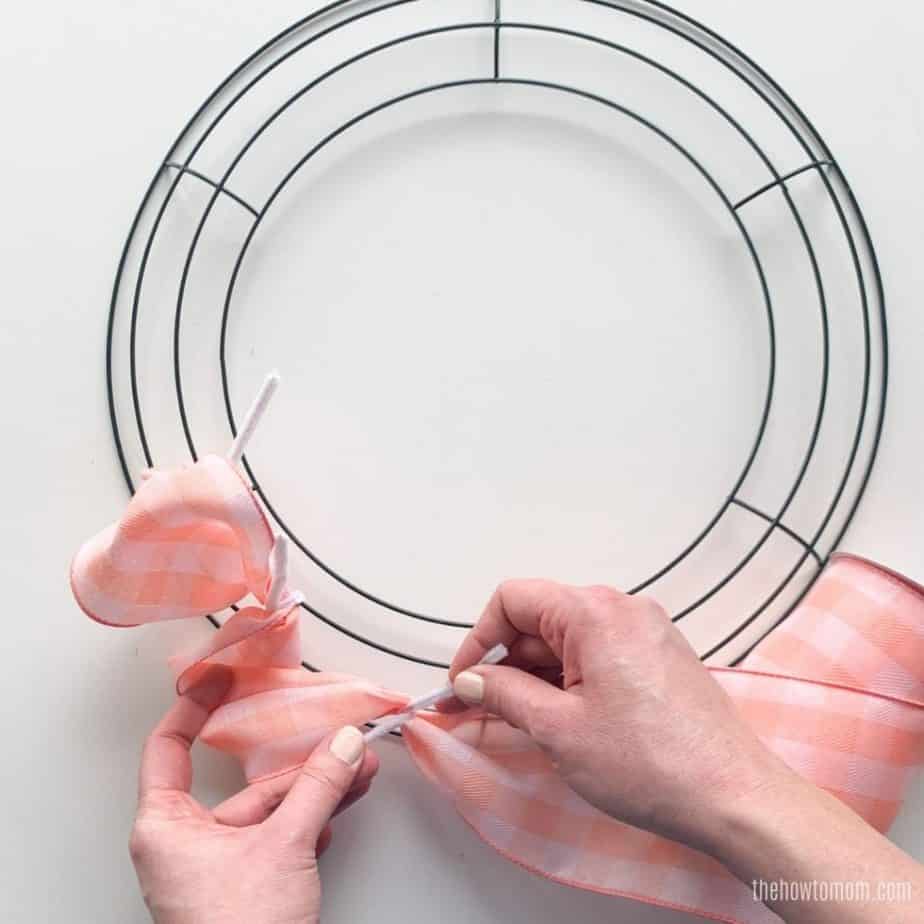

For super wide ribbon (like 5 inches or wider), you can stick with the middle wires and still be able to cover the whole wreath.
For regular ribbon (2-4 inches wide), you’ll probably want to alternate (zig-zag) which wires you attach to. The “bubbles” will scrunch up as you go along, which helps cover the wire frame.
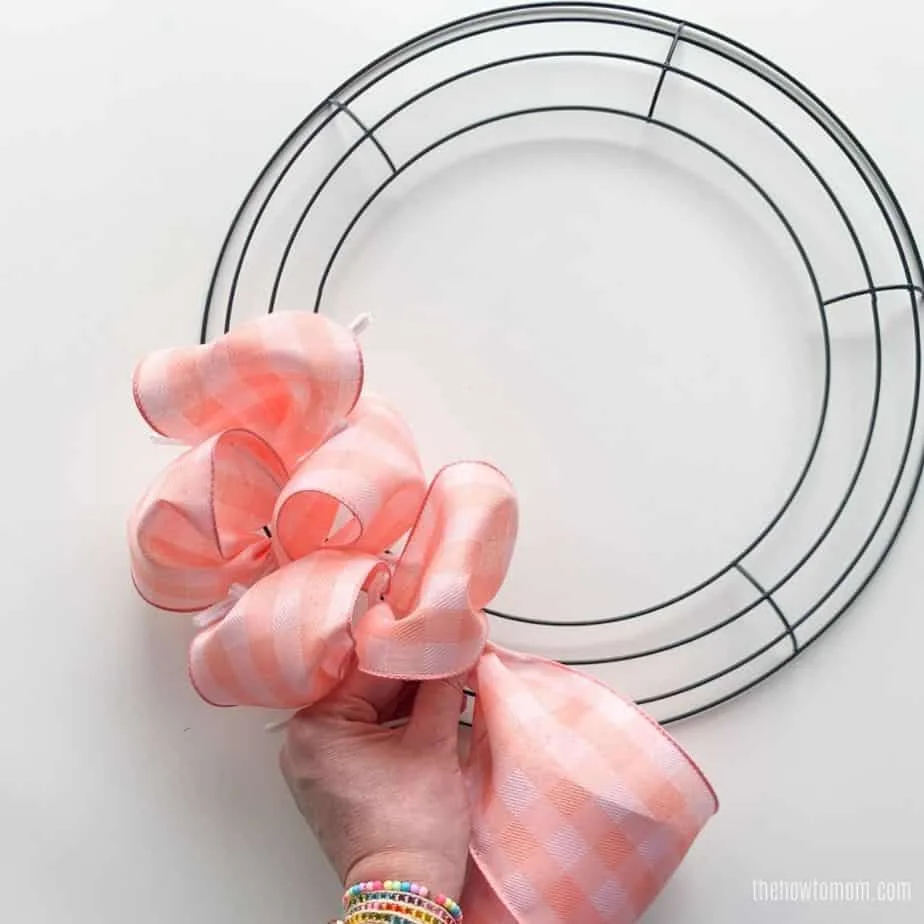
Wire wreath forms also have 6 perpendicular/dividing wires to give support. Depending on how wide/thick your ribbon is, you may want to have 5-7 “bubbles” between each divider, or if you want a really full and ruffly look, you can have more like 8-10 “bubbles” in each section.
Also, the shorter the ribbon is between pipe cleaners, the more bubbles you’ll likely need to cover up the wire.
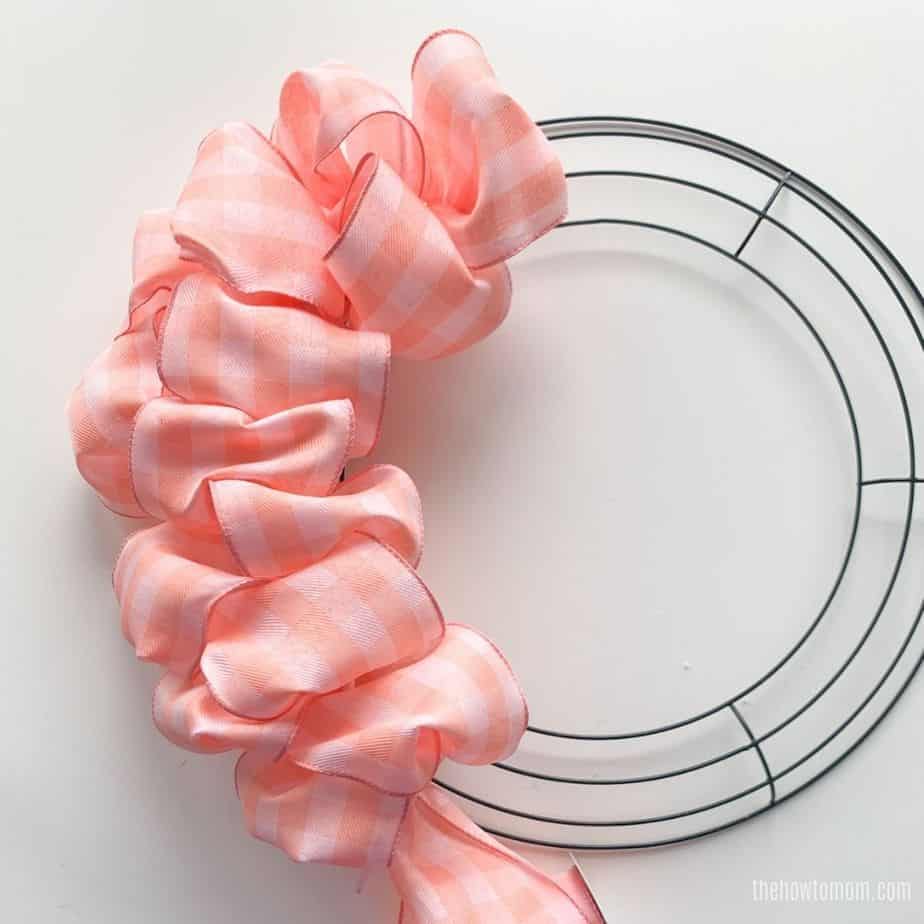

Continue around the wreath, creating the same number of bubbles in each section. If your ribbon ends and you need to start a new spool of ribbon, simple attach the new ribbon with a pipe cleaner, tuck the ends underneath the wire frame, and continue on making bubbles.

When you’re finished, just make sure to tuck the pipe cleaners in, and maybe secure them underneath the wreath so they don’t peek out.
This “bubble” method is nice because you can continue to add more accent ribbons or embellishments on top of the bubbles, and use the existing pipe cleaners to attach them. Its much easier to achieve a layered look with this method, so feel free to go around again with additional colored wire ribbon.
Push-up and Scrunch Method
I saw a LOT of this “push up” style as I was doing my ribbon wreath research. Its advantage is that it requires no extra supplies, just ribbon and the wire frame!
I admit, its super easy and has a really nice ruffled, uniform look. This technique is fool proof, I’m confident almost anyone can do it.
This style of wreath works well for layering ribbons. If you’d like to use multiple ribbons, you will need to layer them on top of each other and attach them together from the very beginning. You may also be able to attach accent ribbons afterward too.
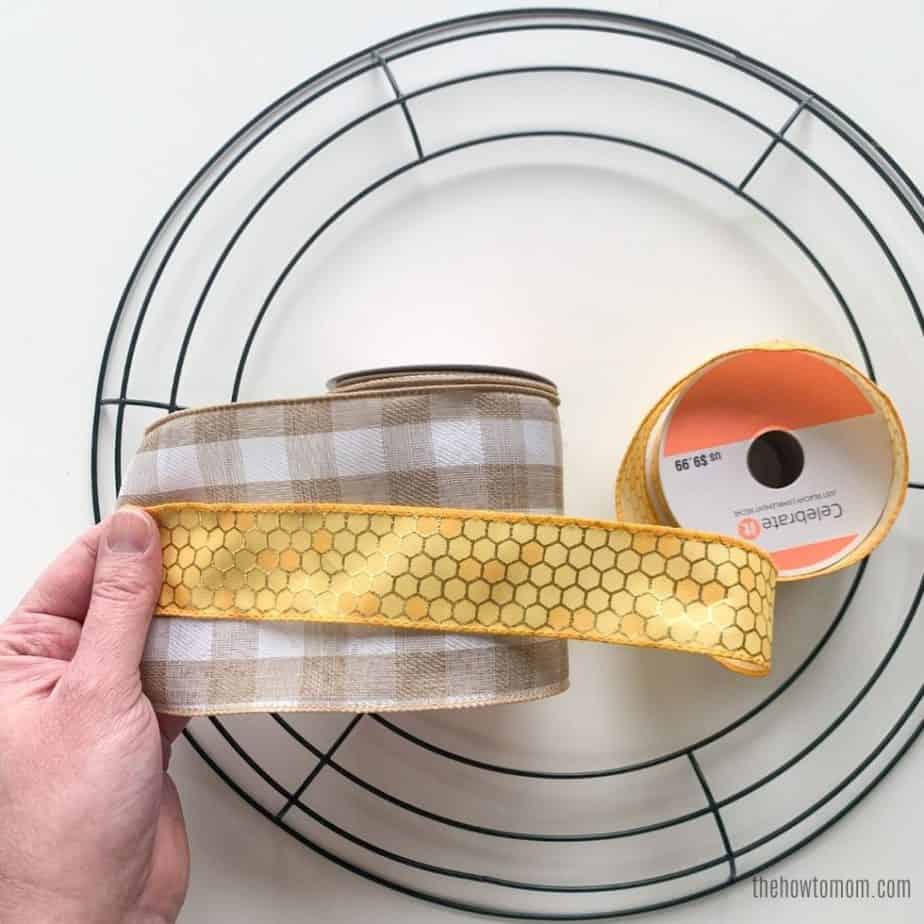
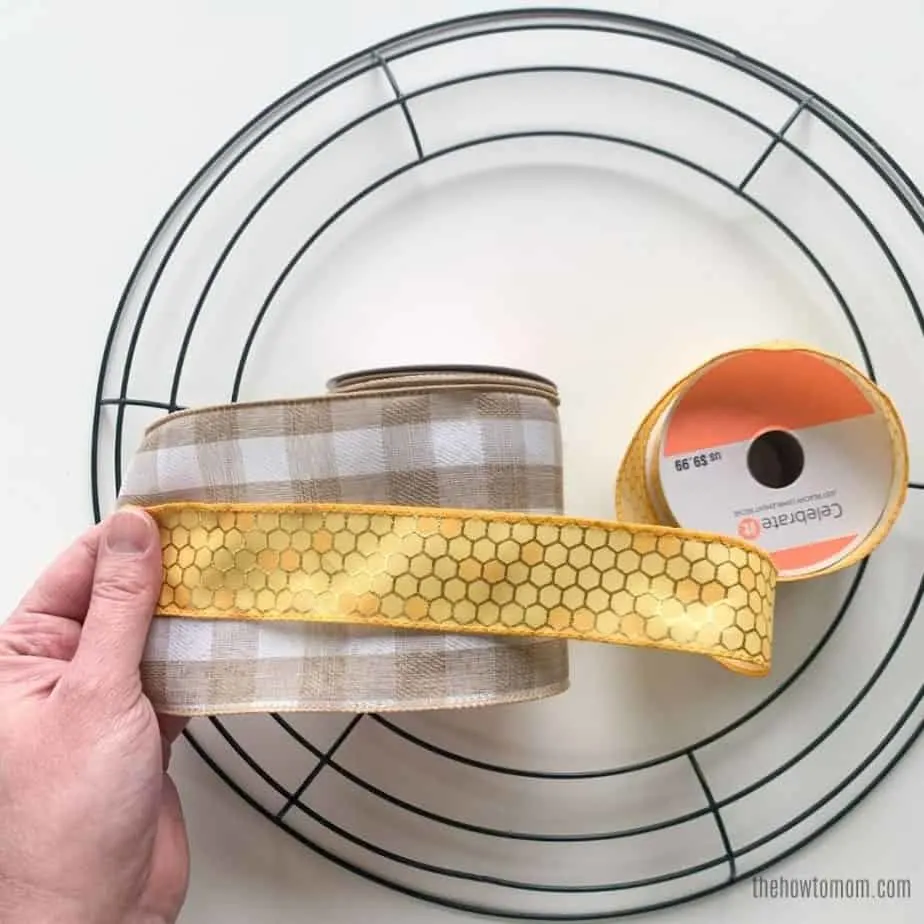
The exact ribbon I used here is this 4″ wide beige ribbon from Michaels. And this darling honeycomb ribbon looks so good with it!
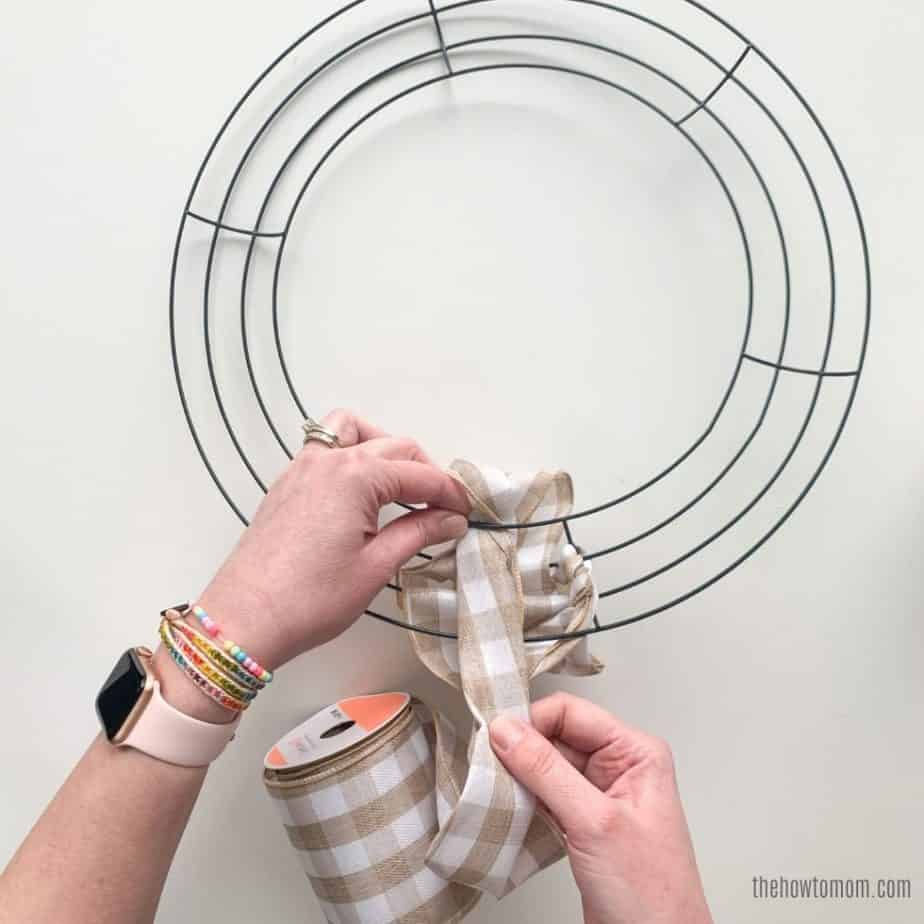
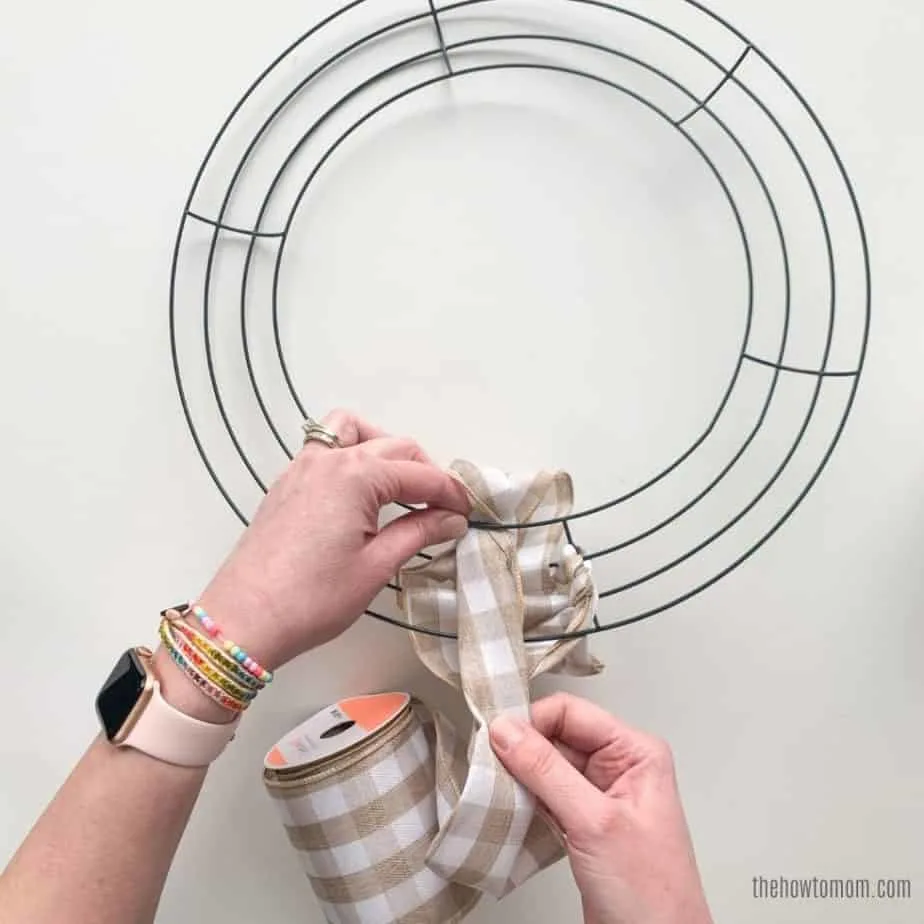
To create this look, you start by attaching the end of the ribbon to the underside of the wire wreath. You’re going to be pushing the ribbon UP through the wires, so the ribbon spool needs to be under the frame.
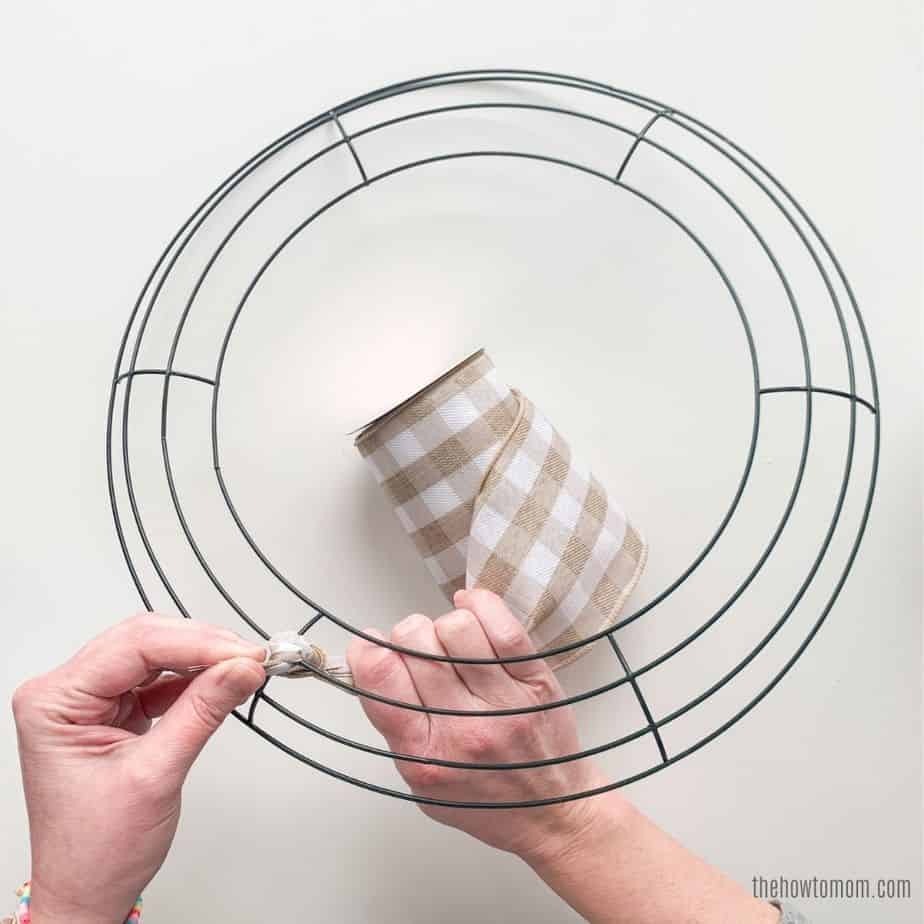
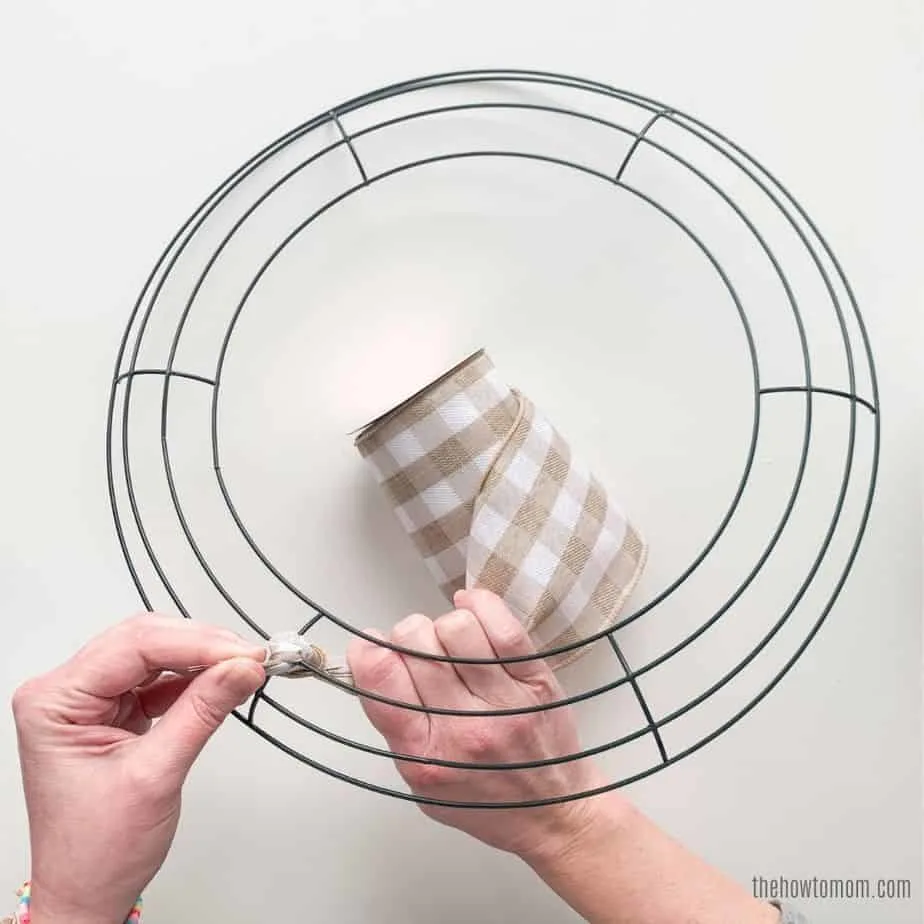
So start by pushing the ribbon up in between the inner set of wires. Choose a size of loop, and try to be consistent with it. Most wreaths have a loop that is about 2-3 inches high.
Continue pushing loops up in the other two spaces, making a row of three loops of similar heights.


On the underside, twist the ribbon once. I’m not exactly sure why, but that’s what the ribbon wreath bosses say. I’m thinking it helps everything stay in place. Its like “tying off” each group of three loops. But I just do what I’m told. haha
Then repeat, pushing up the three loops and twisting once underneath. Wire frames have six sections, so decide how many sets of three loops you want per section.
I had four sets of three loops in each section for this wreath.
This style uses a lot more ribbon than the other two, so you will definitely need more than one spool. With my 4″ wide ribbon, I ended up using exactly two 18 ft spools of ribbon, so we’re talking 36 FEET of ribbon! Wow.
When one spool ends and you need to start another spool, simply trim the end as needed and tie on (or attach with pipecleaner, wire or zip tie) the new ribbon. And continue pushing up your loops.
Continue around the wreath, creating the same amount of sets of loops of three per section. Once you’ve made it to the end, attach the end of the ribbon to the frame and tuck the ends underneath the wire frame.
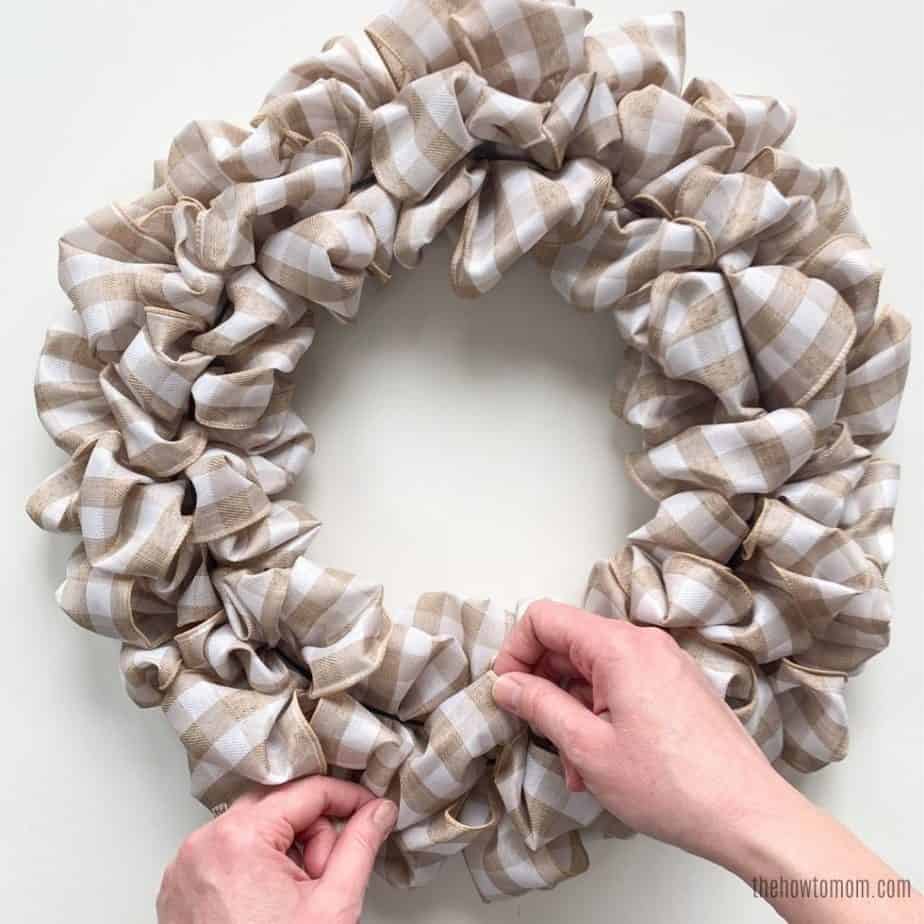
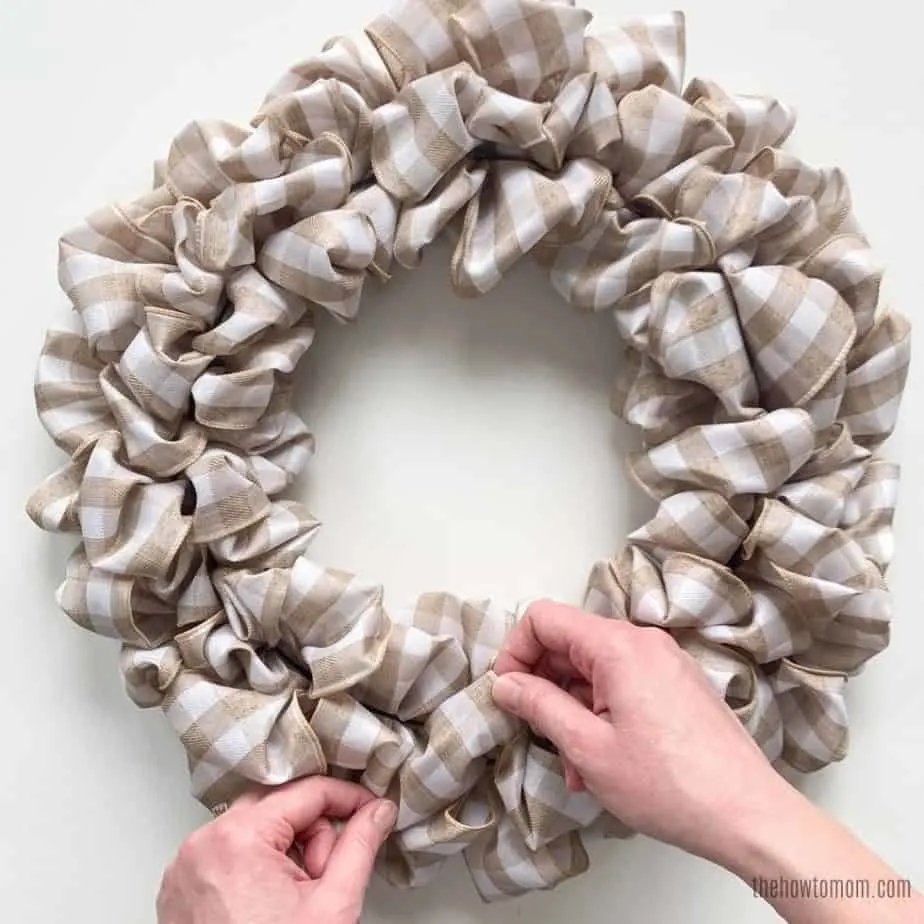
Lastly, fluff the loops and arrange the loops as desired. You could leave as-is, or add more ribbons (attaching with the “bubble method” from above. A grouping of flowers or a contrasting bow might be nice too (use my easy bow tutorial)!
Cut and Bunch Method
This last method is like… the party method. These are the wreaths with polka dot holiday ribbon and deco mesh and stuffed animals and the whole kitchen sink, basically. The ends stick up look kinda wild and festive. Of all the ribbon wreaths, this is probably my least favorite style. Just personal preference.
But it is popular, especially for holidays! I can see how it can be “fun” wreath. I’ll give you that.
To make the cut and spazz, I mean scrunch haha, ribbon wreath, you’ll need to choose a variety of ribbons and cut them into strips that are about 7″ long.


I like to cut the ends at an angle so the ribbon doesn’t fray. You could also cut the ends in a V shape as well.
This wreath can be made by either tying the ribbons directly to the wire, or bundling the ribbon strips together with a pipe cleaner or wire and then attaching them to the wire wreath frame.

Using the pipe cleaners, attach a little bunch of ribbons to the wire wreath. For this wreath, I just used the two inner wires, but if you want to make the wreath super full and poofy, you can use all four of the wires.

Continue adding bunches of ribbon to the wire frame, alternating which wire you attach them to.

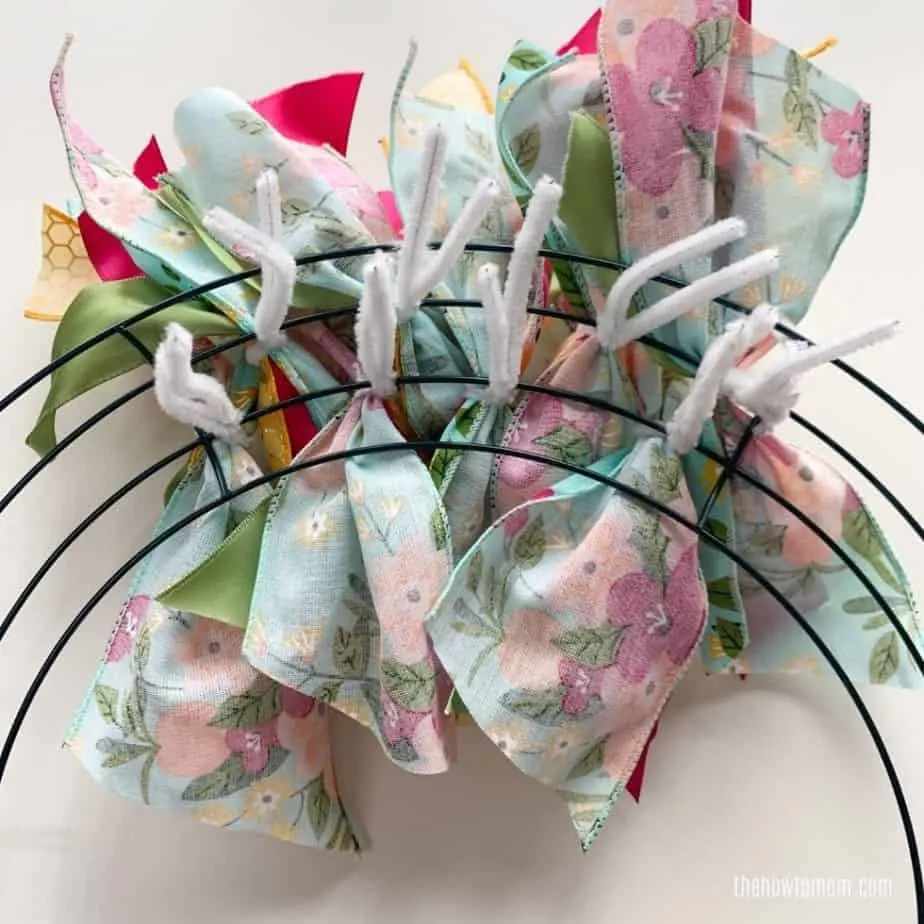
For this wreath, I added 8 bunches of ribbons to each section. Eight bunches times six sections means 48 bunches of ribbon. Thats a lot.
Often curled pieces of deco mesh or burlap are used in this type of wreath to add to the visual interest. The ends make a nice circle shape that varies things up from the pointy ribbon ends.
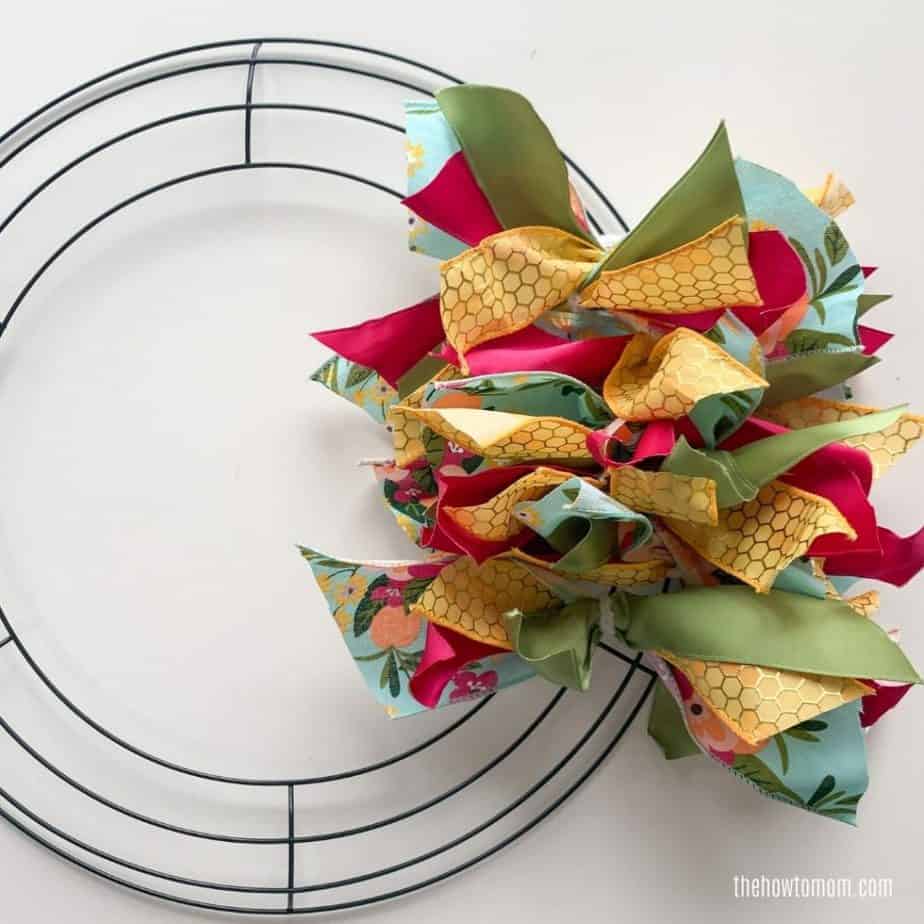

In fact these ribbons might look better on the peach wreath from above… yes, lets try that:


I kinda like it!
Not going to lie, this method is kinda tedious. It takes some time to cut all the ribbon, then bunch all the ribbon, then attach it to the wire frame. I only ended up doing this one section for now, just to show the technique.
Ribbon Wreath FAQs
Here are some commonly asked questions. I’ll add to this section as I get more questions on the topic, so check back often if interested! You can always email me at thehowtomom @ gmail.com if you have a question for me.
Do I need to use deco mesh and ribbon?
You definitely can! With these tutorials, I decided to use only ribbon. I wanted to show what can be done with just wired ribbon. But deco mesh can provide a nice background for your ribbons, and also gives a lot of volume, since it “poofs” naturally.
How many yards of ribbon do I need for a wreath?
Honestly, it depends on a bunch of different things.
- How wide your ribbon is
- How sheer your ribbon is
- How poofy or ruffled you want it
- Which technique you want to use
But I know that’s not the answer you’re looking for. So as a rule of thumb, I would suggest around 12 yards (36 feet) of ribbon. If you want multiple layers of ribbon, I’d say have 8-12 yards for the base color, and then only 3-6 yards for the accent ribbons.
What type of ribbon works best for making ribbon wreaths?
You can use almost any ribbon to make a ribbon wreath! I would suggest using a few different widths, with a nice wide ribbon in the background and maybe a few more narrow ribbons as accents.
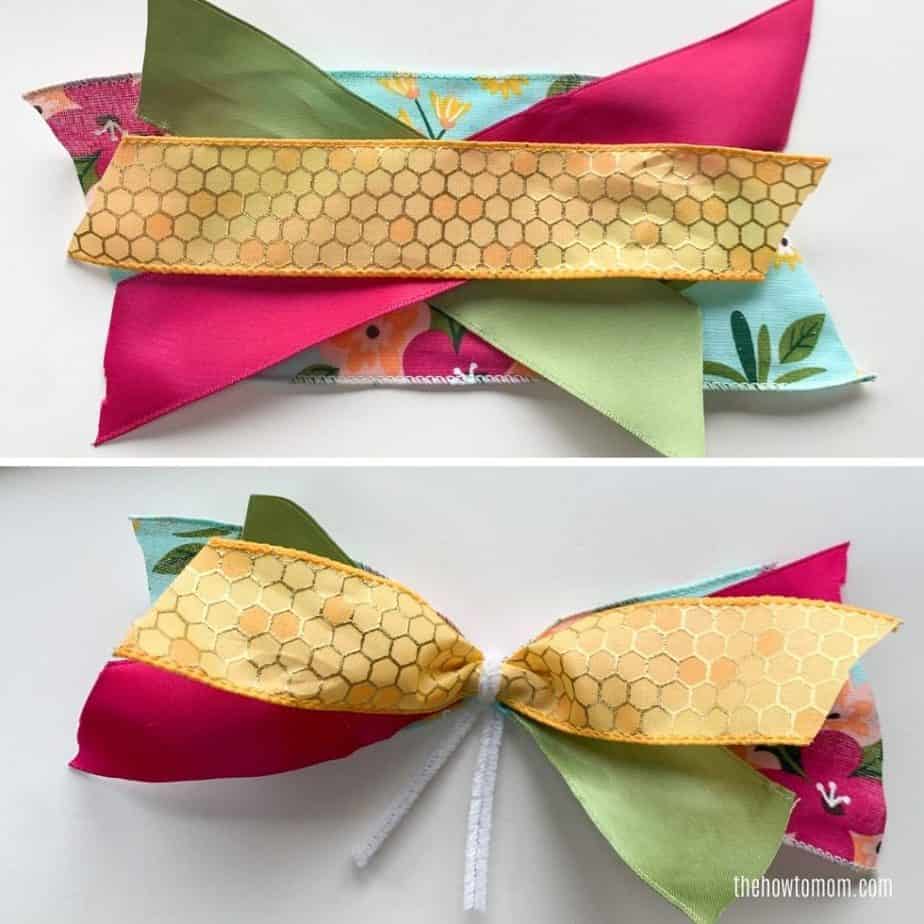
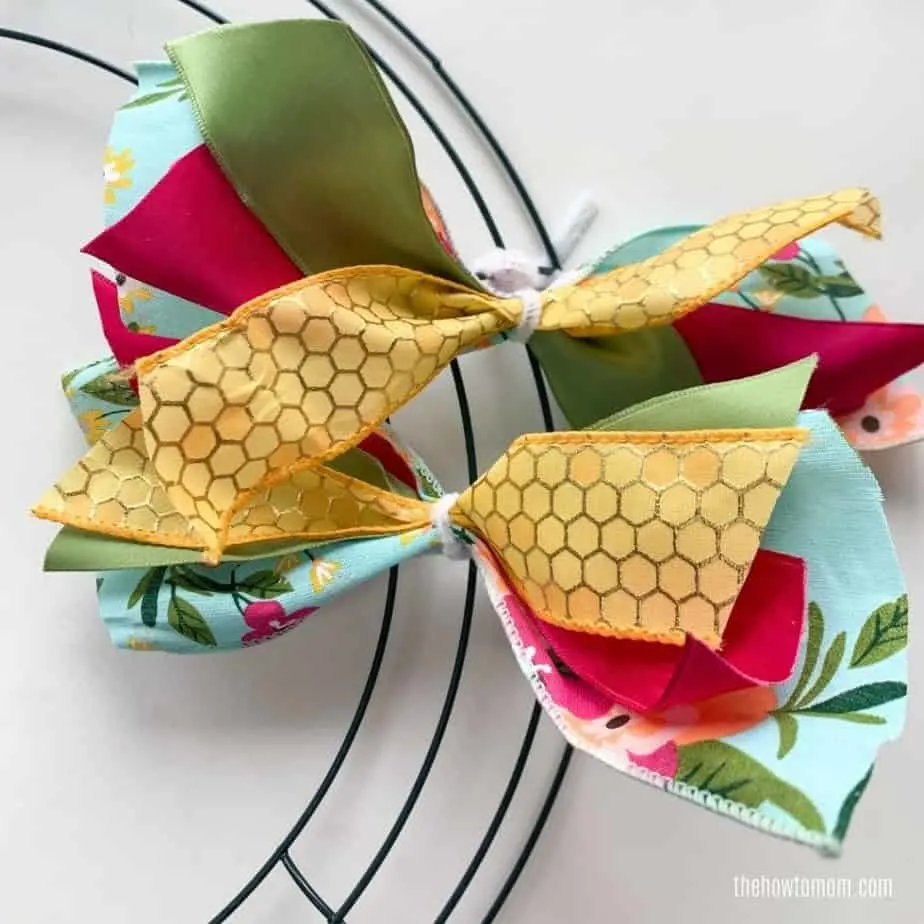
Wired ribbon is probably the most common type for making ribbon wreaths, as the wired edges make it easier to twist and poof and hold the shape you want. I use wired ribbon in my post about how to make an easy bow for a wreath. Wire ribbon is just fun and easy to work with! But you can absolutely use un-wired ribbon as well.
Be careful with really sheer or see-through ribbons. It can be tricky to layer them enough so that they cover the wire frame so it doesn’t peek through. If you like the look of a sheer ribbon, maybe consider using a thicker ribbon as the base to cover the wire frame.
I love to see the wreaths YOU make! Tag me @thehowtomom on IG or use the hashtag #thehowtomomwreaths so I can see it and tell you how talented you are!
Make Your Own Beautiful Living Succulent Wreath Centerpiece! Complete video course by Jeannine Romero now available through Skillshare.