

She enjoys all aspects of home DIY- from simple crafts to complete home remodels.
- Clay Moon Phase Wall Hanging - July 4, 2023
- What To Do When a Toddler Won’t Keep Their Blanket On - June 10, 2023
- How Do Child Locks Work in Cars? (And When To Use Them!) - June 10, 2023
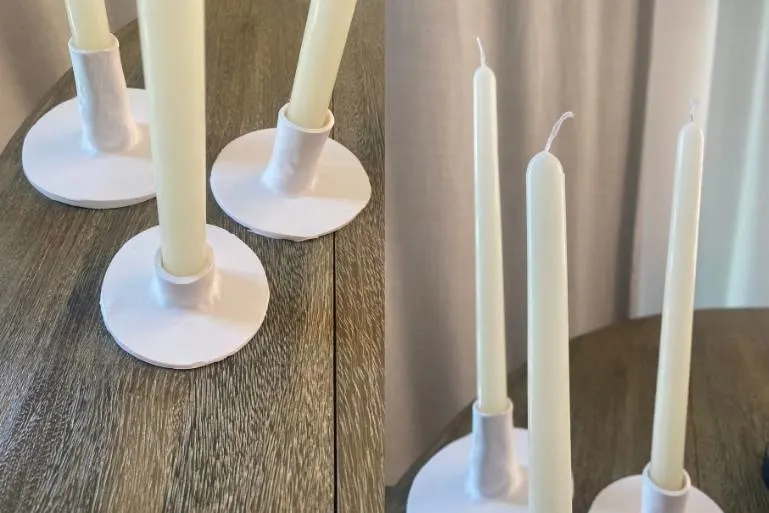
Fall is officially here, and we’re ready for all of the cozy vibes. One of the best things about fall is that you can cuddle up indoors, light some candles, and just enjoy staying in. Finding the right candlestick holders can be tricky, and they can also be pretty pricey.
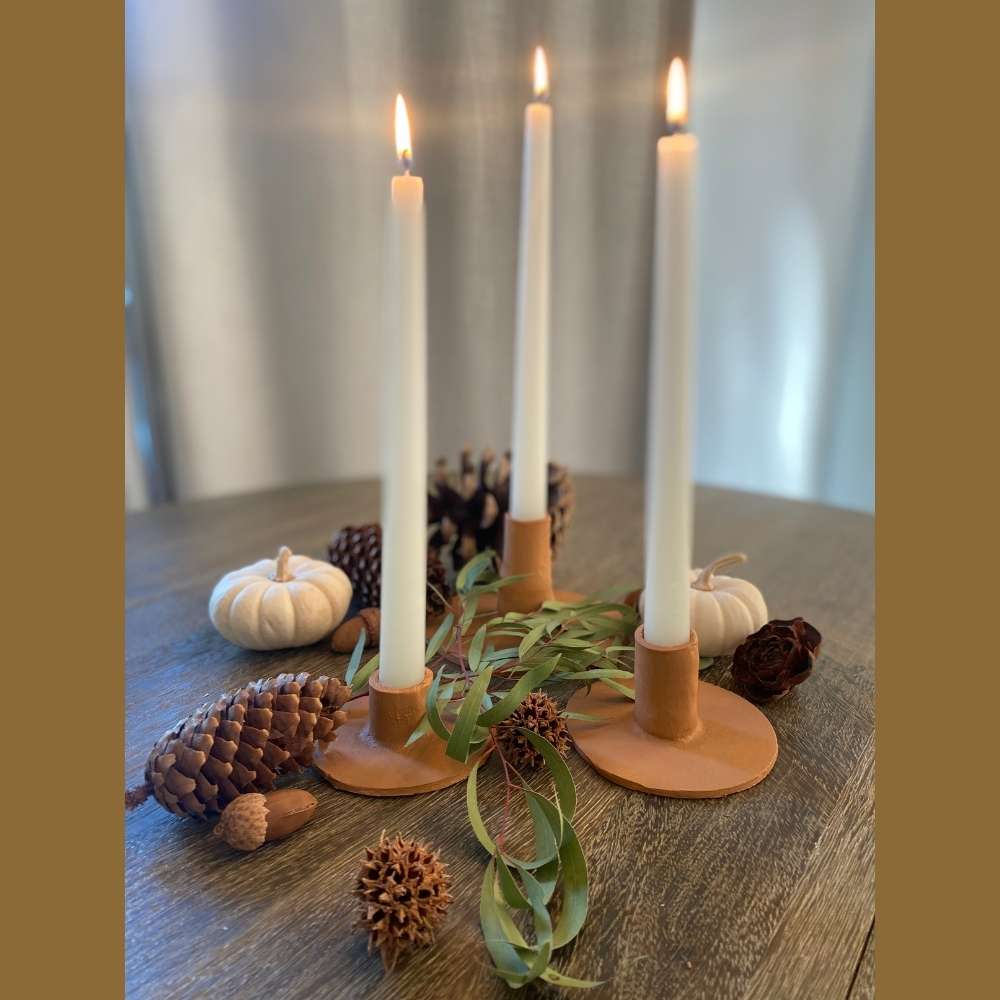

We’re going to teach you how to make your own terracotta-inspired candlestick holders right at home. These candle holders will accent any fall decor perfectly and won’t cost a ton to make.
Supplies Needed:
- Oven bake clay (Link to Michael’s)
- A cutting board
- A rolling pin
- An X-Acto knife
- A cookie sheet
- An oven
- Paintbrushes (we used both a sponge brush and a bristled brush)
- Several round objects of different sizes (bowls, cups, etc.)
- Taper candlesticks
- Terracotta paint (Link to Michael’s). If you don’t want to buy this, you can also just add baking soda to regular acrylic paint!


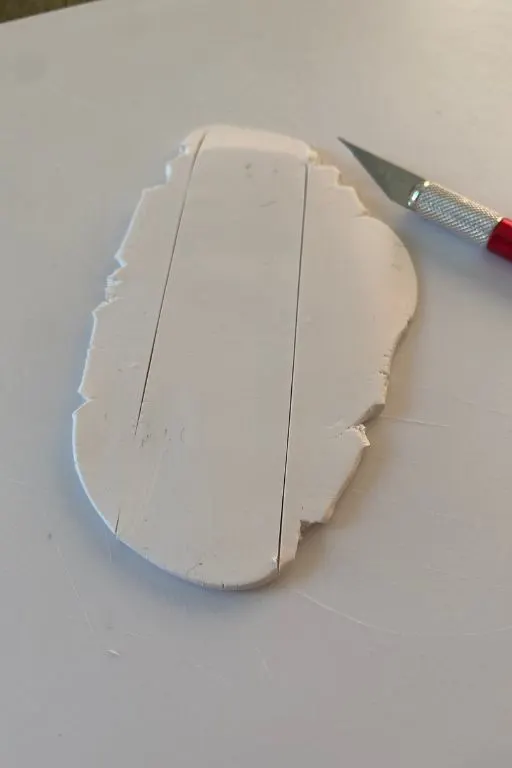
Step 1
Start by rolling out your clay with your rolling pin. This will take some elbow grease, and the best way to get the clay to cooperate is to use your hand directly on the pin itself rather than using the handles.

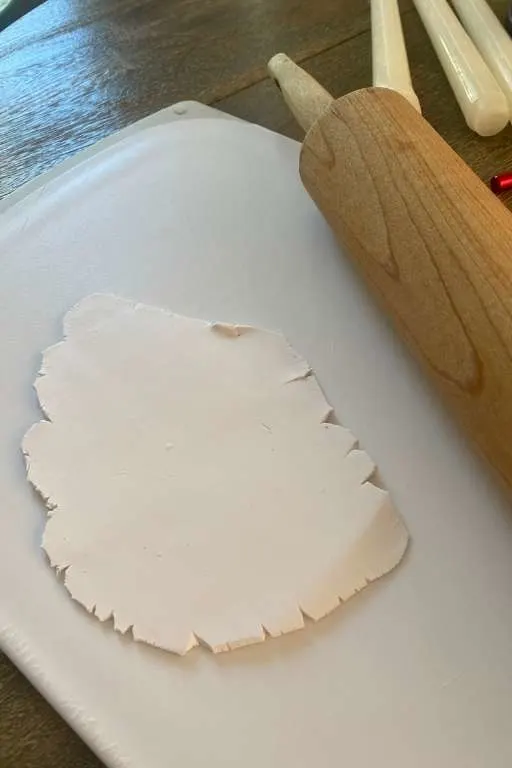
Using your hand on the pin, slowly roll the clay in different directions until your clay is slightly less than a quarter of an inch thick. Try to make sure the clay is relatively the same thickness throughout.
Step 2
Take one of your round objects (cup, bowl, etc.) and place it on top of your rolled-out clay. Using your X-Acto knife, slowly cut around the object until you’ve cut a full circle.
Remove the cup or bowl and peel away the excess clay to reveal a perfect circle of clay. This will be the base for your candle holders.

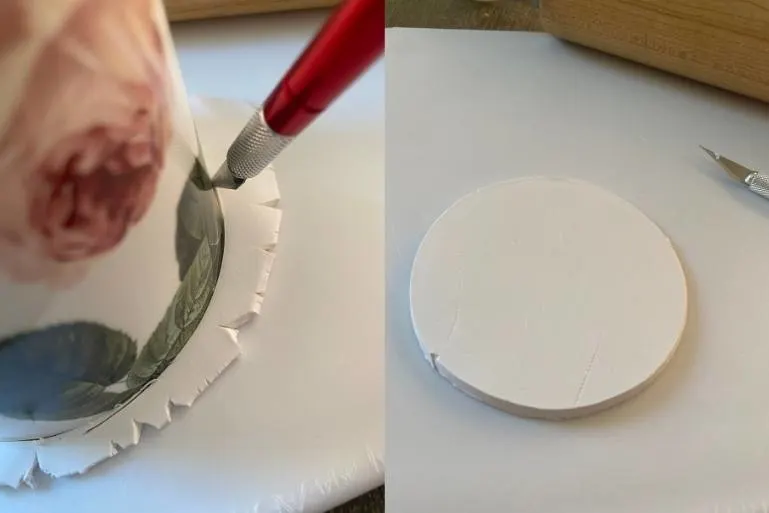
Set this aside for later. (Remember, you can use different sizes to make different base sizes if you want to!)
Step 3
Take your excess clay and combine it to form a ball (it doesn’t need to be perfect). Take your rolling pin and repeat step one with this smaller lump of clay until you have the same thickness you did before.
Now, using your X-Acto knife, cut a rectangle out of the clay. This will need to be long enough to wrap around your taper candle and wide/tall enough to hold it once it’s baked.
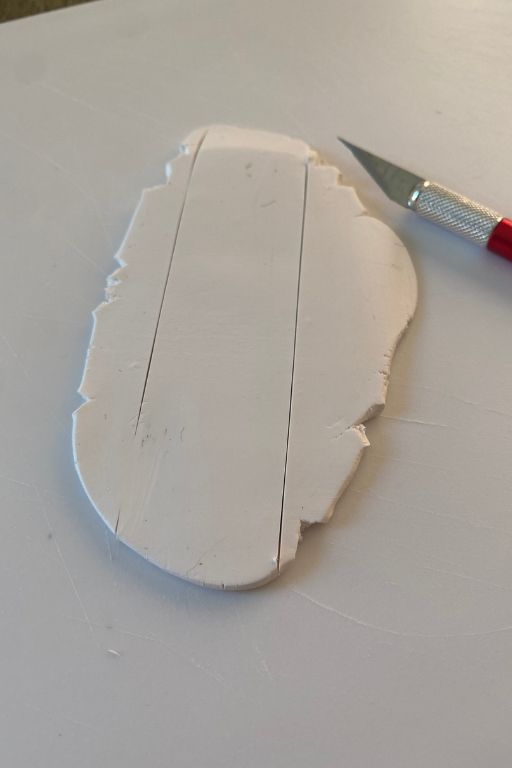
You can play around with different lengths here; we did three different sizes of bases and three different lengths of the part that holds the candles. Once you’ve cut your rectangle, go ahead and peel away the excess clay.
Step 4
Grab your taper candlestick. You’re going to take the rectangle you just cut and wrap it around the base of the candle, leaving a small amount of extra space for the taper so that you can pull it out of the clay easily (and so that when it bakes, your taper still fits in the hole).
Using your X-Acto knife, cut off any excess clay. From here, you’ll use your fingers to mold the two sides of the rectangle together around the taper. This part may seem like it won’t work, but it will if you use enough pressure.

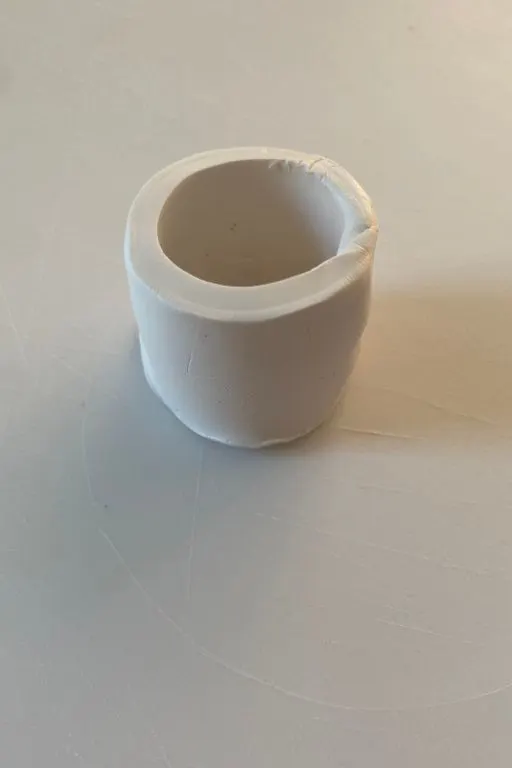
Remember, at this stage, the clay can be remolded until you’re happy with the shape, so if things get a little bent while you’re joining the two sides together, it can easily be reshaped.
Step 5
Take your taper out of the clay cylinder you’ve just created. Using your finger and thumb, pinch the bottom of one edge of the cylinder so that the clay flares out slightly, like a trumpet.
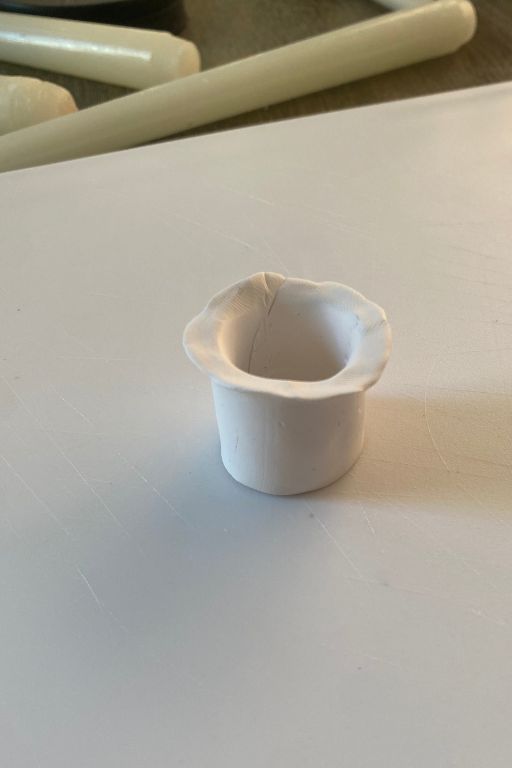

You’ll be pinching and slightly flattening this edge, but don’t pinch it too thin.
Step 6
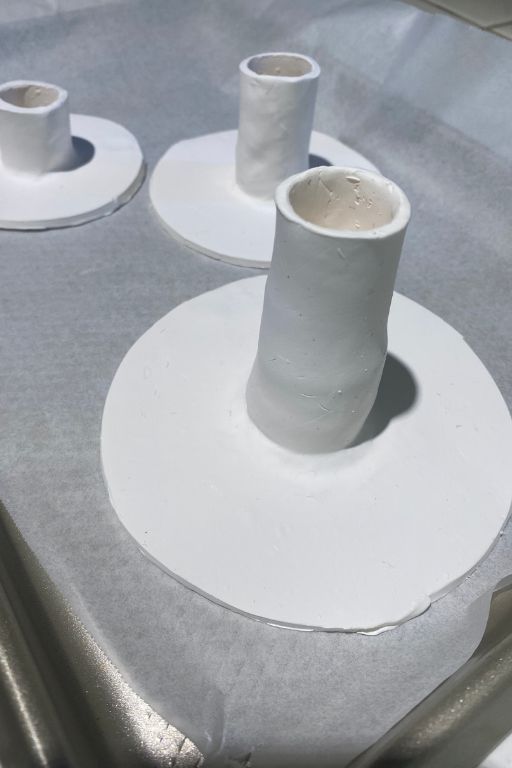
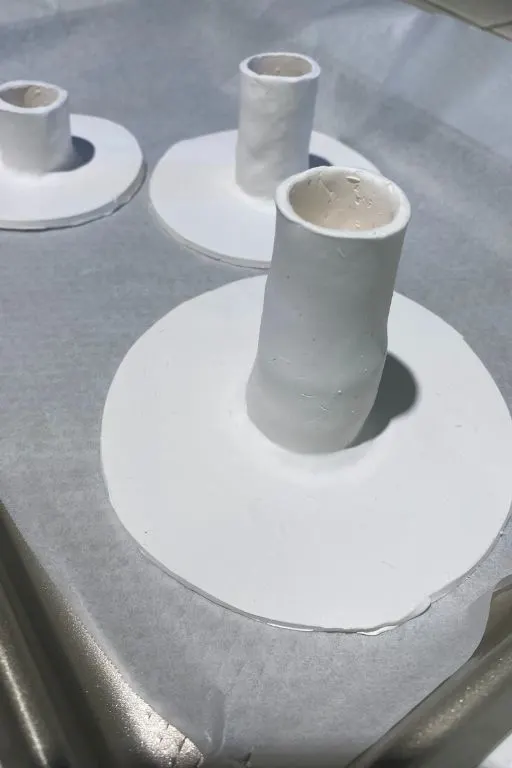
Take the flared end of the clay cylinder and place it in the center of your round clay base. Using your fingers, push down firmly on the flattened edges of the clay cylinder until it merges with the clay base.
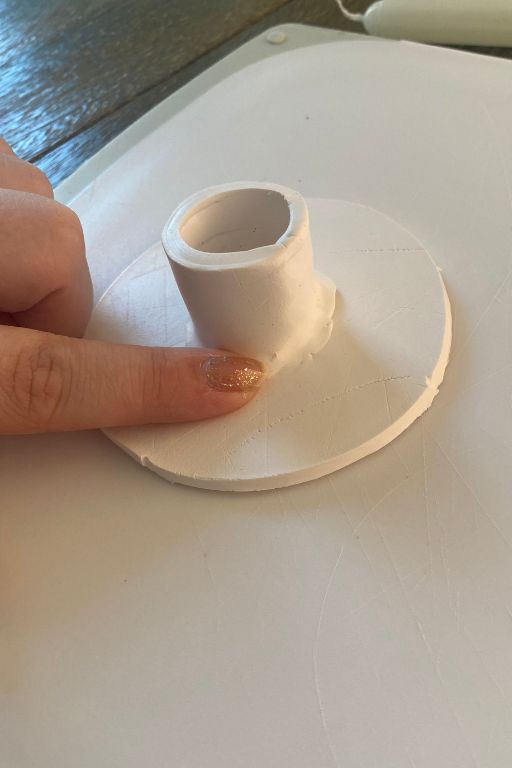
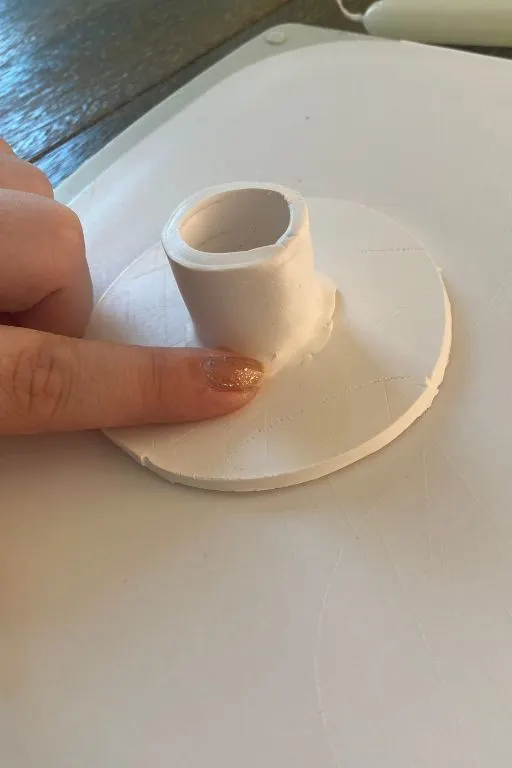
For this step, you need to use pressure and a sweeping motion to get the clay to blend together seamlessly. Don’t be afraid to push and drag your finger across the clay until it molds together!
Step 7
Now that the holder is on the base, you can decide if you want to make your candles sit at different heights. If not, skip this step and go to step 8.
If you do want to make your candles different heights, you’re going to take some of the excess clay you have left and make small balls of clay.
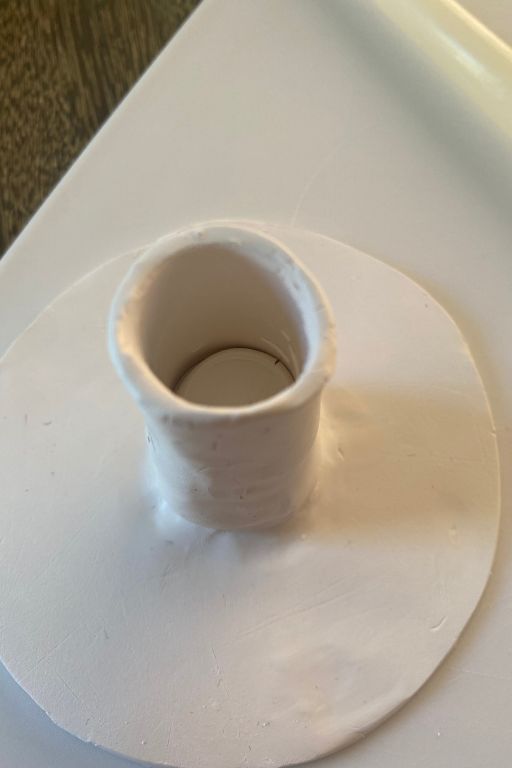
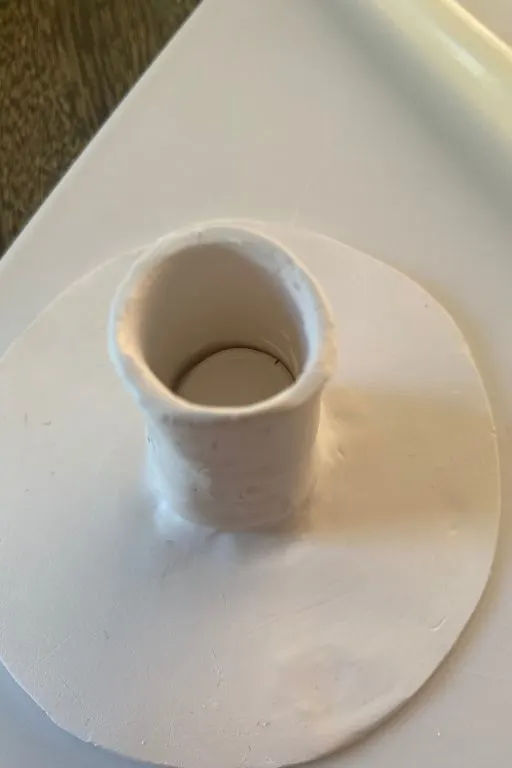
One by one put the ball into the hole and push it down using your taper. This may make the base of your holder a bit wider, but we think this adds to the terracotta look. Test your taper height, adding balls of clay and pushing them into the hole until you’re happy with the candle’s height.
Step 8
Once you’ve repeated all of the steps as many times as you’d like to make several candle holders, go ahead and preheat your oven to 275. While you wait for the oven to heat up, cut the parchment paper and cover your baking sheet with it.
Put your clay candle holders onto this baking sheet, being careful as you transfer them from the cutting board.
Once the oven is preheated, you can stick these into the oven and set your timer. We timed them in intervals, starting with 20 minutes and adding 5-minute increments until we felt they were finished, which ended up being 35 minutes.
With most oven-baked clay, the way to test its doneness is to use your fingernail to make a mark in the clay. Your nail should leave a mark but not sink into the clay.
The brand of clay we used recommends baking the clay for 30 minutes per quarter inch, but we had to bake ours a bit longer.
Step 9
Take your baking sheet out of the oven carefully. Allow the candle holders to cool for at least 30 minutes (longer if you used clay balls to make your candles sit higher). The thicker the clay, the longer it needs to cool. During this time, your candle holders will harden and dry.
Step 10
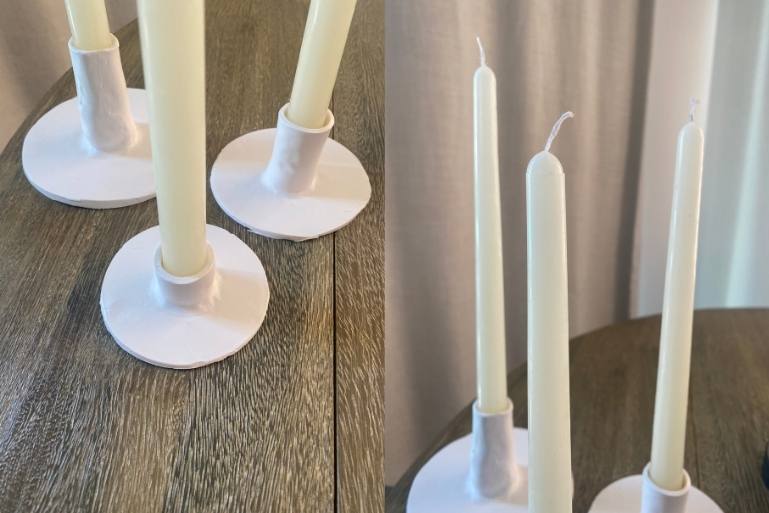
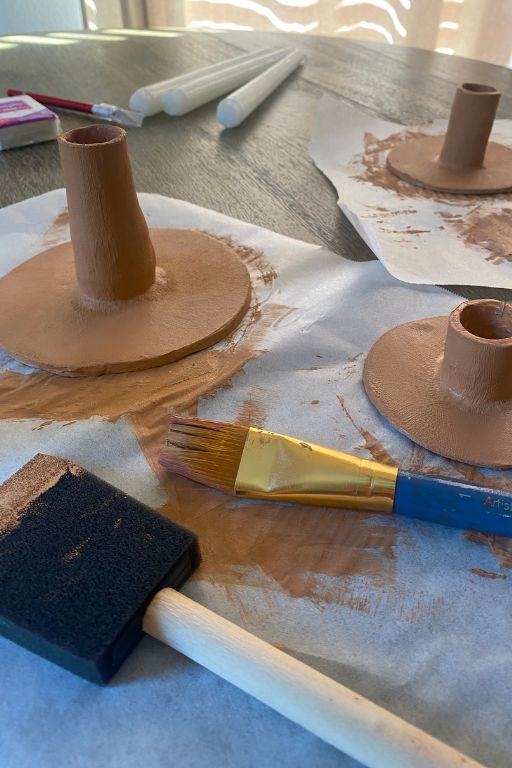
Once the candle holders are cooled, get your paint and paintbrushes ready. We used the shade Pueblo from the FolkArt Terra Cotta paint collection because it’s a warm sienna color that reminds us of fall leaves!
However, any shade will do, and you can mix baking soda with regular paint to achieve a terracotta effect if you don’t have this paint.
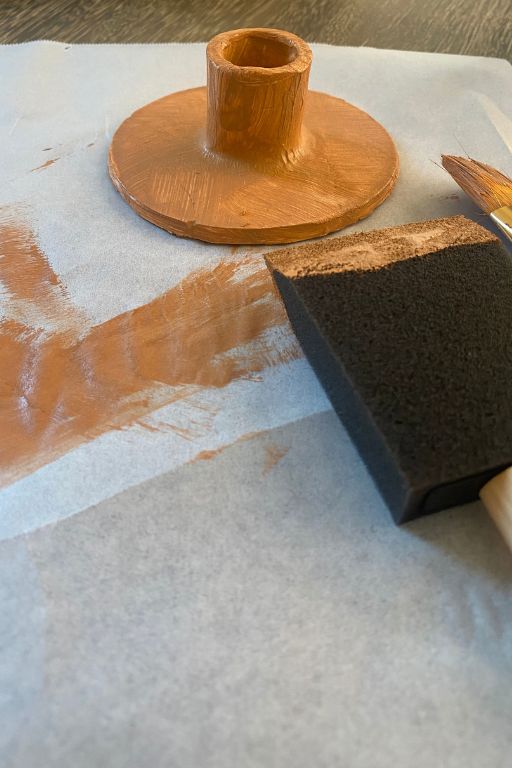

Take your paintbrush (the sponge brush works best, but any brush will work) and paint your terracotta paint onto your cooled candle holders. Experiment with different painting techniques to get different textures.
You may find you like the “dabbed on” paint look, or you may like brushstrokes to be visible. Make sure to paint the inside of the candle holder as well so that the white clay doesn’t show through! You will need to do two coats, so be sure to let your first coat dry for about 30 minutes before adding a second coat.
Step 11
Let your paint fully dry. We suggest waiting at least an hour, but if you painted extra thick, it may take longer.
Once your paint is dried, you can place your taper candles inside your new candleholders! If you have trouble getting them in the position you like (if you accidentally made the hole too big or the clay balls on the inside are uneven), you can use Stick-Um candle wax (link to Amazon) to keep them in place.

Enjoy your new candlestick holders!
Recommended Reading:
- 6 Crafts That Couples Can Do Together
- How to Make DIY Wall Art – Easy Canvas Paintings for Kids Rooms
- How to turn a Calendar into a Gallery Wall – Easy!
Make Your Own Beautiful Living Succulent Wreath Centerpiece! Complete video course by Jeannine Romero now available through Skillshare.