

- Free Video Tutorial – Gratitude Farmhouse Decor Craft - July 25, 2023
- DIY Dollar Tree Bird Feeder Craft - July 4, 2023
- Embroidery Hoop Organizational Wall Art - February 28, 2023
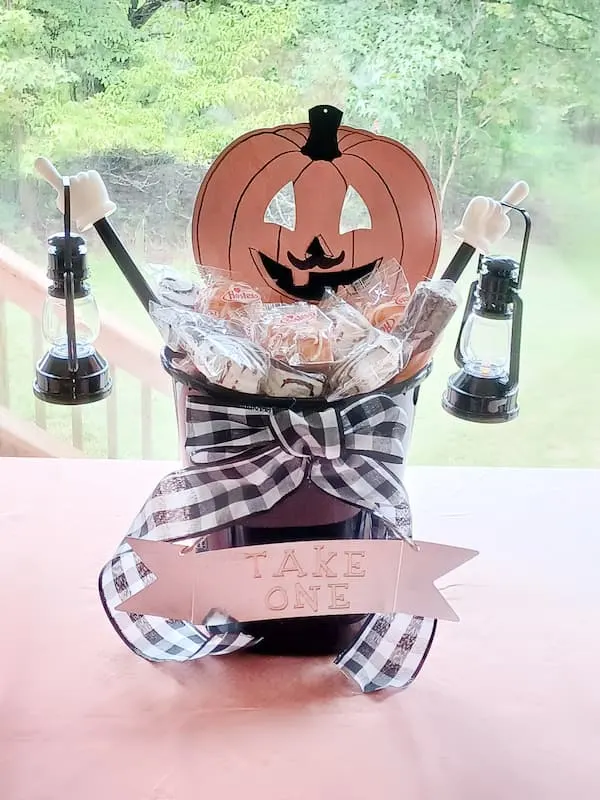
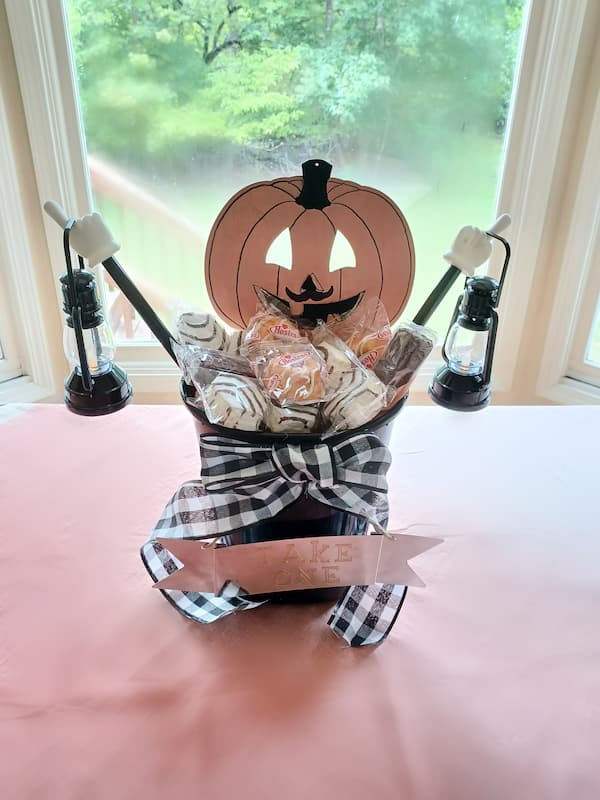
I want to introduce to you this super cute fall decor idea that will hold the delicious snacks you are providing to your loved ones.
This pumpkin butler would be great for any party or gathering. You could make one to simply present snacks and tasty treats to your family, friends, or even co-workers in such a way it will bring a smile to their faces.
This project is extremely easy and quick to make. The cost to make it is delightfully under fifteen Dollars!

You can find all of these items at the Dollar Tree to keep the cost under fifteen dollars. I love that store because it is affordable for everyone and it has so many wonderful items to make crafts and decor.
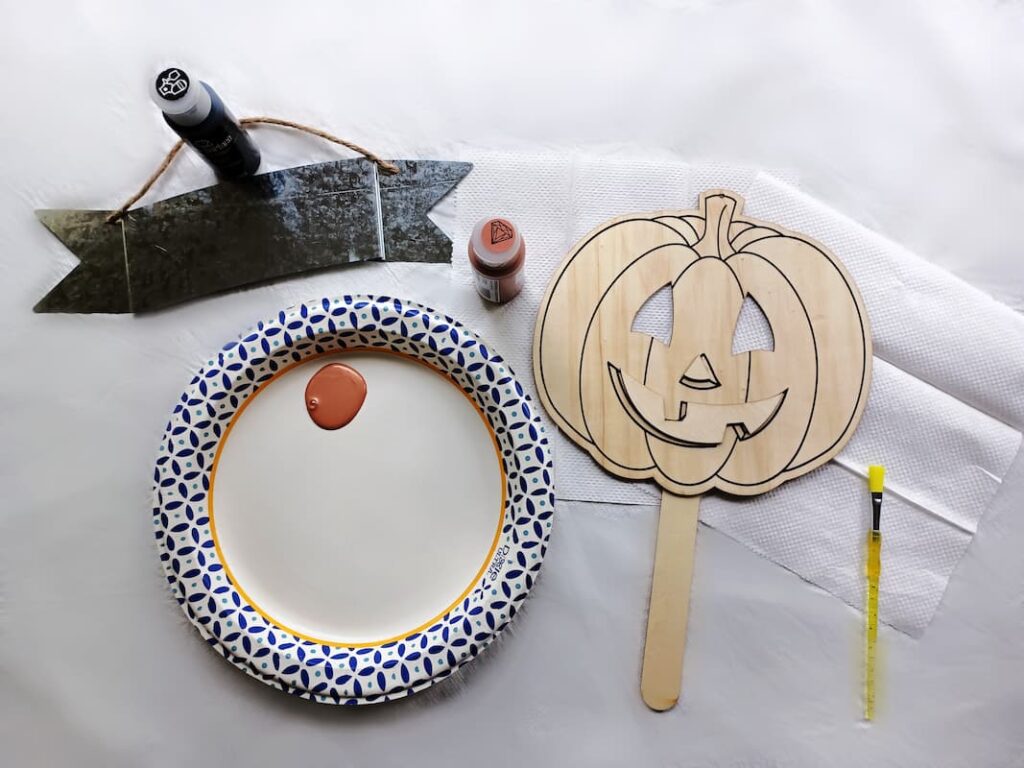
Supplies Needed For This Project

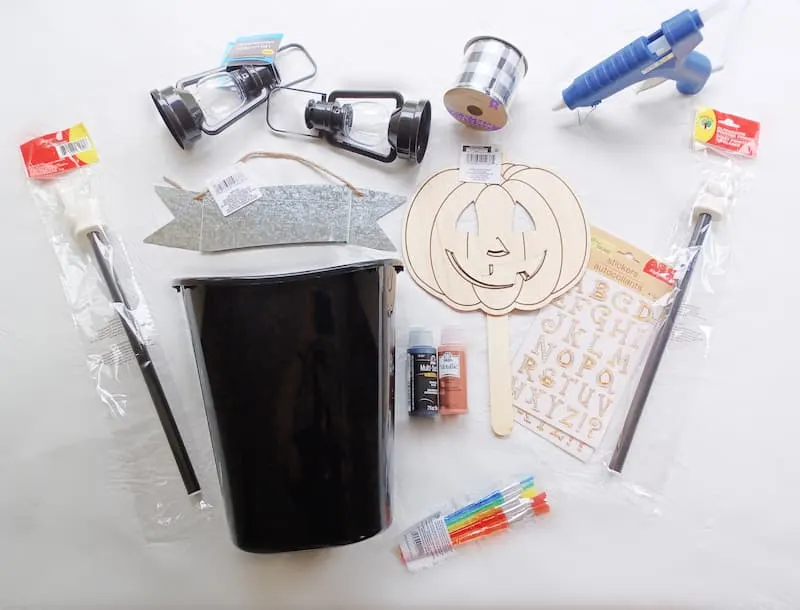
- A small black trash can
- Hot glue gun and a glue stick
- Scissors
- Crafters Square Wide shapping ribbon
- Crafters Square small galvanized metal sign
- Two acrylic paints (I used rose gold and black)
- Paint brush
- Letter stickers
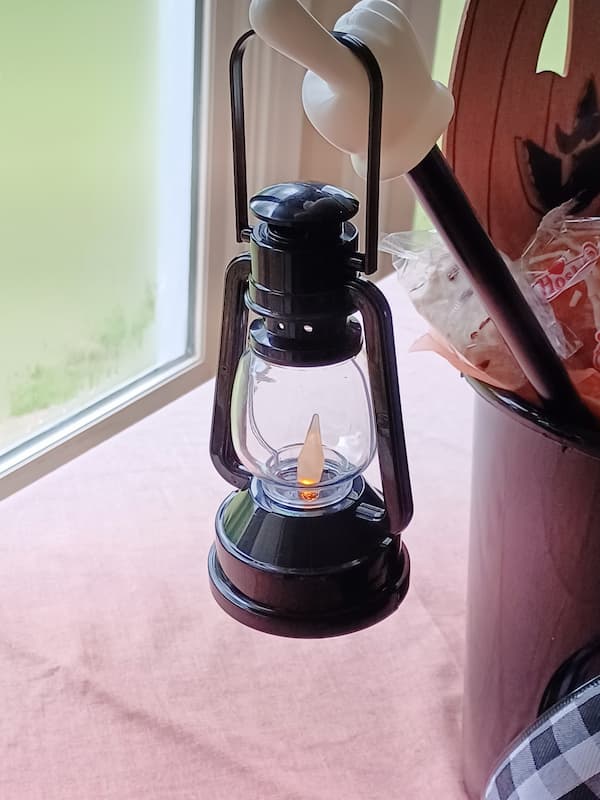
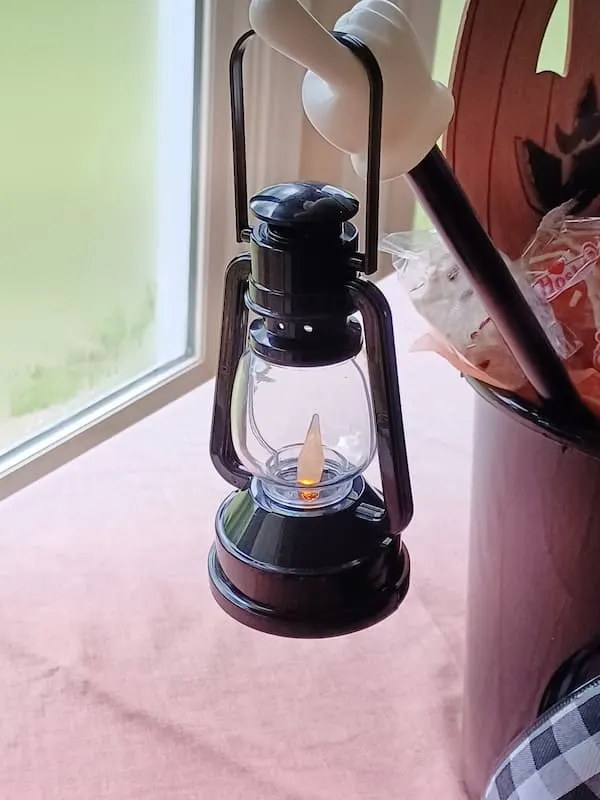
- Two light up LED lanterns of any type you like
- Two Teaching Tree plastic classroom finger pointers (If you are getting these from the Dollar Tree you can find them on the school supplies ile)
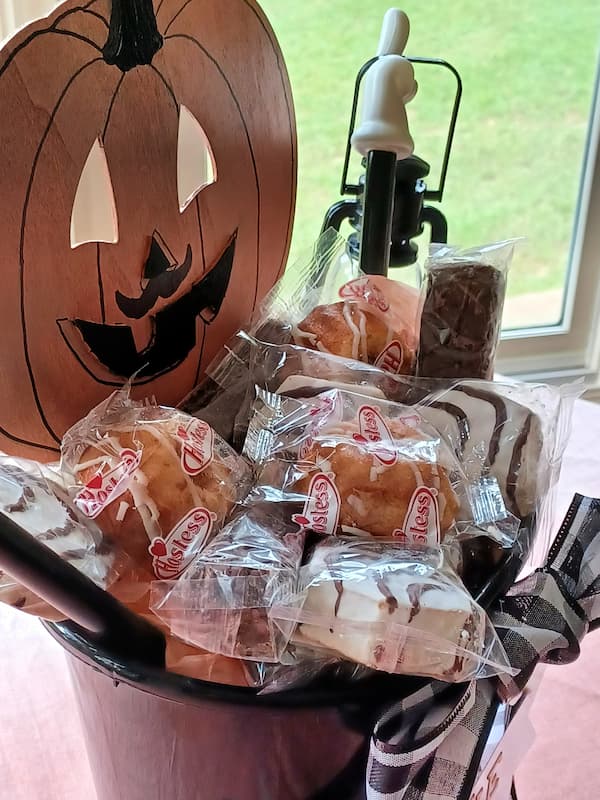
Also, decide what treats you would like to display in your pumpkin butler ahead of time. I chose boxed snack cakes. And actually, it worked perfectly because I could use the cardboard boxes the cakes came in.
So I set those aside for later on in the process. I think the cakes looked so warm and welcoming. I like that I didn’t have to bake them. You could use cookies or candy and anything really!
First, take the paint you wish to paint the pumpkin with and begin to paint your pumpkin mask. Do not worry if you choose a color that is light and it makes the black lines get foggy.
I will show you later how to fix that if you want the lines. So just paint the whole pumpkin with no fear. And actually, if you chose a color like mine you may need more than one coat. Allow each coat to dry a few minutes before painting the next one.
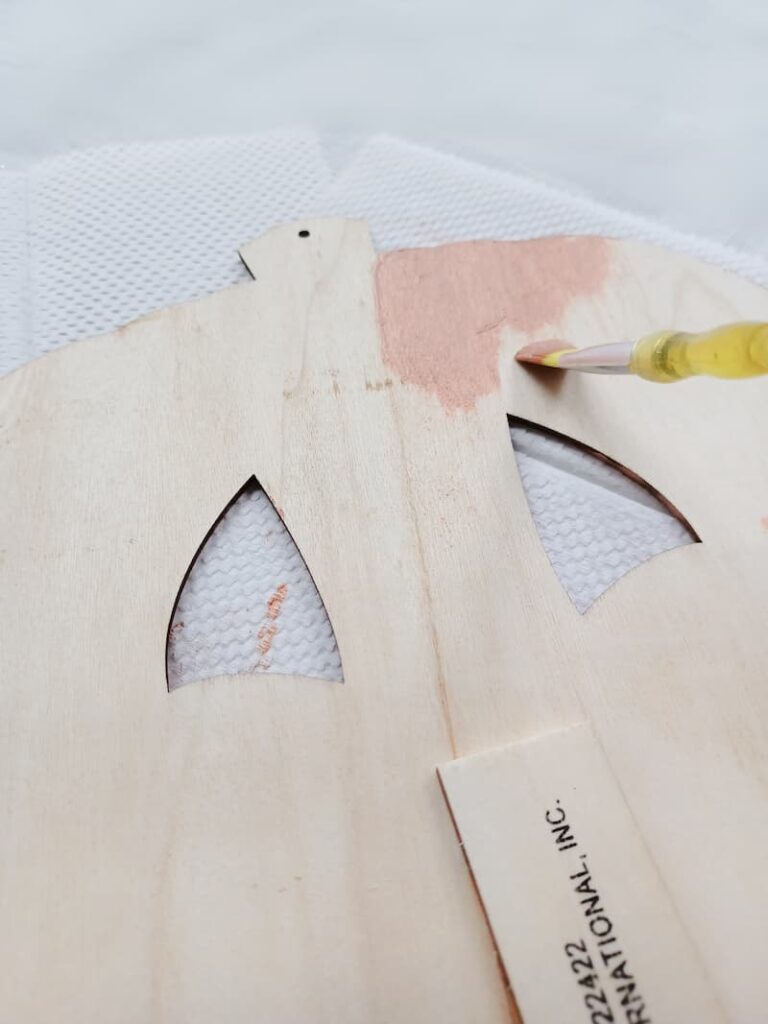
The wood also tends to soak up the paint fast, lightening it as it dries.
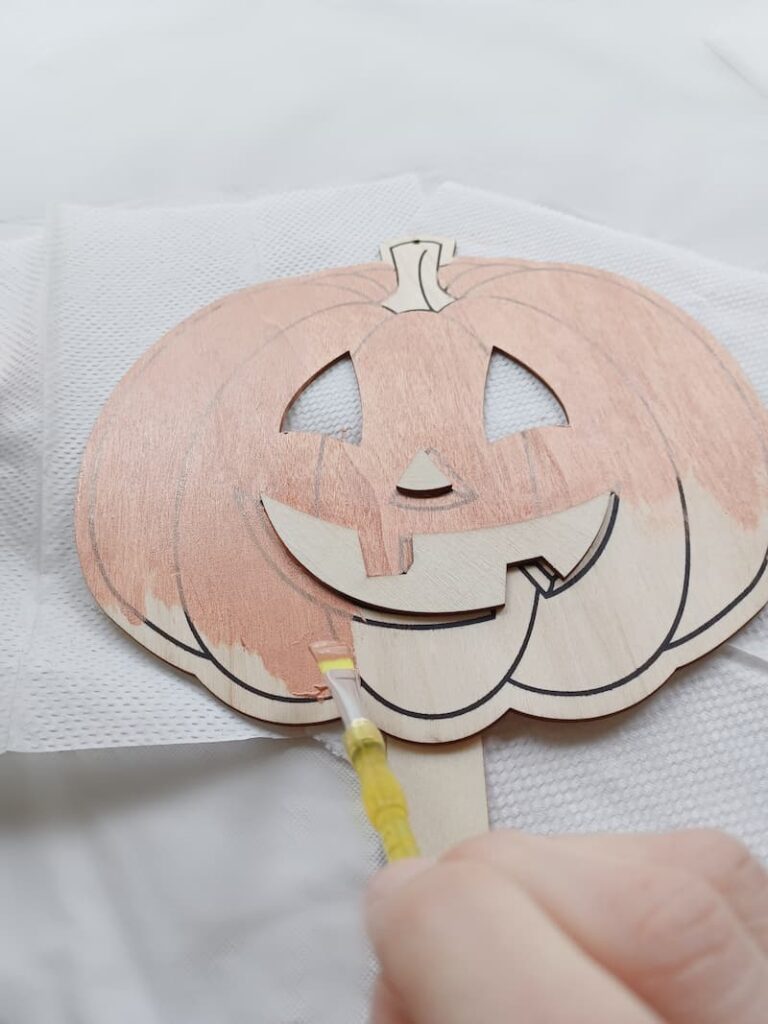

Be sure to flip it over and paint the back side as well. Because the pumpkin butler holder you are making will be seen from all sides when you display it, in most cases. It adds to the balance!
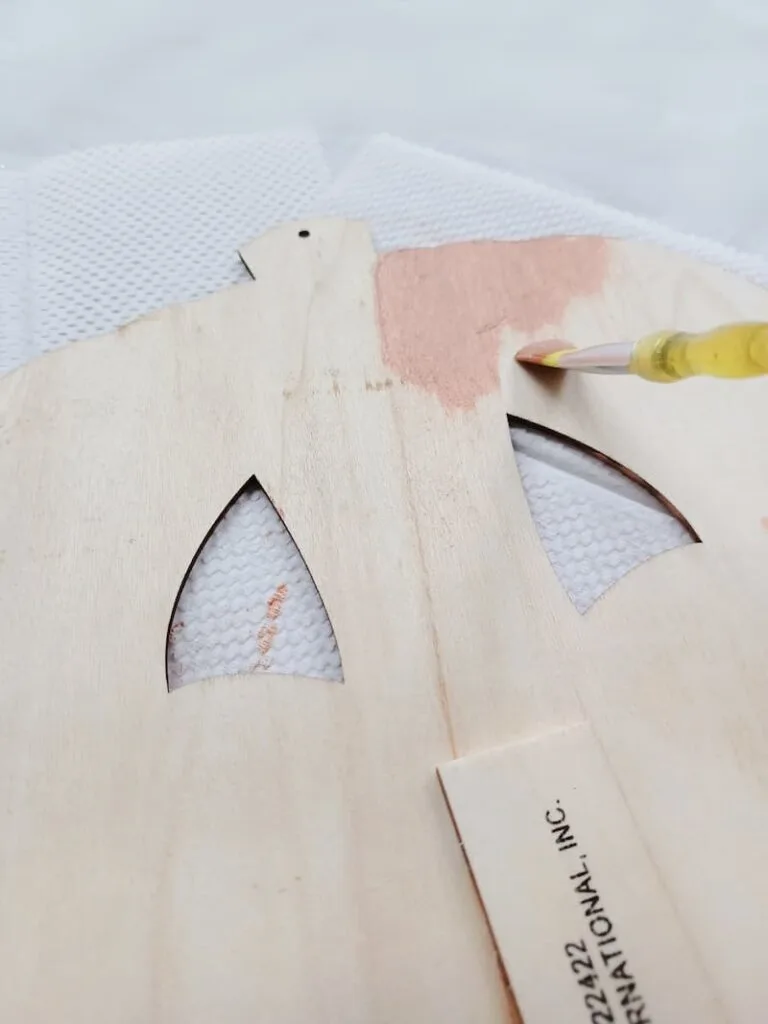
Now paint the features of the pumpkin like the nose and mouth. Do more than one coat if needed. Let each coat dry a few minutes before adding the next.
Do not worry if the painting is perfect or not. It will be cute regardless. I am not a perfect painter but my idea still turned out cute, the most important thing is to have fun making your craft.
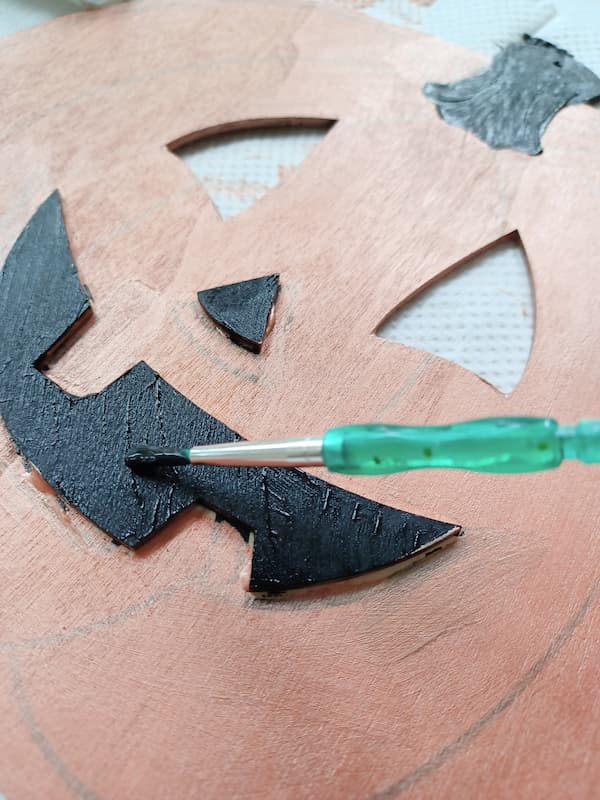

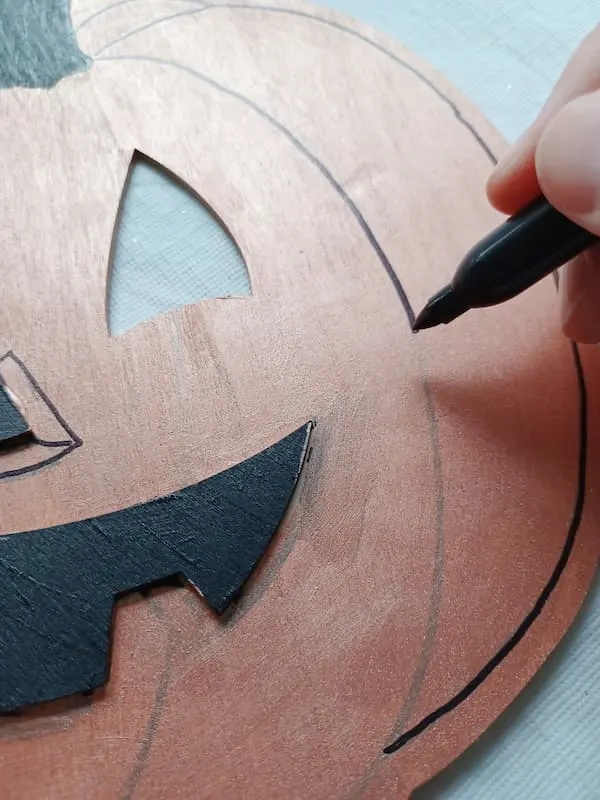
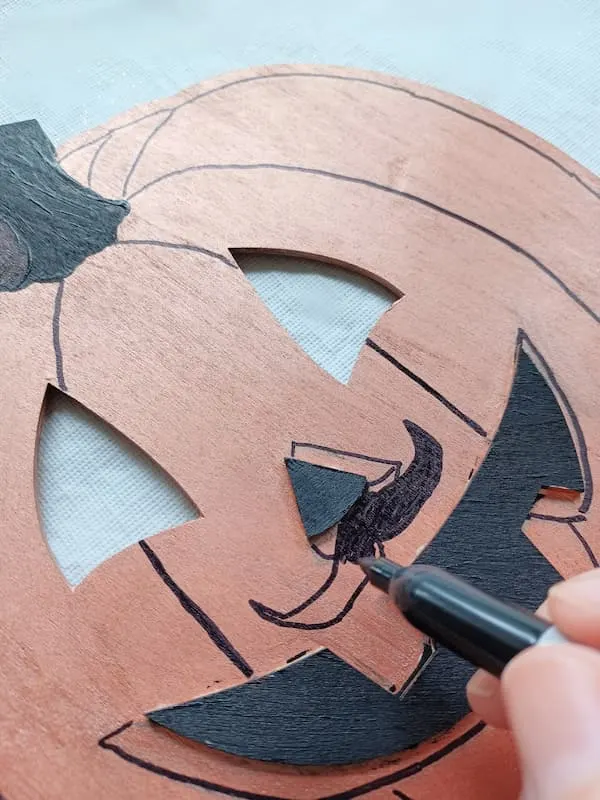
Let the paint dry for a few more minutes. Then if you need to or want to bring back the black line definitions, grab a black sharpie! This worked amazingly.
My hand is not steady enough to paint such small lines perfectly, so the sharpie is a great alternative choice.

I wanted to add more character to my pumpkin butler, so I decided to add a fancy butler mustache free-handed. You do not have to add one unless you would like to. I personally think it is cute!

I just love pumpkins and pumpkin anything in fall. Pumpkin pies, pumpkin spice in my chai tea lattes. I like seeing pumpkins this time of year, and this little guy is coming along into cuteness.
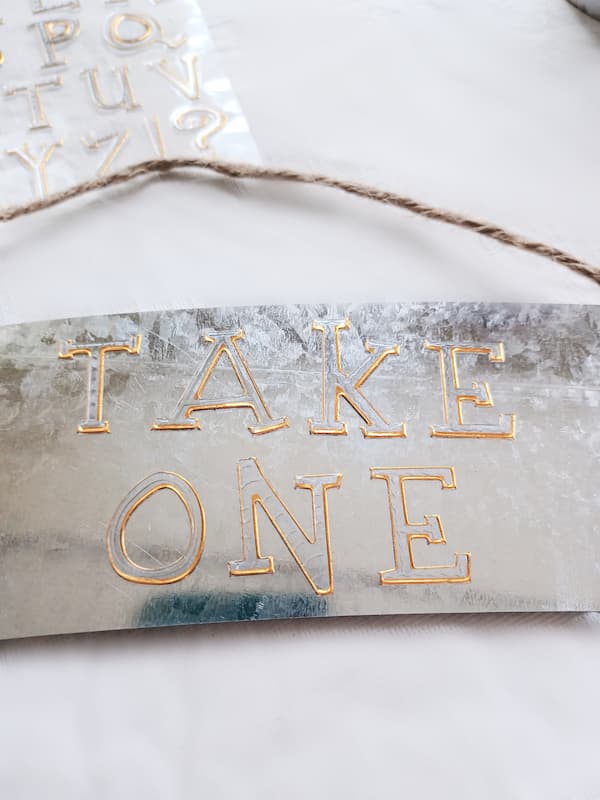
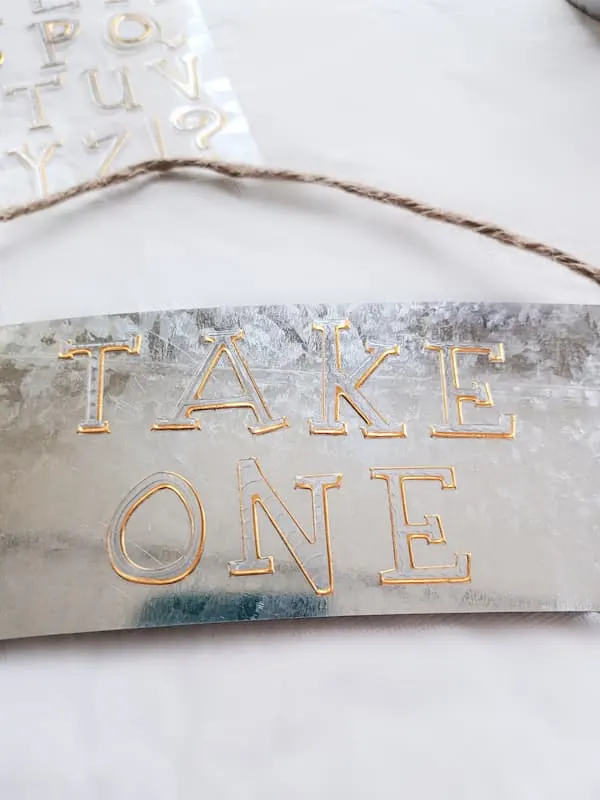
So with the metal sign you can paint it if you wish or leave it as it is. I chose to leave the metal sign as is to save time. I found stickers at the Dollar Tree that were perfect for sticking on the sign.
And they clung to it well. You could paint words on your sign instead of using stickers if you wanted, but for me, I am not a steady hand, and I want easy, clean, and fast.
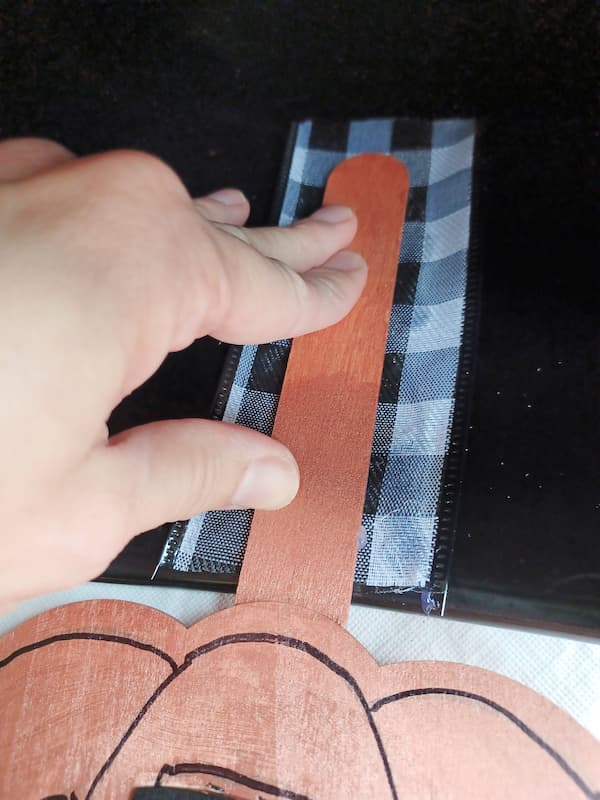
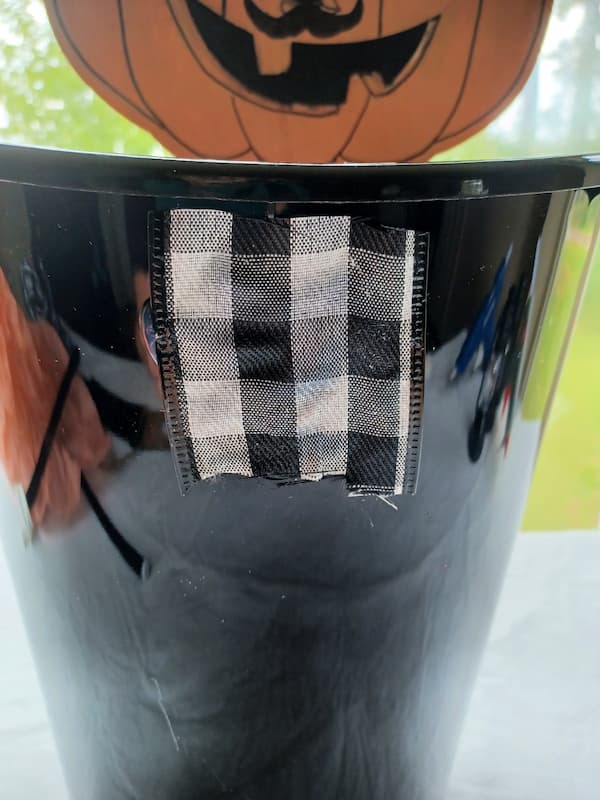
So this next step is very important in the process. The small trash can is shiny and plastic. I have discovered that when you try to glue the sign or anything heavy to it, it will slide right off even after the glue has dried. It peels right off the trash can.
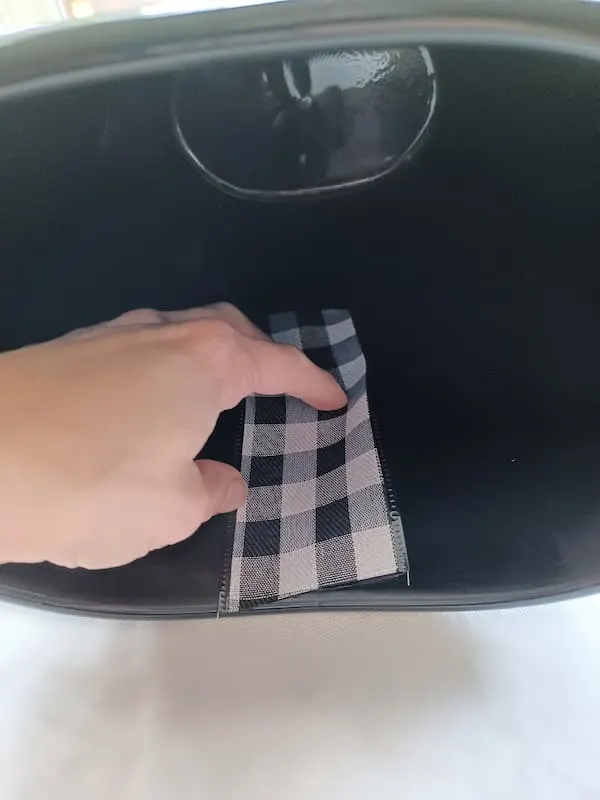
So to create texture to solve the slick surface you want to cut a piece big enough from your wide ribbon to glue flat to the can. This will hold to the can well. It will serve as an anchor to hold the heavy items you will need to glue.
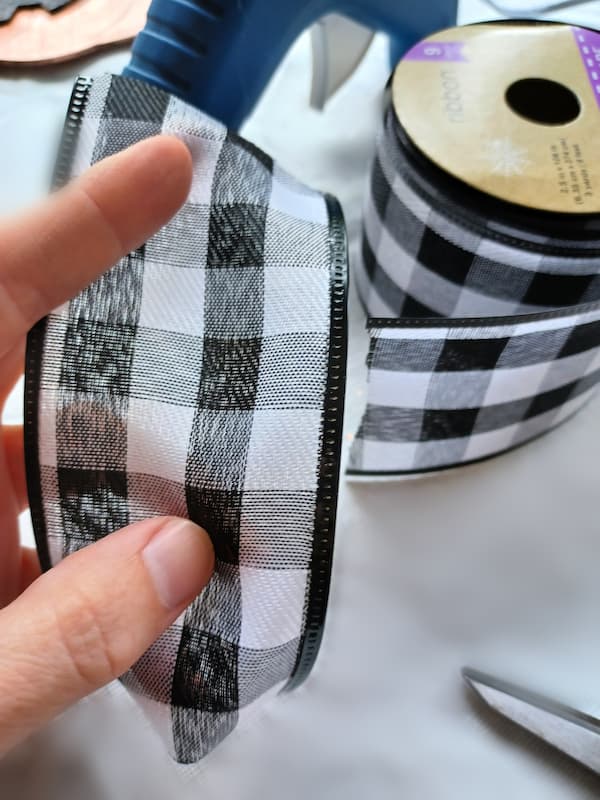

Glue it in the upper middle top inside of the trash can. Take something so your finger doesn’t get burned and press everywhere you place glue on the ribbon as you attach it. It will come through the pores of the ribbon and that is exactly what you want to give more texture for items to hold.
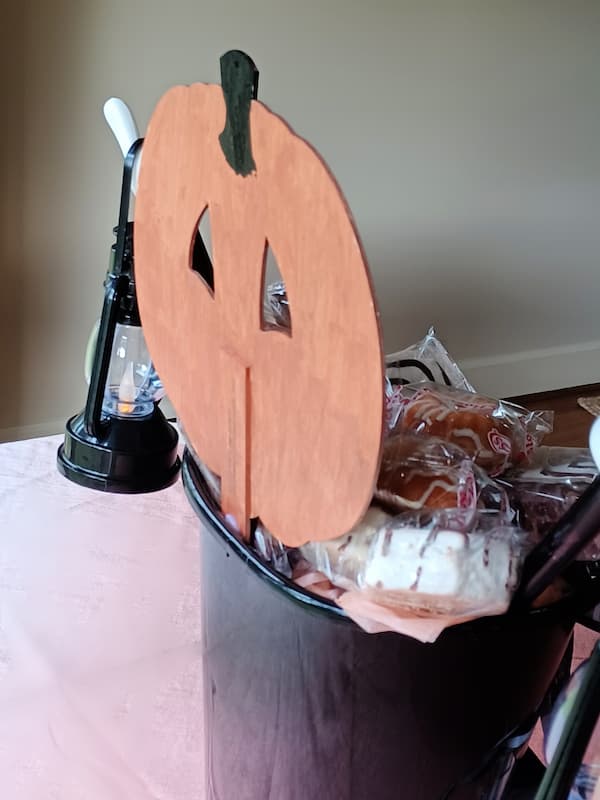
This will hold the pumpkin mask.

Glue your stick handle of the mask on the back side and place on the ribbon base you have placed inside the trash can. Make sure you glue most of the stick into the can for a strong hold.
Be sure to press firmly and wait a few moments for it to set.

Now earlier, I had decided to use boxed snack cakes. So I took the cardboard boxes and opened them up. I folded them in half and then in half again to create a frame support.

I put all three of my cake boxes into the trash can to create the support for my treats, but you can leave those out if you want to fill the butler full of goodies.
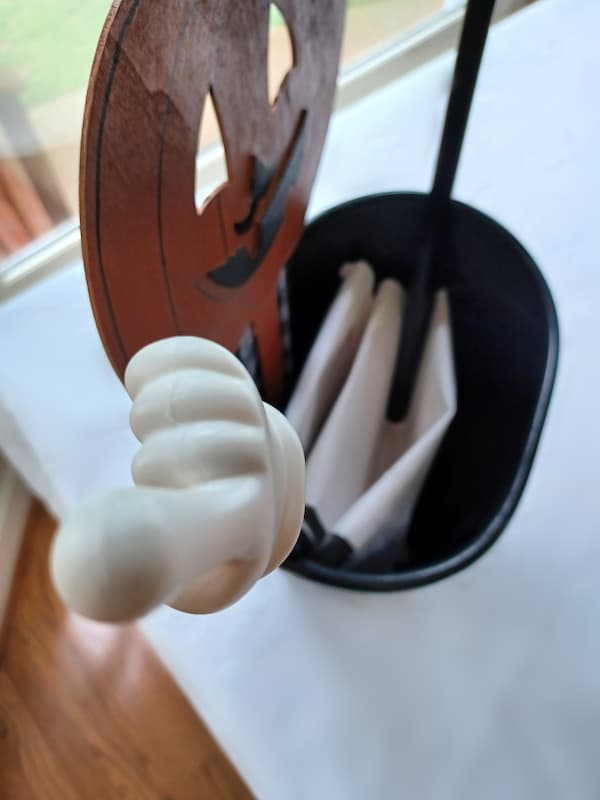
I also took this time to place the two-hand pointers into the can. There is no need to glue these down unless you want. They will hold on their own.

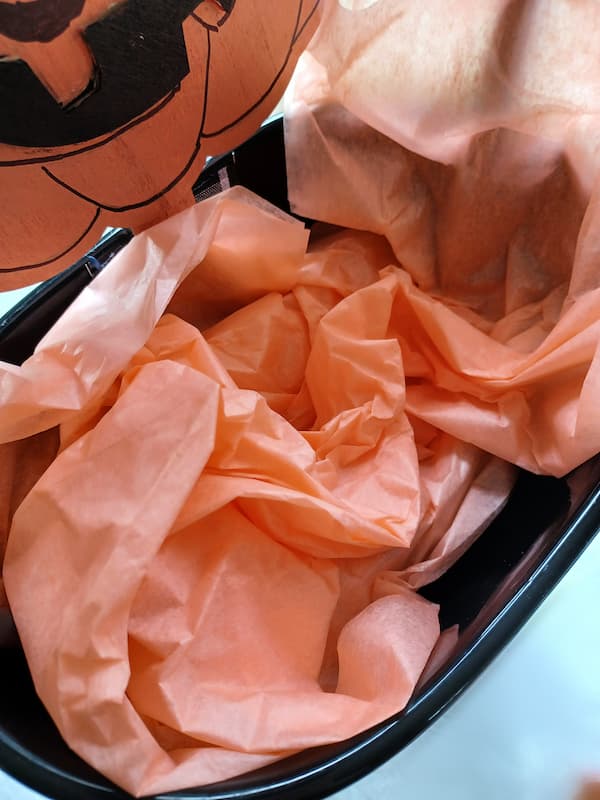
I realized I wanted to throw on top of the cardboard something colorful so I took one piece of orange tissue paper. This is not necessary because the treats will cover the cardboard. If you do this you could use a cute towel if you do not have any tissue paper.

Now cut another square from your wide ribbon. Glue it in the upper top middle outside of the can in the alignment of the pumpkin face.
This will be where we will glue the bow tie and treat sign.

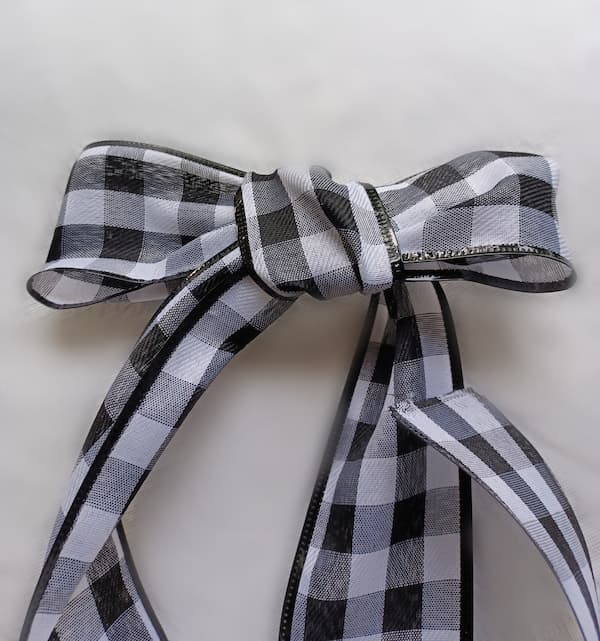
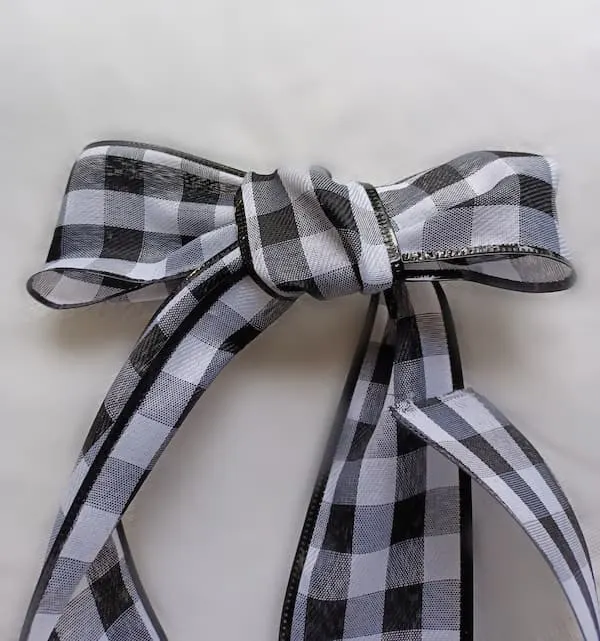
I made a simple bow. I made it a little longer because when the butler is standing holding his cute little sign I wanted a more dramatic effect. A little more whimsical.
If you need help making a simple bow or if you want it a little more fancy no problem. Check out our post How to Make A Bow For A Wreath.
It is time to glue your bow and also your sign to the ribbon square you have already glued down to the front to anchor your items. The sign you will need to hold longer.


I took the base of the ribbons in the bow and glued them together like closing curtains to hide the string and glue gunk of the sign.
Now is the time to get those treats and place them in your pumpkin butler!
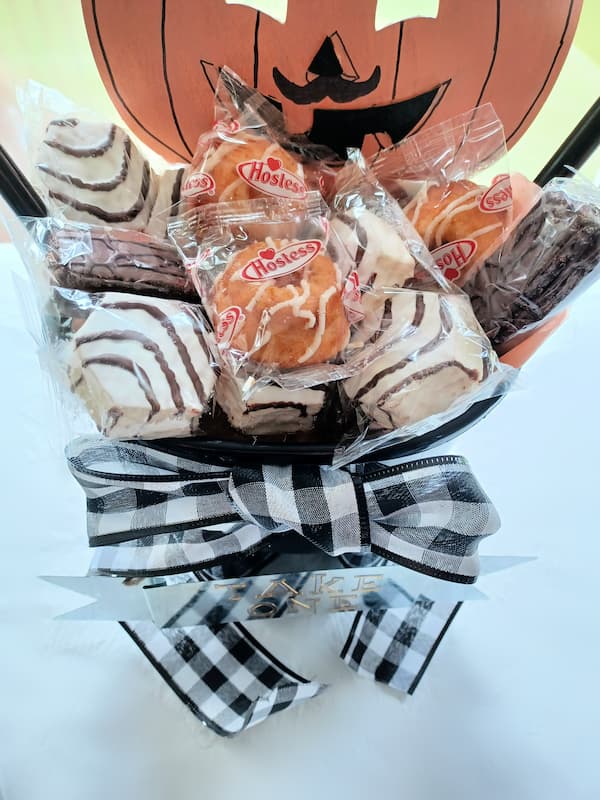

Take your lanterns and place them on the fingers for extra added cuteness. You can skip this part if you do not want the lanterns. I like that these lanterns light up adding even more to the dramatic effect.

Here is a shot showing the importance of why we painted the back side! See how much better it looks compared to if we did not?

Step back and look at your creation with satisfaction! You are probably saying right about now awe how cute?
Your friends and family will be saying the very same, trust me!

Your pumpkin butler is ready to get to work helping you hold yummies and joy this fall with all your holiday gatherings or daily life!
Recommended Reading:
- How To Make A Haunted House Tabletop Scene
- Creepy Black Rose Wreath – Halloween DIY
- Fall Candy Centerpiece – Easy And Cheap DIY Project!
Make Your Own Beautiful Living Succulent Wreath Centerpiece! Complete video course by Jeannine Romero now available through Skillshare.