

- How To Make A Summertime Watermelon-Themed Wall Hanging - January 27, 2023
- How to Tie Dye with Sharpies (Quick And Simple Craft Project) - November 10, 2022
- DIY Wooden Christmas Wall Hanging Project - October 27, 2022
If you are looking for a less messy and simple way to tie-dye, this is the perfect craft for you.
This is a great project to do with younger children and is much easier than traditional tie-dye. You can make beautiful creations in just four simple steps!


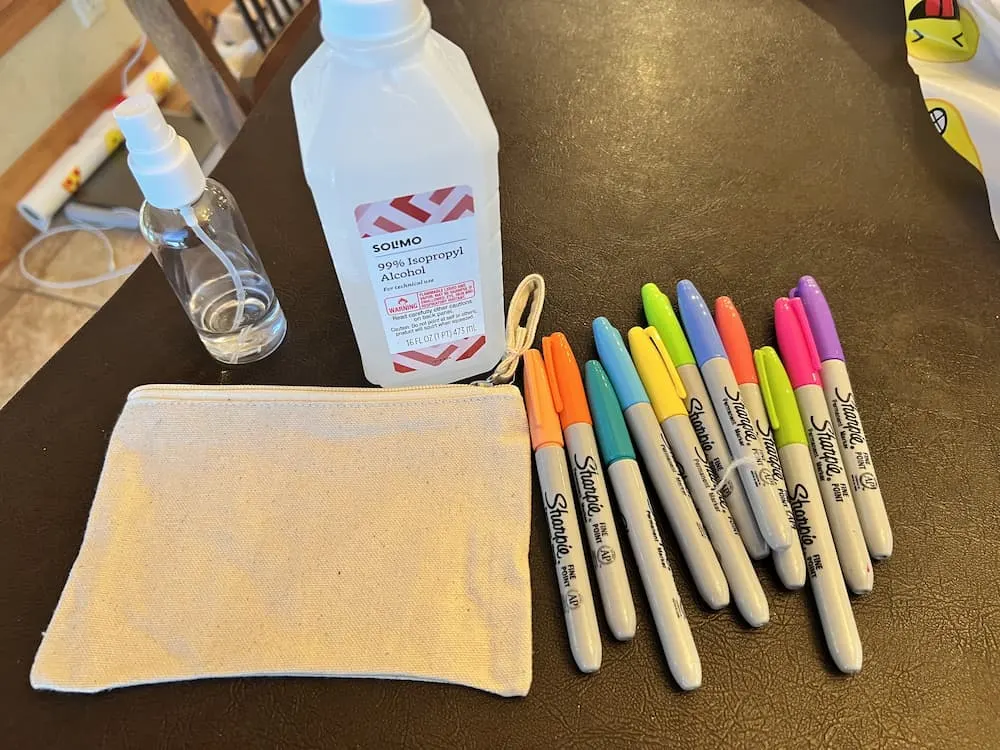
Supplies Needed
- Canvas pouch or other light colored article to tie dye (Bought at Hobby Lobby or any other craft store)
- Light colored sharpies
- Small spray bottle
- Rubbing alcohol
- Black sharpie

Instructions
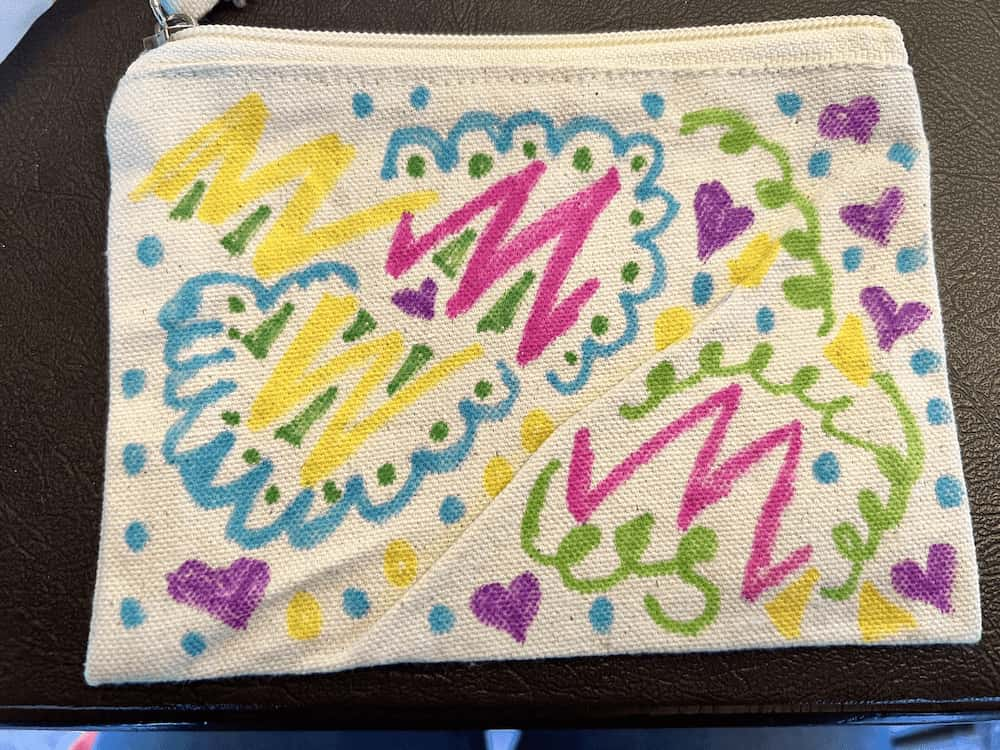
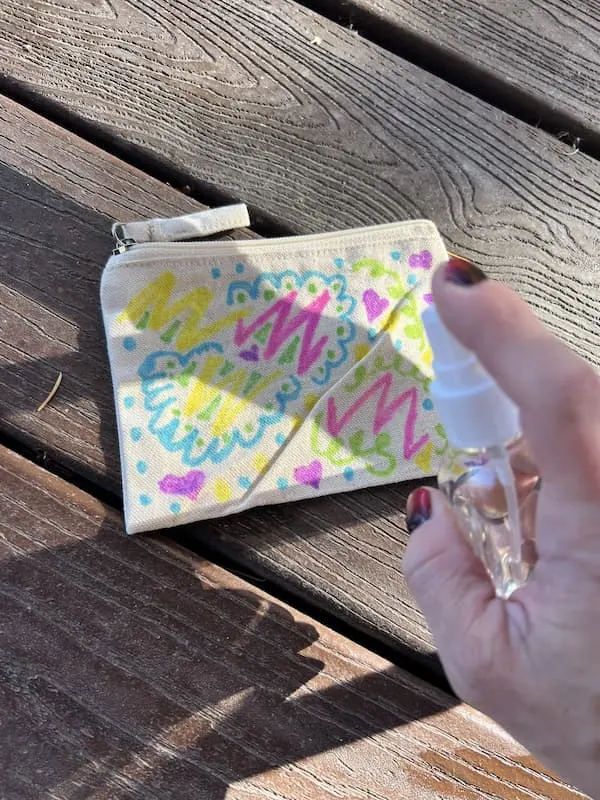
Using light colored sharpies decorate your item to be tie-dyed. It works best if you draw with different colors very close to each other but not overlapping.
This will create the tie dye look later on. Tip: using many different colors gives it a better tie dye effect.

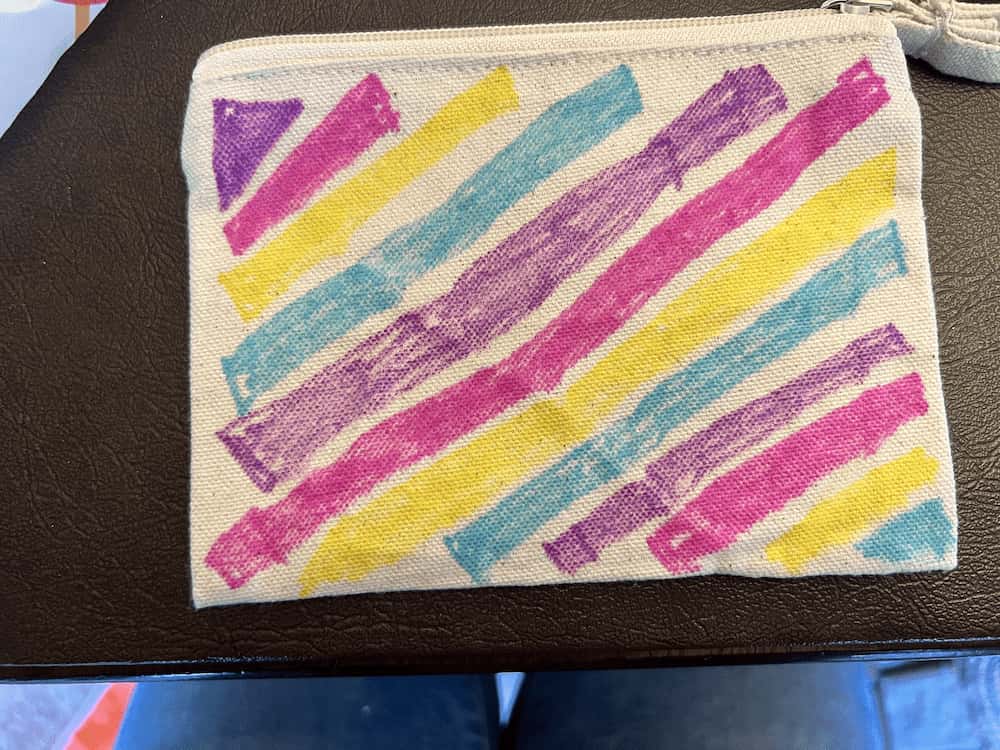

Pour rubbing alcohol into the spray bottle. It is best if you do this step outdoors because it can cause a strong order and/or you could get rubbing alcohol on the surrounding area.
At the very least, cover the surface you are going to spray your item on. Spray rubbing alcohol on your tie-dyed item.
The more rubbing alcohol you use, the greater the blending effect will be. If you prefer less of a blend, use less rubbing alcohol.

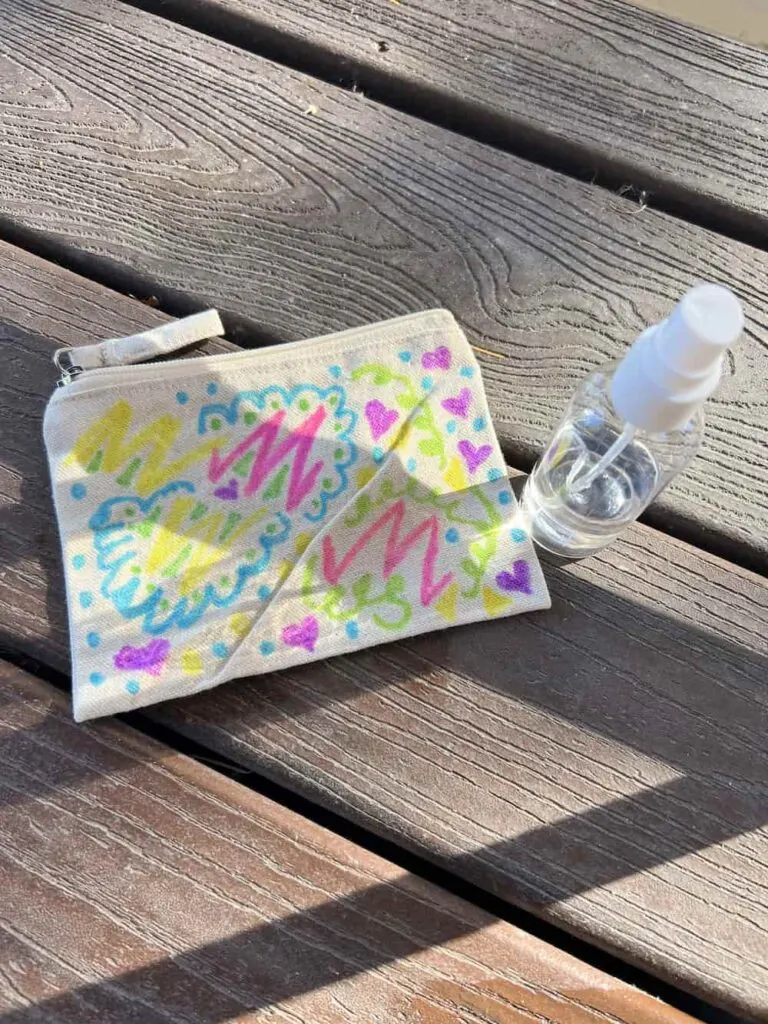
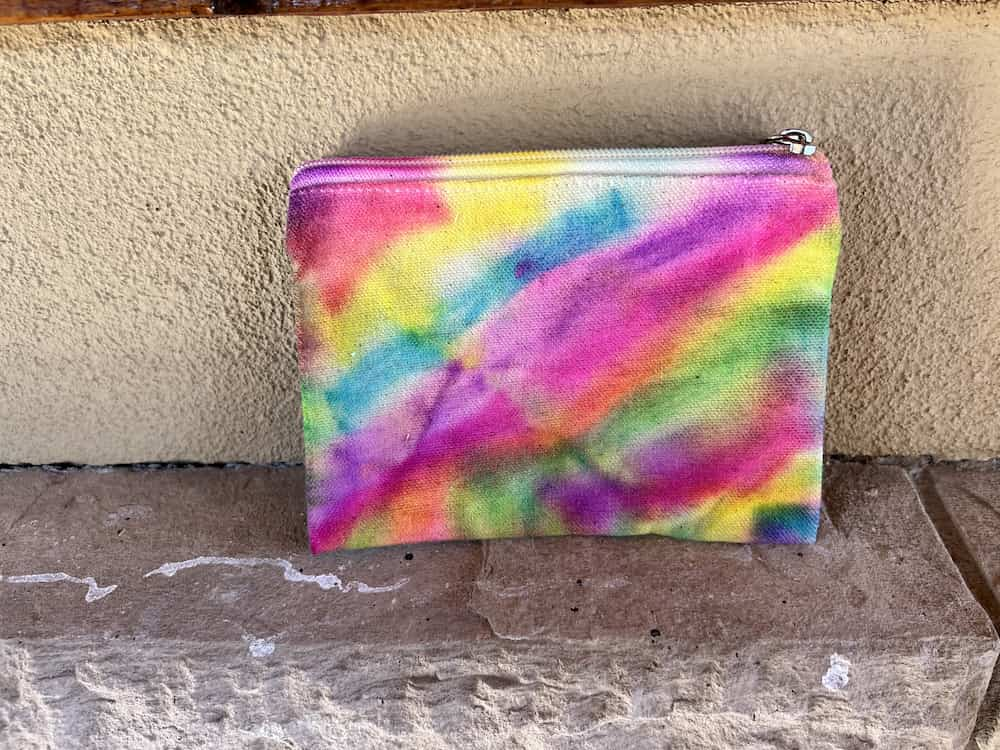


Let dry for at least 24 hours to make sure your creation is 100% dry.
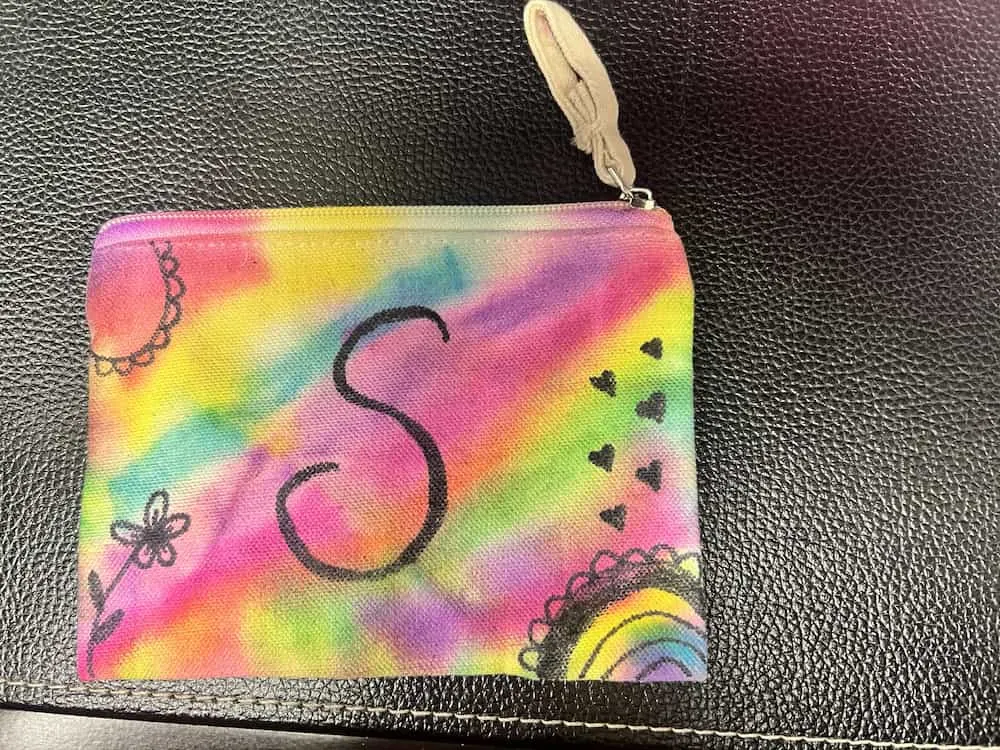
Use black sharpie to decorate or doodle on top of your tie dye design. This is completely optional. I thought it added more interest to my zipper pouch.

Get inspired with these posts!
- Farmhouse Inspired DIY Plant Holder [Repurposing Craft Project]
- 6 Crafts That Couples Can Do Together
- Why Do People Love Crafting?
Make Your Own Beautiful Living Succulent Wreath Centerpiece! Complete video course by Jeannine Romero now available through Skillshare.