

- Free Video Tutorial – Gratitude Farmhouse Decor Craft - July 25, 2023
- DIY Dollar Tree Bird Feeder Craft - July 4, 2023
- Embroidery Hoop Organizational Wall Art - February 28, 2023
Beads and tassels are all the trend right now in home decor. This bathroom decor idea is both affordable and cute.
If you do not want to spend a lot of money or time to refresh your bathroom and give yourself a more put-together bathroom upgrade, this project is for you.


Beaded and tasseled bathroom decor is a fantastic way to add a personal touch to your bathroom. These crafts are relatively easy to make and can add a lot of personality to your space.
You can find all the supplies you need for these projects at your local craft store or online. And, if you’re feeling really ambitious, you can even make your own beads and tassels! Let me show you how below and as a bonus some bathroom refresh tips on a budget.
First, let’s cover how to make the beads and tassels before I move on to the extra bathroom tips, where I will be getting up close and personal to show you my awful before and tidy afters.
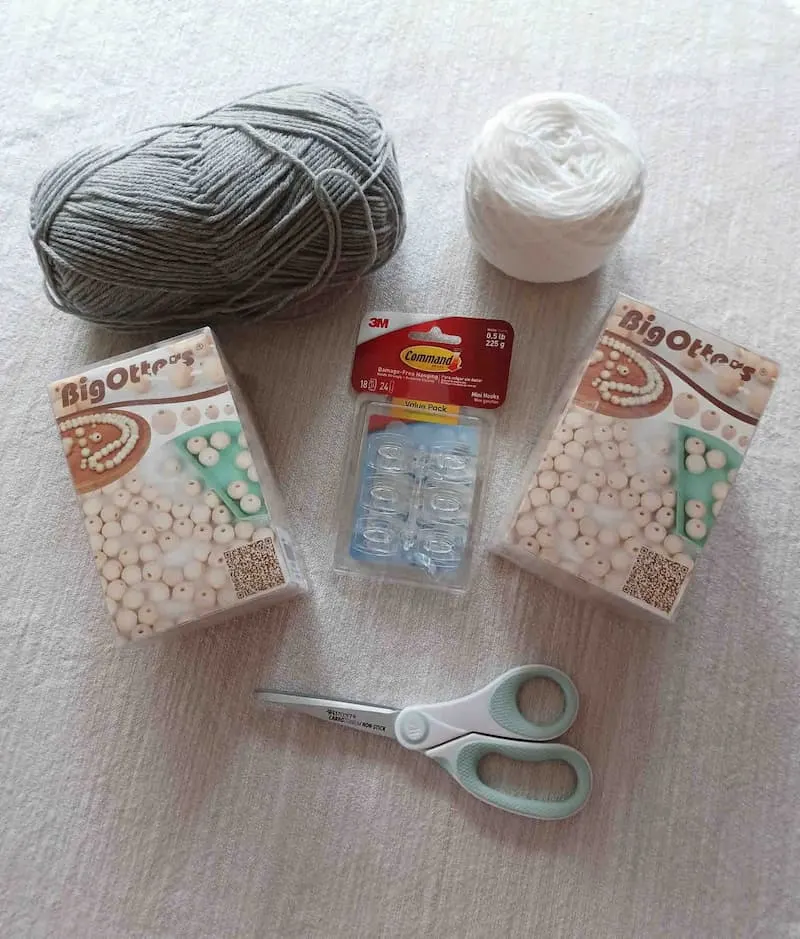
Supplies needed
- Big Otters wooden beads (link to Amazon)
- Yarn in the color or colors you want
- Scissors
- Command Clear Hooks Mini (link to Amazon). Optional if you need a hook to hang with.
Here are some ideas of how you could decorate with beaded tassels to accent in your bathroom.
- A shelf
- The wall mirror
- Window fixture
- A plain wall
- The shower curtain
- The edge of the garbage can (make to wrap the middle bottom or top edge or all three)
- Hang on the toilet paper holder
- Door knob
- Cabinet handle

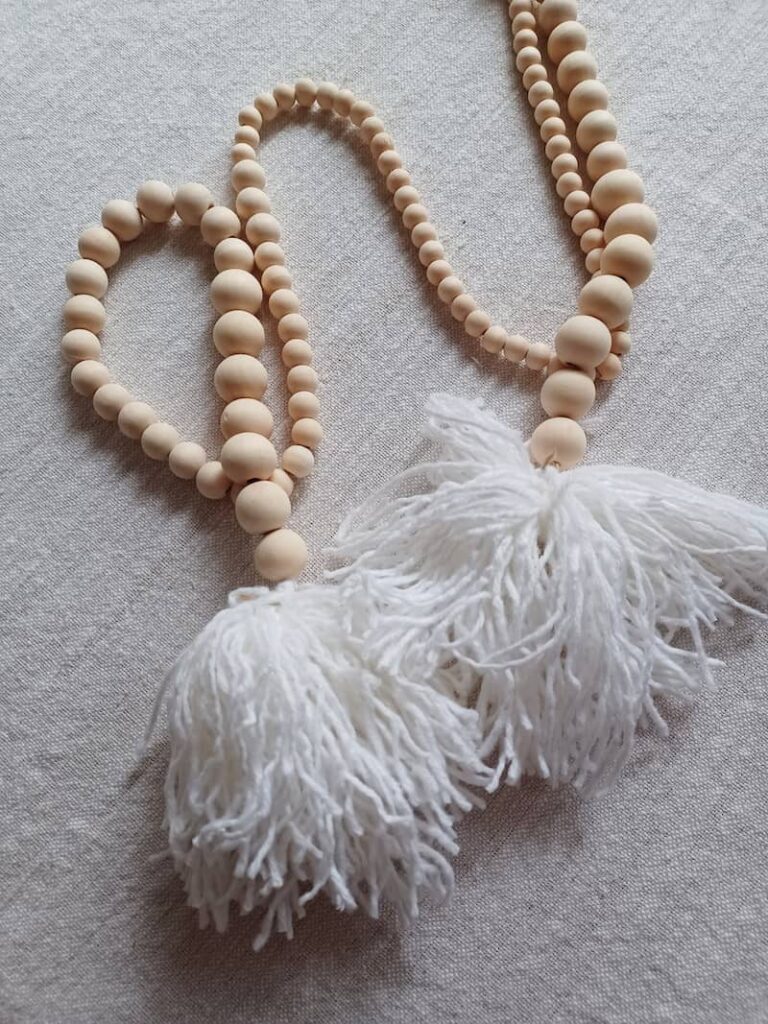
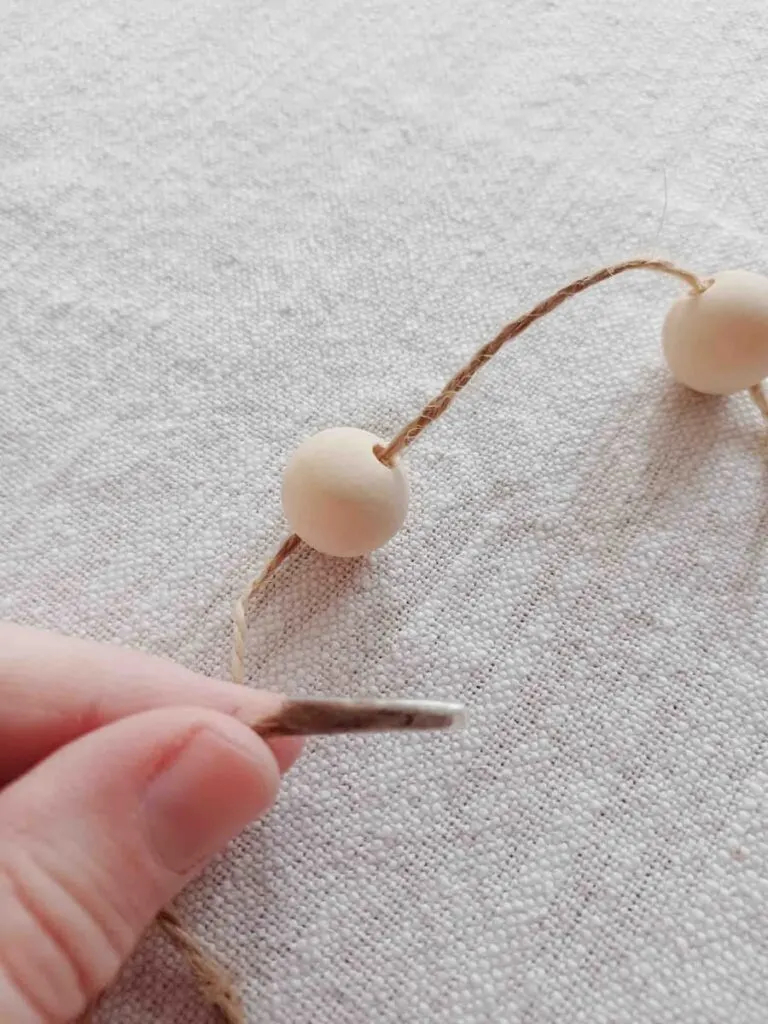
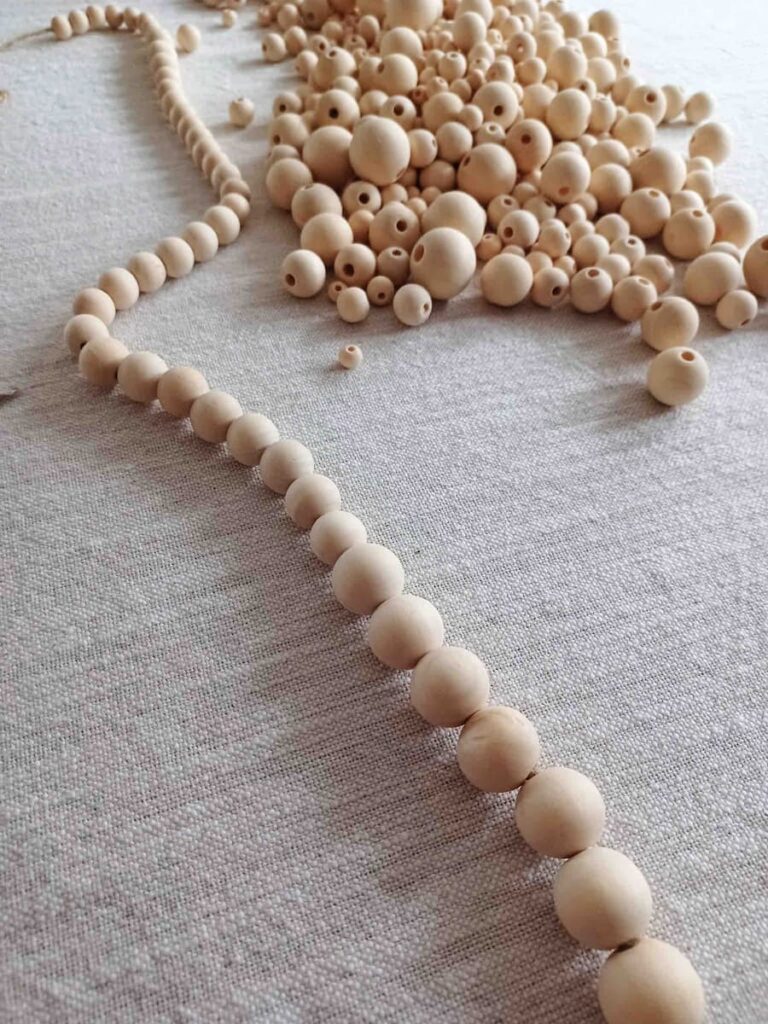
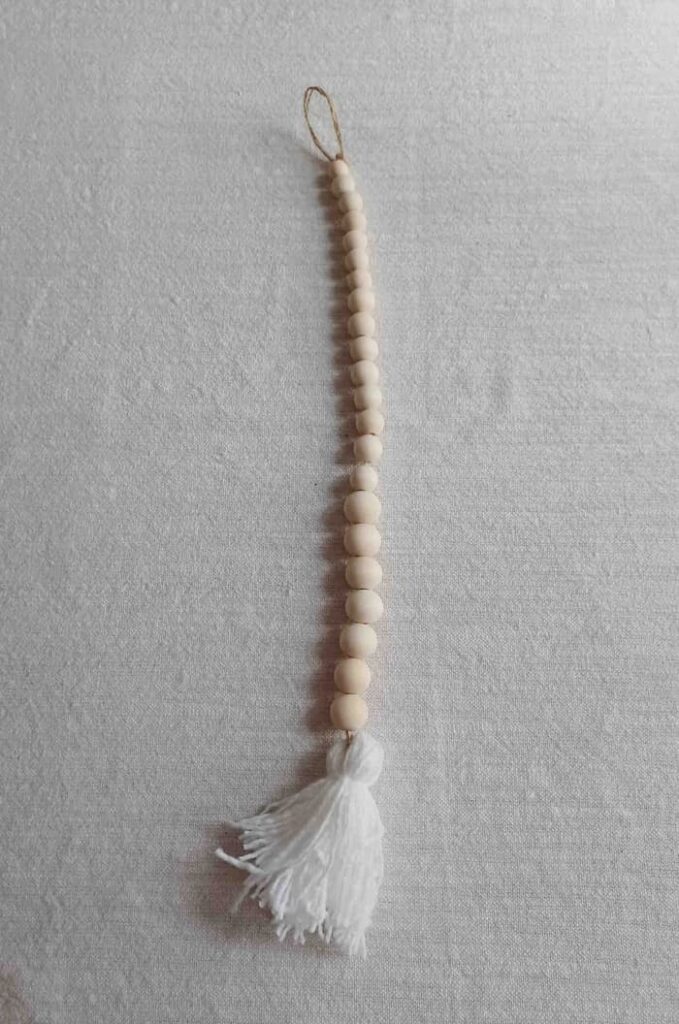
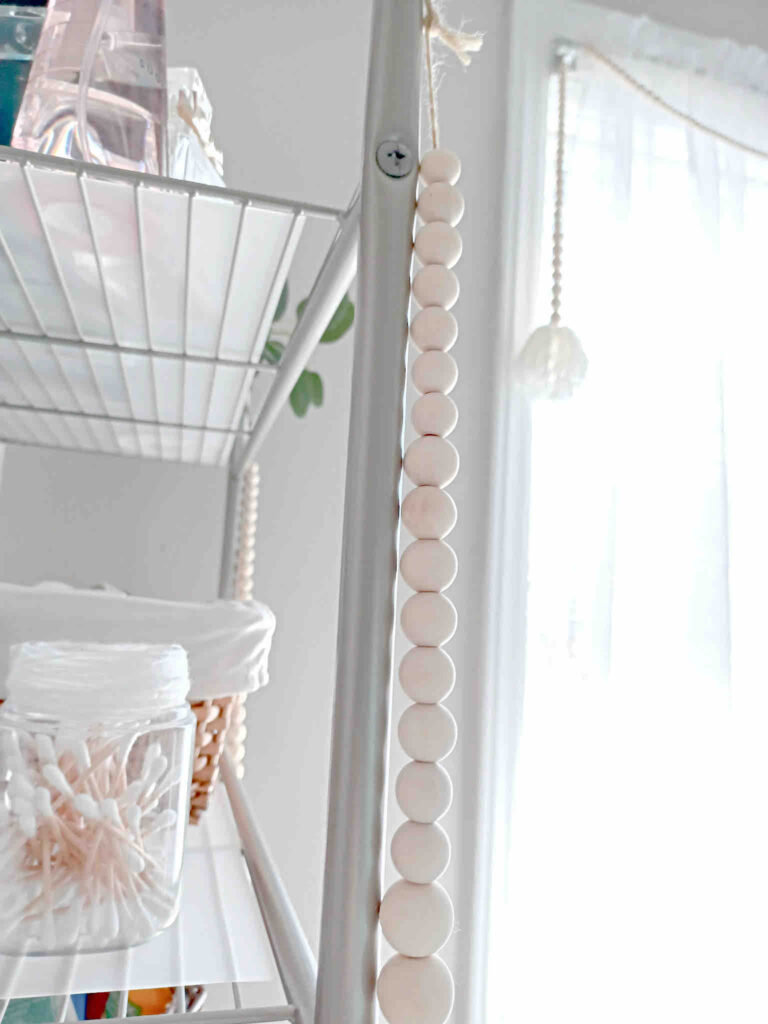
Step one: String your beads on the twine.
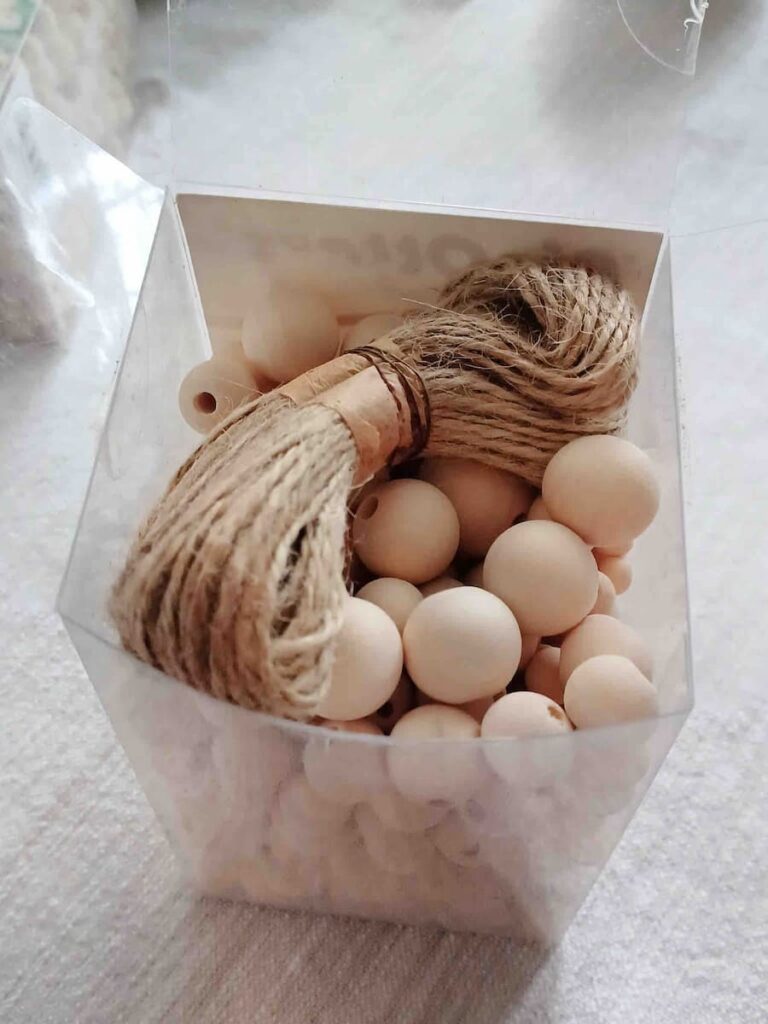
This brand of wooden beads is so great because you get 580 different-sized great quality beads at a great price on Amazon.I bought extra with intention of using them again in another project.
It even comes with a good amount of twine. For my project, I did not need to buy extra twine. You can make your wooden tassel design however you would like and get creative.
The beads come from all-natural wood, but you can paint them if you want to have color. I liked the natural wood look, so I left it as is, and this saved me so much time!

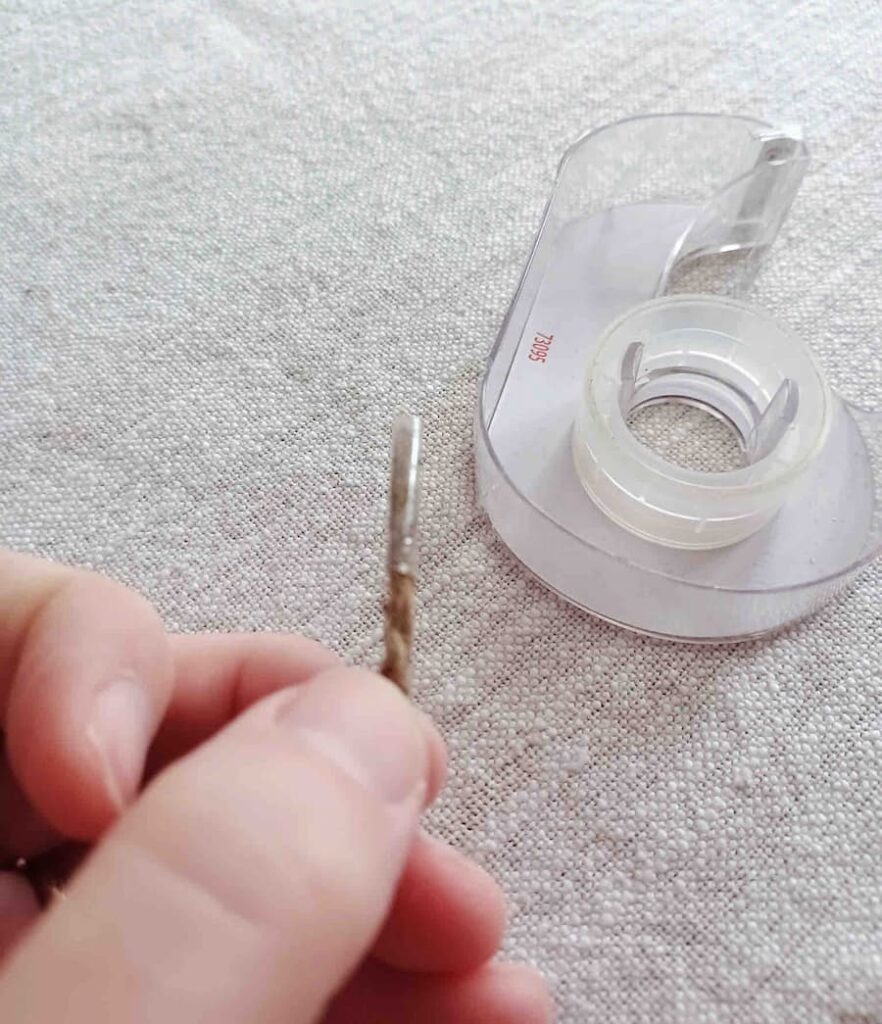
A tip to make the beading easier is to wrap the very end of your twine with some tape tightly. It helps the twine to glide right on through the whole without hang-ups.


There is something so relaxing about choosing the bead size you want and stringing it. The very simple activity is a great dopamine producer I have to say!

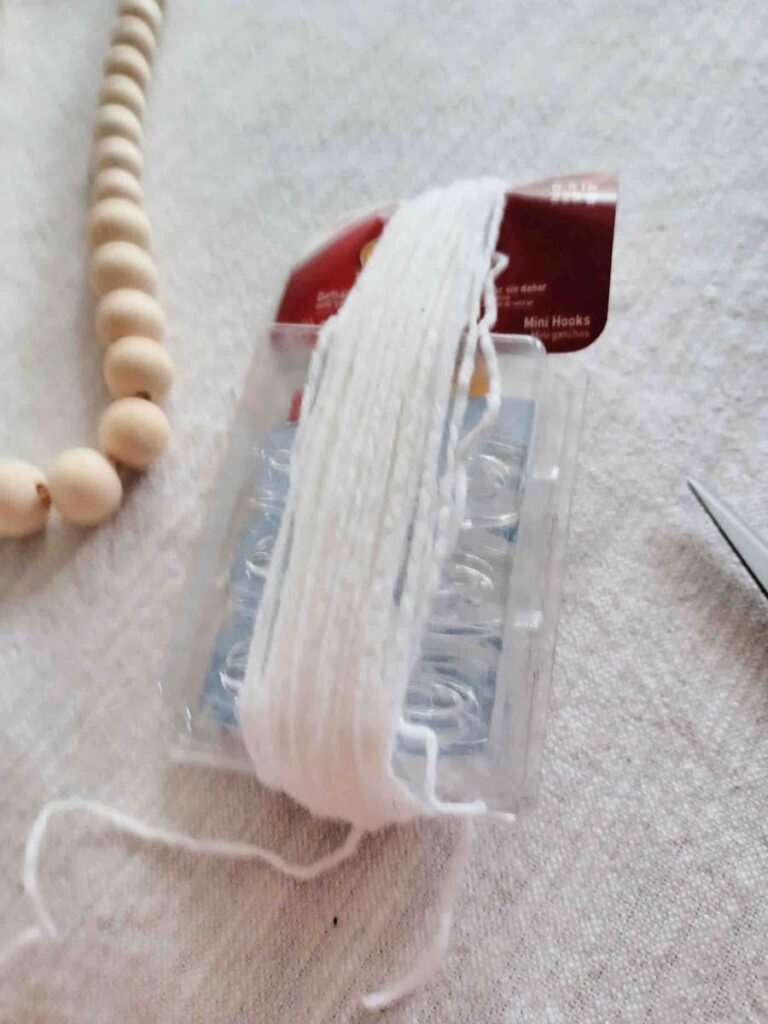
Step two: Make the tassels
Choose the color yarn you want. Wrap the yarn loosely around your fingers or a package. Keep in mind the size you will want your tassels.
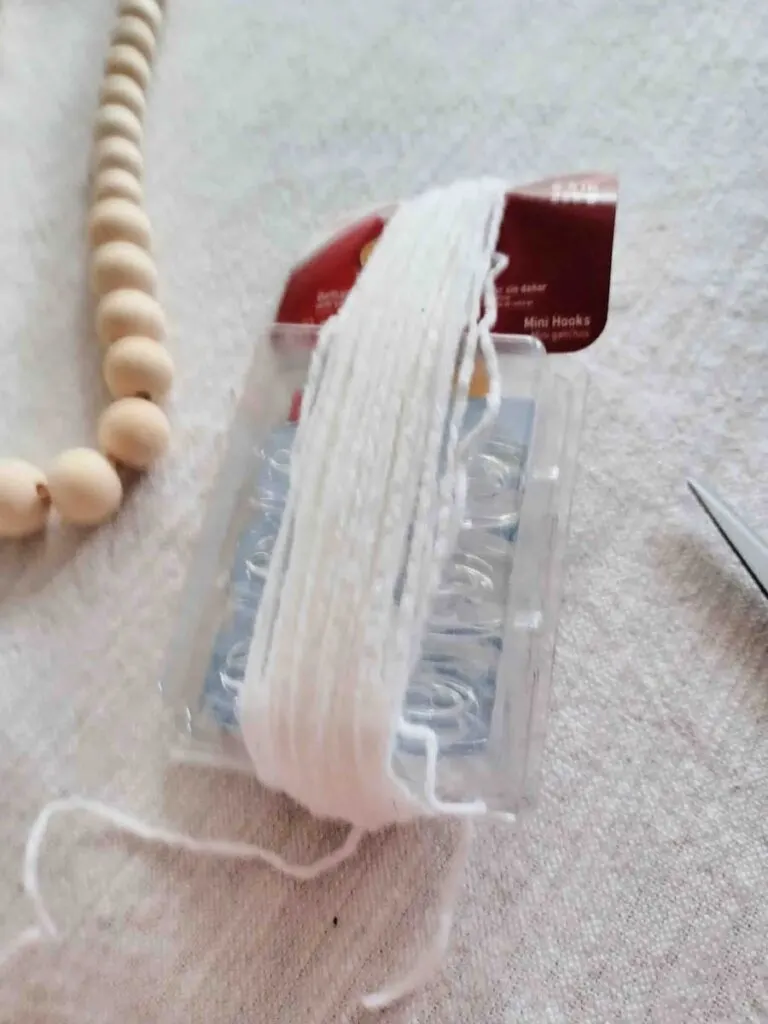
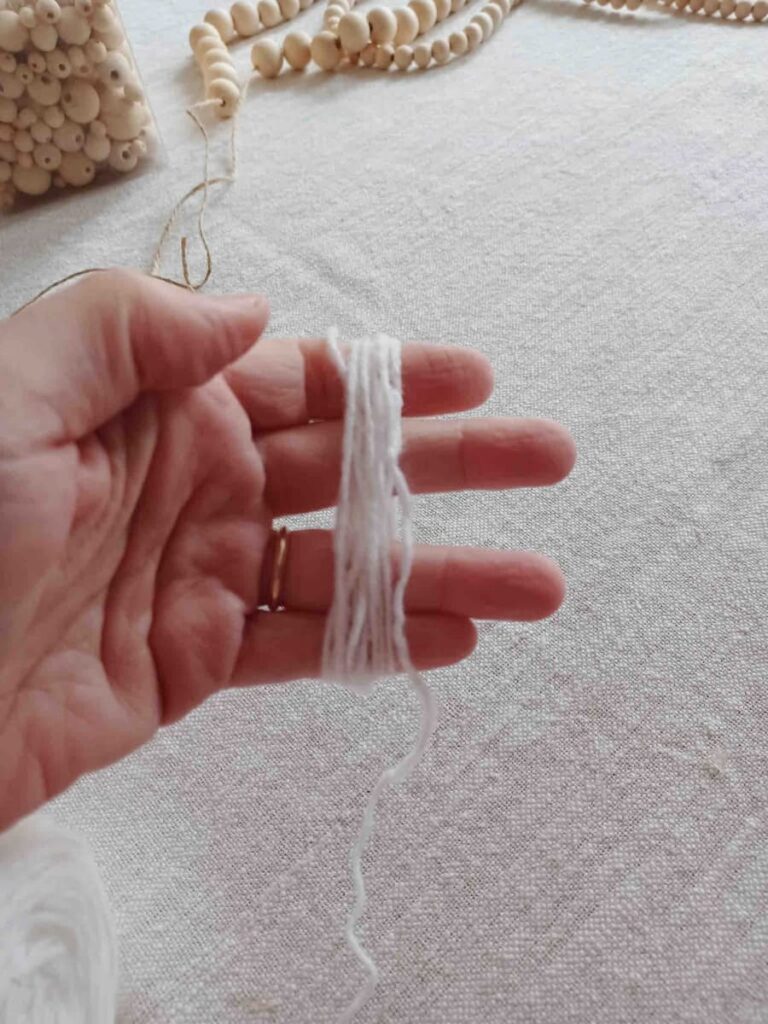

Once you have acquired the size thickness you desire carefully remove your yarn.
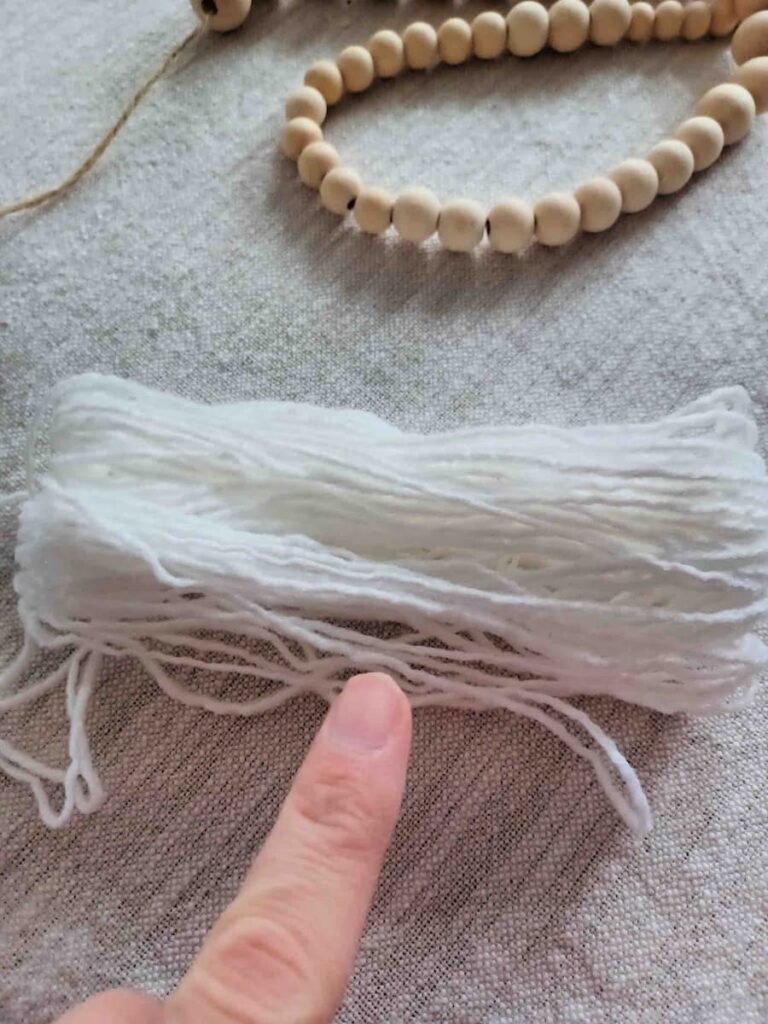

Bunch and tie in the middle with some yarn for the final look.
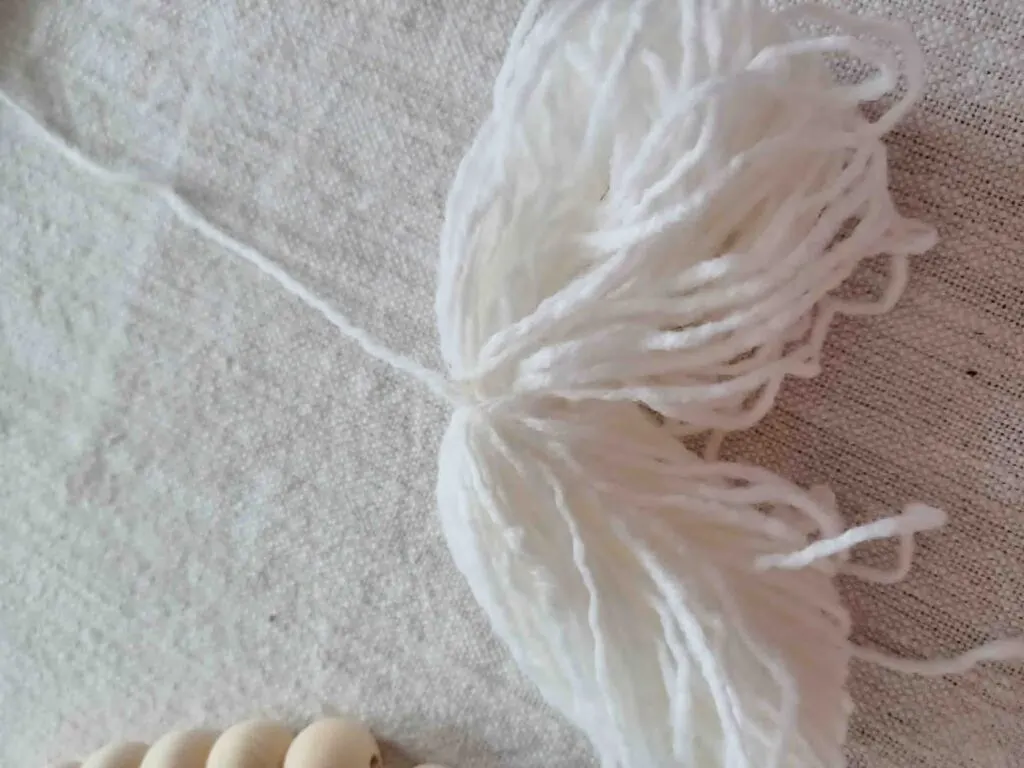
Next cut the end loops evenly open.

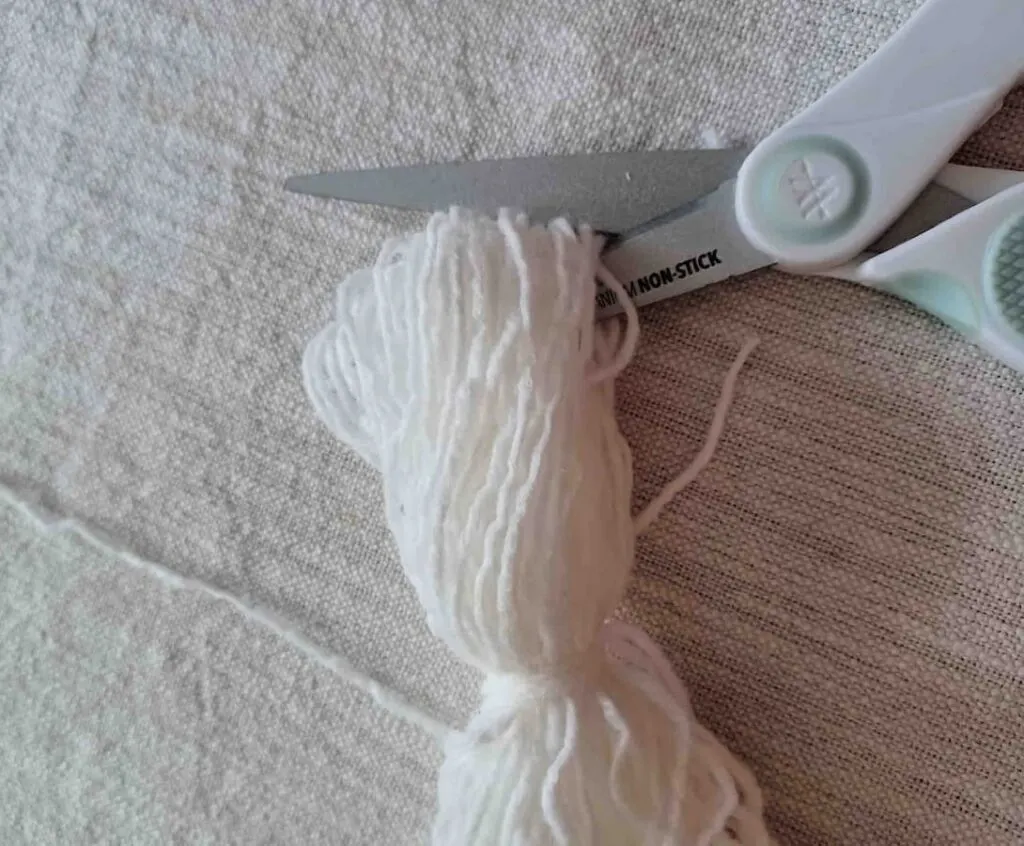
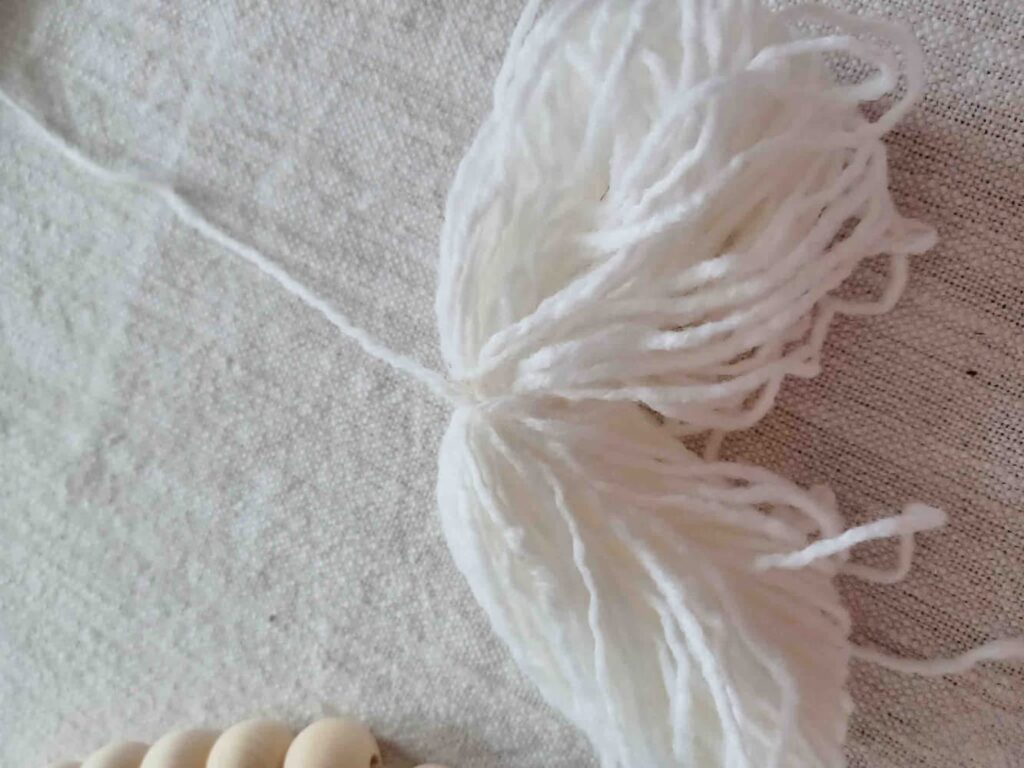
I took this time to tie it to the end of the wooden tassel before the final step.
Now take a piece of yarn and group the top together and tie, cutting the extra off. You can leave it without the smooth bunched top also. I made some tassels with and without.
I love the simplistic beauty of this tassel!

Bathroom refresh tips (optional)
Now I will show you shortly what I used my tassels for in some before and after pictures. But first let’s talk about the bathroom refresh.
A way you can get a better feel for your bathroom on a budget is to really deep clean and declutter it from top to bottom. My bathroom needed that.
I was pushed for time so I just focused for now on one of the visual parts of the bathroom. I will deal with my cabinets soon.
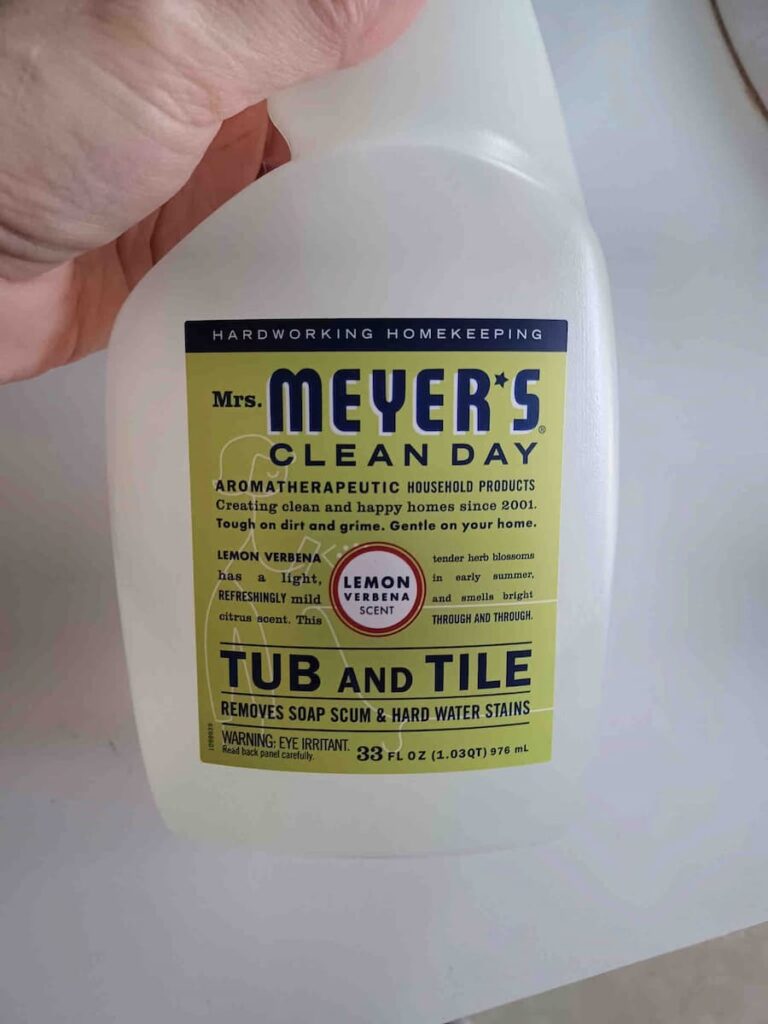
I highly recommend Mrs. Myer’s cleaning products. They are safe, VERY effective and smell great.
I personally use Mrs. Meyer’s Tub & Tile cleaner (link to Amazon) for the shower & tub. It cuts safely through muck like nothing I have yet to see making your refresh easier.

So after I made my beads & tassels I set those aside. I got busy scrubbing my tub & shower.Giving it a beautiful feel without spending a dime. It felt like I updated my faucet handle simply by deep cleaning it. I plan on doing a total full bathroom remodel someday but today is not that day if you know what I mean!
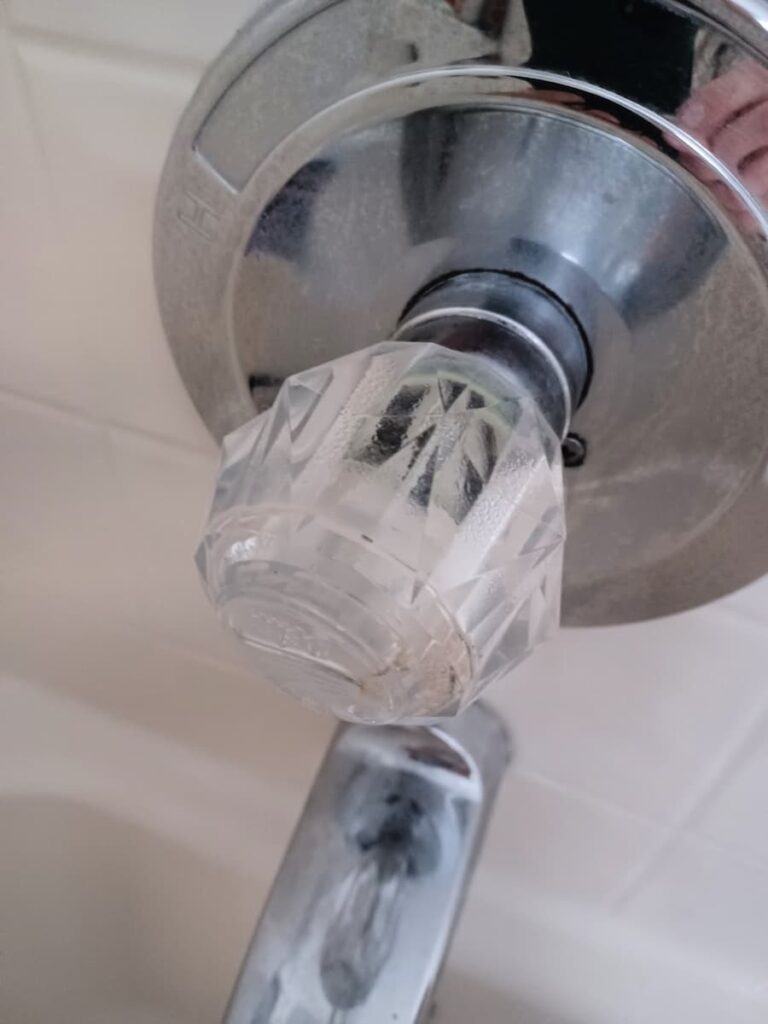
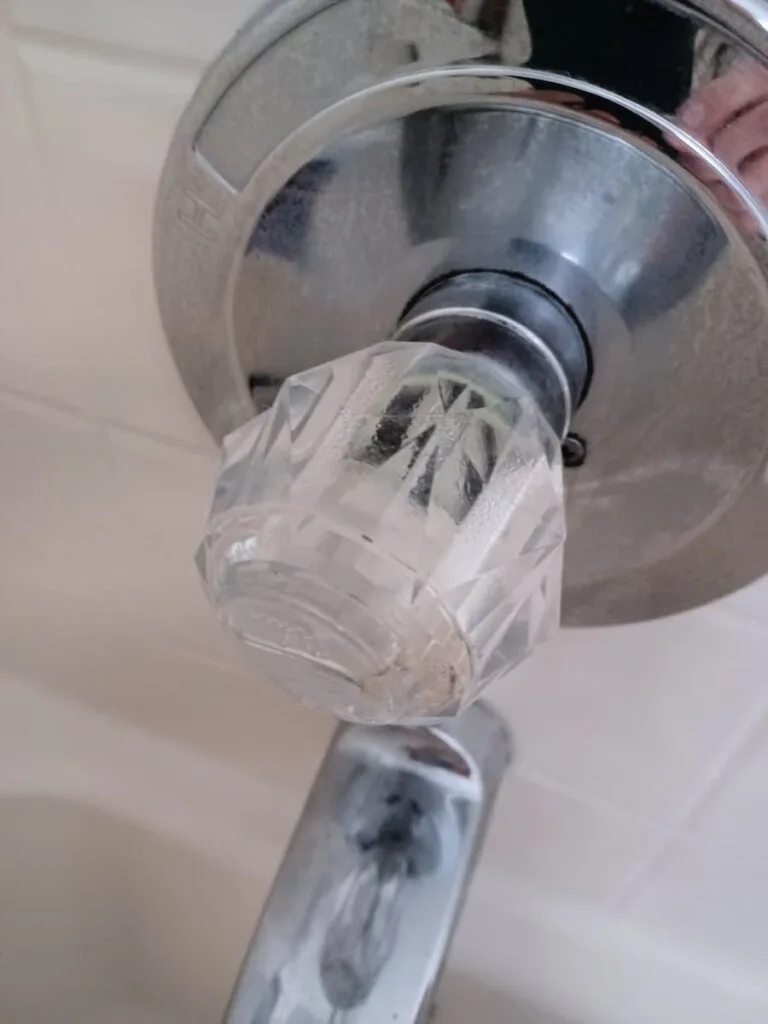
If you have a builder-grade handle that was standard 20 years ago, then this tip is for you and costs nothing.
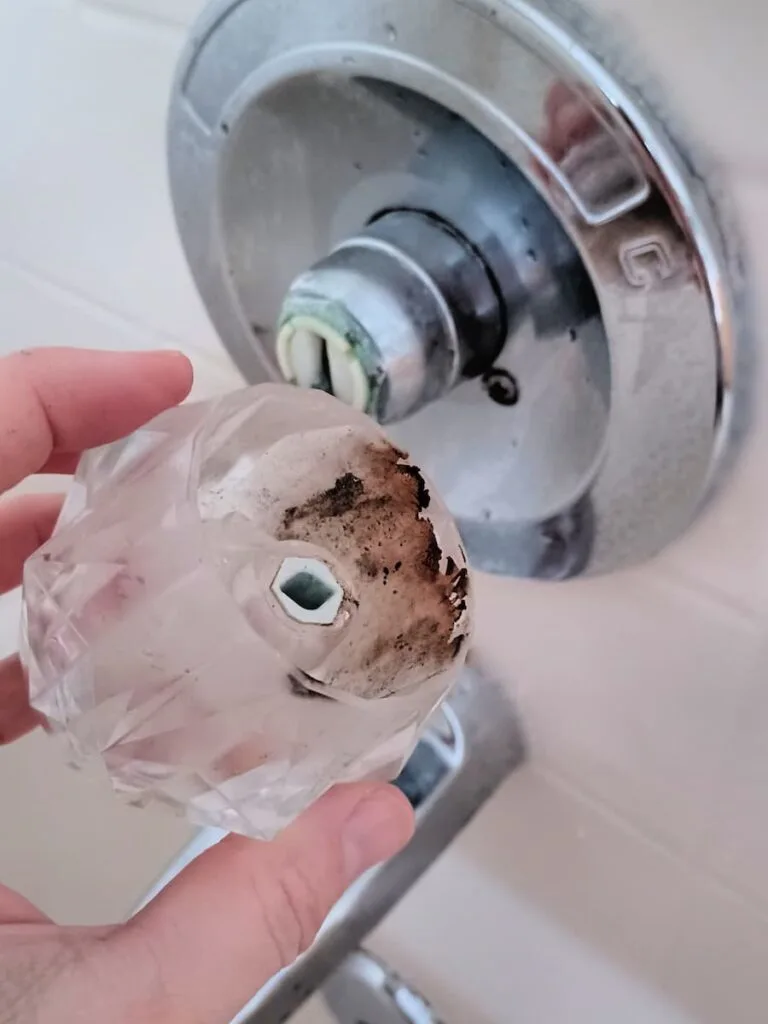
Take a flathead screwdriver and pop off the top center cap.

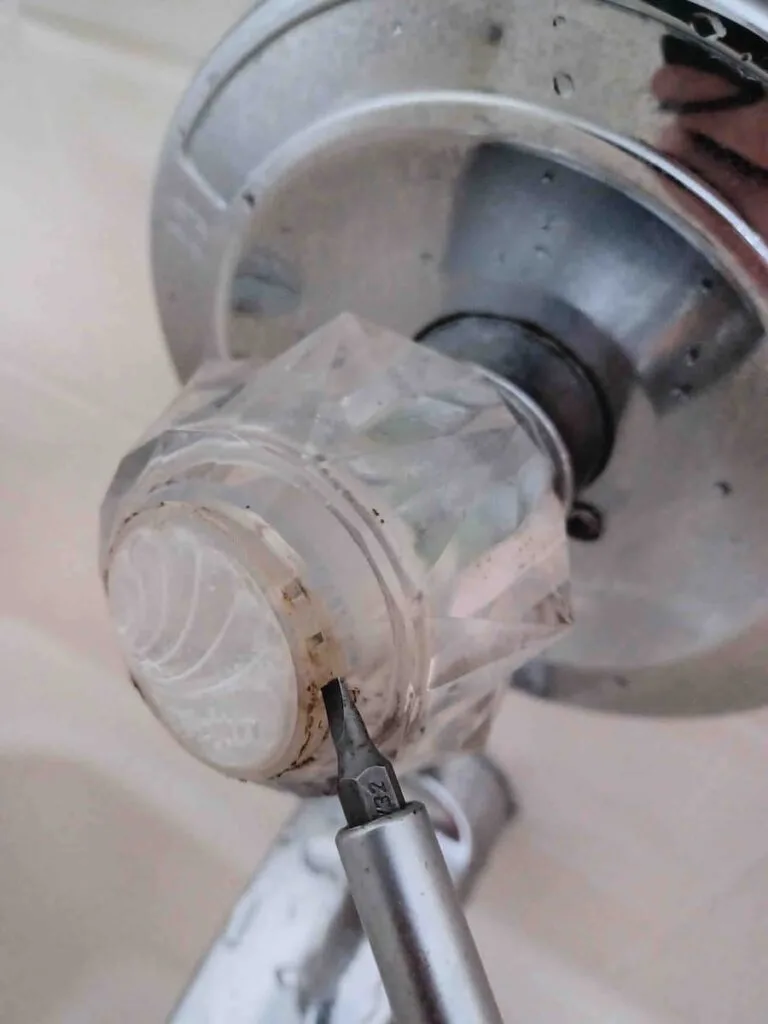
Now use a phillips head and take the one internal screw out inside of the knob.
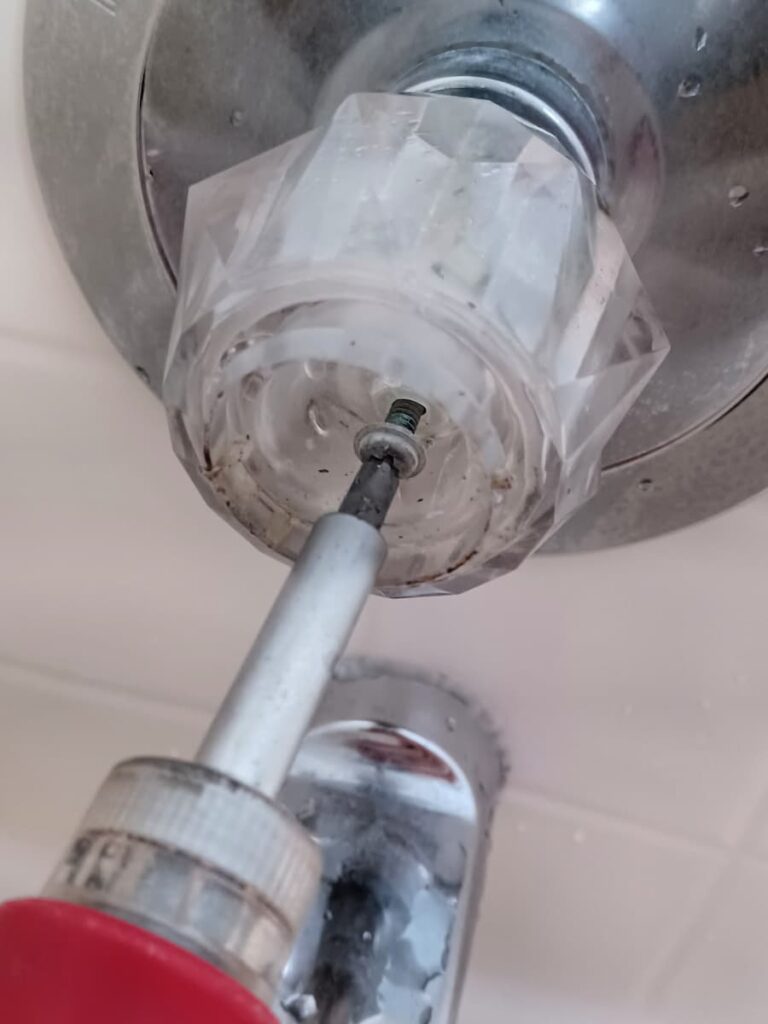
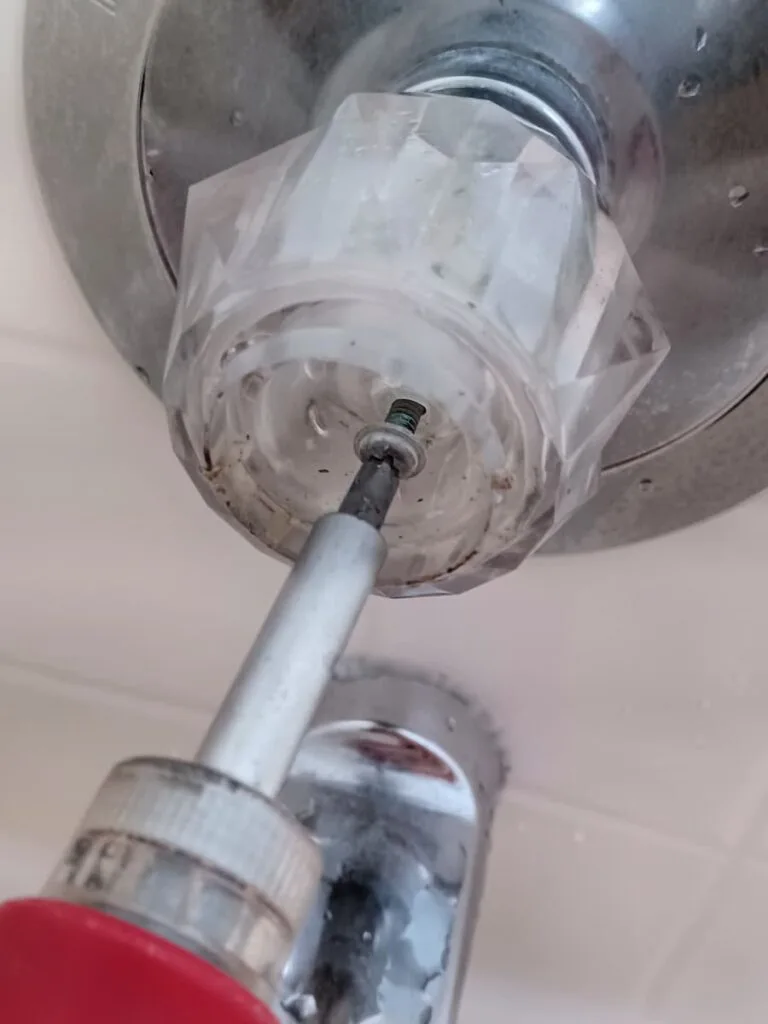

Take the same tub & tile cleaner and spray the inside components we disassembled. I let it soak for a few minutes then clean with an old toothbrush, cloth and water.
Reassemble and enjoy your sparkle!
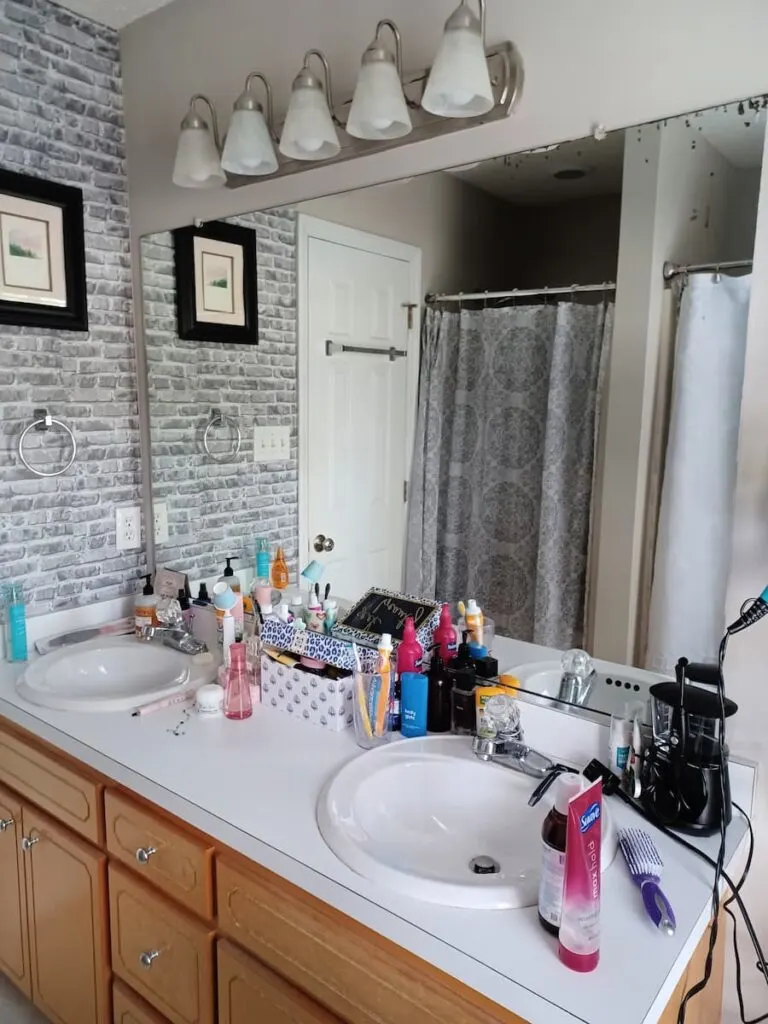
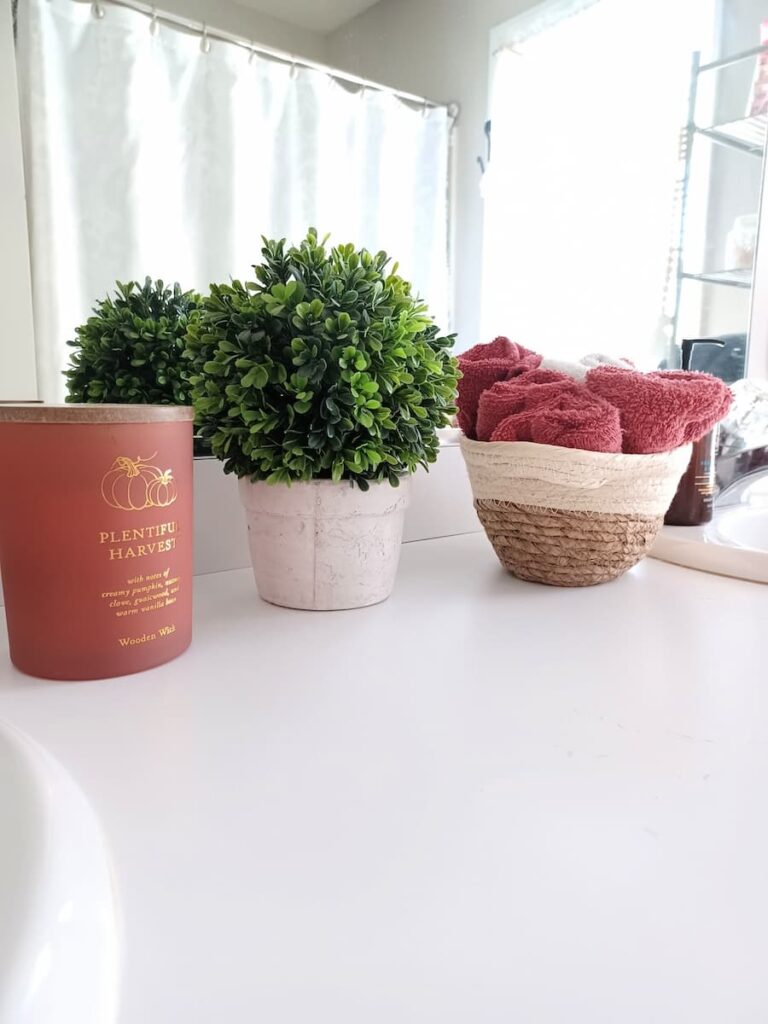
I also got busy decluttering my counter top sink area.Life happens and My life has been very busy lately as most of us are and things slip (like bathroom counters lol).
Here is the ugly hot mess before and after of my counter. A tip I have for you is use what you have and after decluttering decorate. I shopped my house and came up with a candle, plant, and a little basket to display washcloths.
Before

After

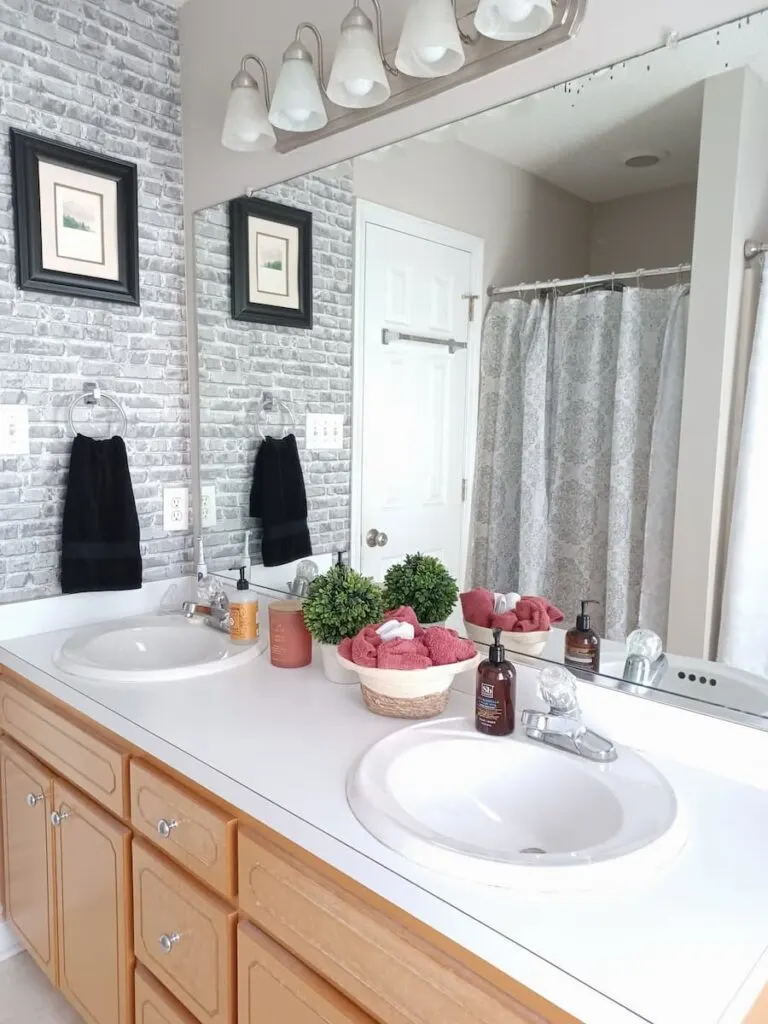
Working with what you have is a very budget-friendly refresh tip.

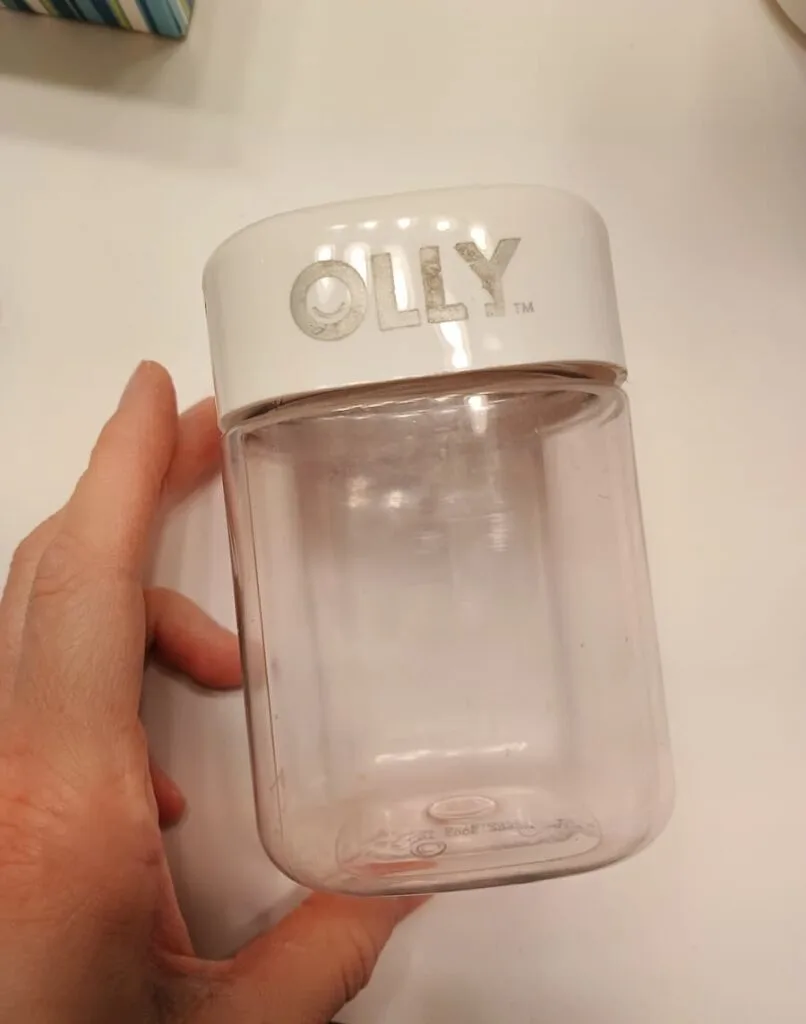
Another tip in working with what you have is rethink containers. I needed something small to put q-tips in. I chose to use an old Olly gummies vitamin bottle. I simply took some of my tassel yarn and wrapped the top to match the tassels.

Ok so now it is time to show you what I used my beaded tassels for!
I wanted to make more but for now this was my start.
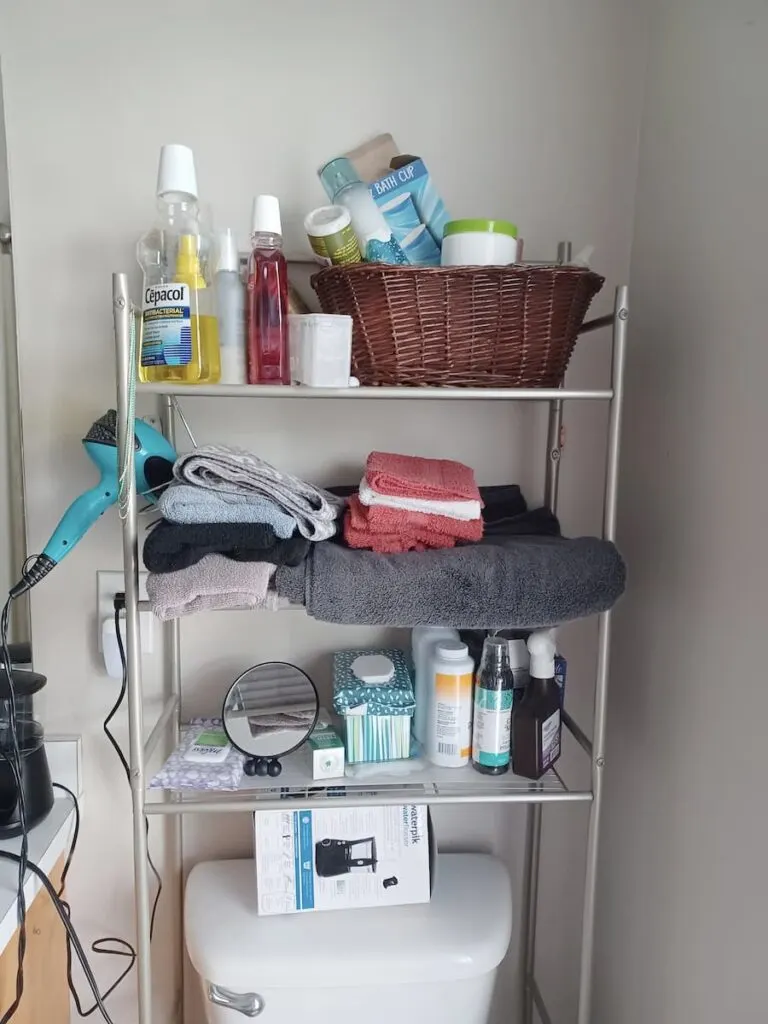
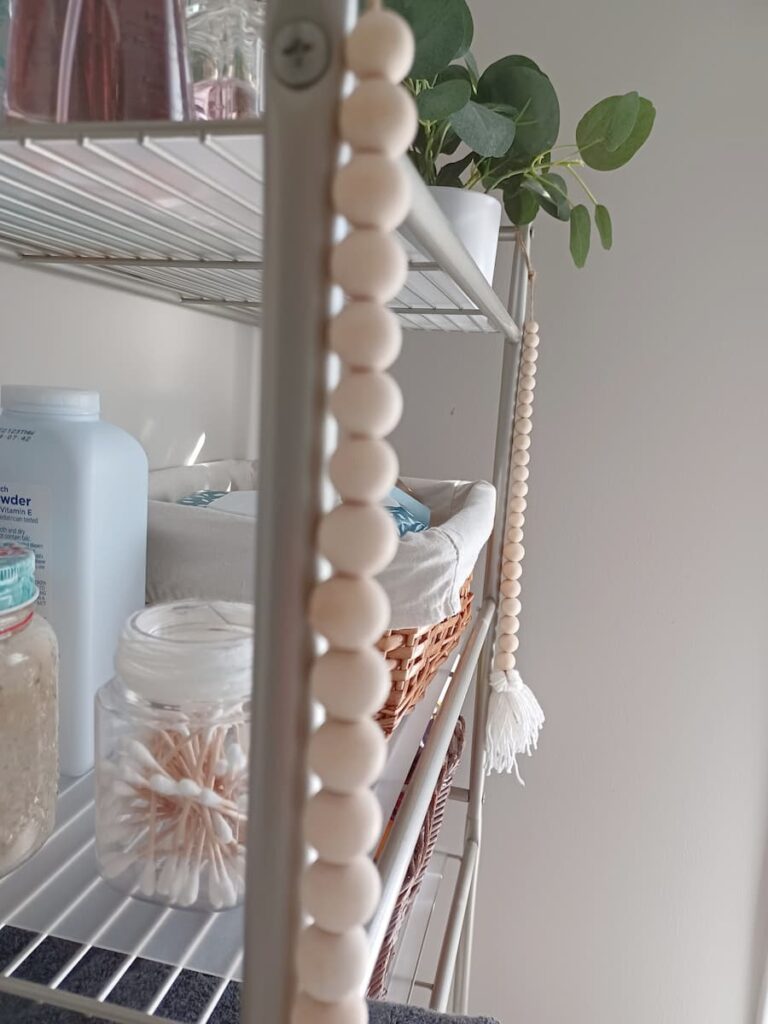
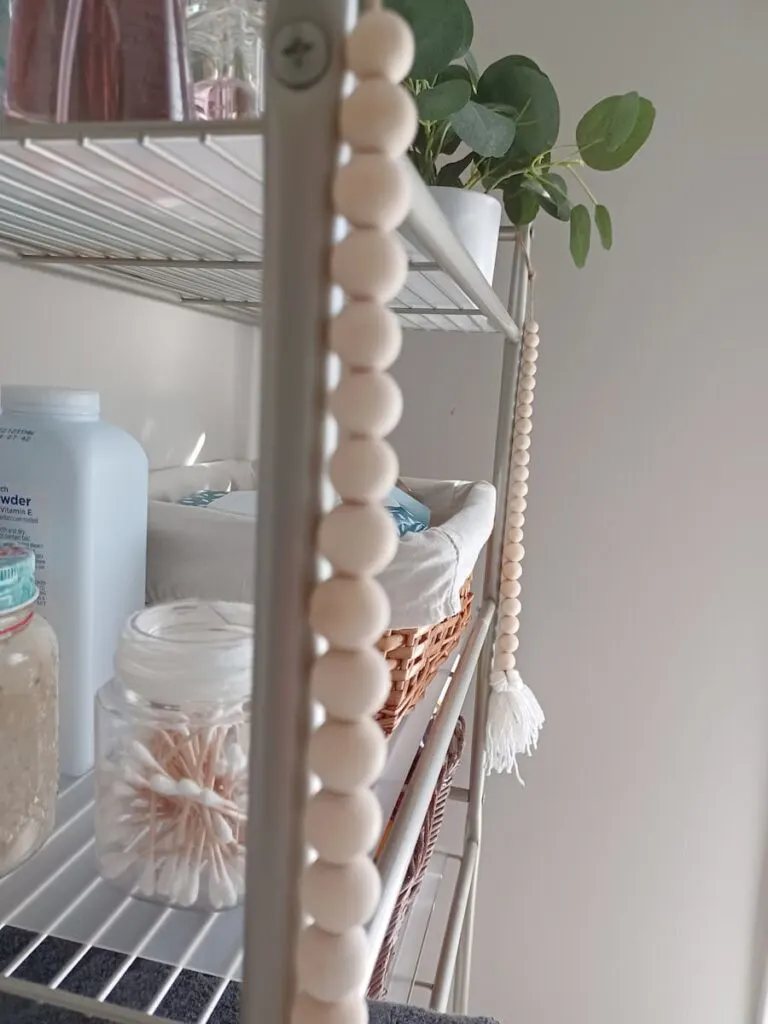
By the way, here is my front of my toilet shelf clutter.

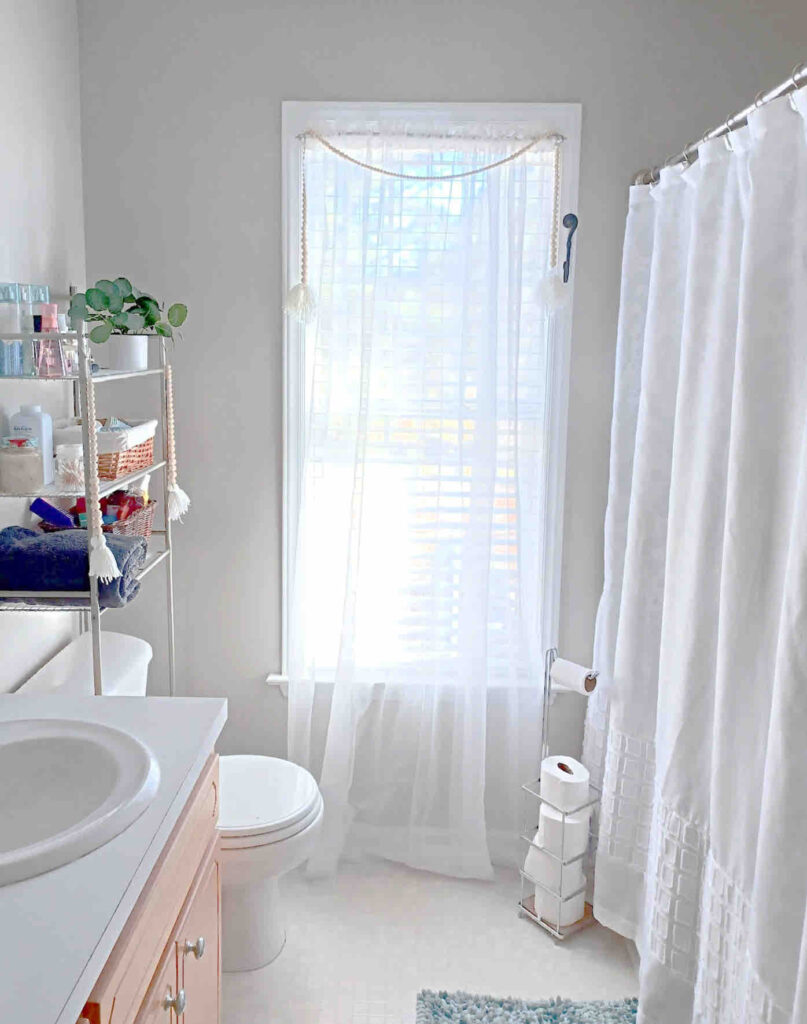
And here is my after using my beaded tassels for a touch of elegance after some decluttering.
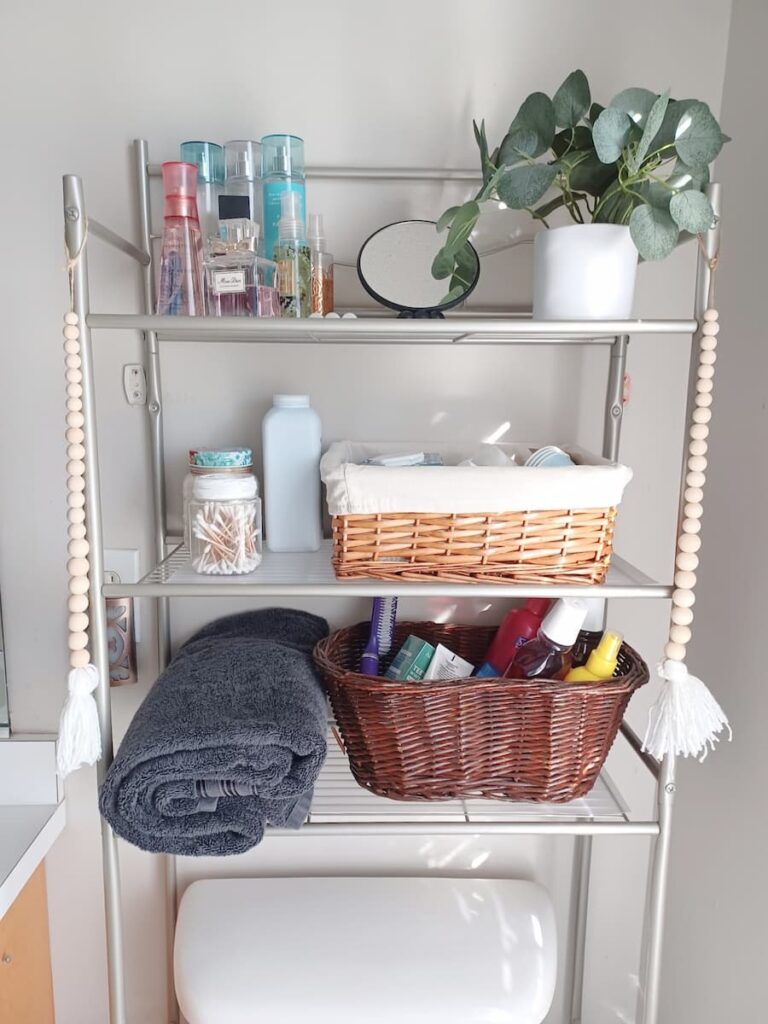

Notice the former Olly bottle?
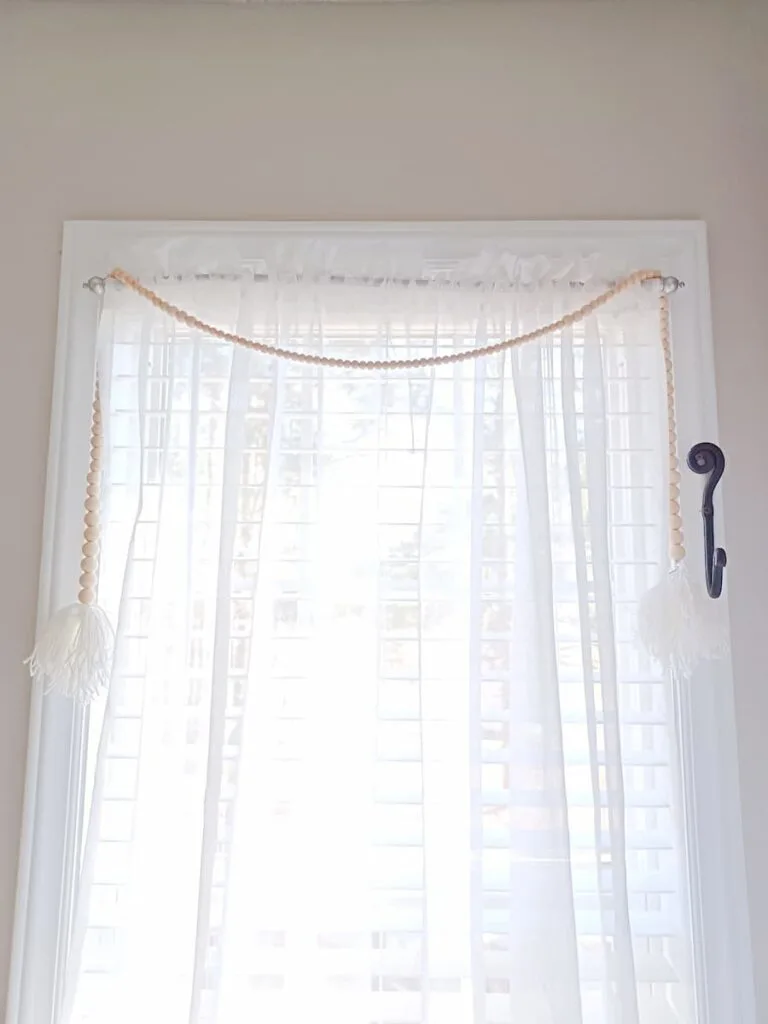
Here is the boring before of my window.

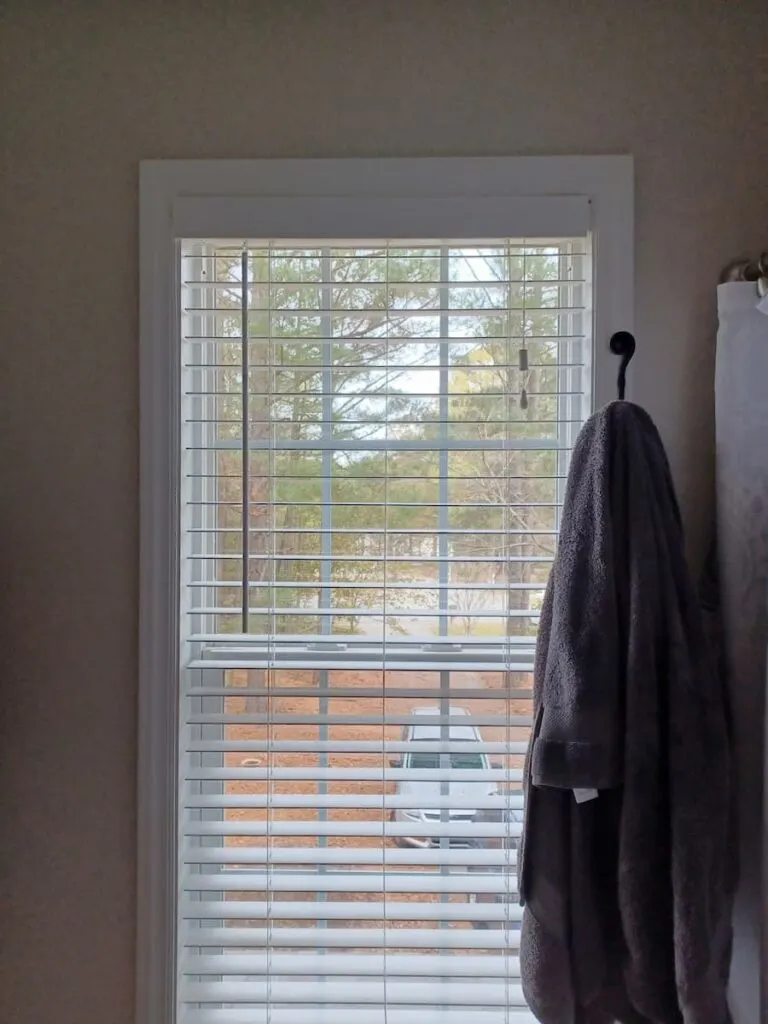
I really wanted to add some effortless beauty to my simple window. I added a sheer window covering I already had and my beaded tassels.


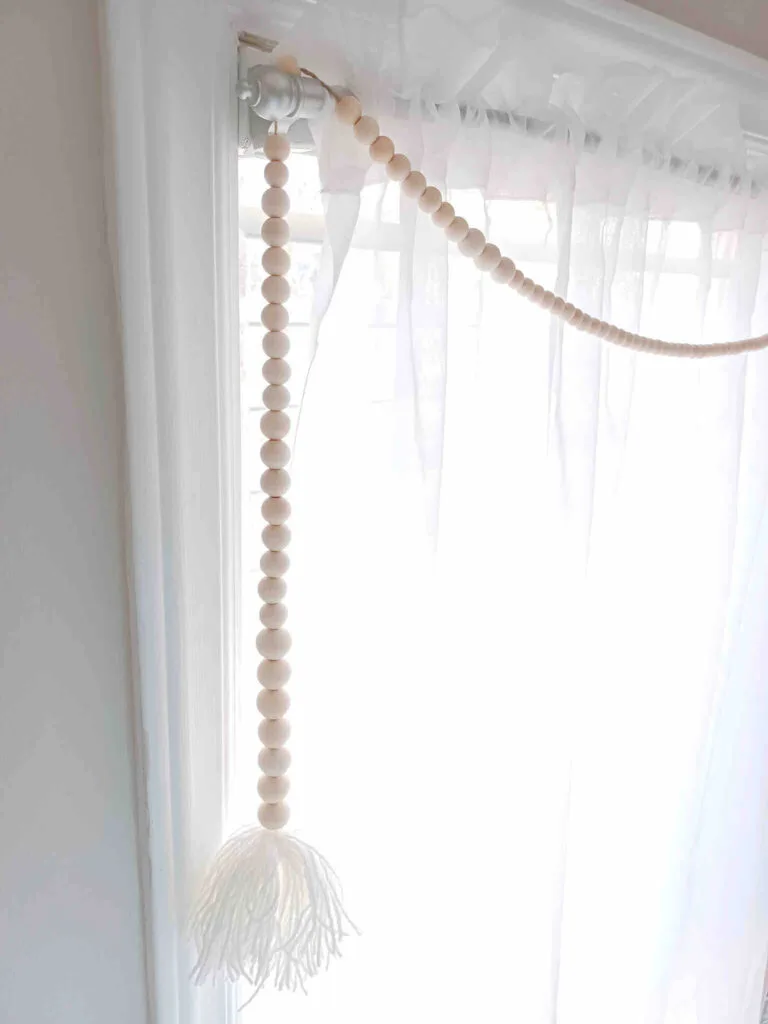

I like the lighter feeling I get when I walk into this bathroom now.

Stepping into a space that has been cleaned well from top to bottom and some small decor touches given can give you such a satisfying feeling of accomplishment!
Other DIY Projects You May Be Interested In:
- Farmhouse Inspired DIY Plant Holder [Repurposing Craft Project]
- Easy DIY Wall or Door Decor For Fall – Under $10!
- DIY Terracotta Candlestick Holders (Step-By-Step Guide)
Make Your Own Beautiful Living Succulent Wreath Centerpiece! Complete video course by Jeannine Romero now available through Skillshare.