

- How To Make A Summertime Watermelon-Themed Wall Hanging - January 27, 2023
- How to Tie Dye with Sharpies (Quick And Simple Craft Project) - November 10, 2022
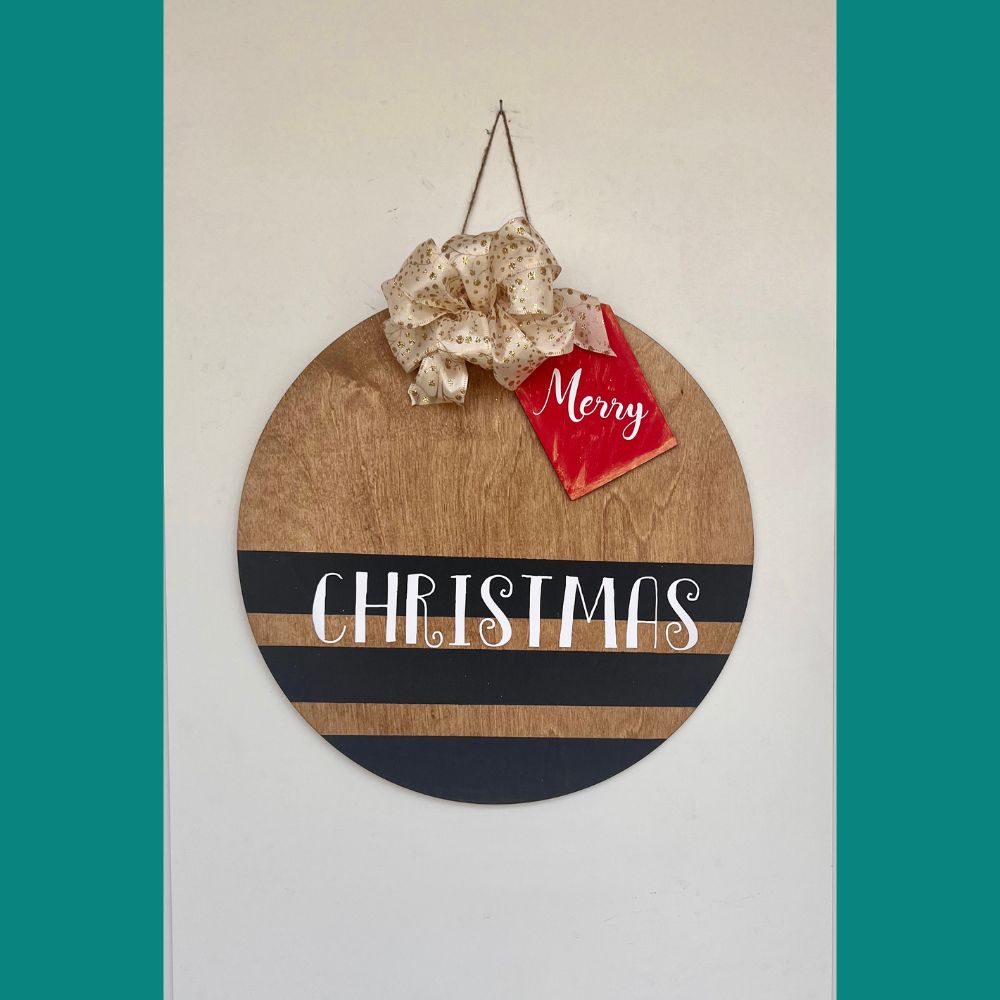
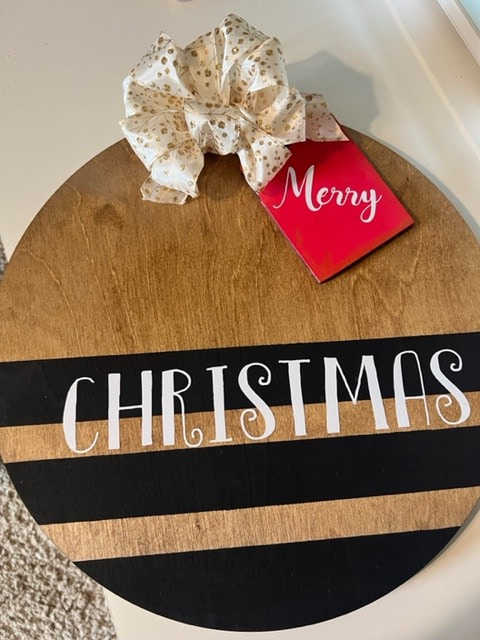
- DIY Wooden Christmas Wall Hanging Project - October 27, 2022
Brighten up any room in your home with these quick and easy wall hangings. Making a wood wall hanging is easy and will add sparkle and interest to any doorway or wall.
You will have people thinking you are a crafting master even if this is your first DIY project. Easily customizable, wood wall hangings can match any aesthetic or be made for any occasion.

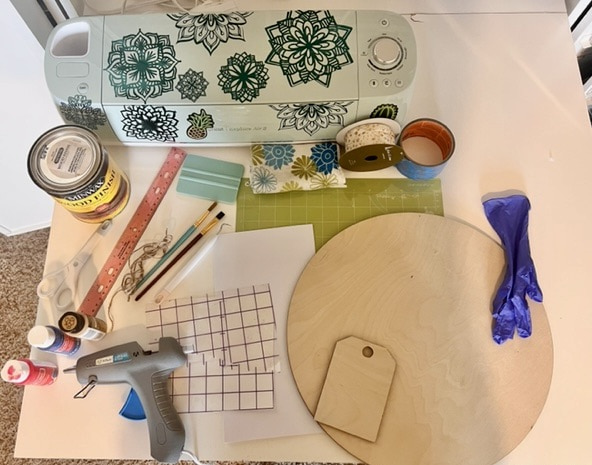
Supplies Needed For This Project:
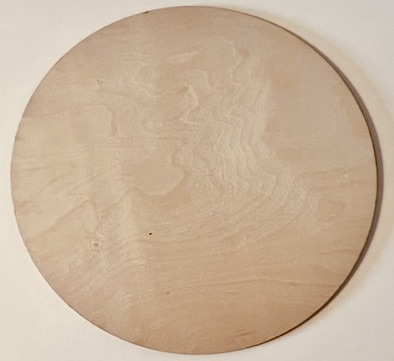
- 15” wood round. I buy mine from https://mrpeacockswood.com
- 3.5” Wood gift tag also purchased from https://mrpeacockswood.com
- Wood stain of your choice (I used Early American by Minwax purchased from a home improvement store.)
- Latex Gloves (for using while staining)
- Microfiber cloth or shop towel to apply stain
- Painters tape
- 1 large and 1 small paint brush
- Acrylic paint: red, navy, and gold (purchased from any craft store.)
- 7’ of 1.5” wired ribbon
- Scissors
- Weeding tool
- Cricut or cutting machine
- Craft vinyl or vinyl saying purchased from craft store
- Transfer tape
- 12” of twine or string to use for hanging
- Drill or Dremmel
- Hot glue gun or super glue

Instructions
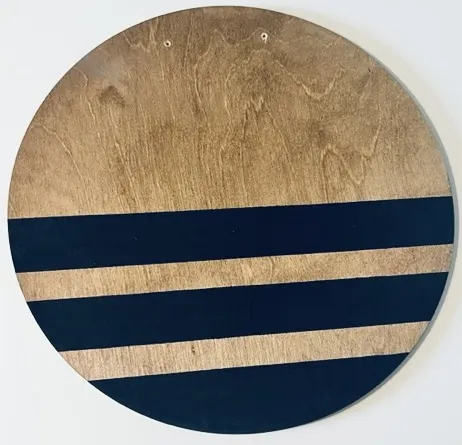
Start by staining wood round using a microfiber cloth or shop towel in a well-ventilated room. I take the end of the microfiber cloth and dip it in the stain, then apply it to the wood round, wiping off all the excess.
A little goes a long way! I used Early American by Minwax. Any stain color of your preference will work! Let dry for at least 24 hours.
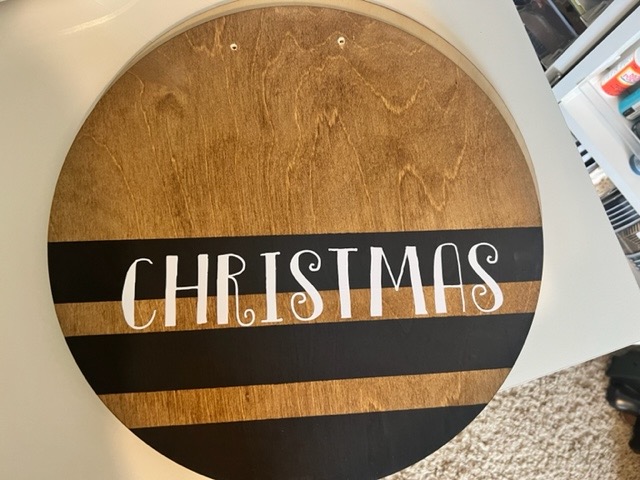
Next, use painter’s tape to create stripes of desired thickness. I did not measure my stripes, as I wanted to create a more random look. They are approximately 2-3 inches in thickness.
After taping, use acrylic paint to paint strips onto the stained wood round. I used Navy paint, although it appears black in the photos.
Leave taped to dry for at least 12 hours to ensure the paint does not bleed or smudge. You can speed up drying by using a hair dryer. Remove the tape once dry.
You can use a small paintbrush to touch up the edges of stripes if needed.

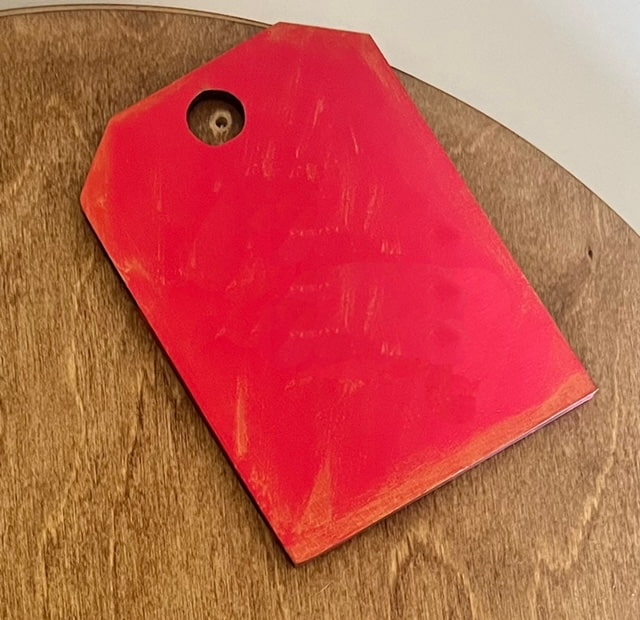
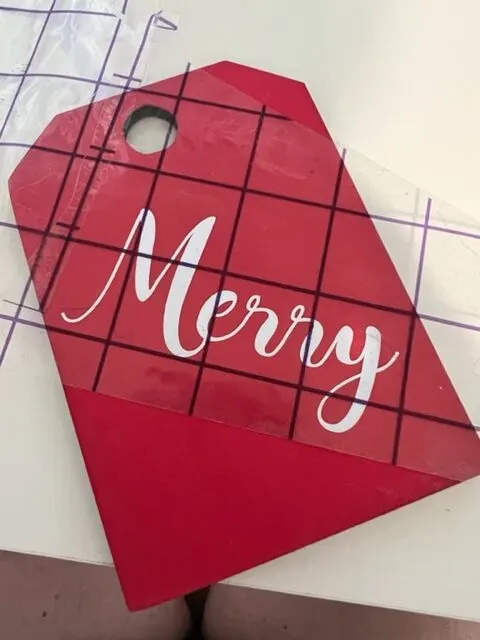
Paint the wood gift tag red and let dry for around 1-2 hours. Once dry, dry brush gold acrylic paint onto the edges to add dimension.
To dry the brush, dip the end of a small paint brush and blot it on a paper towel to remove the bulk of the paint. You want the brush to be mostly dry in order to achieve a lightly painted look.

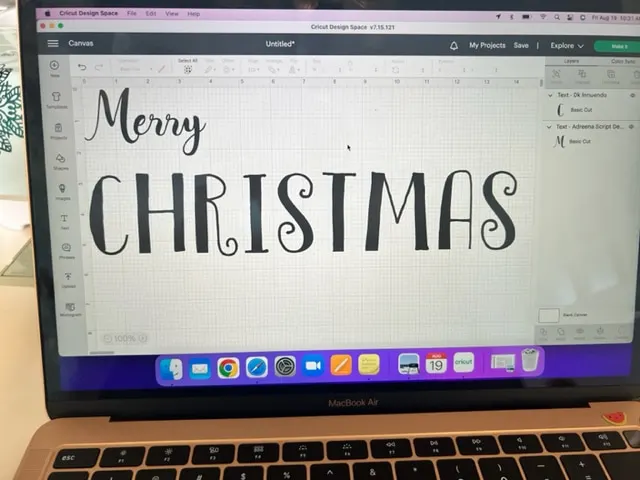
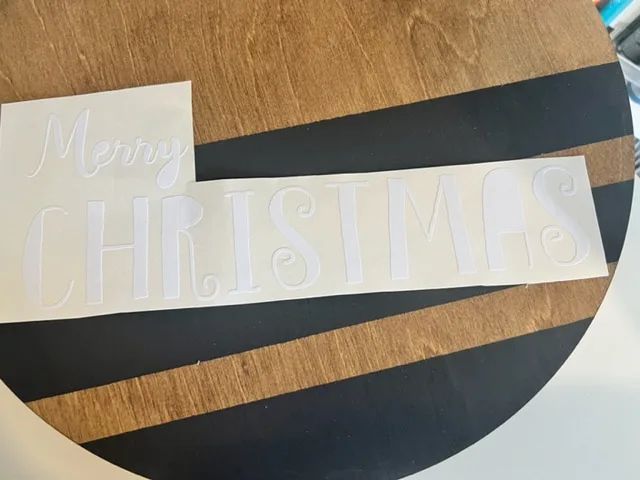
Cut out vinyl letters using a cutting machine.
For this project, I used matte white vinyl by Oracle purchased on Amazon. I used a Cricut and fonts Adreena Script for the word “Merry” size 60, and DK Innuendo for the word “Christmas” size 151 to cut out my words.
If you do not have a cutting machine, you can buy vinyl letters at any craft store.

Weed vinyl letters (take off excess vinyl, leaving only the letters) using a sharp weeding tool. After you have weeded your letters, cut words apart.
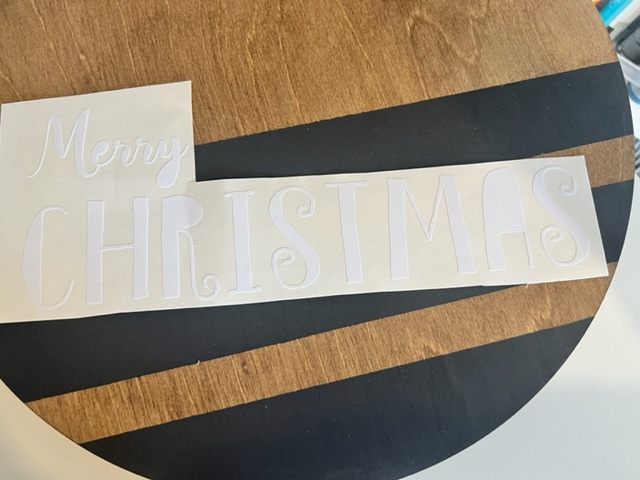
Using transfer tape, attach the word Merry to the wood gift tag. I attached mine at a slight angle.

Measure the middle of your wood round in order to ensure the word Christmas is centered. Using transfer tape, attach the word Christmas to the lower half of your wood round.

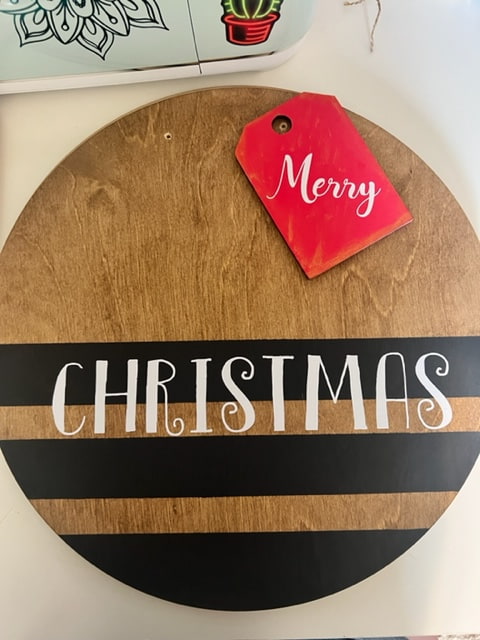
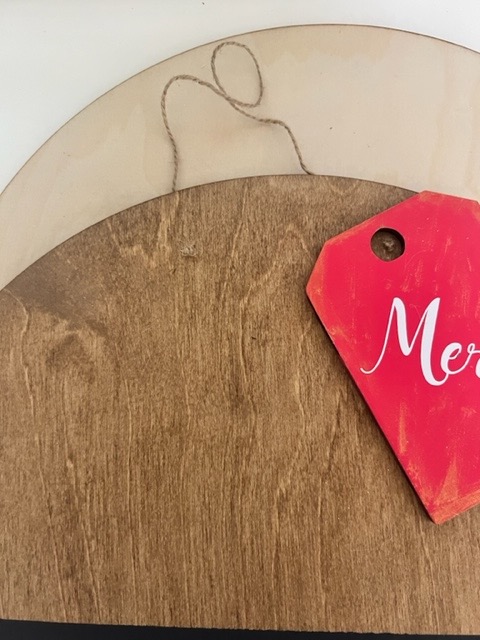
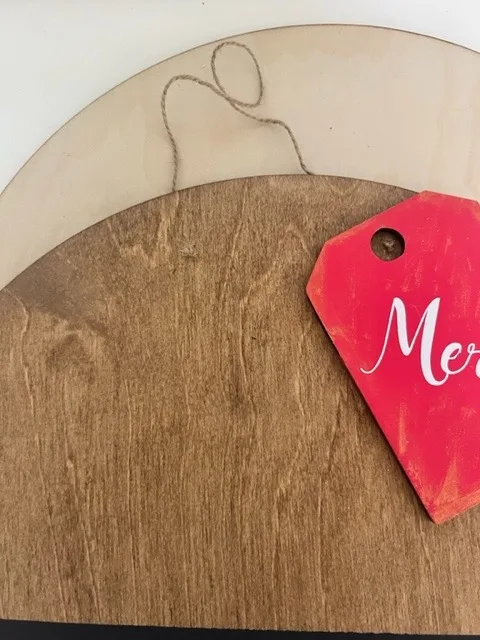
Using a hot glue gun, glue the wood gift tag to the top of your wood round, so the hole in the gift tag, and the hole in the wood round match up.

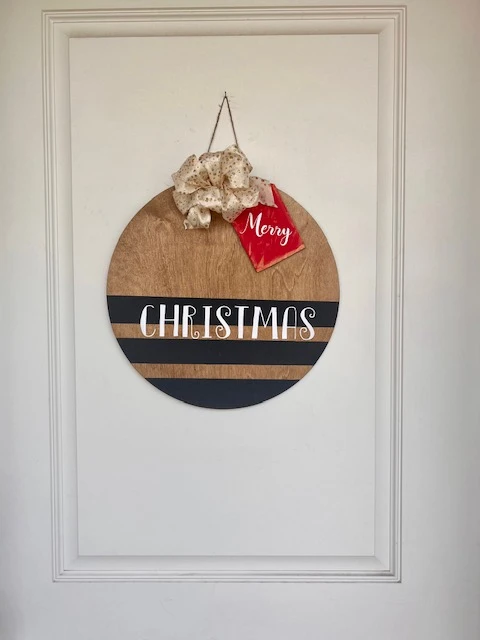
Prepping The Project For Hanging
Using a drill or dremel, drill 2 holes at the top of your wood round for hanging. If you do not have a drill or a dremel, you can use a hot glue gun to attach your hanging twine to the back of your wood round.
Measure a length of twine. I used 12”, feed through the drilled holes. Tie it with the knots in the front to your drilled holes in order to hang it.
You can lengthen or shorten your length of twine depending on how low you would like your wall hanging to hang.
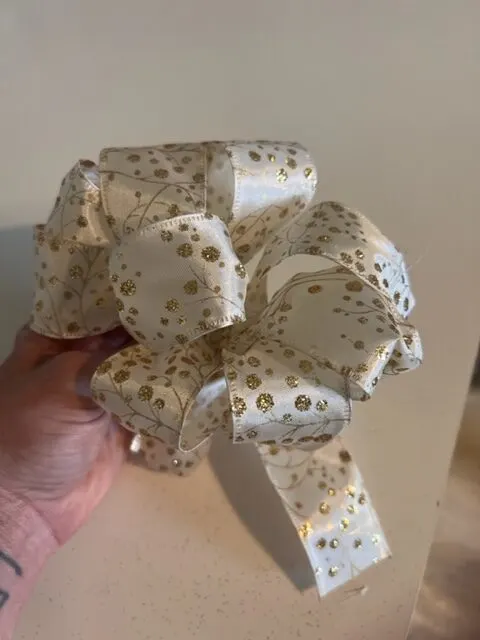
Making The Bow
Time to make a beautiful bow to go on the top of your circle. Not only wil this add sparkle, but will cover the twine you used to hang your project.
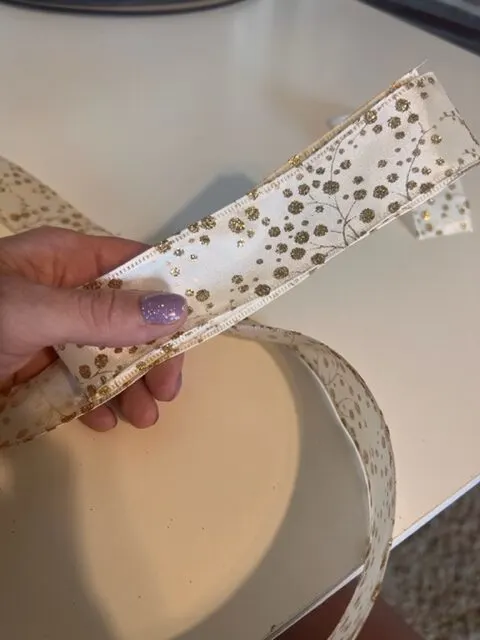
Cut 7’ of 1.5” wired ribbon. I used what I had leftover at home from Christmas last year. I had previously purchased it at a Michael’s Craft Store.
After cutting your length of ribbon, cut off 5 inches and set aside.

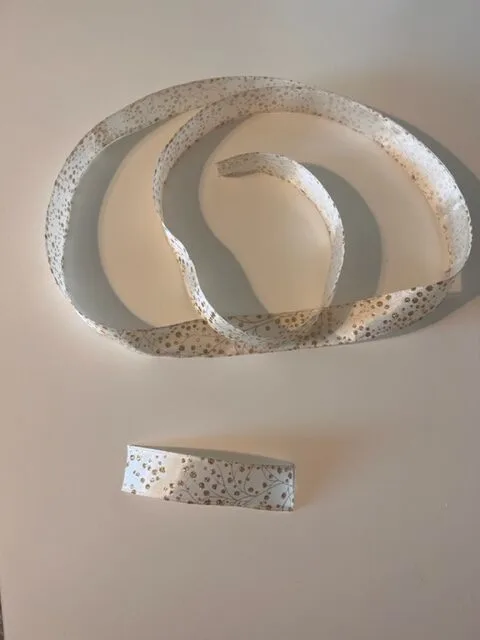
Holding an end of your ribbon on one hand, fold the ribbon over itself so you have one continuous loop measuring 8-9 inches with the pattern of the ribbon on top.
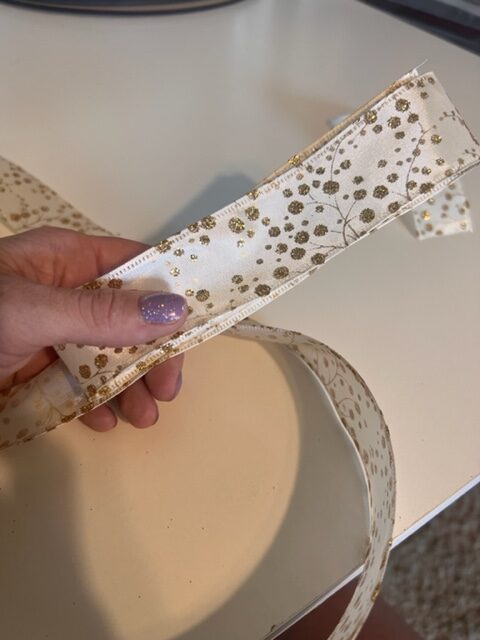

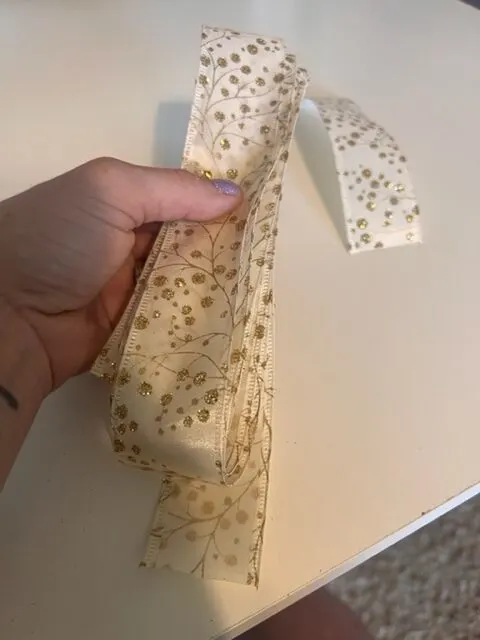
Then, take the 5” strip you set aside and tie it in the middle of your large loop, creating loops on each side of the tie. This will become your bow.


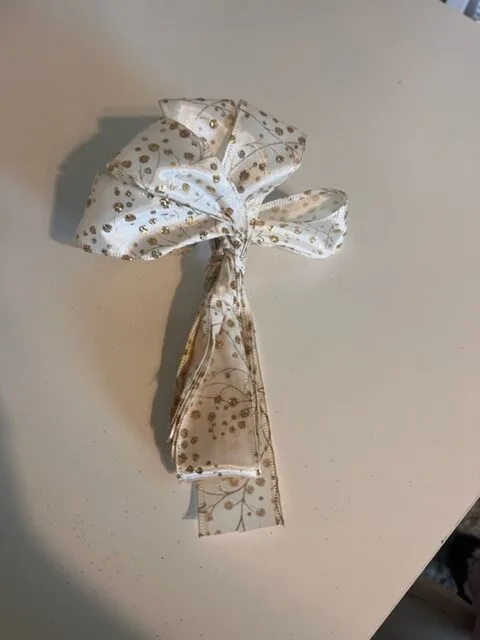
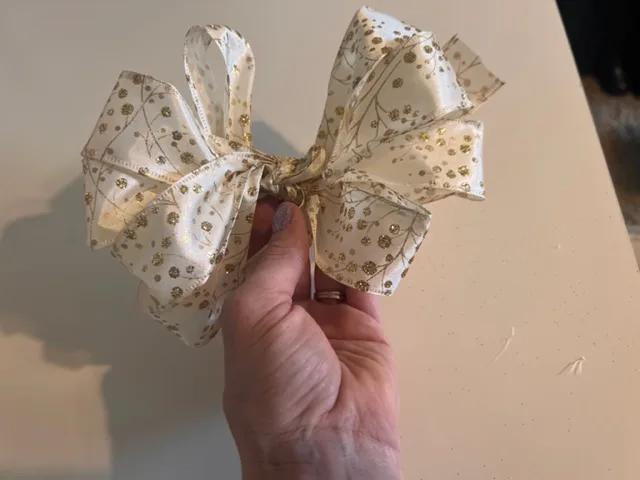
After you have tied the middle, separate each loop on both sides of the tie and pull out, move around, and fluff, until you have a bow shape you like. You will have two ends of loose ribbon, cut these to your desired length.


If you need a little more guidance on this part, see our tutorial on tying a bow for a wreath. The principles are the same.
With a hot glue gun or super glue, glue the bow to the top of the wood round, covering the ends of tied twine used to hang your wall hanging. You can glue your bow to another location if you would prefer.

Hang your wall hanging for all your friends and family to enjoy!

Here are some other Christmas DIY Craft Projects you may enjoy:
- Christmas Sock Gnomes: Fun and Easy DIY Craft Project!
- DIY Christmas Cards: Super-Simple Craft Project
- 3 Easy DIY Christmas Craft Ideas With Jar Lids
Make Your Own Beautiful Living Succulent Wreath Centerpiece! Complete video course by Jeannine Romero now available through Skillshare.