

She enjoys all aspects of home DIY- from simple crafts to complete home remodels.
- Clay Moon Phase Wall Hanging - July 4, 2023
- What To Do When a Toddler Won’t Keep Their Blanket On - June 10, 2023
- How Do Child Locks Work in Cars? (And When To Use Them!) - June 10, 2023
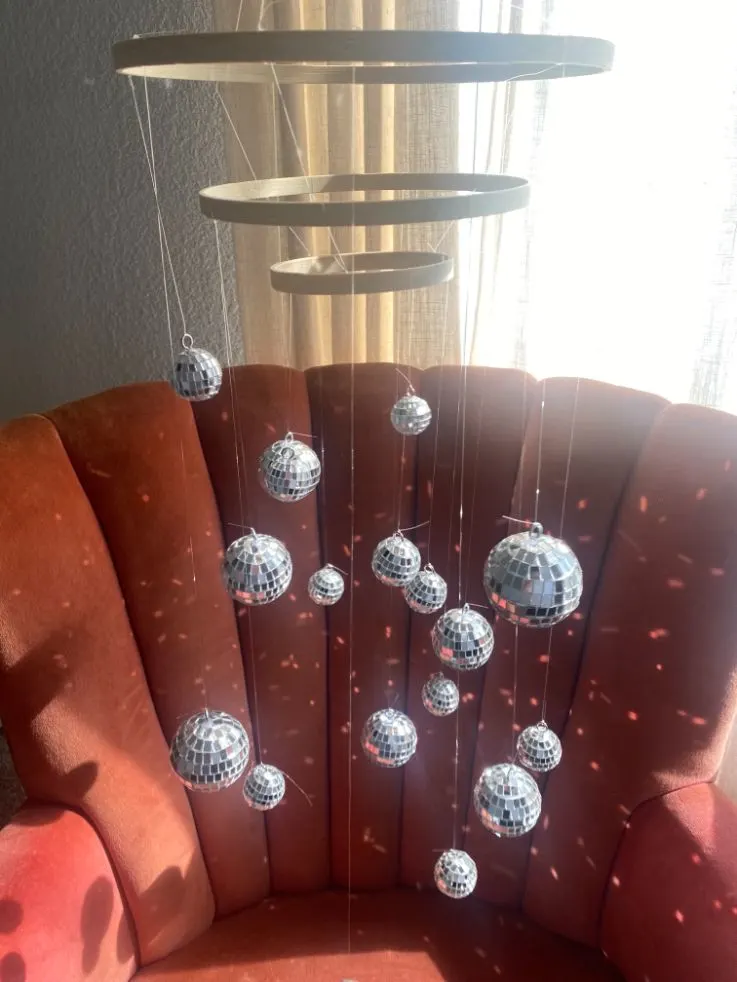
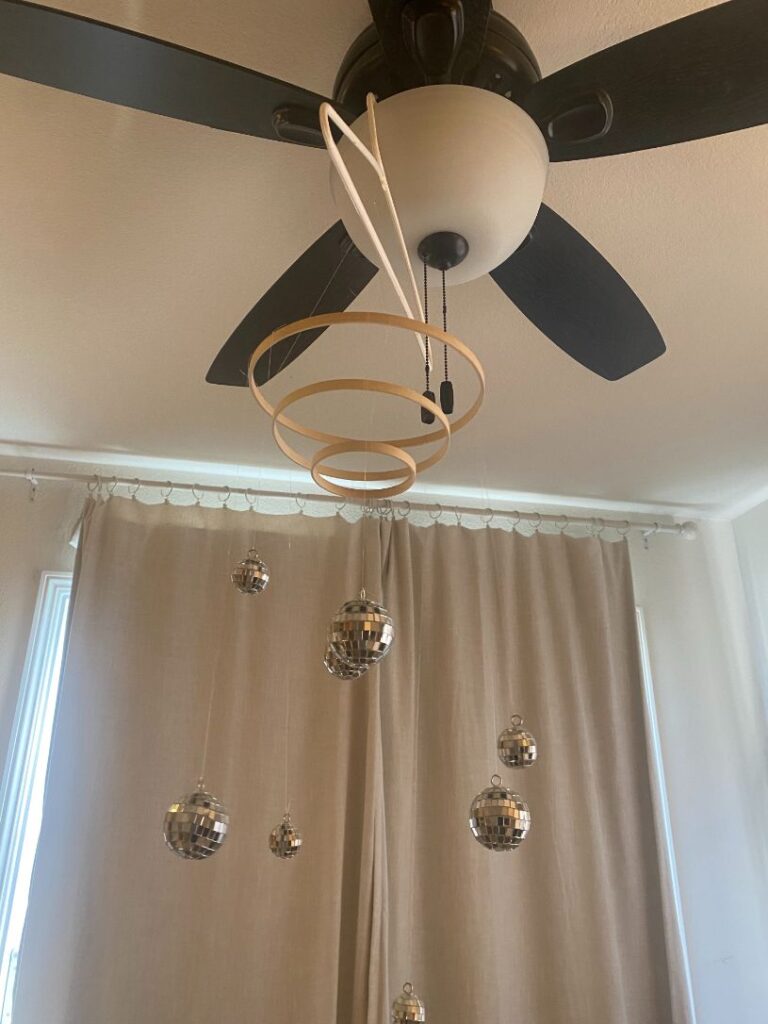
We all need a little disco in our lives. When I saw these mini disco balls, I knew exactly what I wanted to do with them!
This adorable DIY disco ball chandelier will add a lot of sparkle to any space and brighten up any corner!
It’s so whimsical, fun, and cheery; it’s guaranteed to put a smile on your face. Read on to learn how to make this super fun DIY chandelier for yourself.

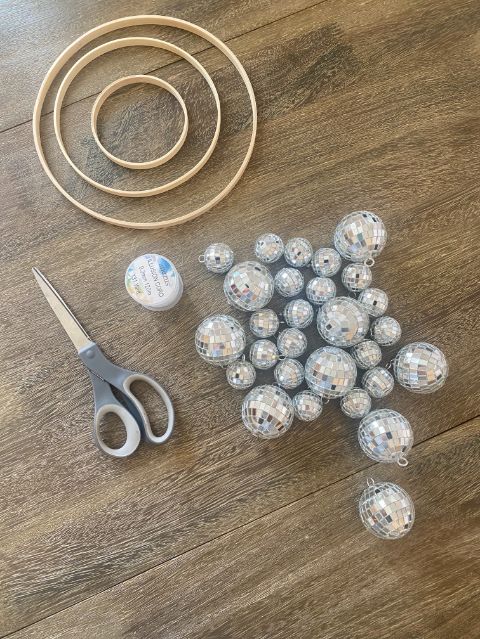
Supplies Needed
(Links are to Amazon)
- Mini disco balls (I purchased the one with one inch and two inch balls, but that’s up to your preference!)
- Fishing wire
- Embroidery hoops
- Scissors
- A hanger (optional)

Step One
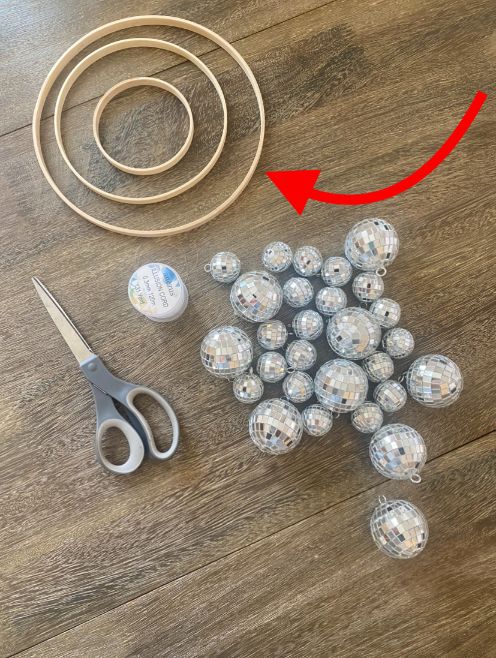
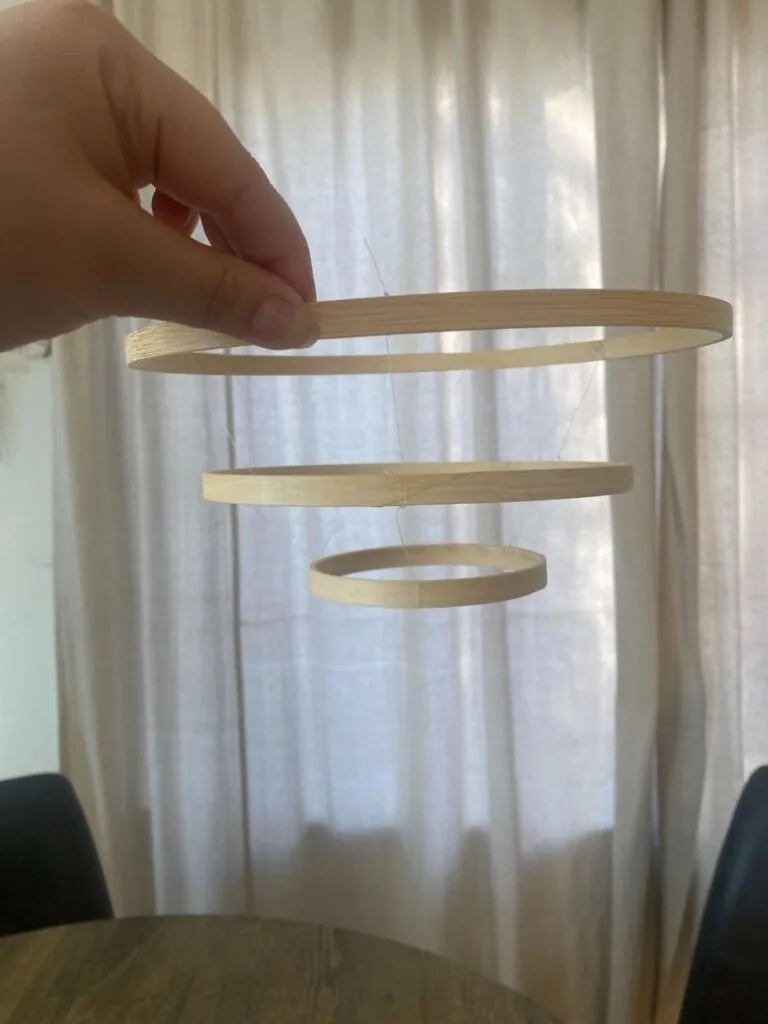
Remove the inner wooden hoops from three different sized embroidery hoops. To do this, simply unscrew the outer hoop until it is loose enough for the inner hoop to come out.
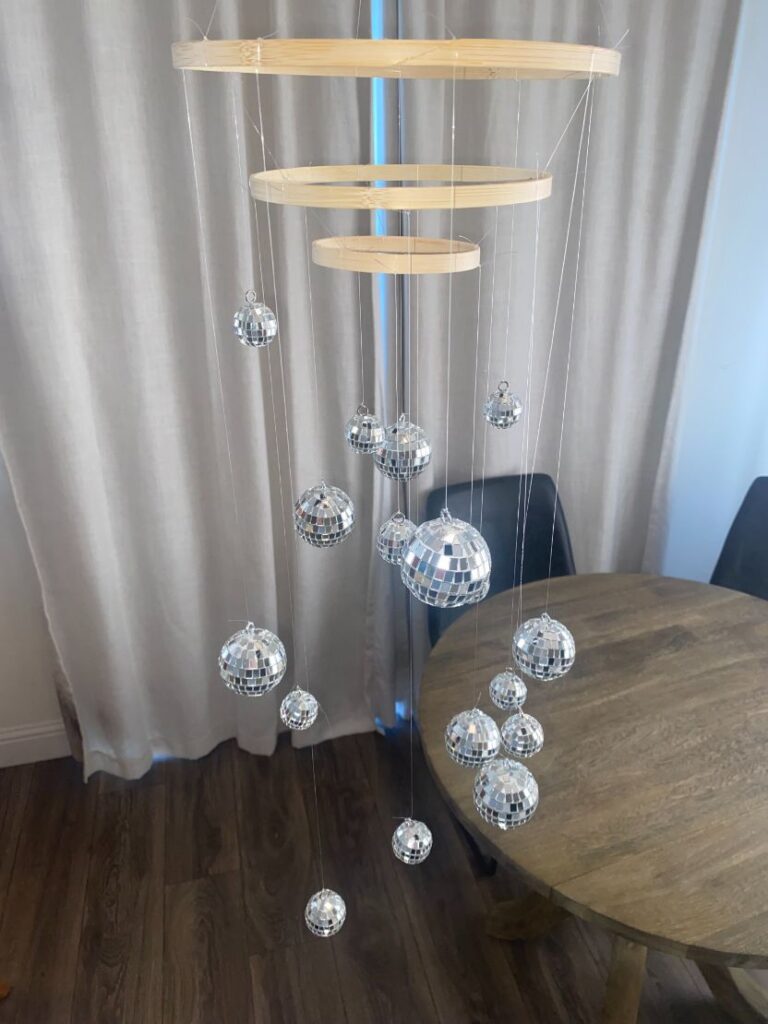
The sizes you choose should go from largest to smallest.
The smallest one will be hung in the middle. You can choose to do two, three, four, or even five hoops, but the more you do, the more work you will have.
It just depends on how full you want your chandelier! I decided that three was a perfect balance.

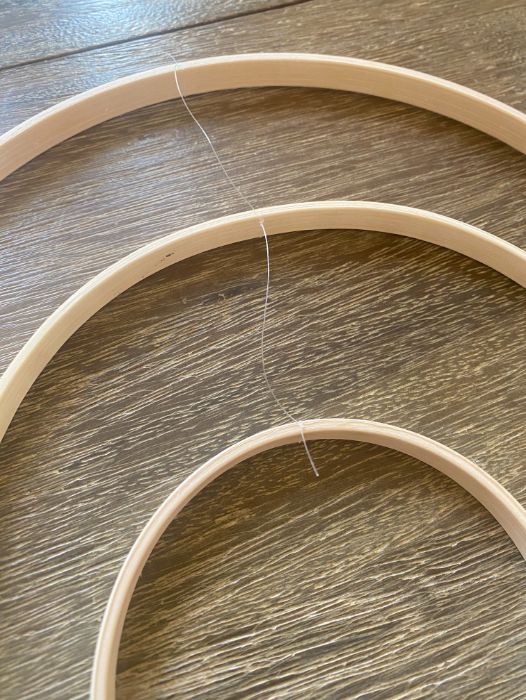
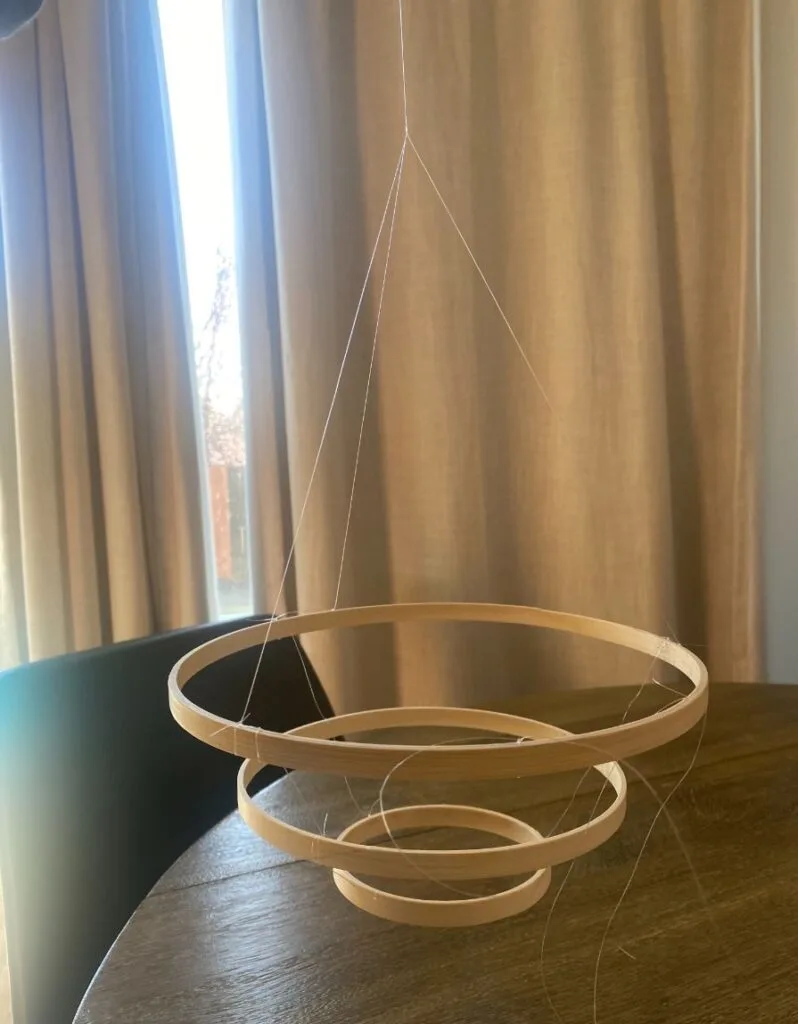
Step Two
Take your fishing wire and cut a long piece. You’re going to use this to tie all of your hoops together.
Starting with the largest hoop, tie a triple knot around the wood, pulling very tight to ensure that the fishing wire stays tied.
Then, space the next ring however far apart you’d like it to hang from the outermost ring, and tie a triple knot with this same string onto that second ring.
Repeat this step until you have three knots, one on each hoop, with the rings all connected together by fishing wire.
You should be able to pick up the outer hoop and have the other two hoops come with it, and the amount of fishing wire between each hoop should be about the same length.

Step Three
Repeat step 2 twice, spacing the knots evenly in a triangular formation around the wooden hoops.
This will leave you with three areas in which the hoops are tied together, and you want these areas to be evenly spaced apart from each other so that the chandelier will hang evenly.

Step Four
Cut another long piece of fishing wire. This is going to be used to hang your chandelier.
Tie one end to the outermost hoop, using a triple knot.
Then, spacing the other end evenly apart so that it will again form a triangle once there is a third string tied to it, tie the other end to the next section of the outermost ring, using another triple knot. This will form a connected string between two points that you will thread your third string through.
Cut another piece of fishing wire, and tie it to form the third point of the triangle on the outermost ring.
Thread the other end of this string through the string that you just tied onto two places, and tie a triple knot. Make sure that your third string is the same length as the lengths of the other string, which is now being held up by the third string.
Once the knot is tied, form a loop with the end of the excess string, and tie a triple knot to secure it. This loop will be what you hang your chandelier from.

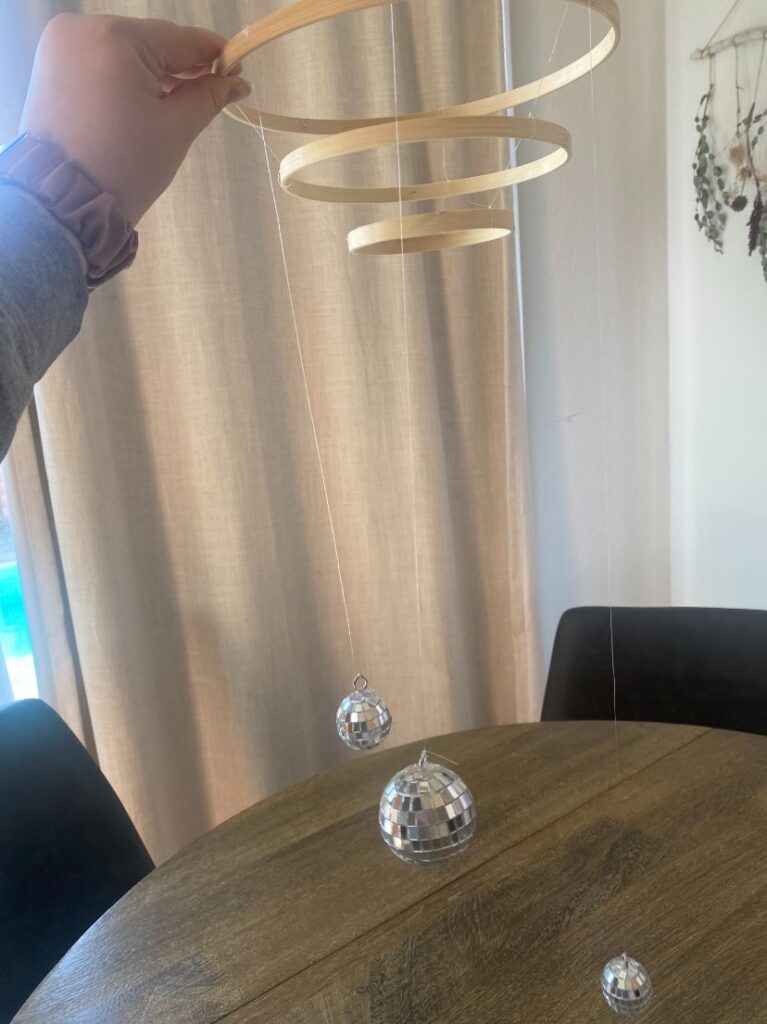
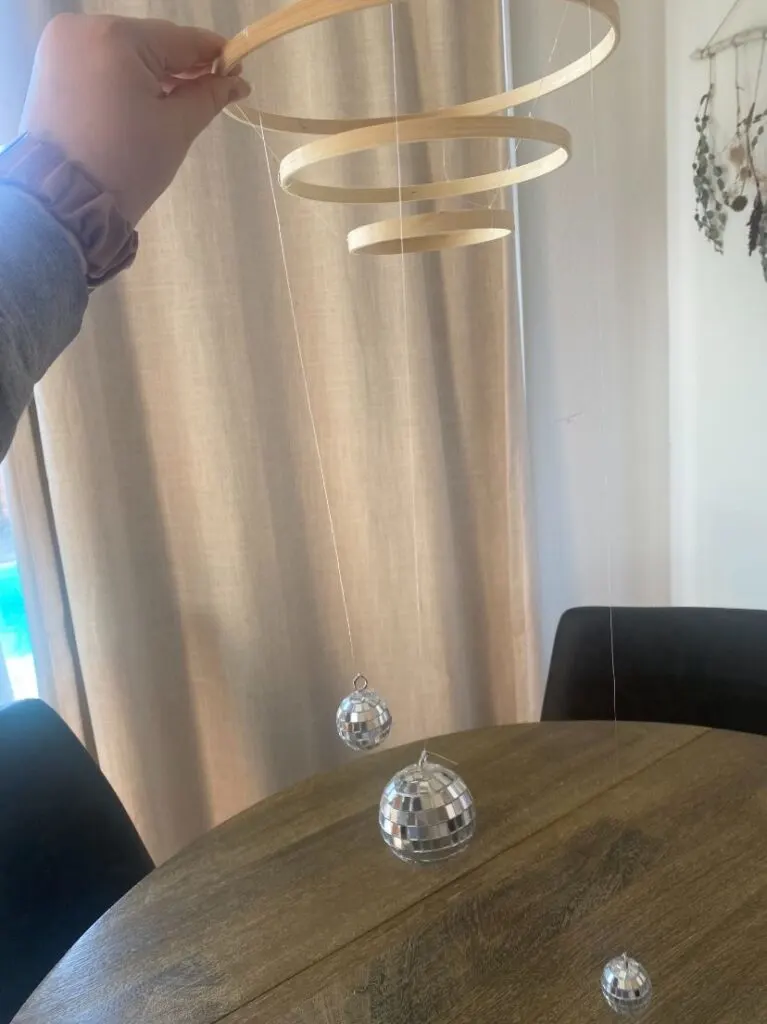
Step Five
Take your fishing wire and your disco balls. Cut a piece of fishing wire and tie one end to a disco ball. Tie the other end onto the outermost (biggest) ring.
I alternated between larger and smaller disco balls, ensuring that the rings had equal amounts of both to balance the weight. You can experiment with this until you have the placement of each ball where you like it.
If you want to make your chandelier more uniform, you can tie them with even lengths on certain rings.
I liked the look of uneven, sporadic lengths, so I went with that! Ensure your ring is balanced, with the weight even enough for the hoop to hang evenly.
Step Six (Optional)
Taking your hanger, slide the loop over the hook of the hanger.
This will allow you to hang your chandelier, which will make it easier to complete the rest of the inner rings now that your outer ring is balanced.
I hung mine on my light fixture, but if you don’t have a light fixture you can hand something from, I’d recommend a shower rod (with the shower curtain pulled away).

Step Seven
Repeat step 5 until your chandelier is full of disco balls to your liking and your rings are equally weighted. Find a sunny spot to hang your chandelier and voila!
You have a sparkly, fun, whimsical addition to your home that will bring light and joy to any space. Enjoy!
Have a look at these other fun and creative DIY projects:
- Easy DIY No Sew Apron Idea (Upcycled Dinner Napkins)
- Make A Momento Frame Using Items From Your Past!
- DIY Pressed Flower Globe – Step-By-Step Tutorial
Make Your Own Beautiful Living Succulent Wreath Centerpiece! Complete video course by Jeannine Romero now available through Skillshare.