

- Free Video Tutorial – Gratitude Farmhouse Decor Craft - July 25, 2023
- DIY Dollar Tree Bird Feeder Craft - July 4, 2023
- Embroidery Hoop Organizational Wall Art - February 28, 2023
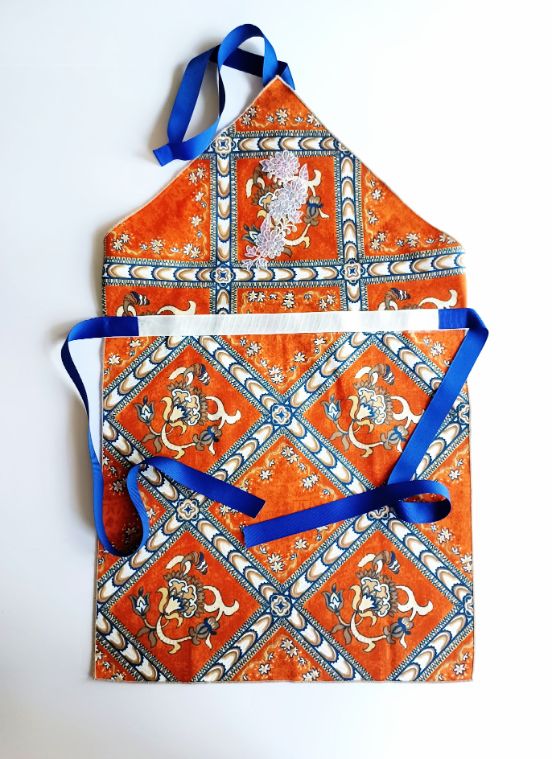
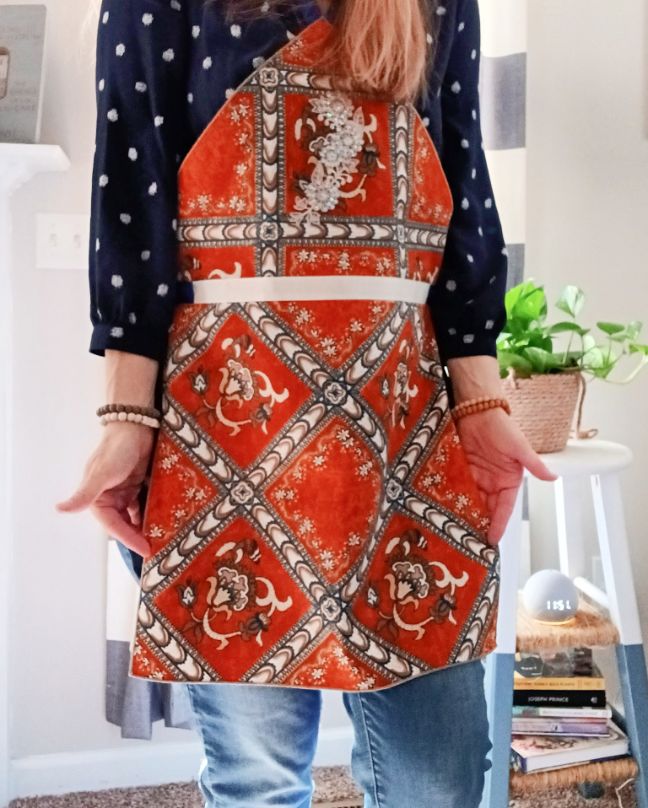
Looking for an easy DIY no sew apron? I will show you in this tutorial how to upcycle cloth dinner napkins into cute and functional aprons.
Not only is this dinner napkin apron nice to look at, but it is also incredibly budget-friendly.
Crafter level = Beginner.
Estimated time to make = 30 minutes or less.

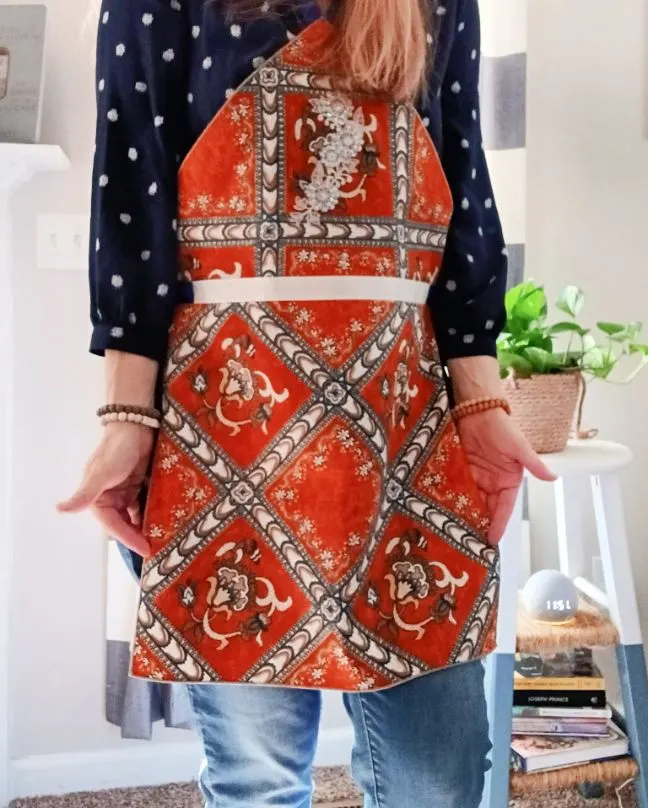
I absolutely love aprons and collecting them. I have both modern, vintage, and my own handmade items in my growing collection.
Each one represents a special season of life or a place I visited. They all hold memories of the journey to get the apron and the homemaking that followed using the said apron.
My heart smiles with the glance of each one. This new season of my life will be fondly remembered by this napkin apron.
Browsing the isles at my favorite thrift store I saw some thick dinner napkins that caught my eye. At a dollar for all of them, it was truly a price I couldn’t beat.
I have wanted a new apron, and it dawned on me why not make these into one?
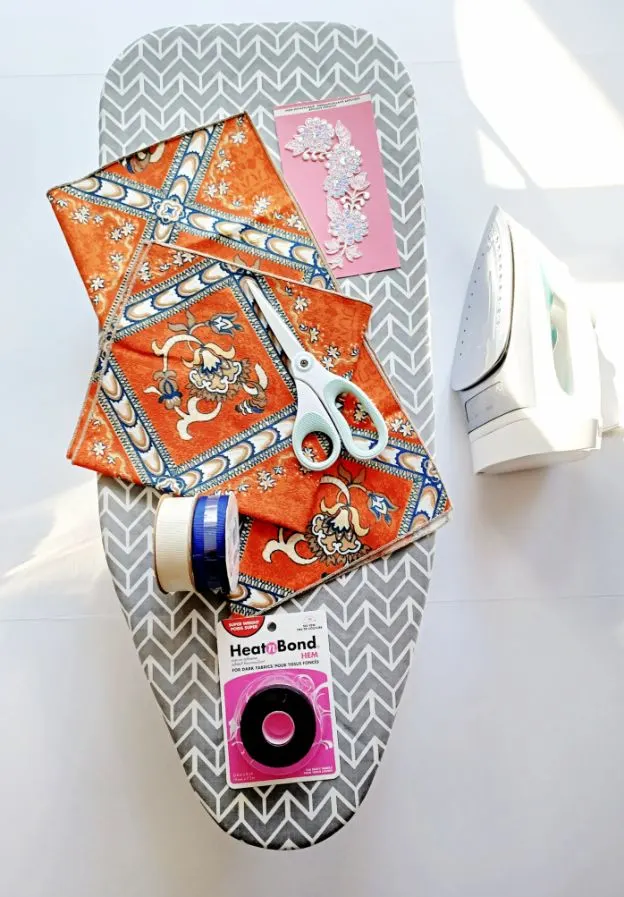
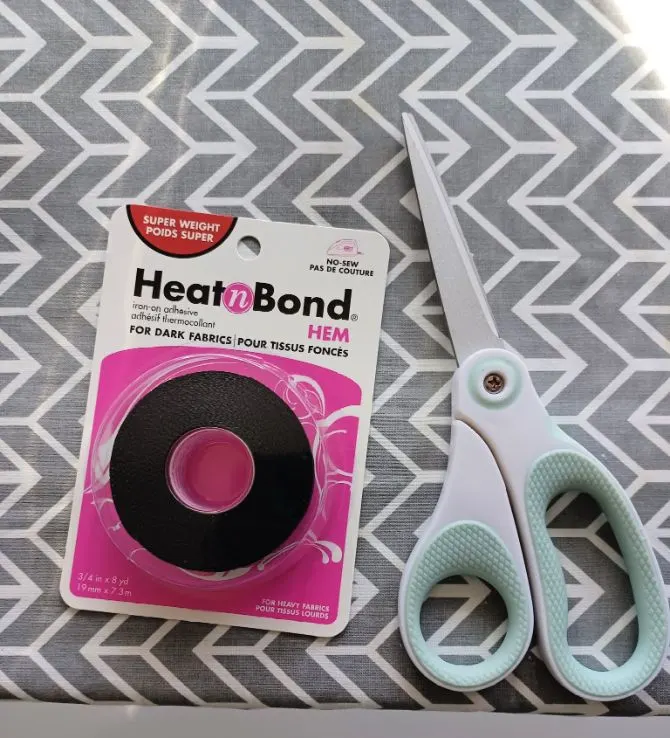
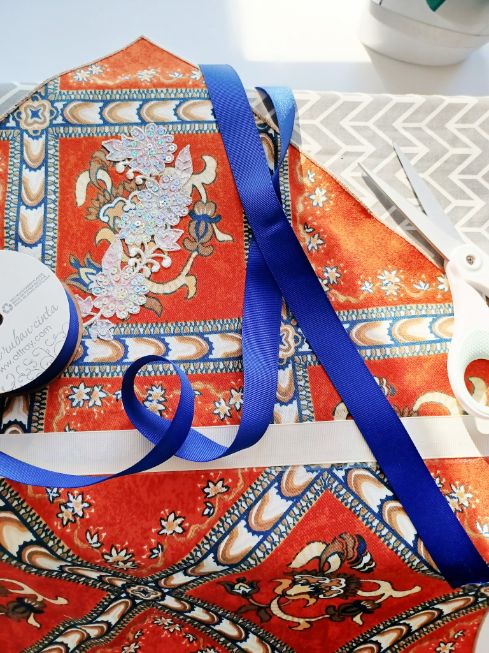
Supplies Needed
- Thick large dinner napkins (just 2 unless you need a larger size)
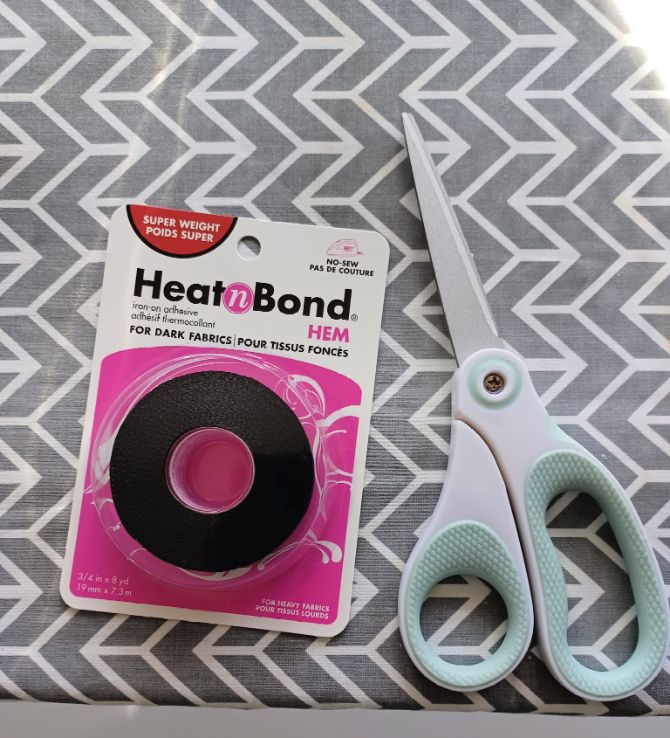
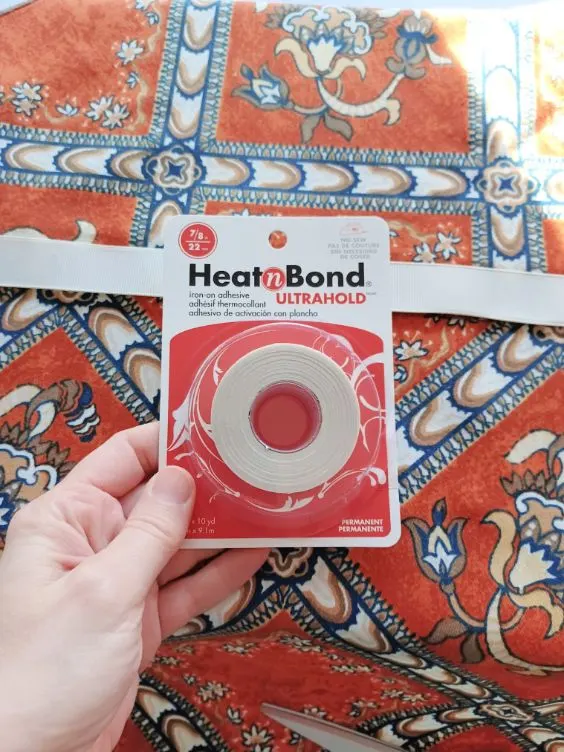
- Heat n Bond Hem Tape (link to Amazon)
- Iron
- Ironing board
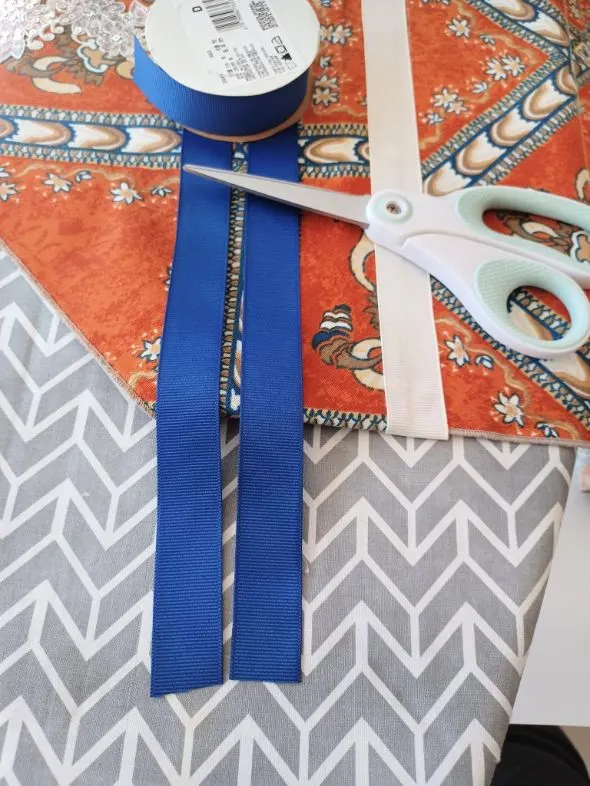
- Scissors
- Ribbon (use a thick cloth ribbon)
- Applique (optional)

Step one
Wash and Iron your dinner napkins.
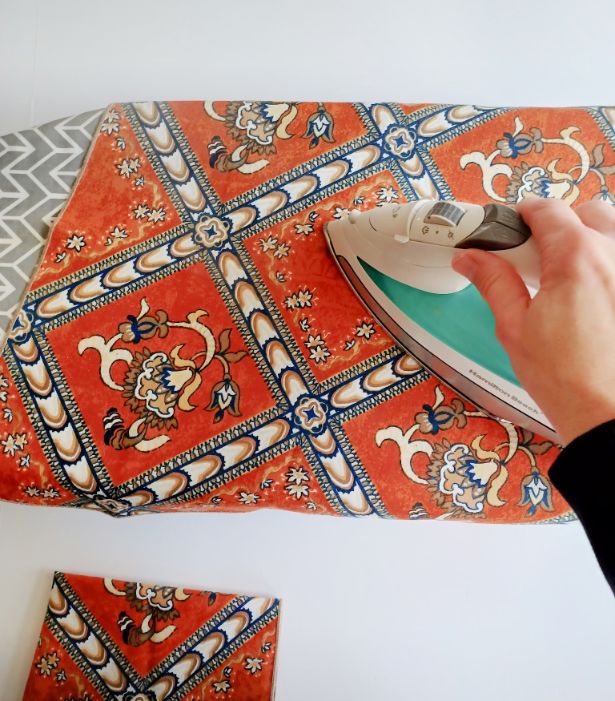

Step two
Iron the dinner napkins together.
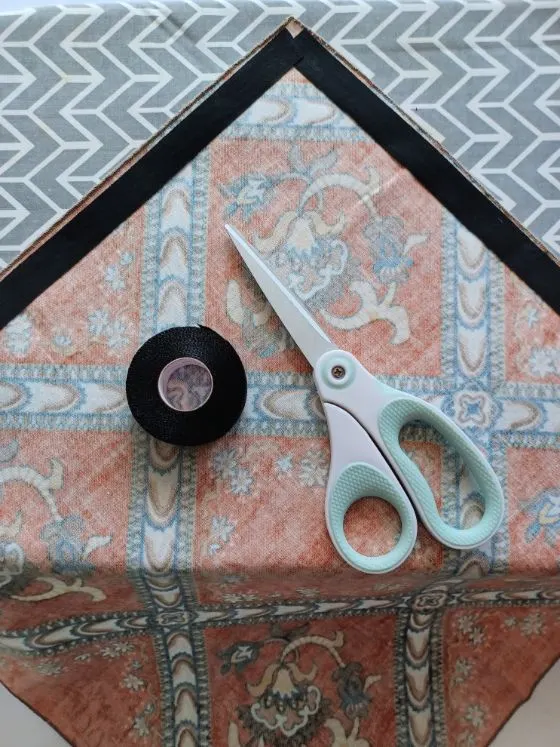
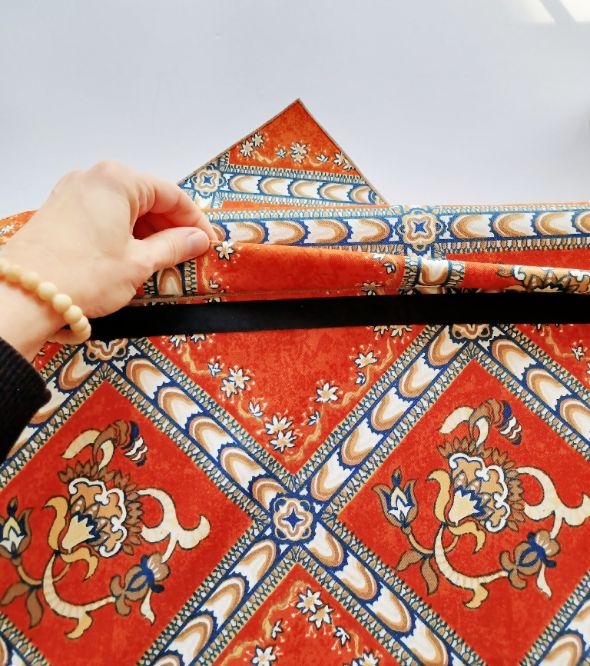
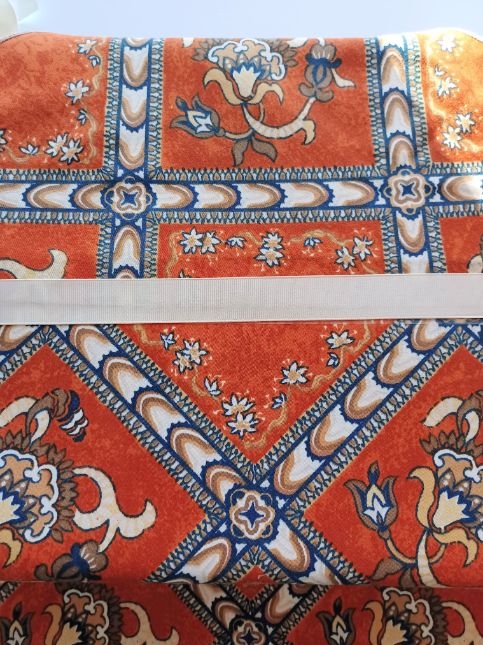
First I want to show you what shape you should have with two napkins before we iron them together so that you get the idea. Open one large napkin. Then fold the second one into a triangle once and place at top.
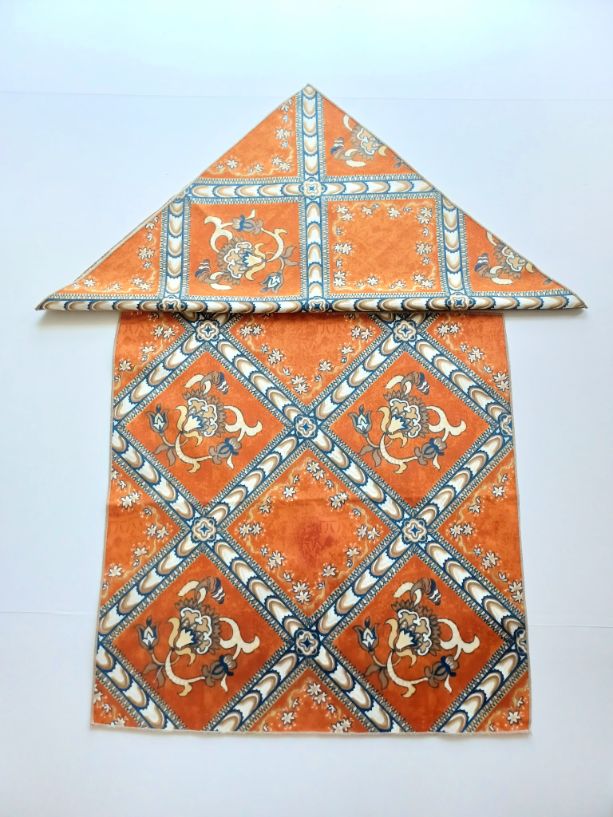
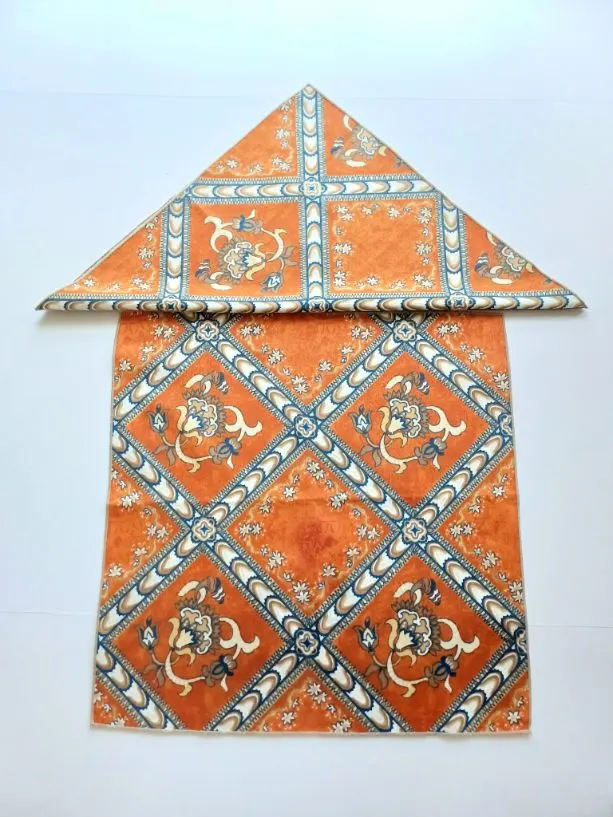
Do not worry that it looks uneven yet. We will be folding the edge of the triangles over to create an even edge later.
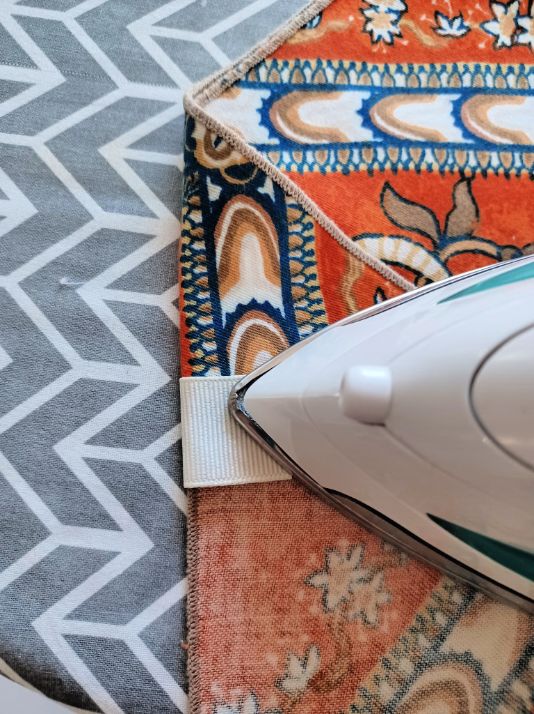
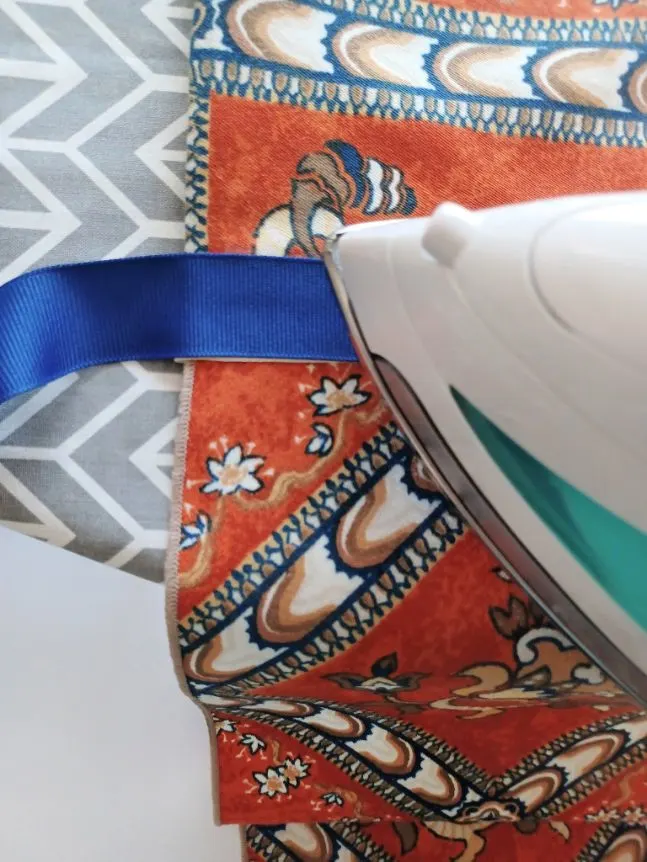
Now we need our Heat n Bond tape.
Start first with the upper top portion of your apron, the triangle. Open it and cut the tape to bond together to the inner two sides.


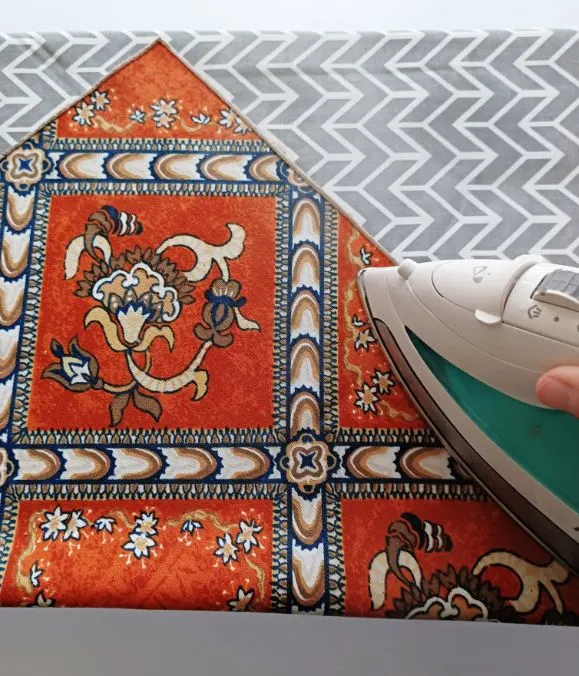
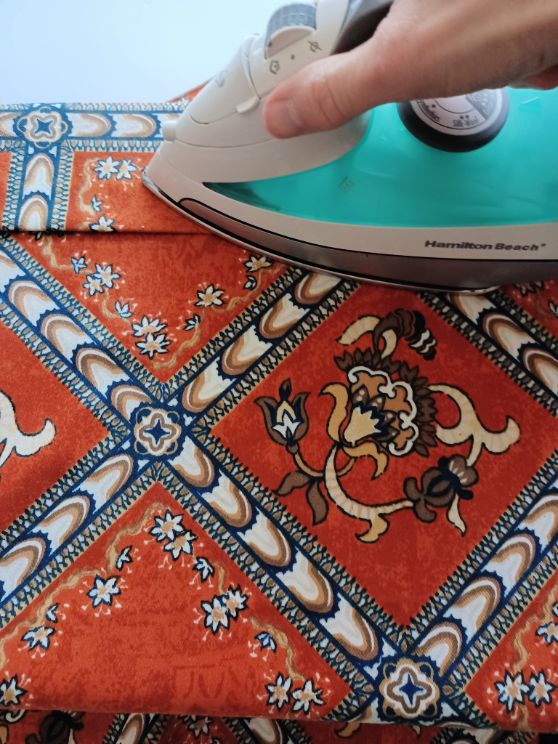
Iron them together following your particular brand’s instructions for your hemming tape.

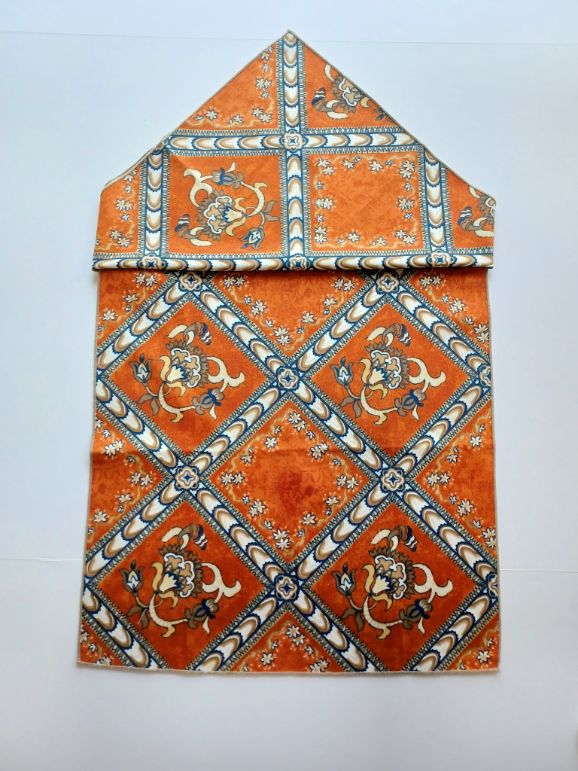
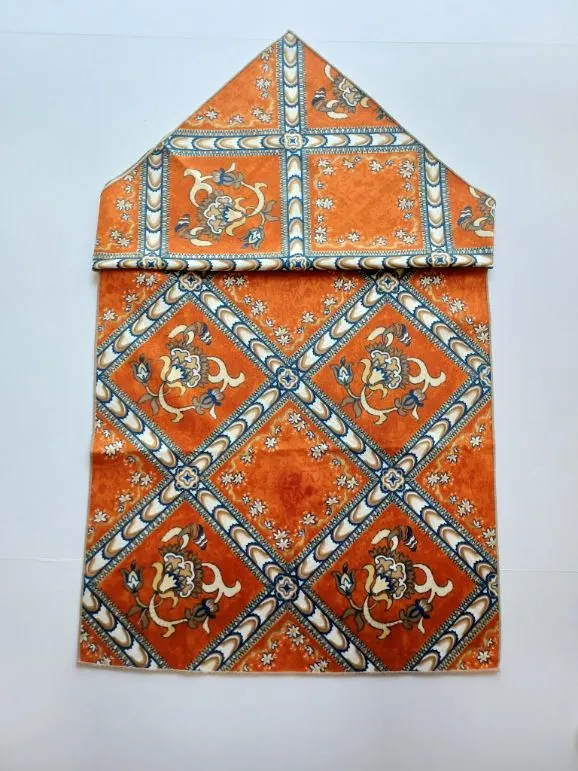
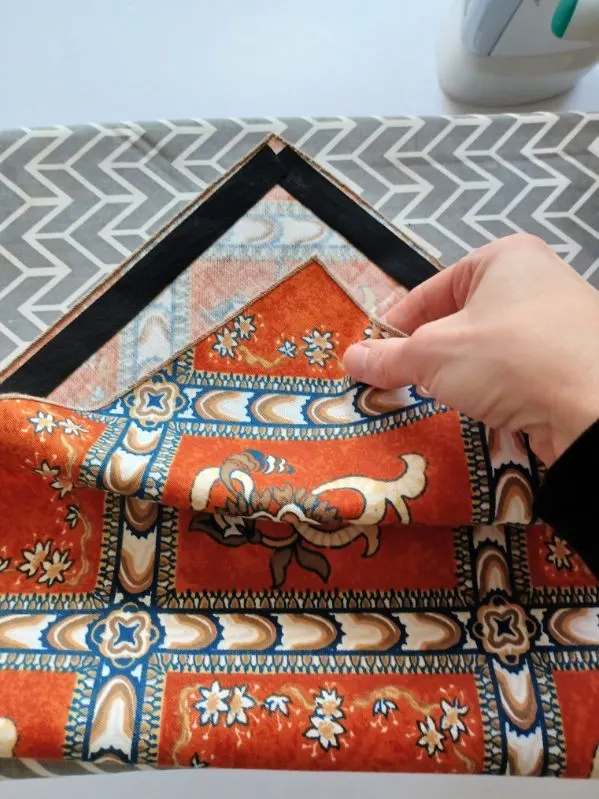
Now attach the bottom half of the apron using your hemming tape. I used the dark jeans ultra-hold hemming tape to secure the top and bottom. I could get away with the dark color tape because my fabric was so thick and dark. For lighter fabrics use white.

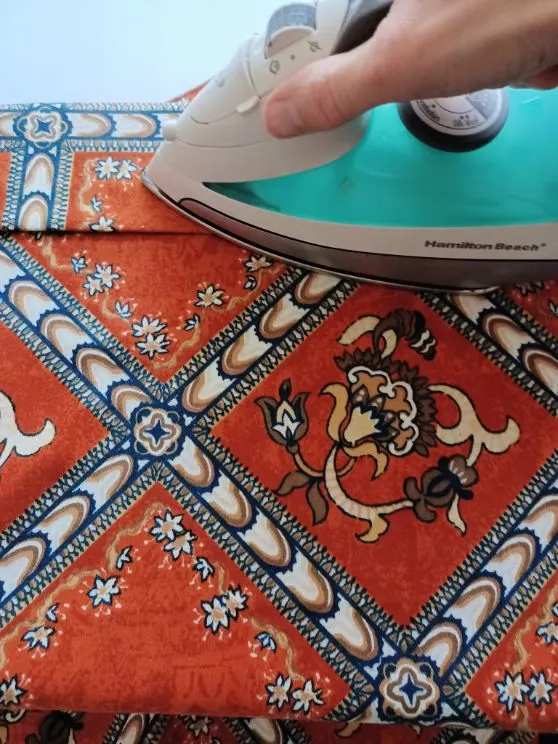
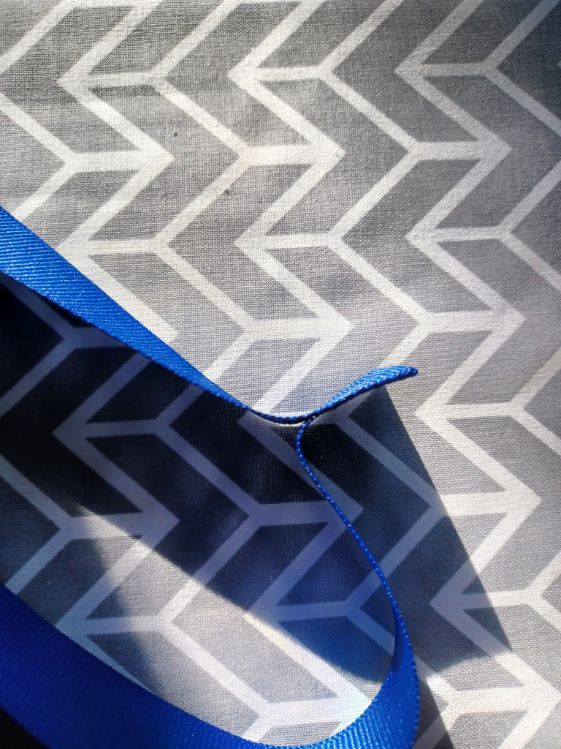
Fold your little triangle edges that jut out over and tack down with hemming tape.

Step three
Add your decorations and tie ribbons.
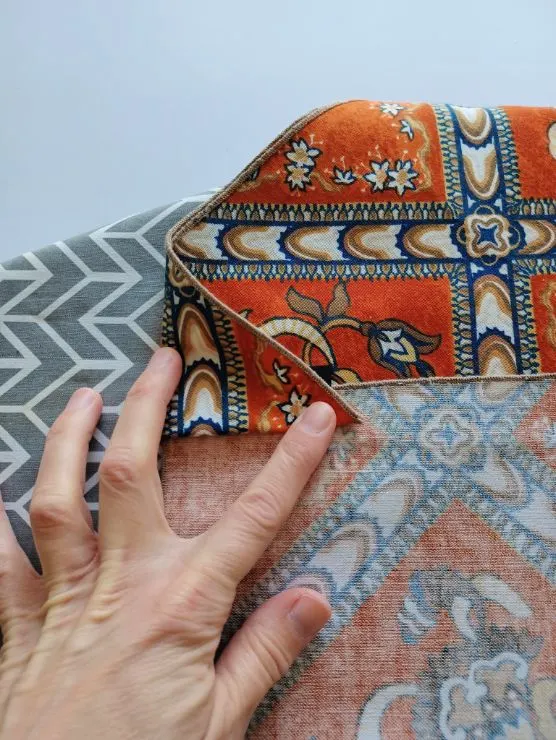
Next cut the ribbon you would like for the front decoration. I wanted a lite cream color to add some contrast. I used a lighter color hemming tape since my ribbon is lighter.
I cut the tape to fit the front waist hem. I ironed the ribbon in place. Make sure when you cut it you leave a little extra to fold over.


Now, this next part is completely optional. I had an extra ornate applique in my sewing box. I had thought to myself why not use it on the apron?!
So that is what I did.
You could use some you have or purchase one if you want to jazz up your apron with a little extra pizazz.

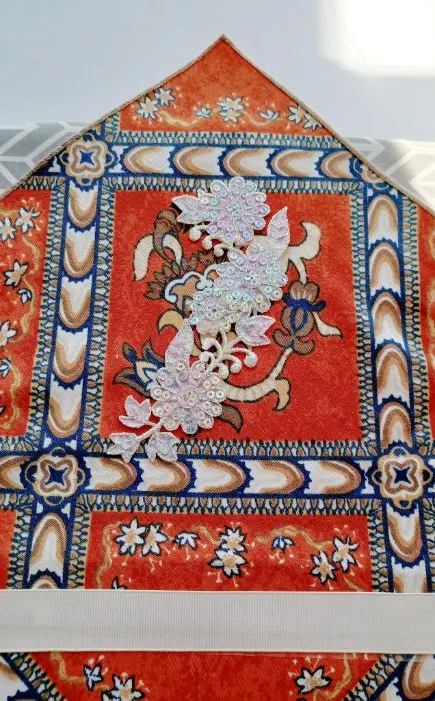
I wanted the same blue in my apron design as my apron ties. I think it gave it pop.
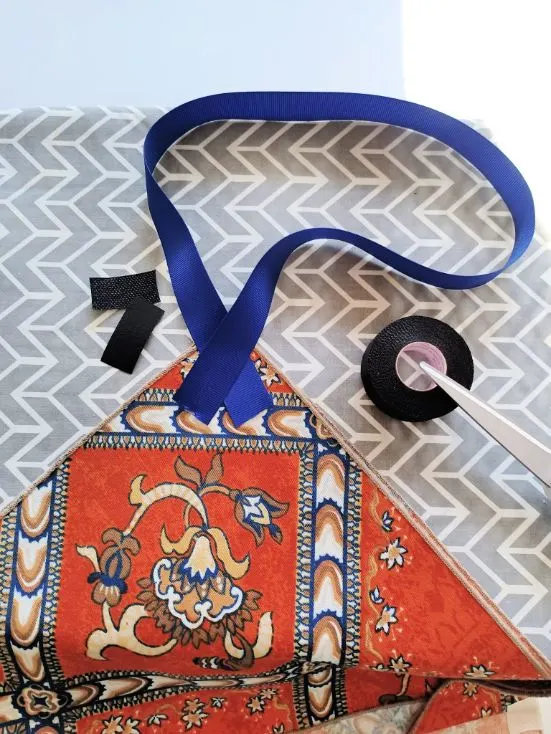
Take the ribbon you will use for your neck holder and cut a piece you think will fit over your head well once attached to your apron. I suggest draping it around your neck like so.
We will be doing a simple slip-over neckpiece, no two-piece ties.


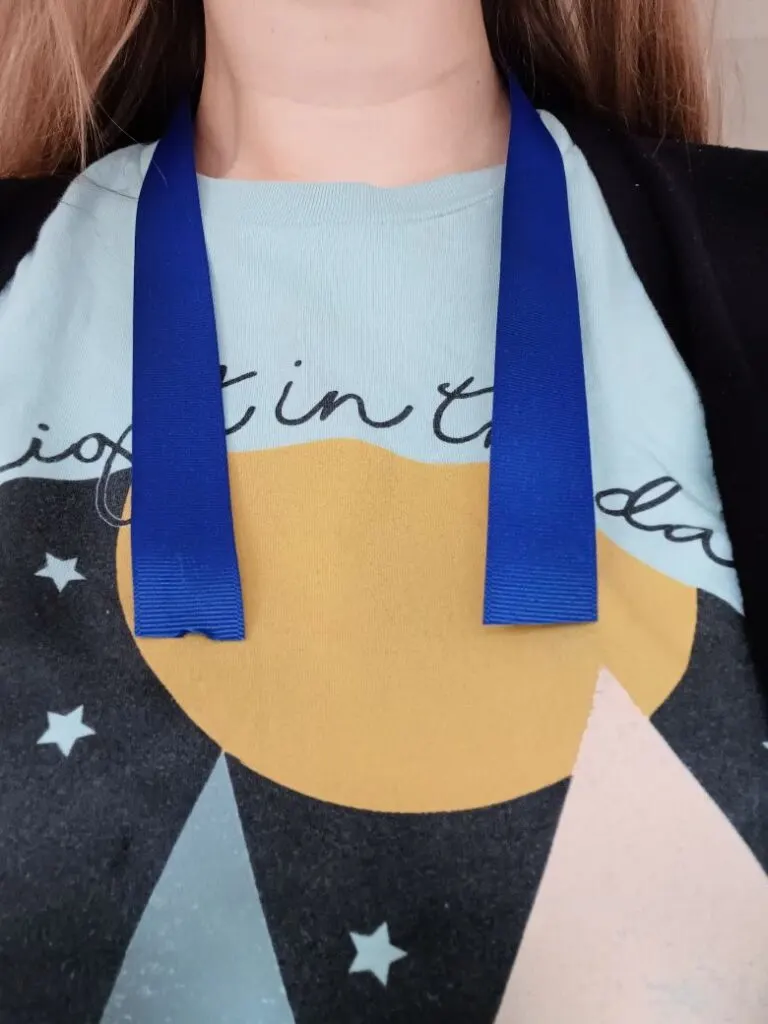
Now flip your apron to the back and crisscross your ribbon as seen below and secure it with your hemming tape.

Now cut the ribbon you will use to tie your waist and sides together. I used the same color as my neck loop color.
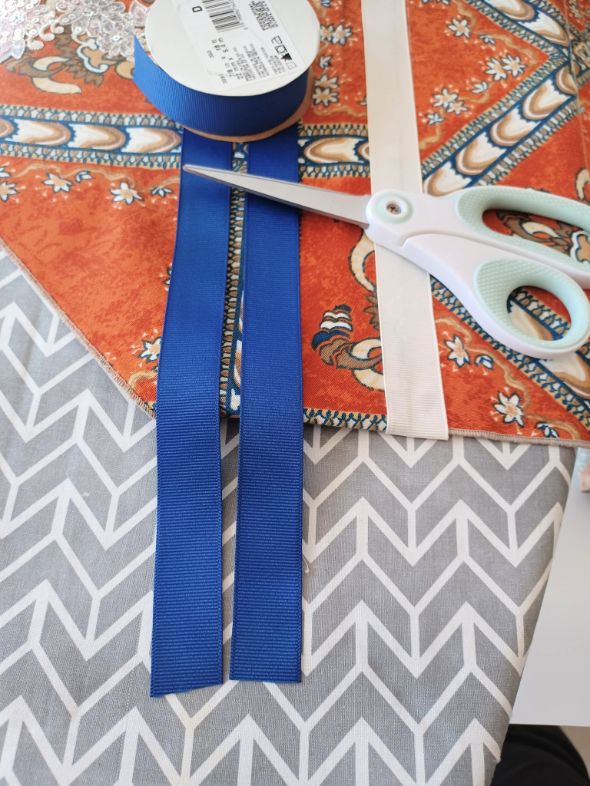
Flip back to the front and cut some tape to iron on the ribbon to the edge of your side.

Bonus tip
If you made your neck loop too big do not worry. Just cut a piece of hem tape to match the amount you need to adjust the slack and iron on like so.

Enjoy your new apron!
The amazing thing about these aprons is that they look great but they are durable because dinner napkins are meant to be used and get dirty! So are these aprons.
I have seen people have aprons they never wear in order to not get them dirty, I say what’s the point?
These are stylish enough to wear when hosting a dinner party, yet when splatters happen just toss them into the wash.


Here is a little side history of aprons!
Aprons have been around for centuries, and their history tells us a lot about the changing roles of women and men in the home.
The earliest aprons were worn by women in ancient Greece, where they were used to protect their clothing while they cooked, cleaned, and did chores. In the Middle Ages, aprons were used by both men and women as a way to protect their clothing while they worked in the fields.
Something changed during the Victorian era. In the Victorian era, aprons became fashionable as a way to protect clothing from dirt and grime. During this time, they were often made of bright, colorful fabrics and decorated with lace, ribbons, and embroidery.
In the early 20th century, aprons were associated with housewives, who were often portrayed in ads wearing them. However, aprons have made a comeback in recent years and are now seen as a stylish and practical way to protect clothing from spills and stains.
I am so glad because I love the fashion of aprons and I hope you like this one!
Here are some more fun and creative DIY craft projects you may enjoy:
- Make A Momento Frame Using Items From Your Past!
- DIY Farmhouse Chalkboard Craft (5-Step Project)
- Love Pops DIY Upcycle Craft Project (Fun and Simple!)
Make Your Own Beautiful Living Succulent Wreath Centerpiece! Complete video course by Jeannine Romero now available through Skillshare.