

She enjoys all aspects of home DIY- from simple crafts to complete home remodels.
- Clay Moon Phase Wall Hanging - July 4, 2023
- What To Do When a Toddler Won’t Keep Their Blanket On - June 10, 2023
- How Do Child Locks Work in Cars? (And When To Use Them!) - June 10, 2023
I’ve never been the best at tying knots. I never learned any cool scout knots or sailor’s knots or even fishing knots. That’s why, when I saw these earrings, at first, I was scared.
But once I saw how the knots were tied, I realized it was actually pretty simple! The best part? You can use any combination of colors that you’d like in any pattern!

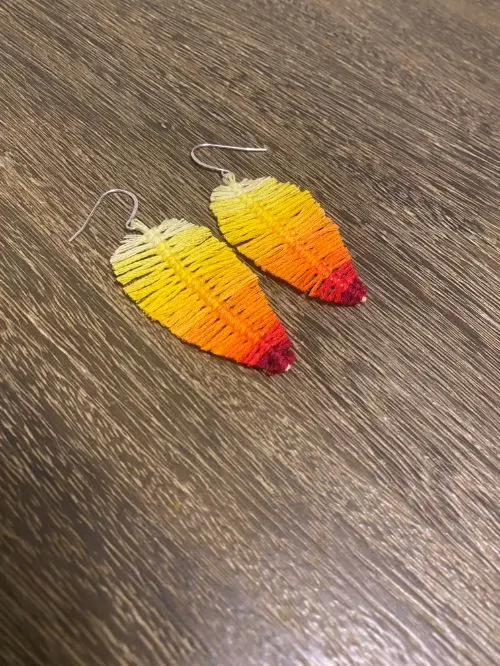
Follow along below to make these adorable earrings.
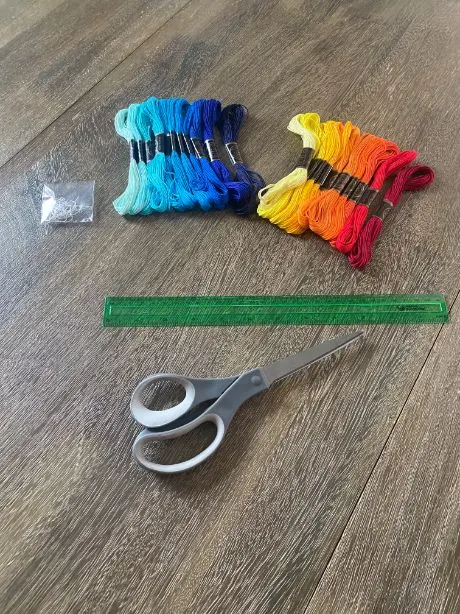
Supplies Needed:
- Embroidery floss (link to Amazon)
- Scissors
- Earring hooks (link to Amazon). These are sterling silver for allergy purposes, but you can buy whichever metals work for you!
- A brush with bristles (like a teasing brush)
- A ruler
- Cardboard

Step One:
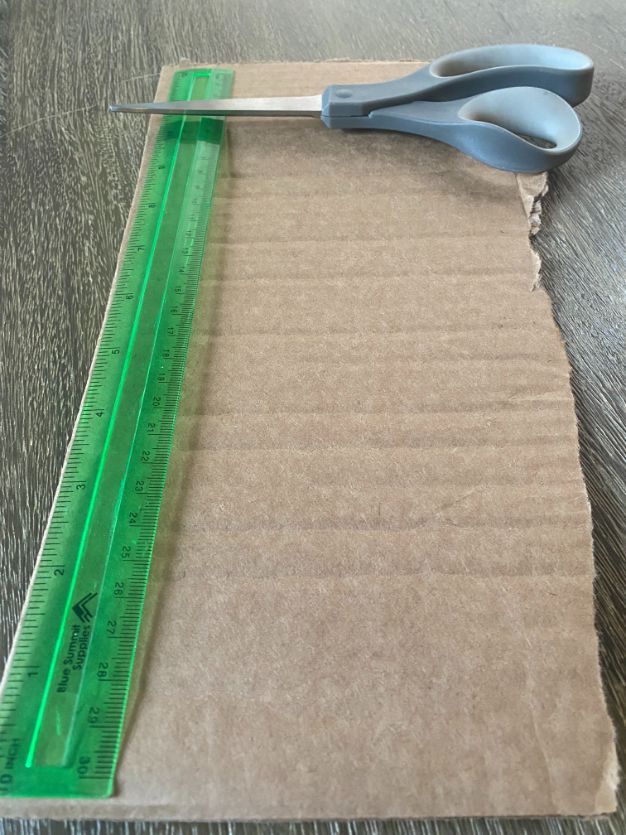
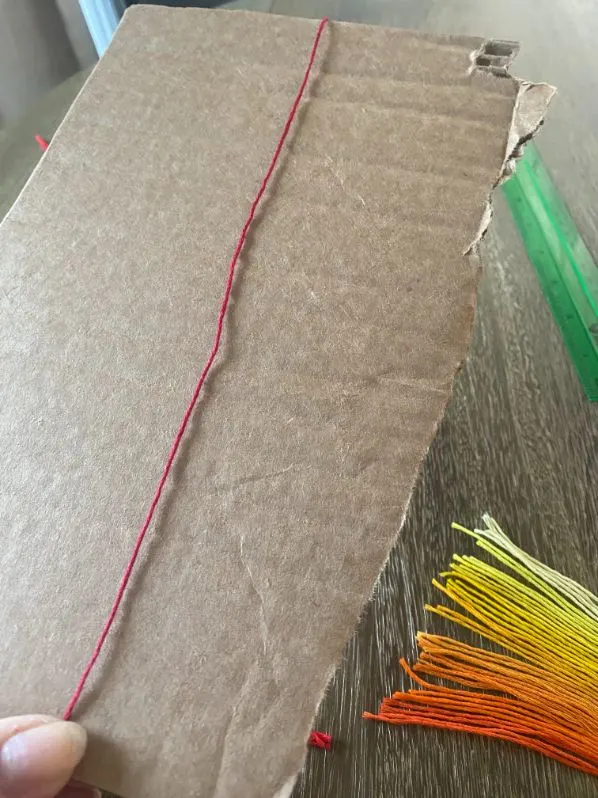
Decide your pattern. I chose ombre! You will be measuring several strands at 10 inches, so I recommend finding a piece of cardboard and measuring and cutting it at 10 inches so that you can wrap your embroidery floss around the cardboard to measure it.
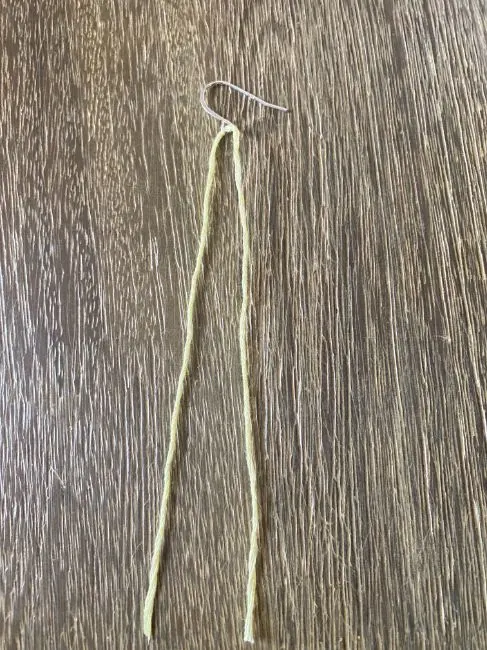
Decide what color you want the top loop of your earring to be, and cut a string that is 10 inches in length.
I initially chose the lightest color (the color at the top of the earring, but later I realized that this light color would peek through the bottom, so I’d recommend starting the loop with whatever the last color of your pattern will be.

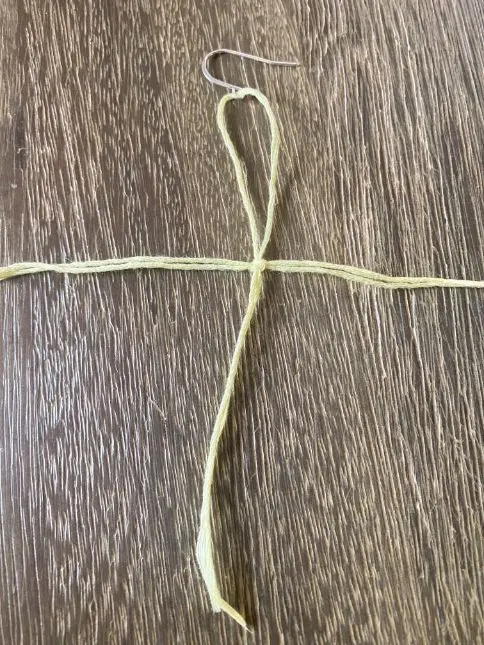
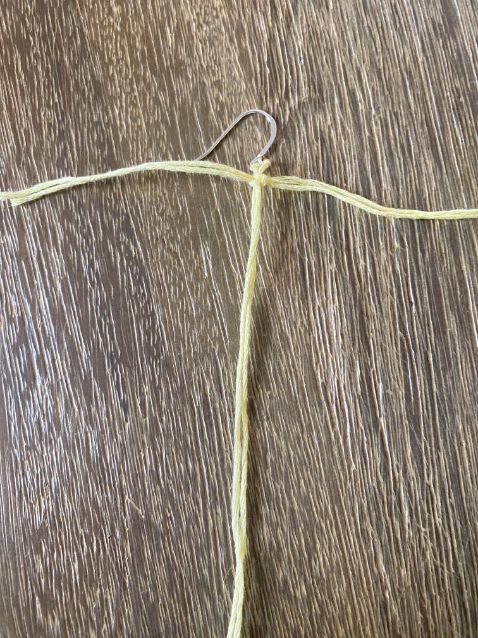
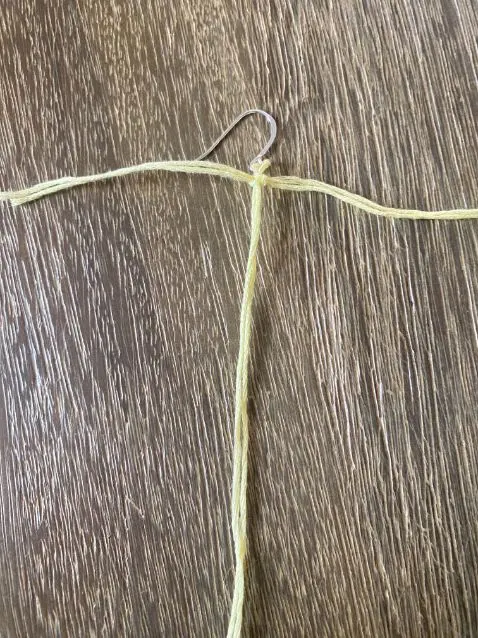
Step Two:
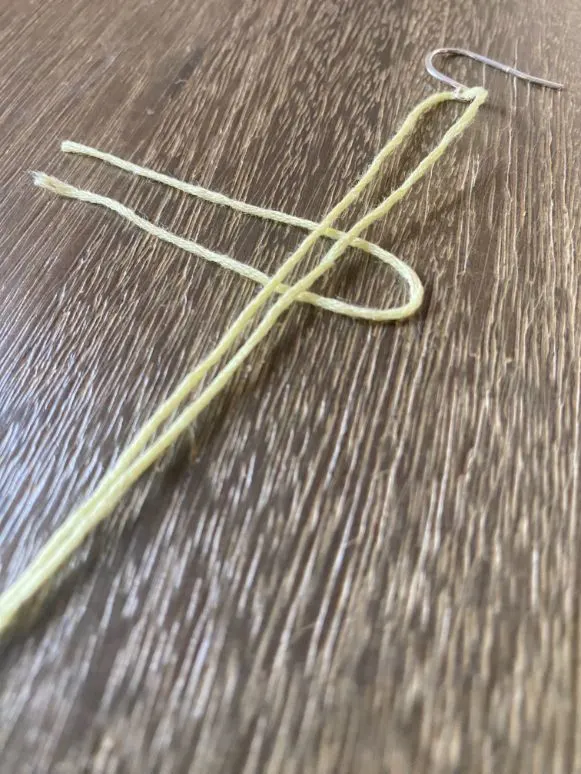
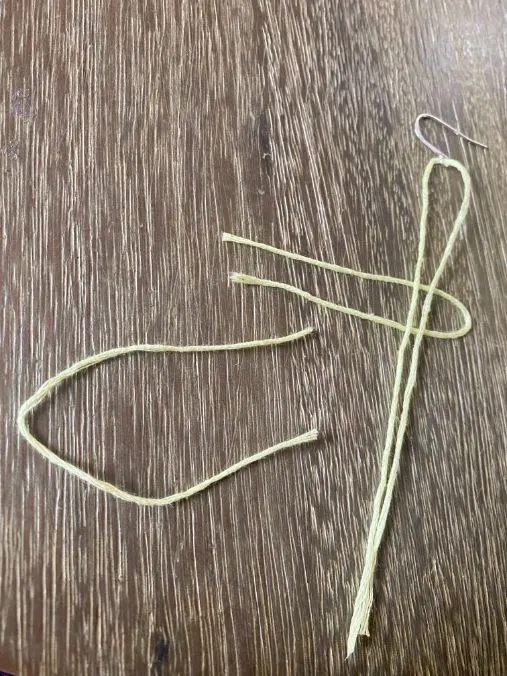
Fold this 10 inch string in half. Take one end of the string and thread it through the loop of one of the earring hooks.

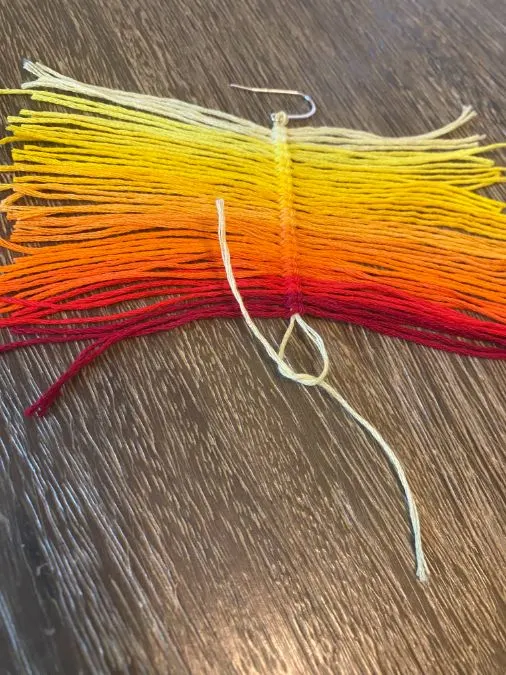
Step Three:
Grab the embroidery floss in the first color of your pattern, the one that will be at the top of your earring (mine was light yellow).
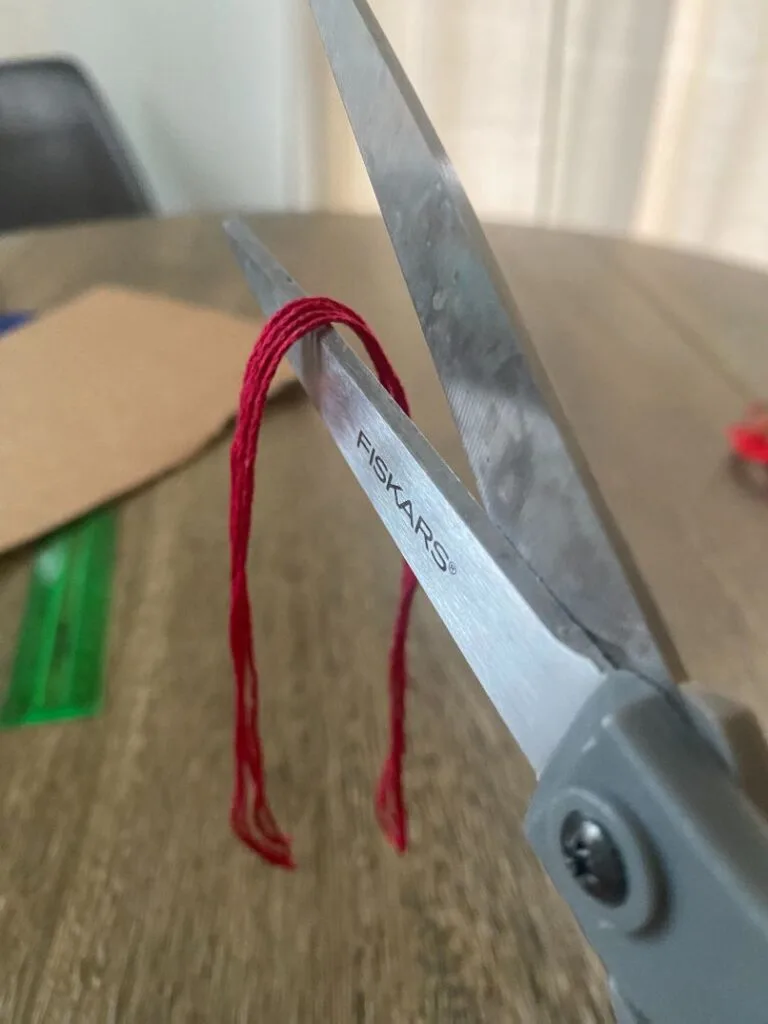
Take your piece of cardboard and wrap this color completely around the cardboard twice, so that you technically have 40 inches wrapped around it.
Cut these strings at both ends of the cardboard so that you have 4 10 inch strings. Fold these all in half and cut again. You should now have 8 strands that are 5 inches long.
Set 4 of these aside for the second earring that you’ll make.


Step Four:
Take one of the 5 inch strands and fold it in half.
Place the folded end underneath the longer strings that are attached to the earring hook, making sure that the two loose ends of the string are facing out (to the left).

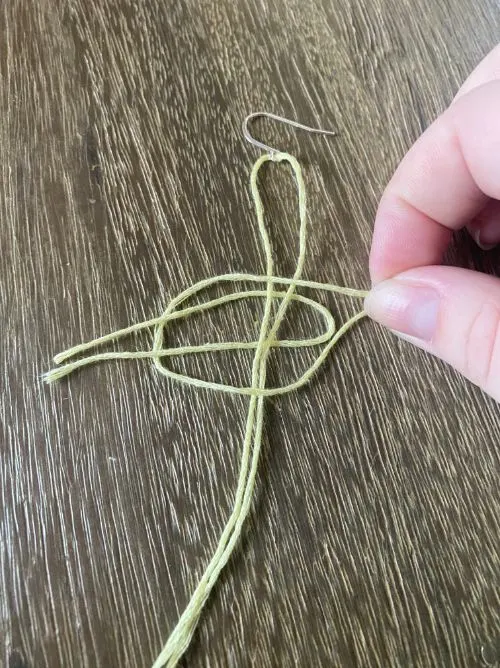
Step Five:
Take another 5 inch string and fold it in half. This is where you’ll intertwine the two strings to form a knot around the long strings.
Take the side of the string you just folded in half that has the fold/loop on it, and put the ends of the string that’s facing left OVER/through the folded loop of the other folded string.

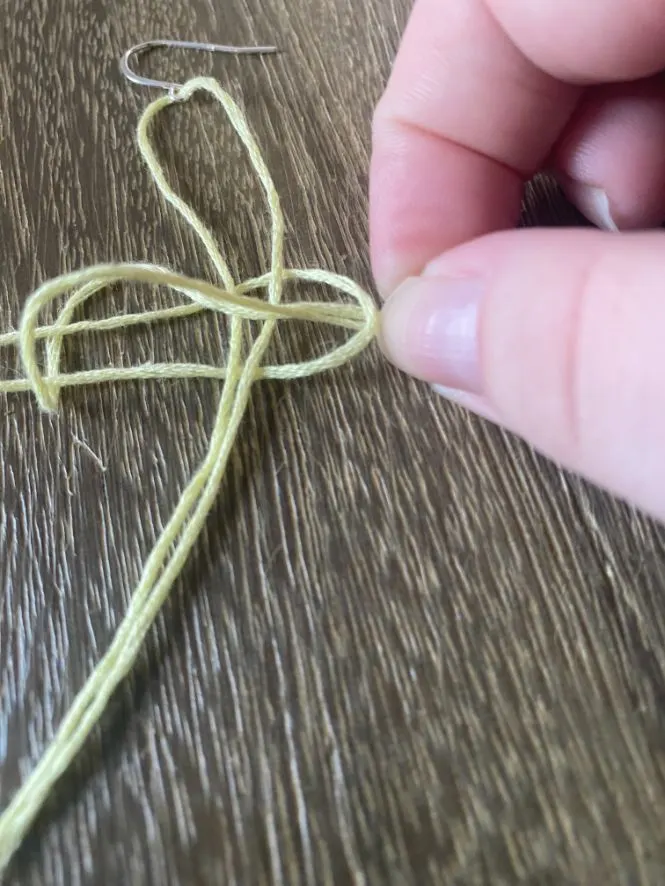
Step Six:
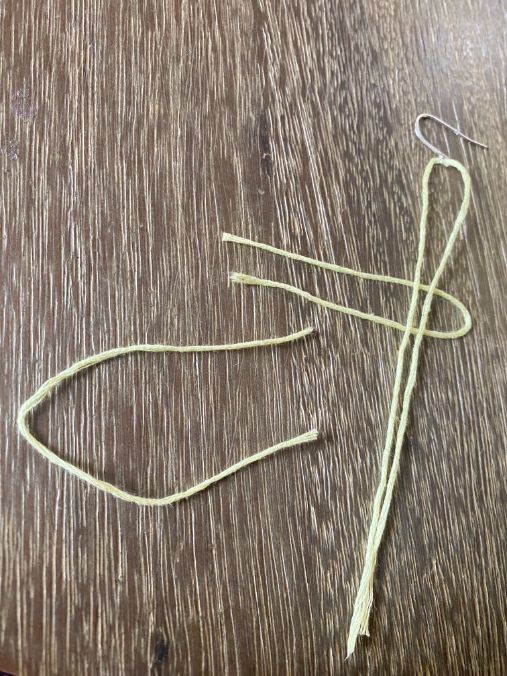
On the right side, take the loose ends of the string that are facing right and put them UNDER/through the folded/looped end of the other string.
Now, you can pull all four ends that are facing outward at the same time.

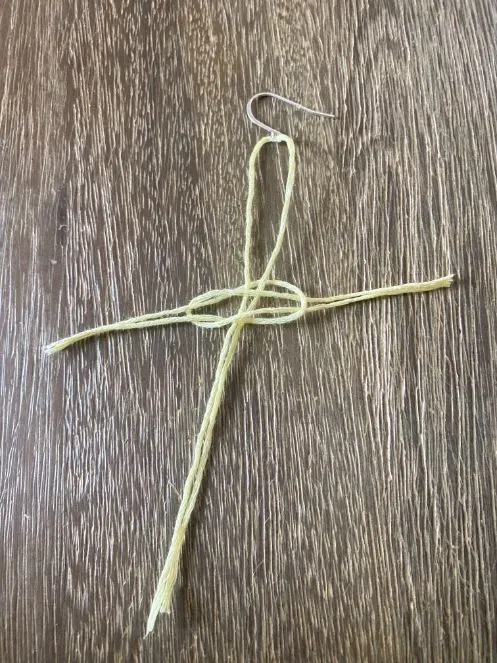
Step Seven:
Pull these ends tight to form a knot.

Step Eight:
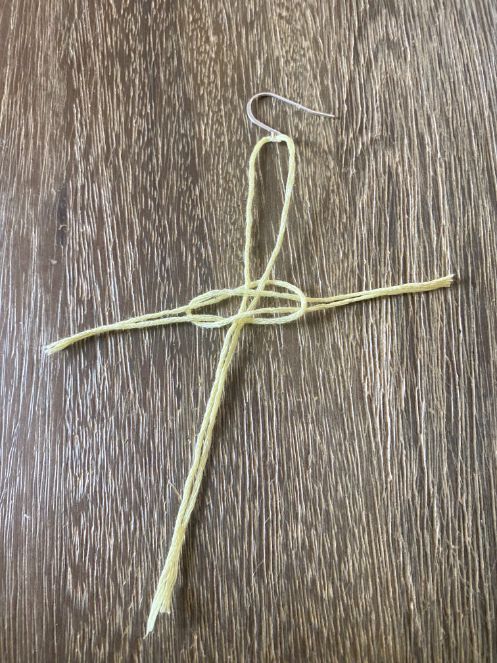
Pull this knot that you just made to the top of the earring, wherever you’d like the string pattern to start.
Step Nine:
Repeat steps 4-7 until the earring is covered in knots to the length you’d like it to be. It will most likely not need to be the full length of the long string that’s attached to the earring hook, unless you want to make super long earrings!
Tie the ends of your long string together twice, forming a double knot that is slightly tucked beneath the last knot in your chain of knots.
This should be the same color as your last knots, unlike my example, so you can leave these strings hanging off the bottom. If you did what I did, you’ll need to cut off the excess.

Step Ten:
Take your bristled brush and begin to brush one side of the floss out.
It may cause your embroidery floss to curl, so go slow and smooth it back out with your fingers as you go.
In this photo, the right side has been brushed and the left hasn’t. It just creates a more fringed look, which I think adds a nice texture to the earrings. Repeat this step on the other side.


Step Eleven:
Take your scissors and cut the fringe in whatever shape you’d like. Repeat Steps 1-10 to make the second earring, and voila! Enjoy your adorable embroidery floss fringe earrings!
Here’s more simple and fun DIY craft projects you may enjoy:
- Embroidery Hoop Organizational Wall Art
- Make A Momento Frame Using Items From Your Past!
- DIY Pressed Flower Globe – Step By Step Tutorial
Make Your Own Beautiful Living Succulent Wreath Centerpiece! Complete video course by Jeannine Romero now available through Skillshare.