

- How To Make A Summertime Watermelon-Themed Wall Hanging - January 27, 2023
- How to Tie Dye with Sharpies (Quick And Simple Craft Project) - November 10, 2022
- DIY Wooden Christmas Wall Hanging Project - October 27, 2022
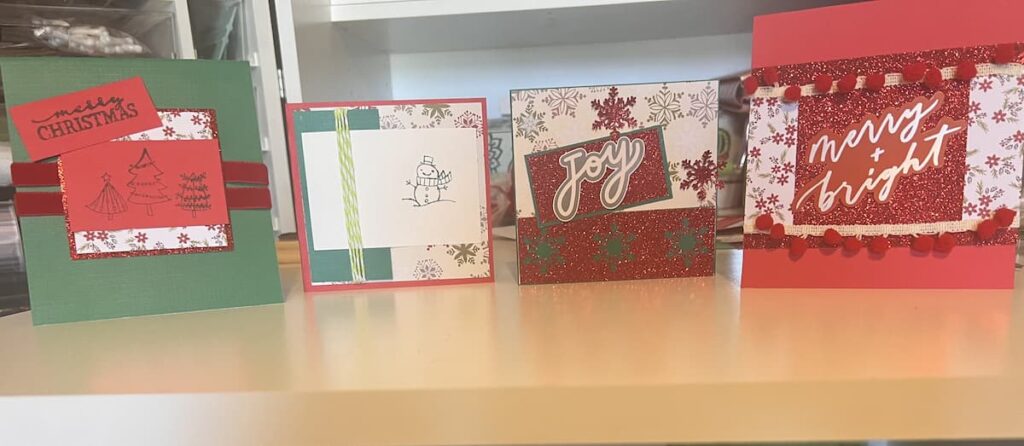
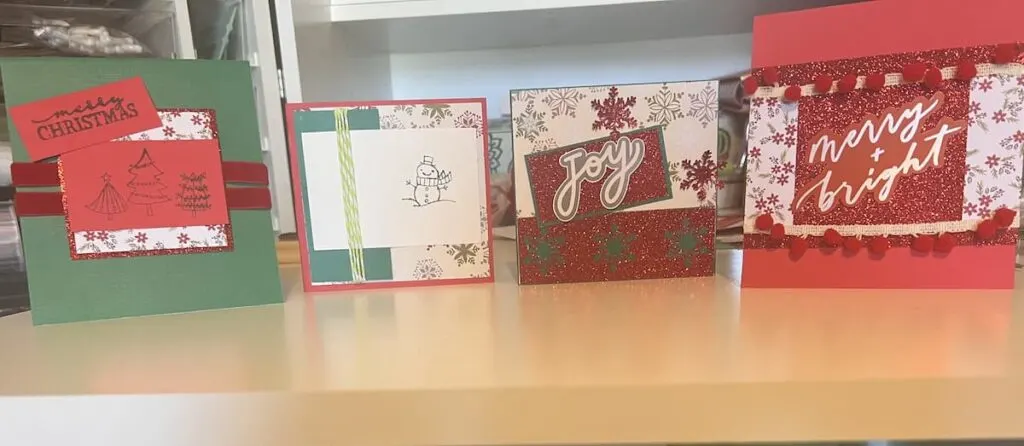
Creating 4 Christmas cards to brighten your friends’ and families’ day with just five pieces of paper. This simple craft will make anyone’s holiday special.
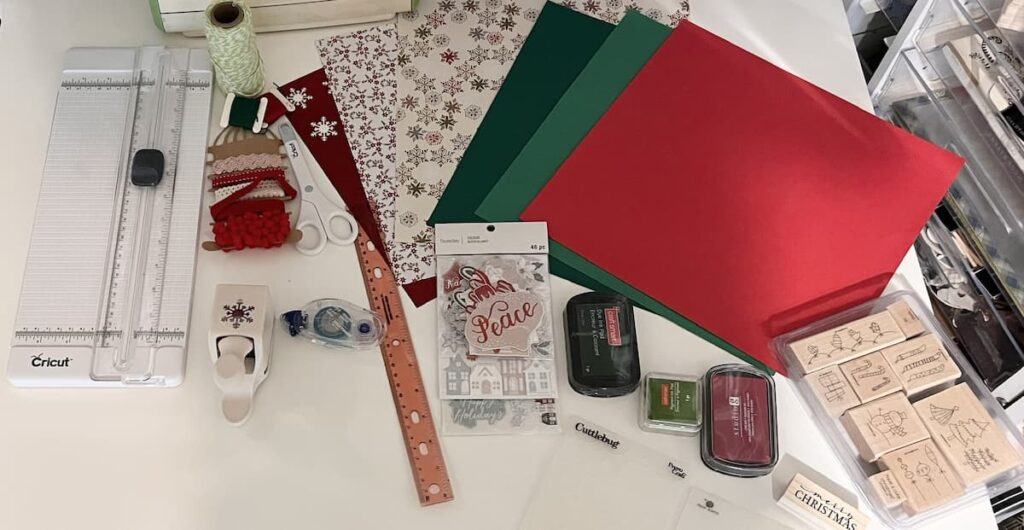
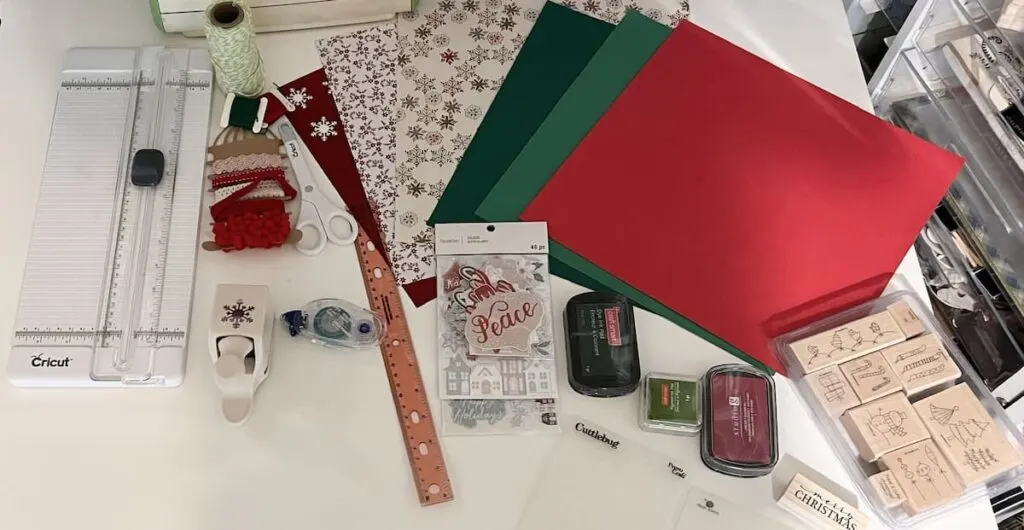
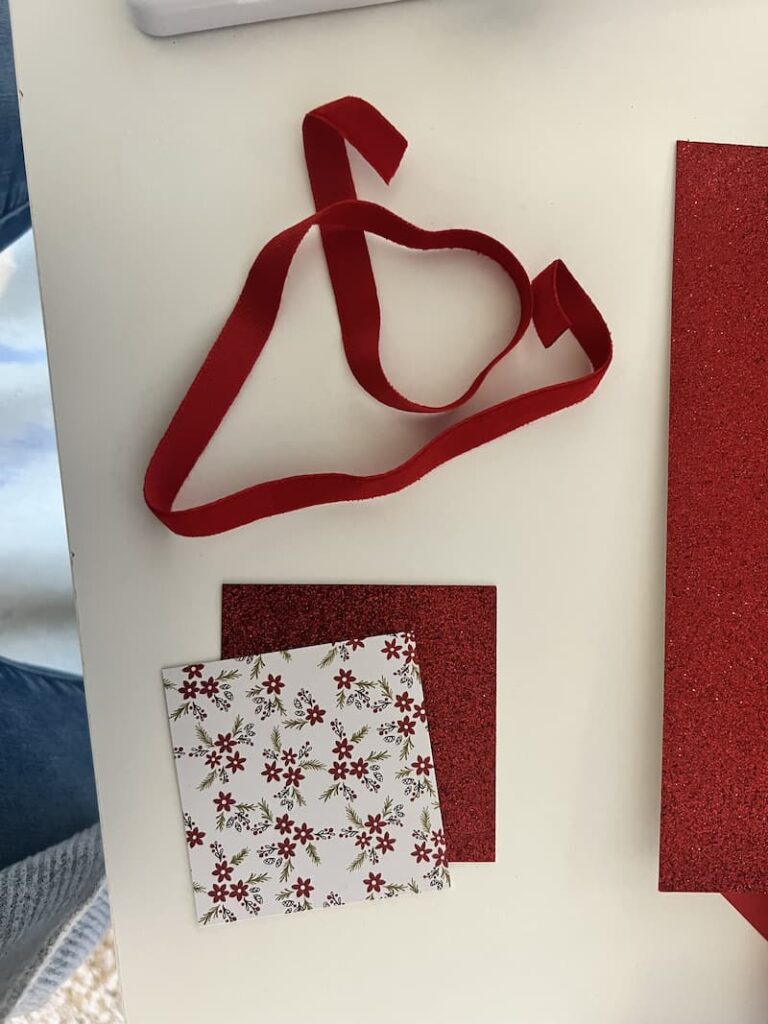
Supples:
- 2 pages of cardstock red and green
- 3 pages of accent paper: snowflake, poinsettia, red sparkle
- 1 4×2 5/8 sheet of white card stock
- Craft glue or glue dots
- Christmas Stamps, green
- Ribbon pack (Michaels craft store)
- Christmas sticker pack (Michaels craft store)
- Envelopes
- Ruler
- Paper cutter
- Scissors
Start by selecting your base card stock and accent paper. You can buy cardstock by the sheet at most craft stores or in stocks of various patterns.
For larger cards Cut base card stock to 5“ wide and 11.5“ long. You will do this with both red and green. Score in the middle to fold your card easier.
For smaller cards Cut base card stock 4 5/16 x 9 1/2. Do this in both green and red. Score the middle and fold in half.
You will have 2 large cards and 2 smaller cards.
One 12” x12” sheet of cardstock will give you two cards. Save the extra for later!


Card #1
Using the large green card base. This card opens from bottom to top
Cut accent card stock to pattern #1 3 x 3 and sparkle 3.5” x 3.5” and red 3 1/16” x 1 9/13” for tree stamp and red 2 9/16” x 1” for merry Christmas stamp and pattern #1 4 9/13” x 5 1/2” for inside top to cover ribbon

Cut 22” red ribbon and glue to the back of the card, wrapping it around the front and back twice. It’s ok if the inside is messy, we will cover it!
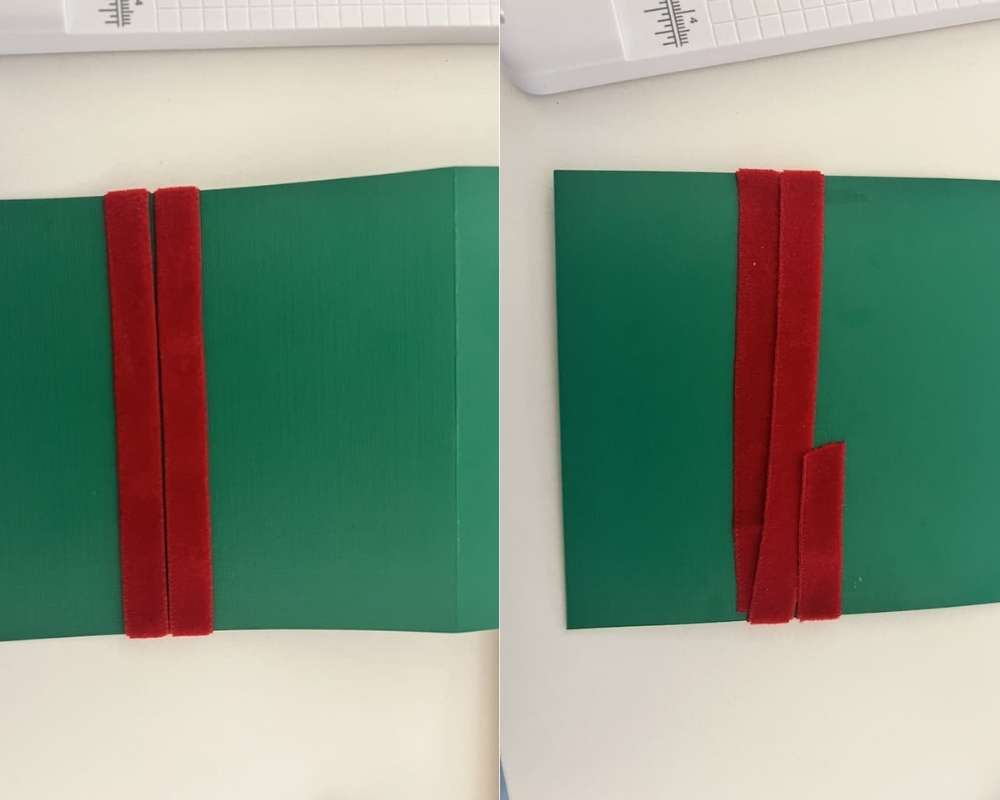
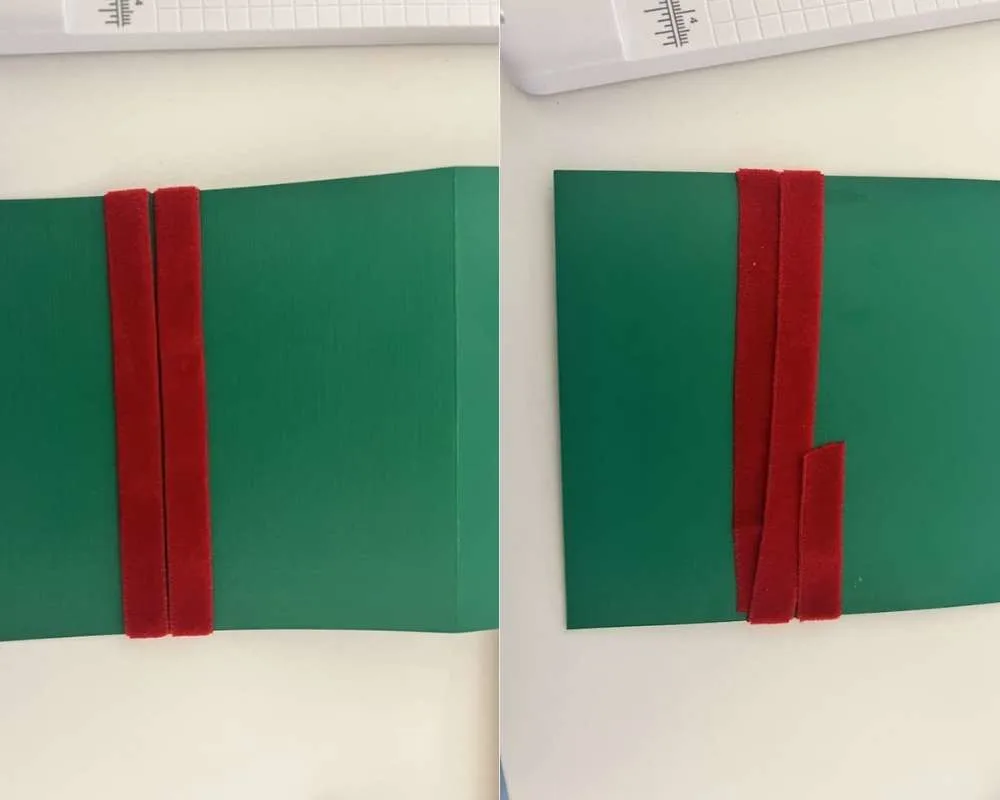
Glue accent paper 1 into the middle of accent paper 2. Glue to the middle of the card over the ribbon, creating a layered look like this:
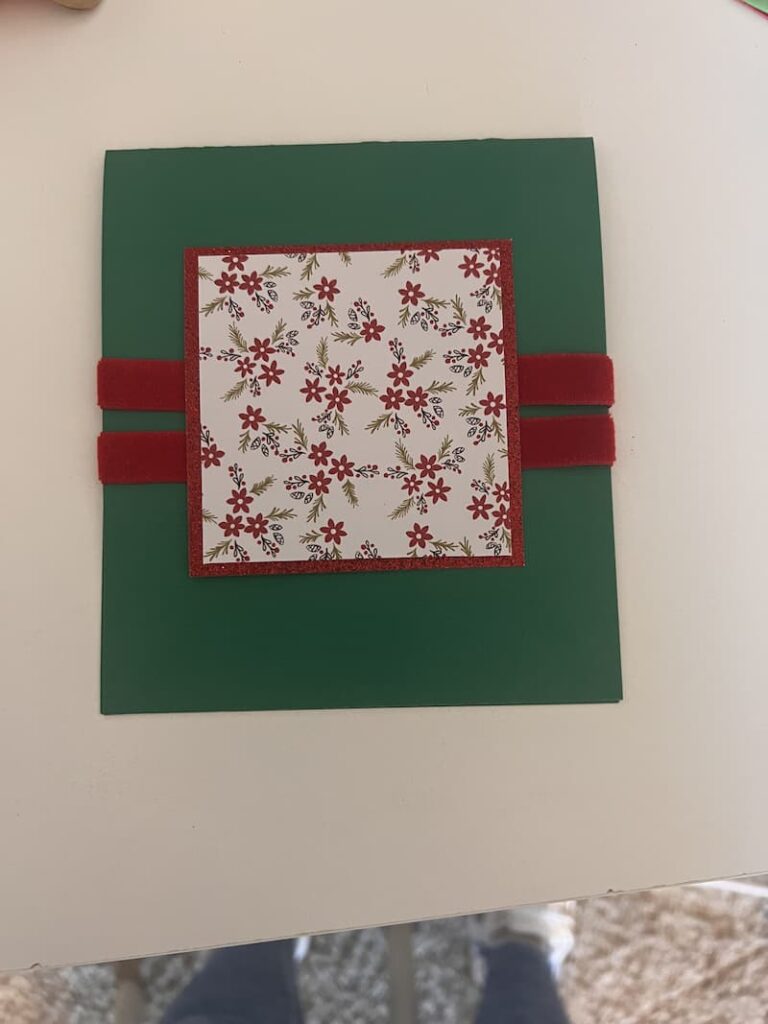
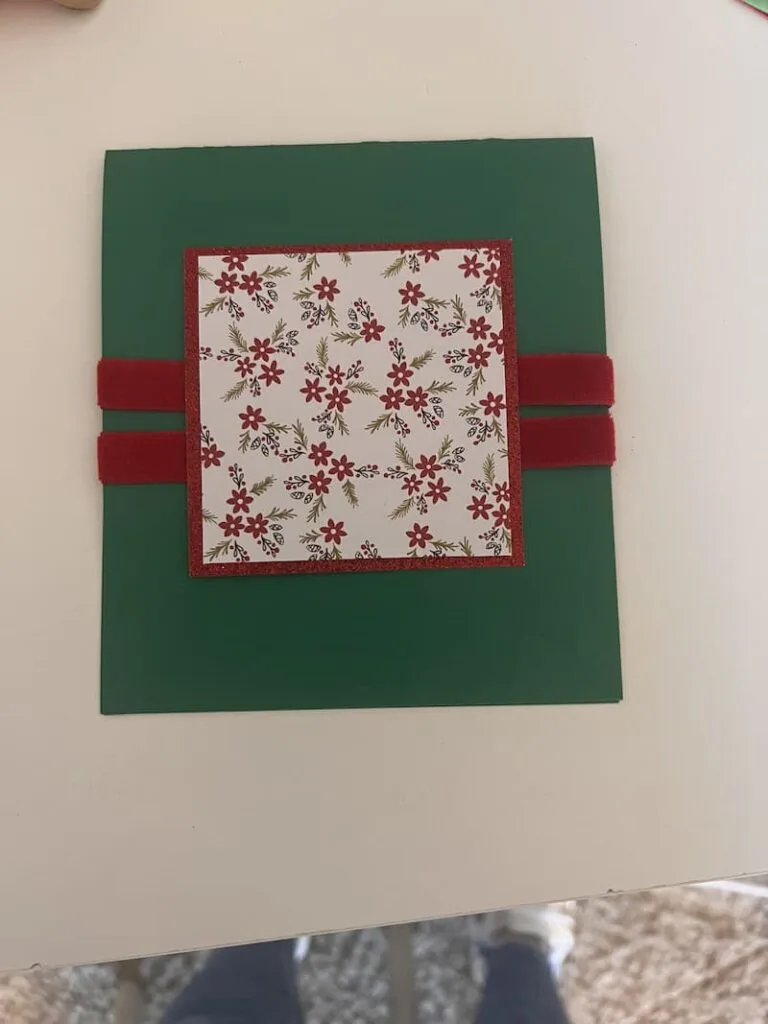
Stamp the tree and “Merry Christmas” and affix them to the card.
Glue pattern #1 onto top inside to cover the ribbon.
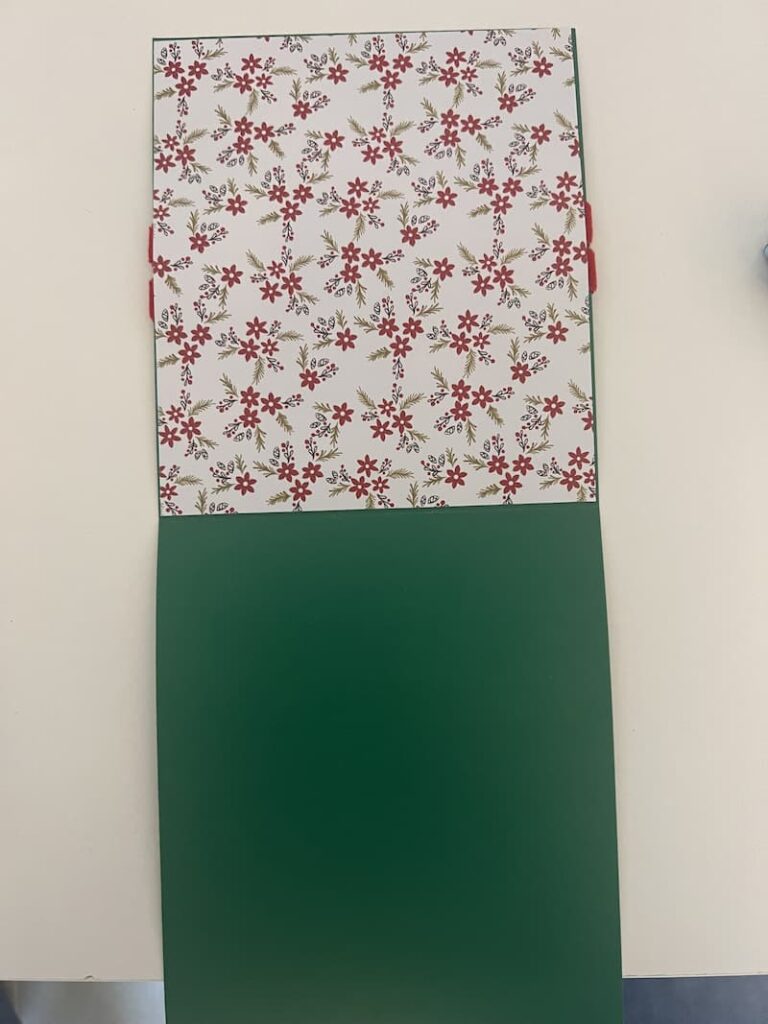
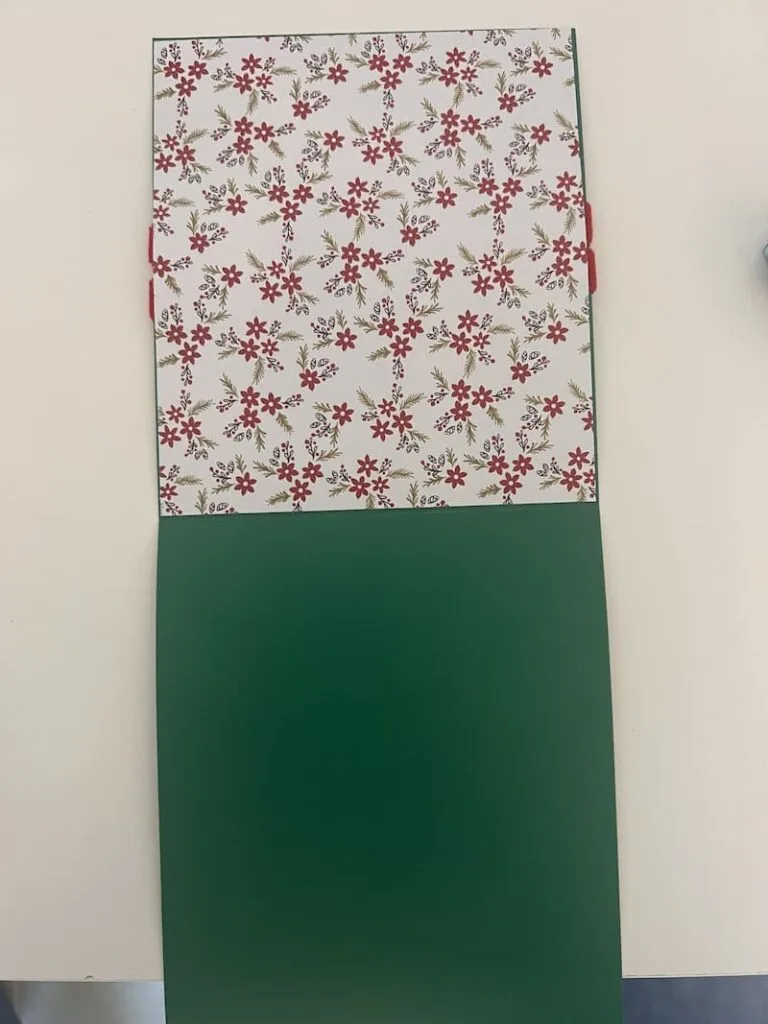
Optional: you can glue a piece of white or neutral paper on the inside bottom to write on. I just use a dark pen!
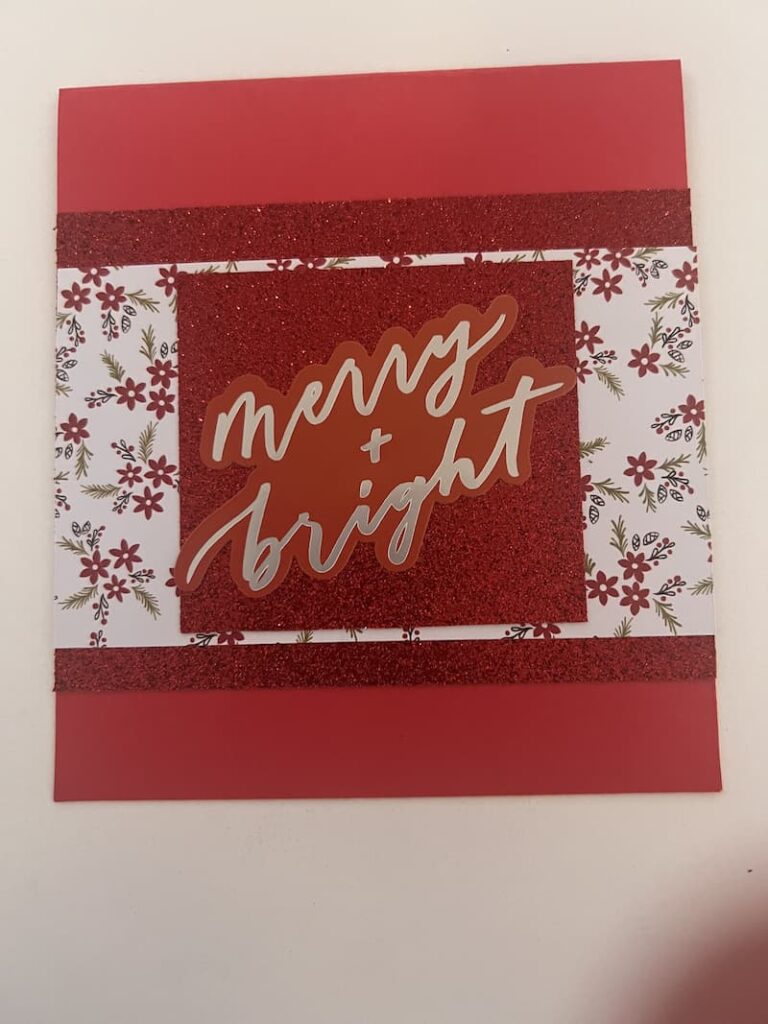
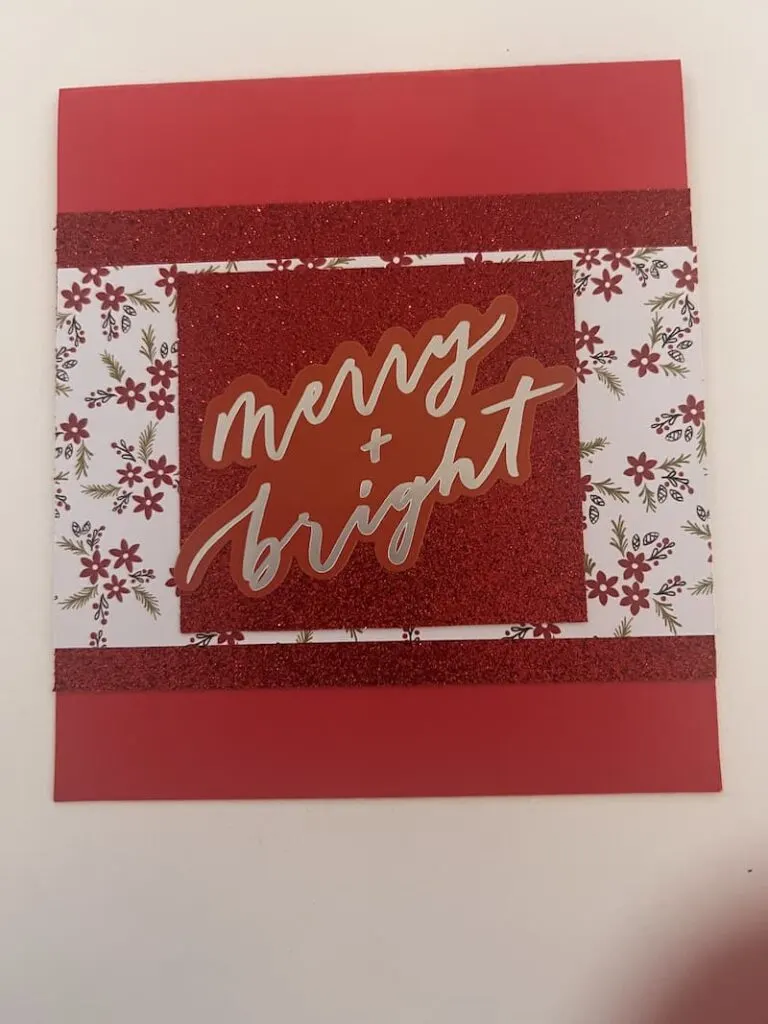
Card # 2
Using the large red card base. This card opens from bottom to top
Cut sparkle 5 9/15 x 3 9/11 and 2 9/15 x 2 9/11. Cut pattern #1 5 9/15 x 2 7/8
Glue pattern #1 piece to large sparkle piece, leaving some sparkle visible on the top and bottom. Glue this to the middle of the front of your card.
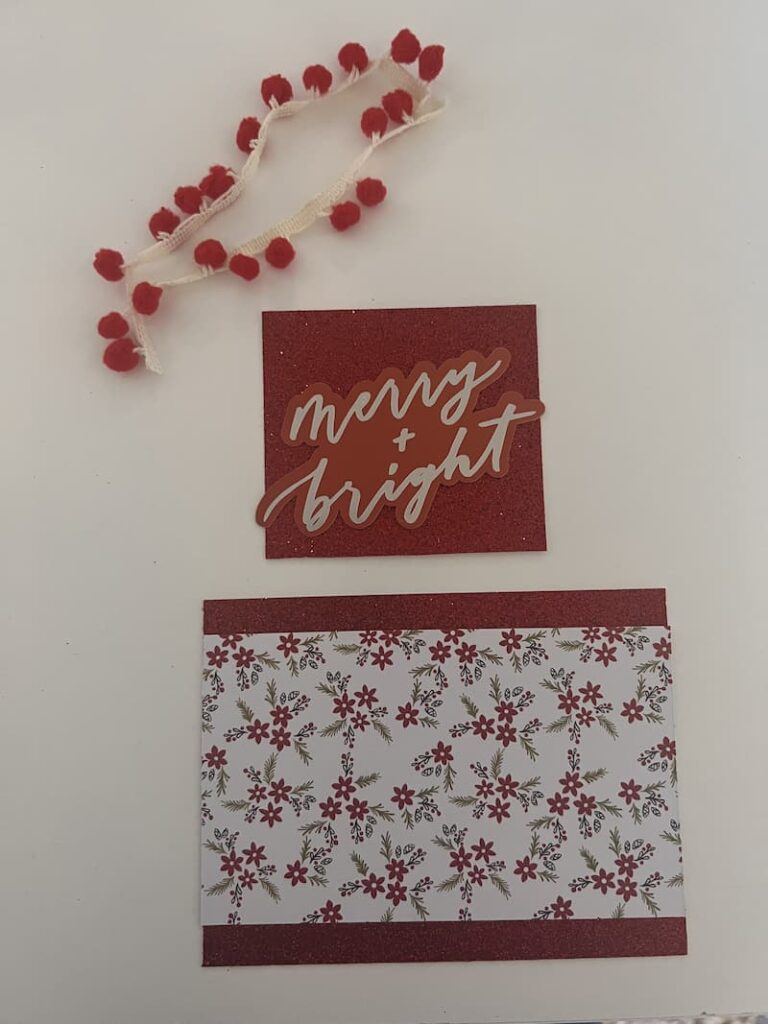
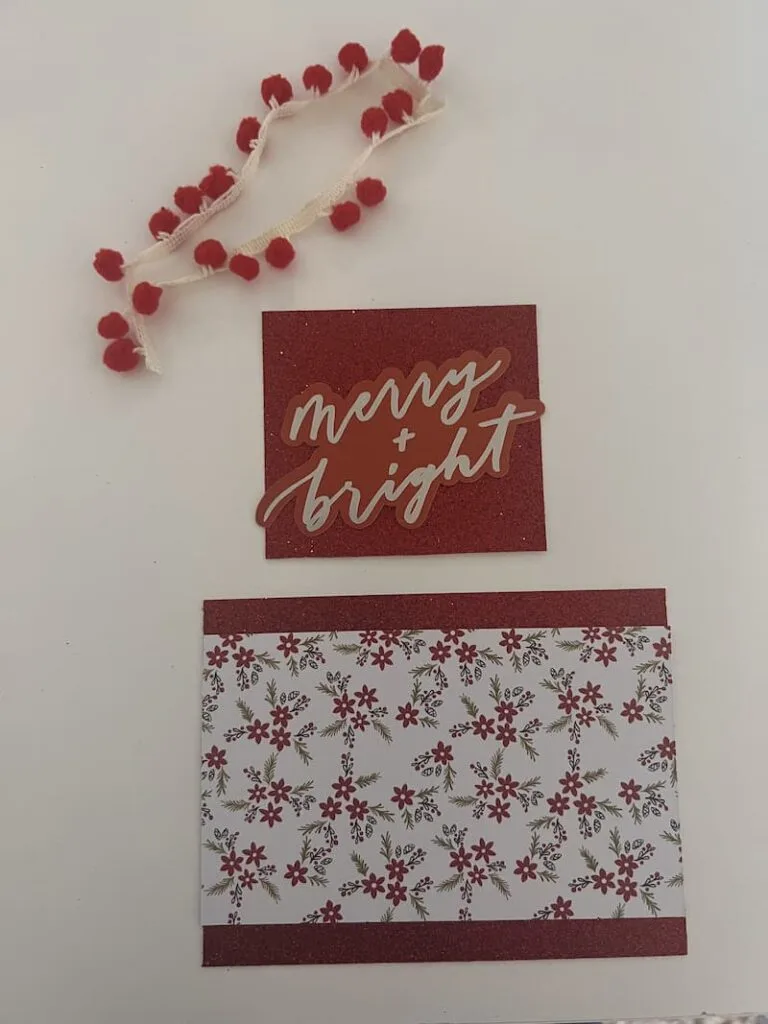
Attach “merry and bright” sticker to the middle of the small sparkle square. And glue this to the middle of the front of your card.
Glue ribbon to the edge of patterned paper #1 on both top and bottom
Card # 3
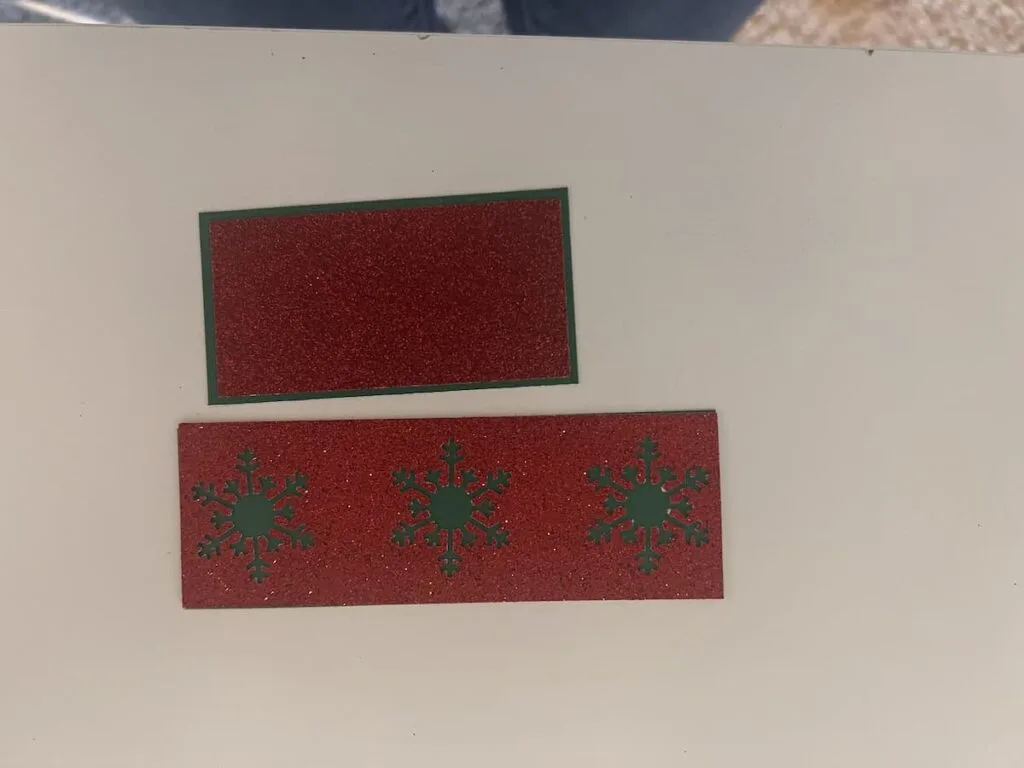
Red sparkle
4 9/16x 1.5” and 3 x 1 7/16”
Green
4 9/16 x 1 1/2”
3 1/8 x 1 9/16
Pattern #2
4 5/8 x 4 7/16”
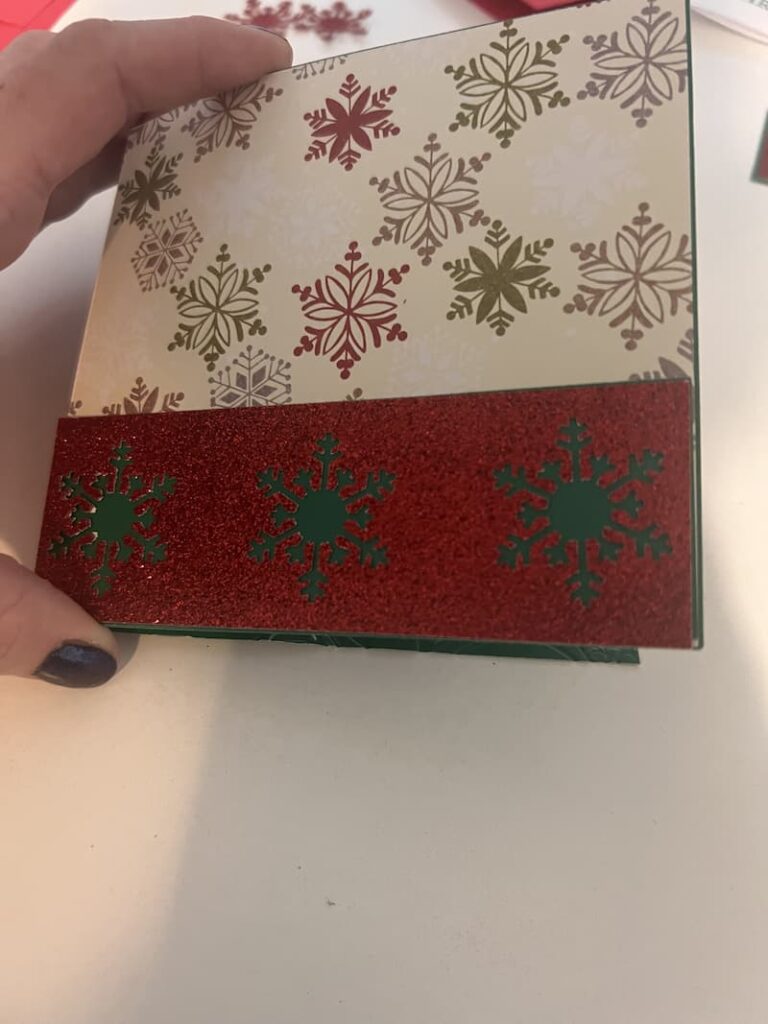
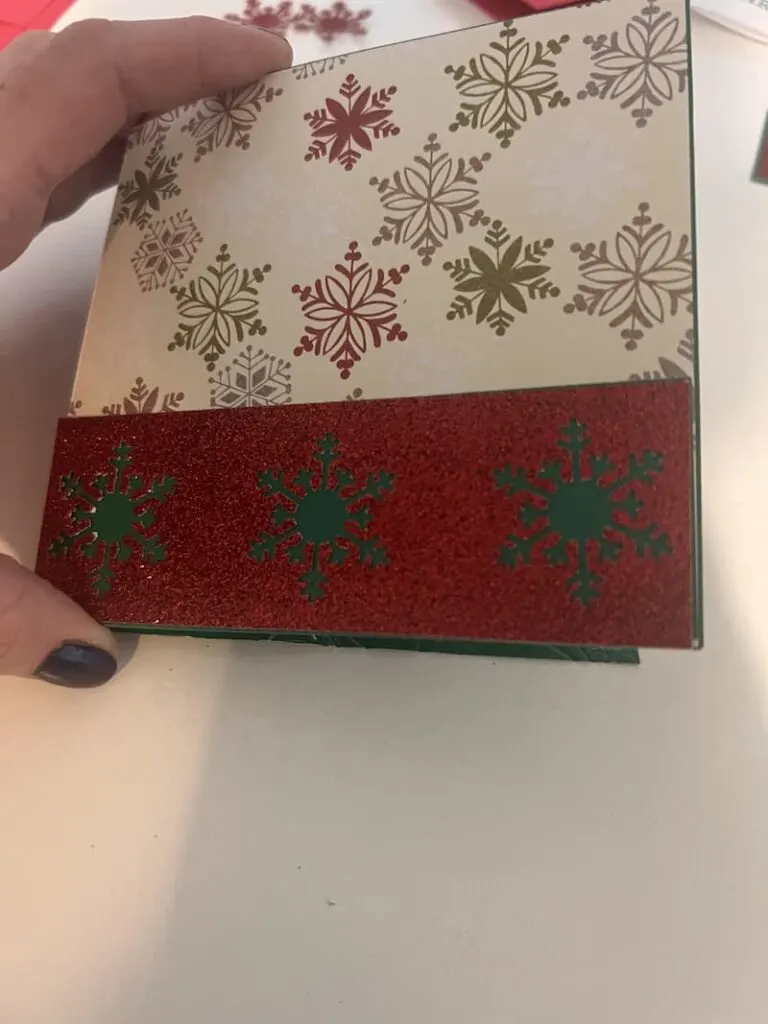
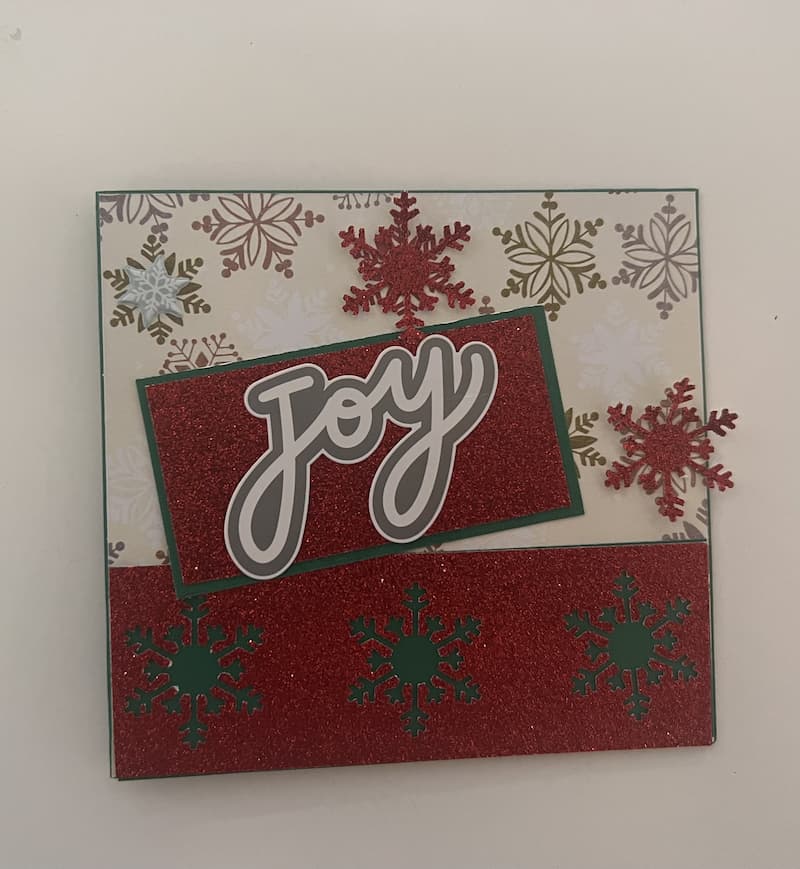
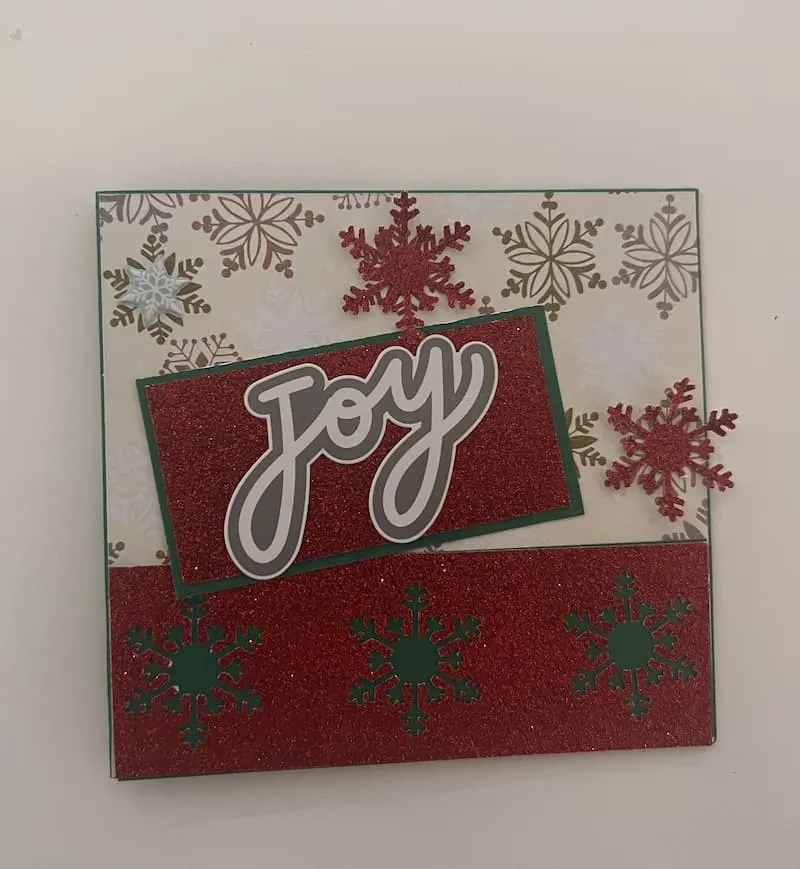
Using the small green card base. This card opens right to left Cut cardstock to the above measurements.
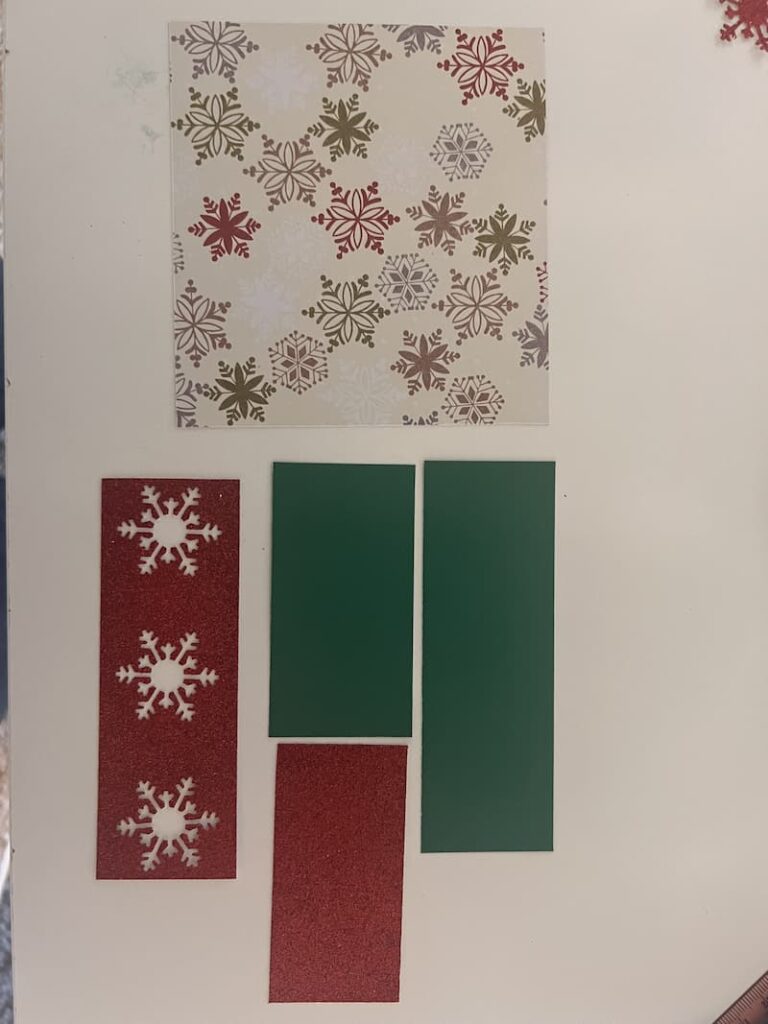

Glue pattern #2 to the front of the card.
Cut three snowflakes out of the medium sparkle piece and glue this to the top of the small-sized green piece. The green will show through where the snowflakes have been cut out.

Glue the small sparkle piece to the middle of the small green piece.
Glue snowflakes with green backing to the bottom of the front of your card.
Attach two snowflakes to the top of a snowflake that matches the pattern of the paper. This will make it look raised off the paper.
Once that’s done, glue the small red and green pieces to the middle of the card. I put it at an angle, but you could put it straight up and down or in a different spot.

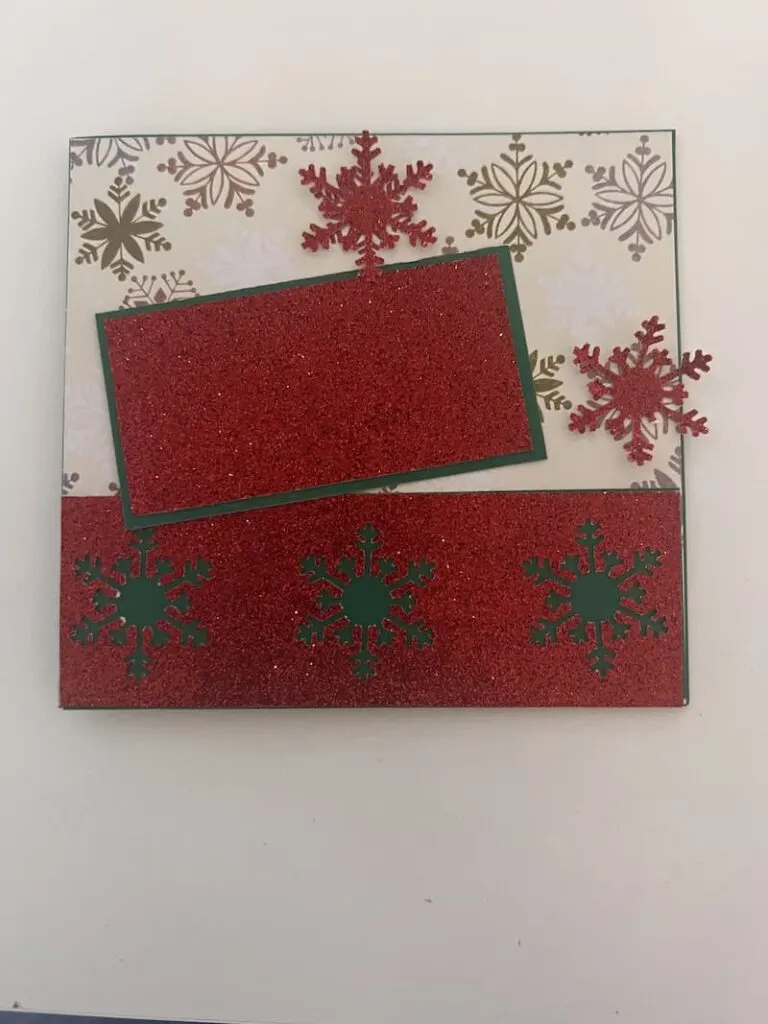
Attach joy and snowflake stickers:
Card #4
Using the small red card base. This card opens right to left
Green
3 9/15 x 2 7/8
Pattern #2
4 5/8 x 4 1/16
White
4 x 2 5/8
Cut cardstock to the above measurements
Glue patterned cardstock in the middle of the front of your card. Leaving a border of the red card underneath
Wrap 31” green/white ribbon around small green card stock, gluing in the back (if you feel like the glue is not holding it well enough in the back, you can use a small piece of clear tape to attach it more securely. You won’t be able to see it!) Glue this to the left side of your card (the side with the crease) over the patterned paper.
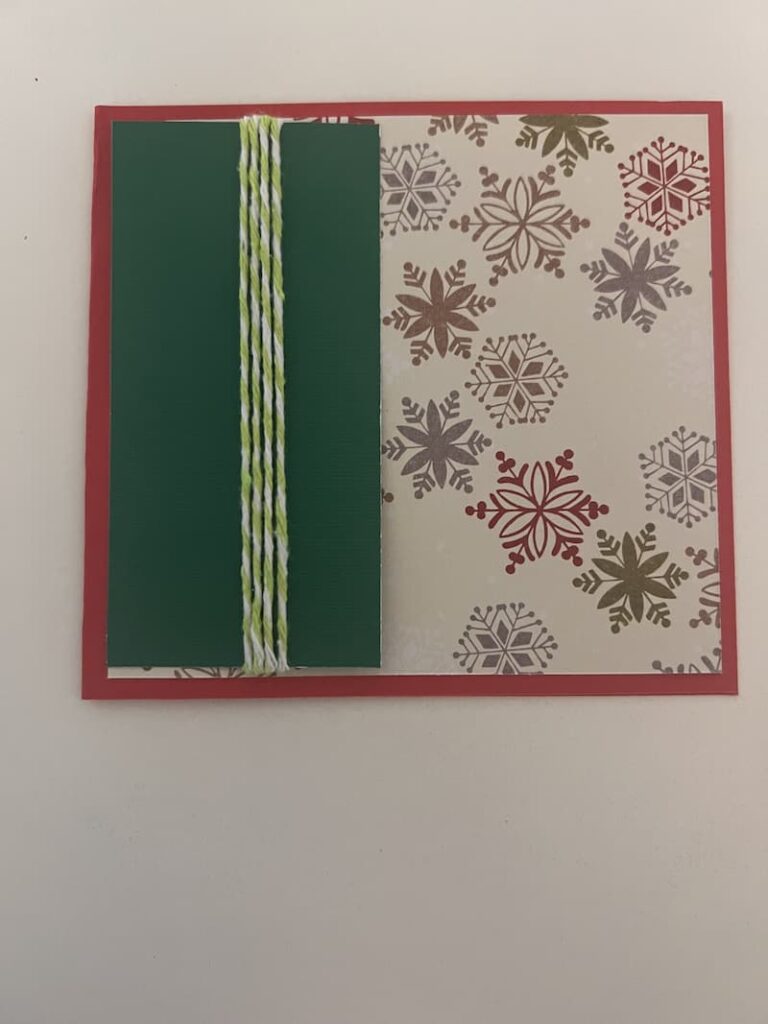
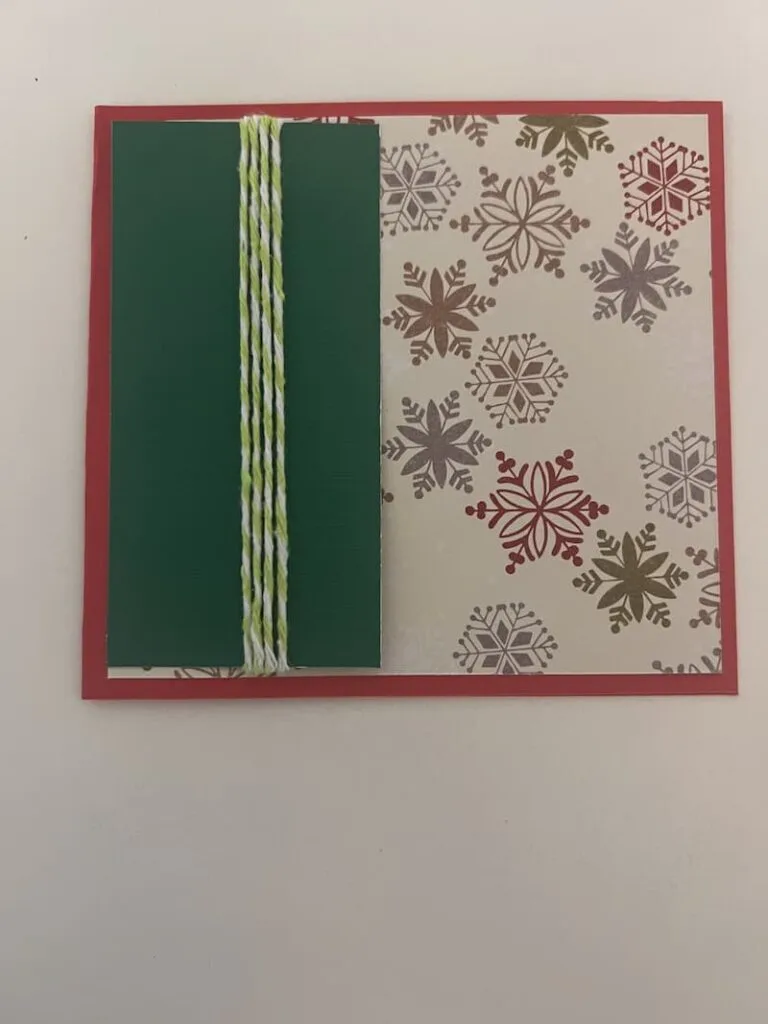
Glue white card stock to the front of your card (slip it under the twine you wrapped around the front of the green card stock.)
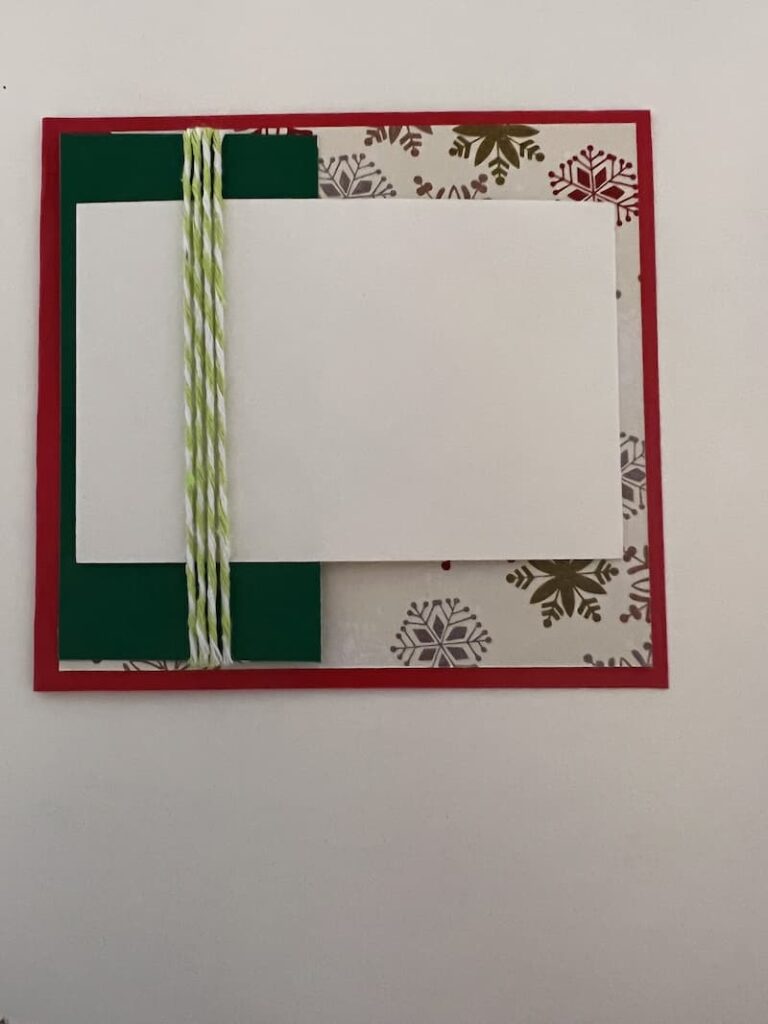
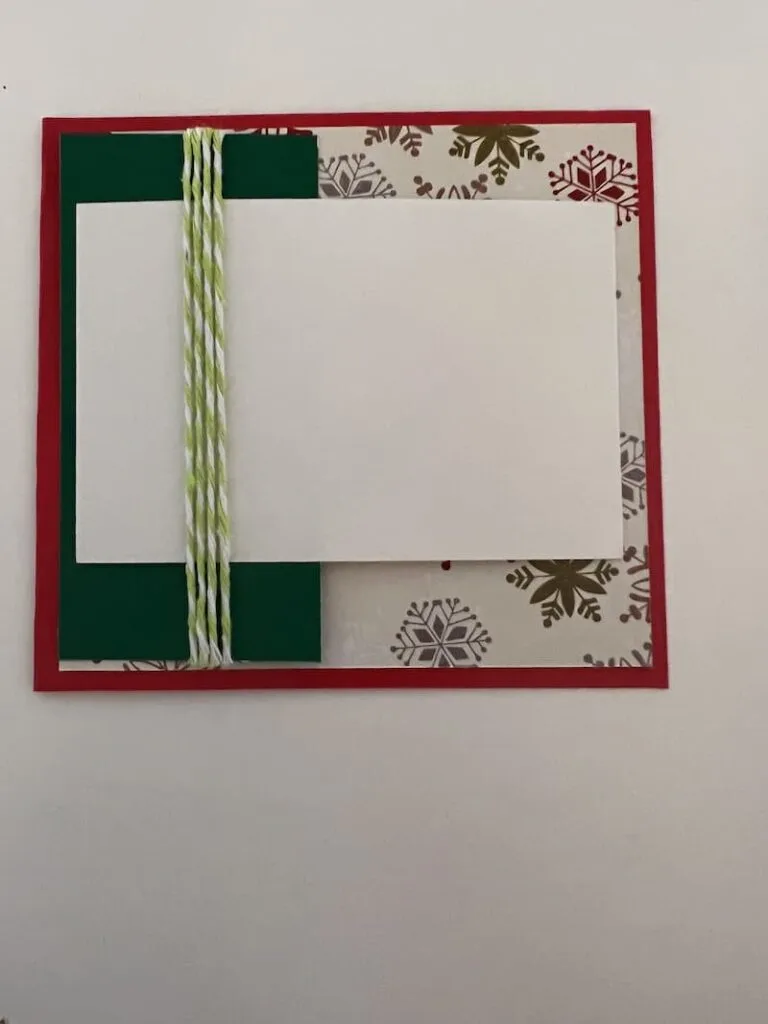
Stamp snowman on the right side of white card stock.
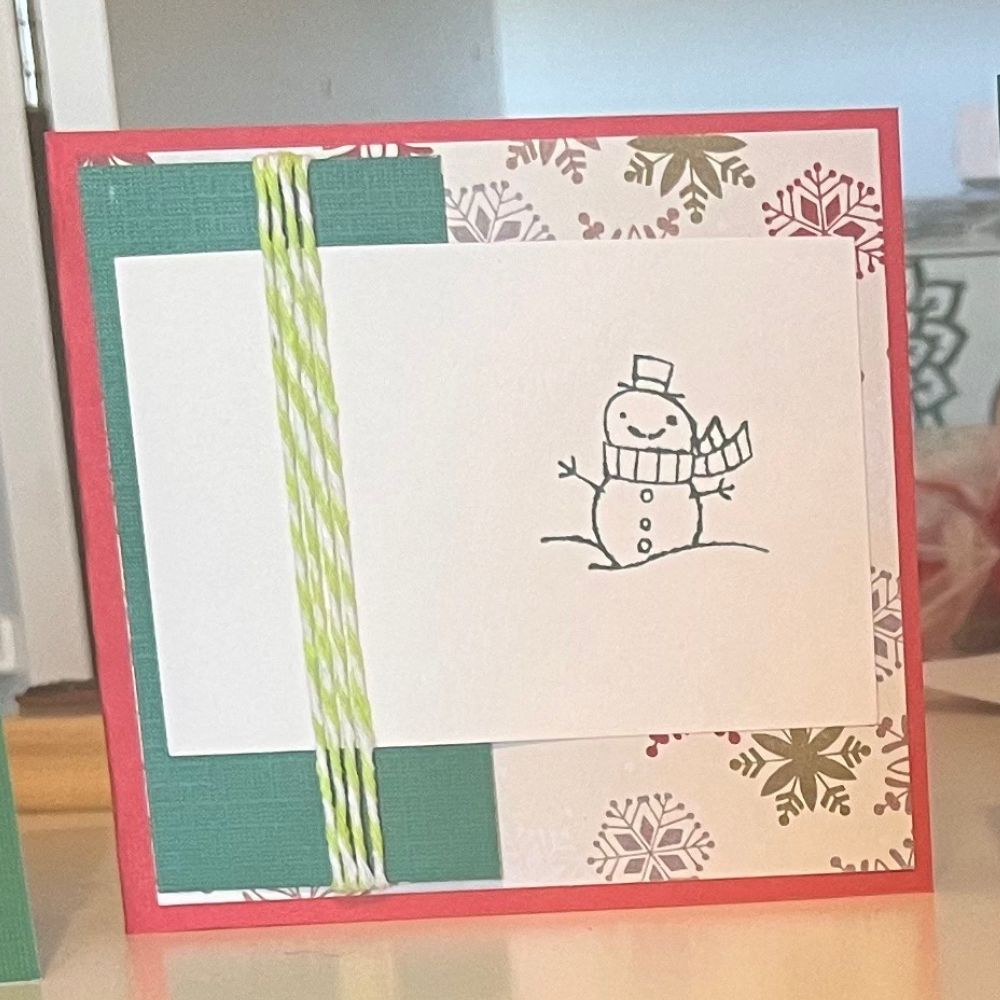

All done!
Send your handmade cards and impress the holiday spirit on your friends and loved ones.
Other Christmas Craft Projects You May Enjoy:
- 3 Easy DIY Christmas Craft Ideas With Jar Lids
- Easy DIY Christmas Wreath – with boxwood and holly
- Sparkly “Noel” Cardboard Letters – Christmas Craft
Make Your Own Beautiful Living Succulent Wreath Centerpiece! Complete video course by Jeannine Romero now available through Skillshare.