

She enjoys all aspects of home DIY- from simple crafts to complete home remodels.
- Clay Moon Phase Wall Hanging - July 4, 2023
- What To Do When a Toddler Won’t Keep Their Blanket On - June 10, 2023
- How Do Child Locks Work in Cars? (And When To Use Them!) - June 10, 2023
Spring has sprung! The scent of flowers in the air, the sunshine peeking through the windows, the dew on the morning grass; we’re here for all of it. We especially love all of the beautiful pastel colors that come with spring, and all of the plants that come to life during this season!
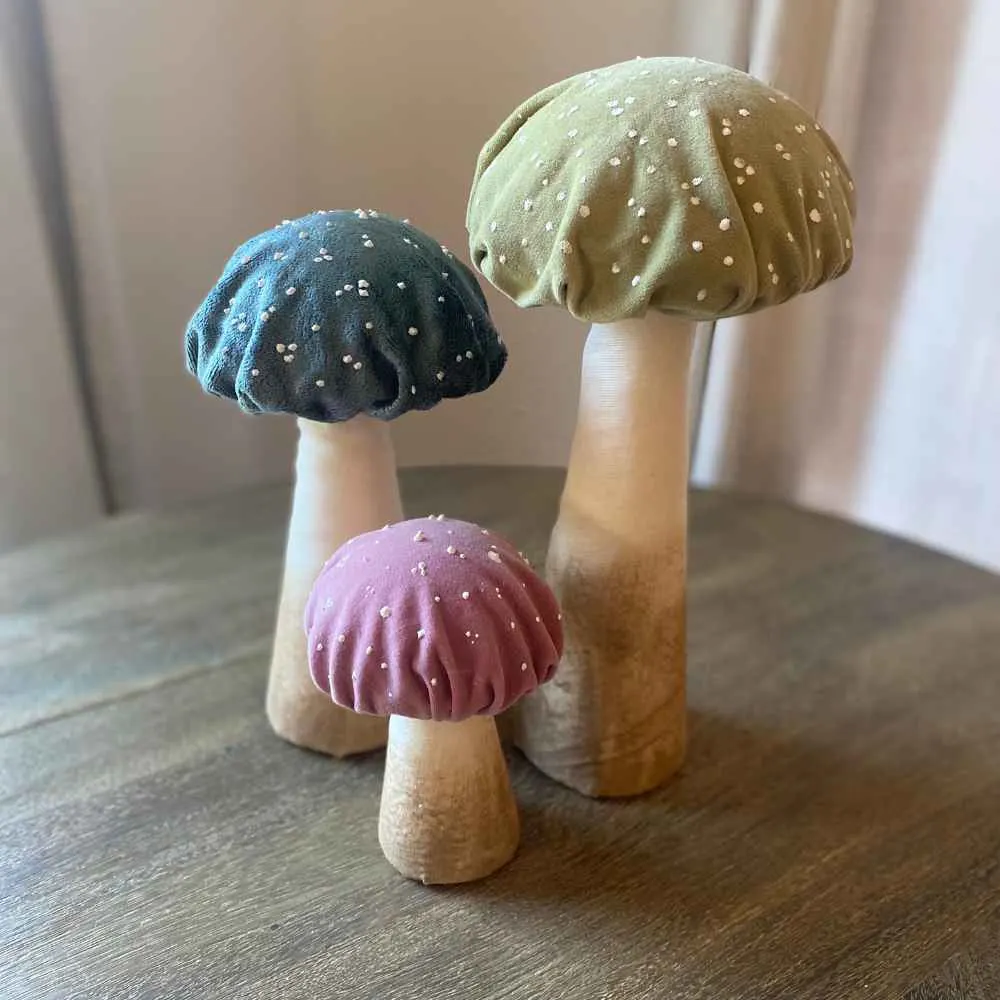
In this article, we’ll show you how to make whimsical velvet mushrooms to accent your spring decor and bring a little pop of color and whimsy to any space.

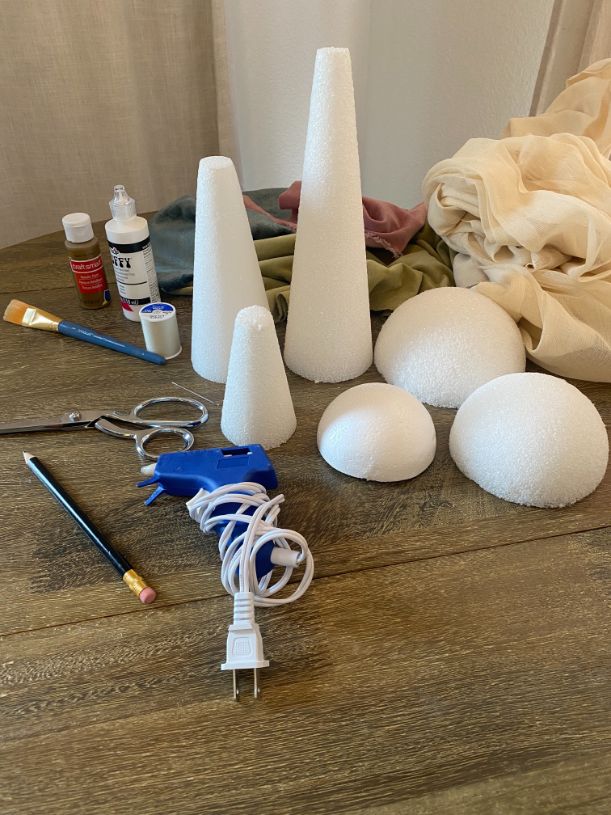
Supplies Needed:
(linked products are available at Michael’s)
- Scissors
- A pencil
- Velvet in various colors (you can use other fabric besides velvet, too)
- Hot glue gun
- White puff paint
- Brown or gold craft paint
- A paintbrush
- Cream, beige, or white colored fabric (we used cheesecloth that we already had)
- A large needle and thread of any color
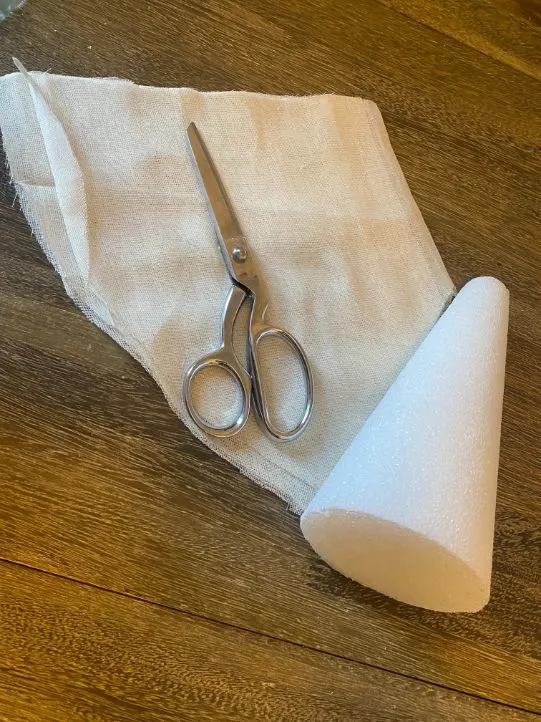
- Styrofoam cones
- Styrofoam half balls (You can also purchase styrofoam balls and cut them in half with a saw or electric knife. This is what we did, but it was pretty hard to cut through them!)

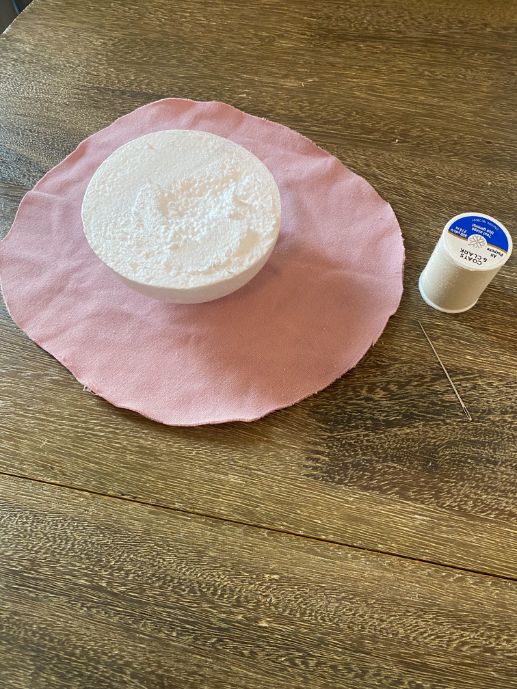
Step 1:
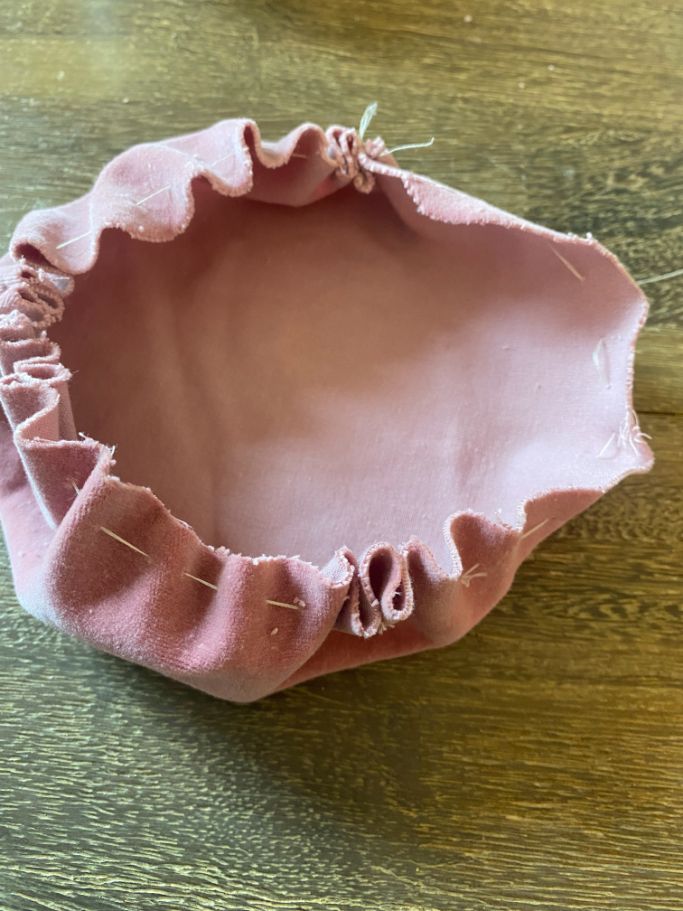
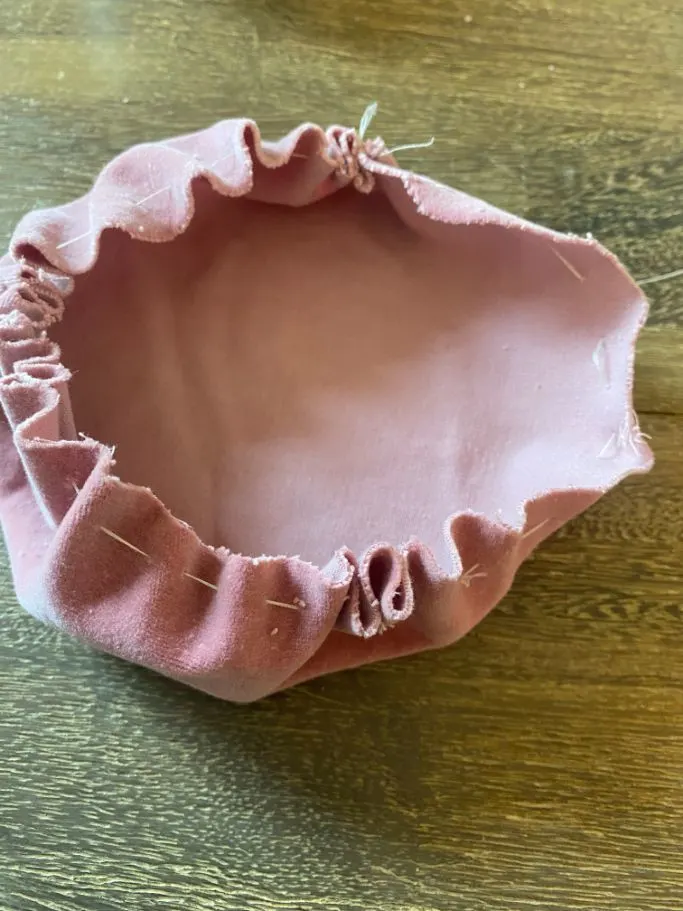
Take a piece of your colored fabric (we used colored velvet) and turn it so that the backside of the fabric is facing up. Take one of your half domes and place it upside down in the middle of the fabric.
Take your pencil and roughly mark a circle on the fabric, testing the edges to see if they will cover the top and most of the flat surface of your half dome (you want to leave a small circle of the styrofoam uncovered by the fabric). Take your scissors and cut this circle.

Step 2:
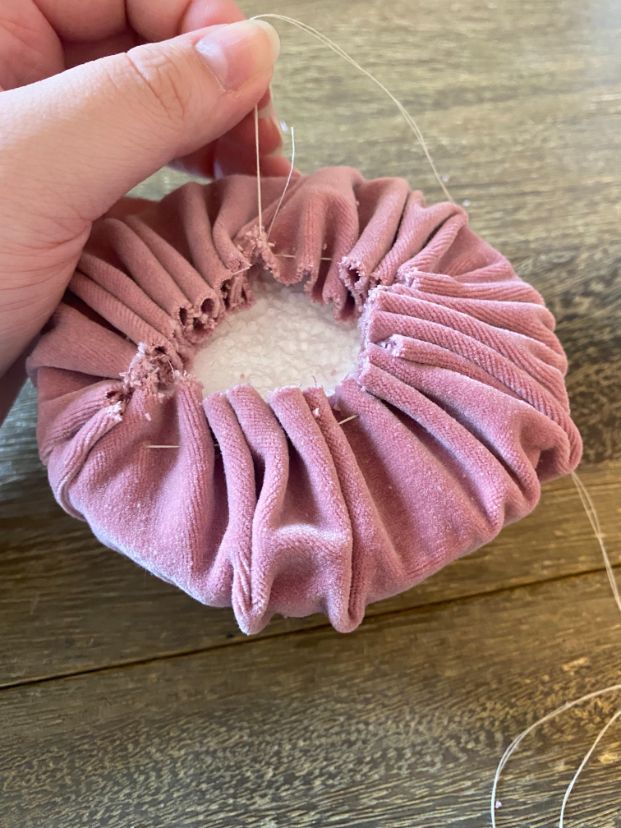
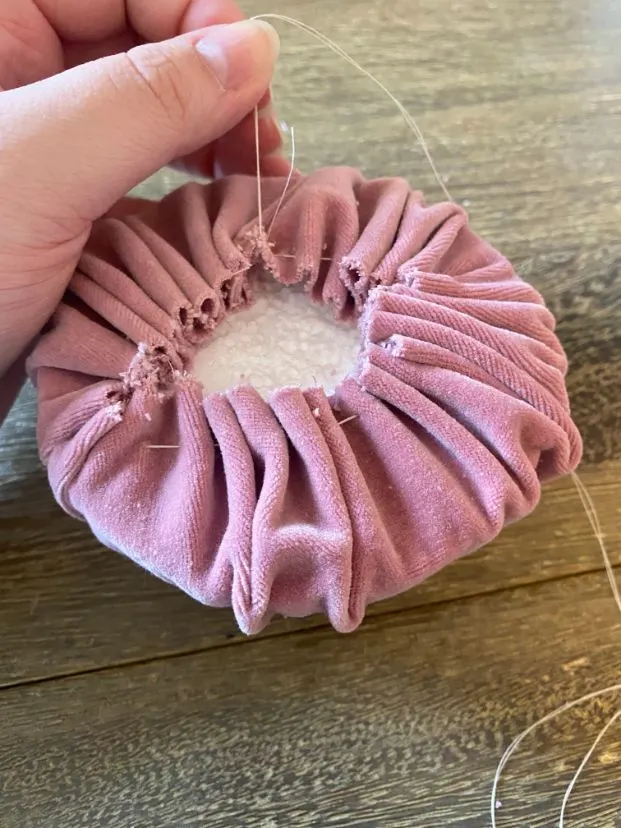
Grab your needle and thread. You’re going to want to sew a gathering stitch all the way around the circle, which is just a stitch that goes in and out of the fabric in large stitches. It should be able to be pulled tighter when you pull on the thread. Do not pull it tight or tie and cut your thread yet.
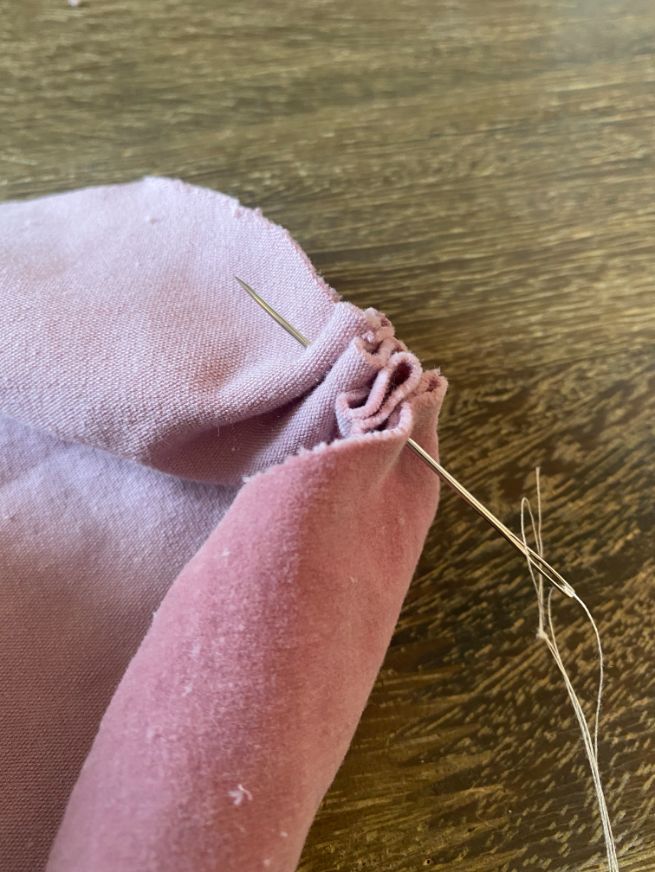

Step 3:
Take your styrofoam half ball and put it in the inside of the little pouch you just made. Once centered, pull the thread tightly until the fabric mostly closes around the bottom of the mushroom cap.
It’s best if you leave the very center of the styrofoam uncovered by the fabric, as you will be gluing your cone base into the center.
Tie off your stitch a few times with your needle, and cut the excess thread. Repeat this step with all of your half balls and fabric pieces until you have three covered mushroom caps.
Step 6:
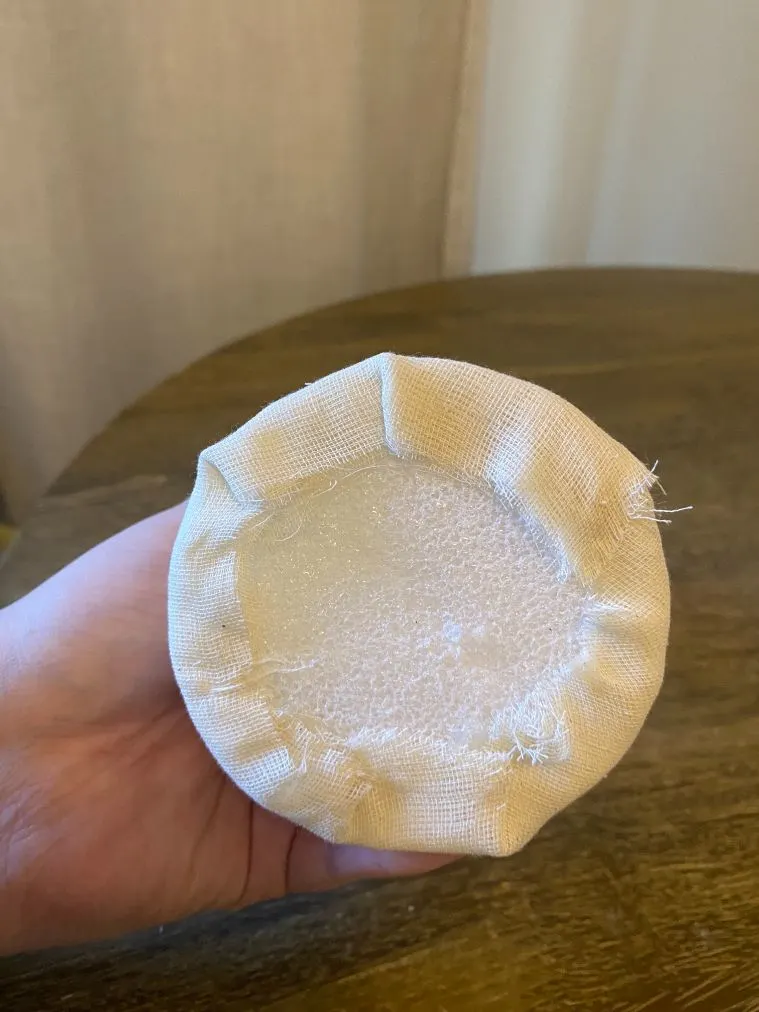
Take your white/cream fabric (we used cheesecloth that we already had and quadrupled it) and take one of your cone bases.
Note: you may need to cut off some of the bottom of your cones before covering them and putting the mushroom caps on, depending on how tall they are. We found that the sizes we bought were each an inch or two too tall for the half ball sizes that we had.
Line up your cone with one edge of the fabric, and begin to roll the fabric with the cone until the fabric overlaps on itself and fully covers the cone. Using your scissors, cut the fabric along the line of the cone.

Step 7:
Take your hot glue gun and apple glue to one inside edge of the fabric you just cut. Apply the cone to this edge, and begin to roll the fabric to cover the cone. Once you get close to the other edge, apply hot glue to this edge and roll on top of it to seal the fabric over the cone.
Take your scissors and cut off most of the excess fabric off, leaving enough to hot glue down on the bottom. Using your glue gun, glue down the remaining fabric onto the bottom of the cone. You can cut all of the excess fabric off of the top of the cone, as this part will be covered by the mushroom cap.

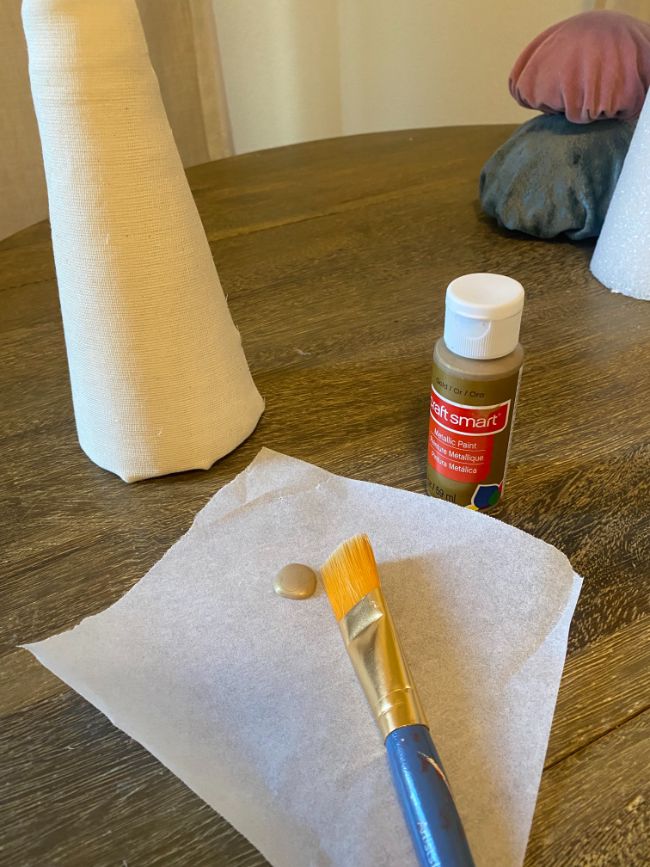
Step 8:
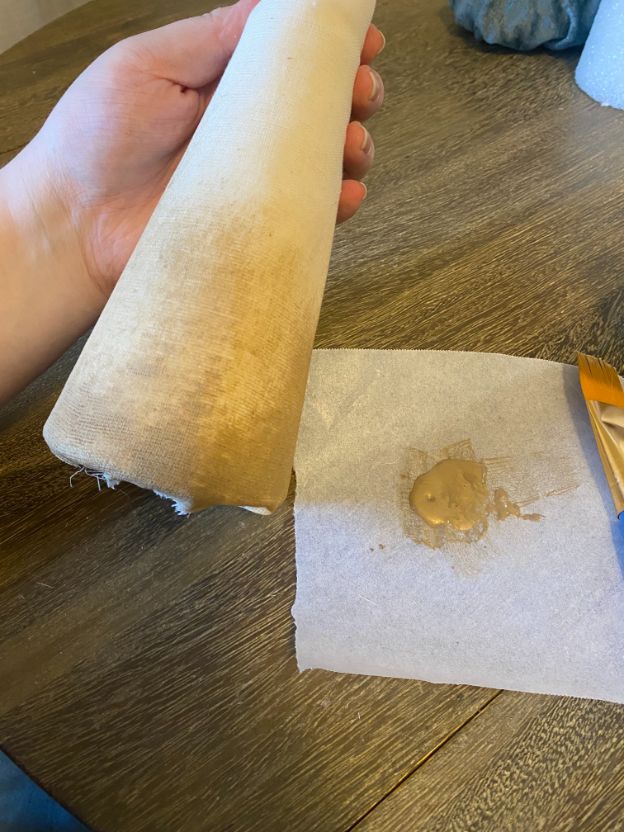
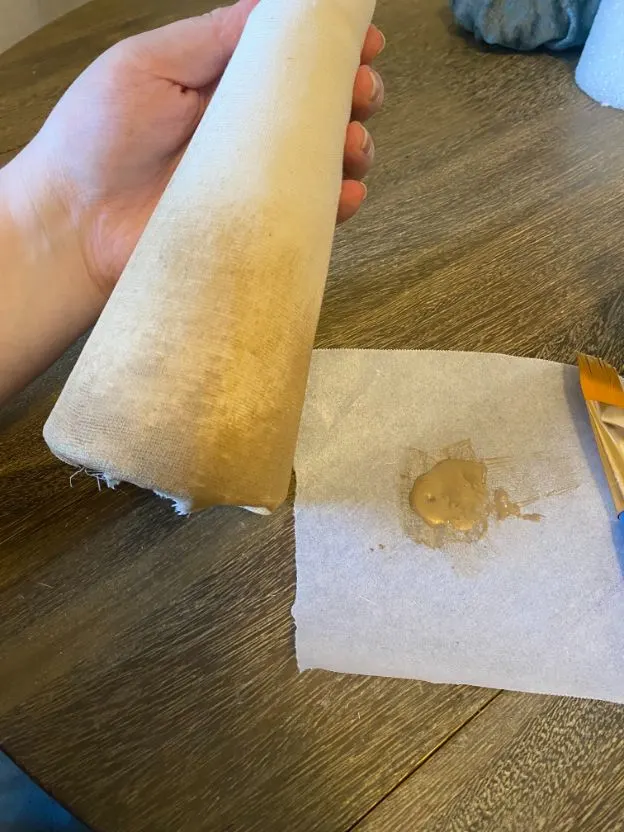
Take your paintbrush and get your brown or gold paint ready. Dip your brush in the paint and begin painting from the base of the cone, going upward in sweeping motions.
It should have an almost ombre effect, getting lighter and less saturated as the paint goes up the fabric. Allow these to dry for about 30 minutes.

Step 9:
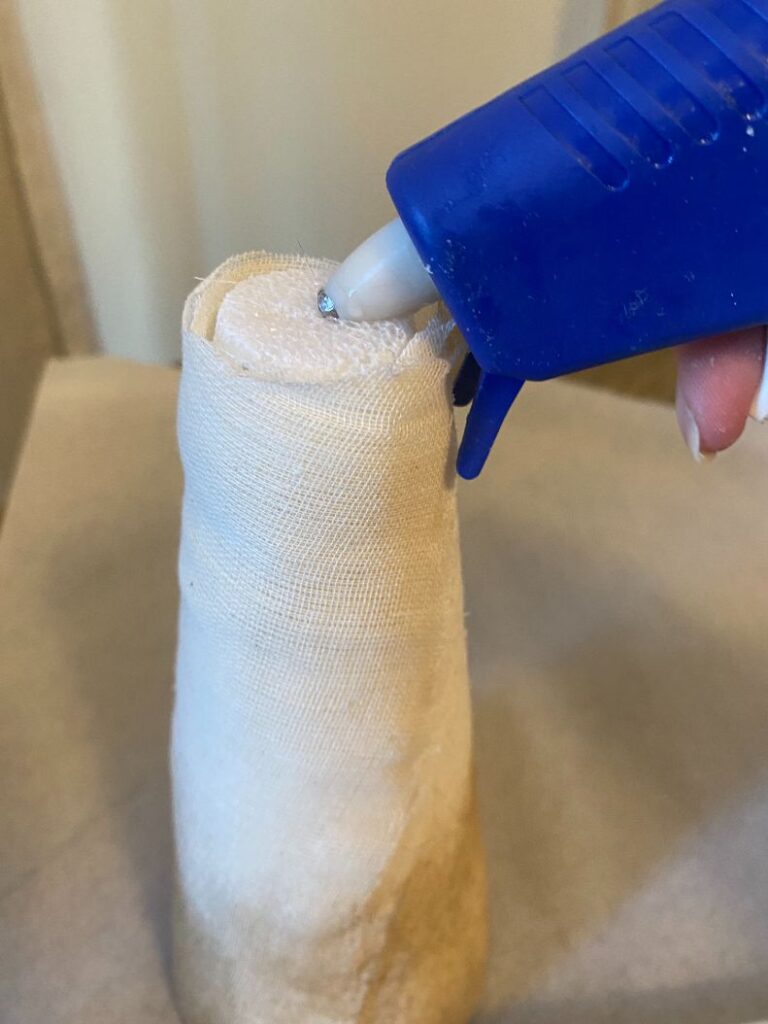
Take your hot glue gun and one of your mushroom stems. Find the mushroom cap of corresponding size.
Put a generous amount of hot glue onto the top of your cone, and press it into the bottom of the mushroom cap where you left some of the styrofoam uncovered.

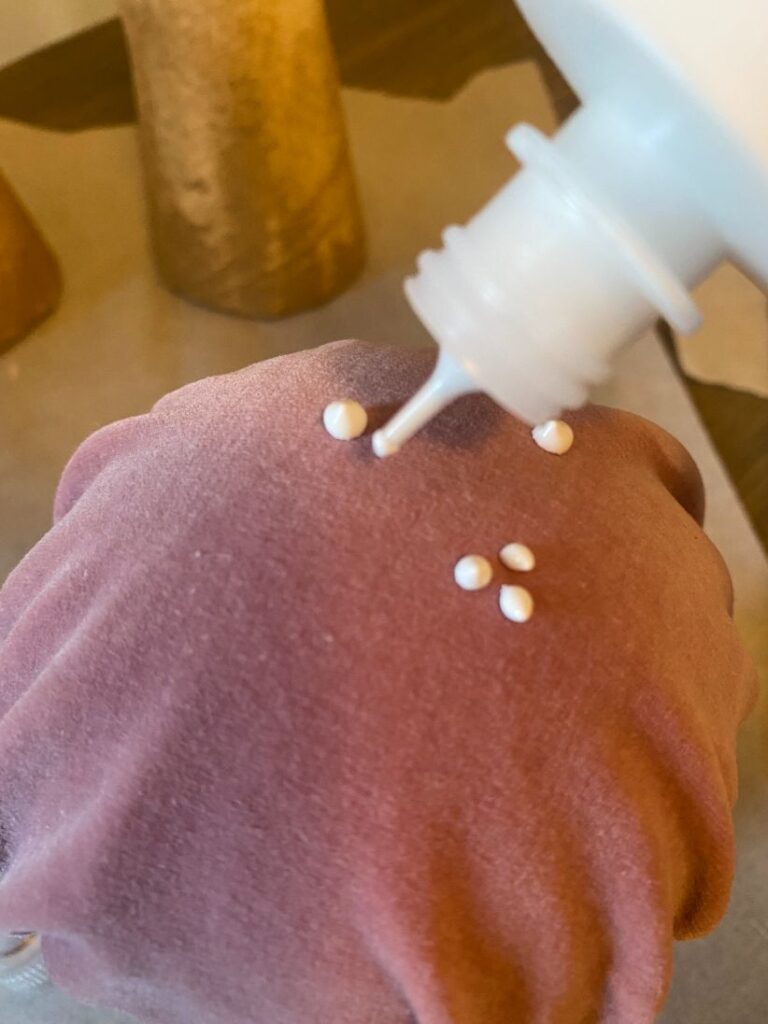
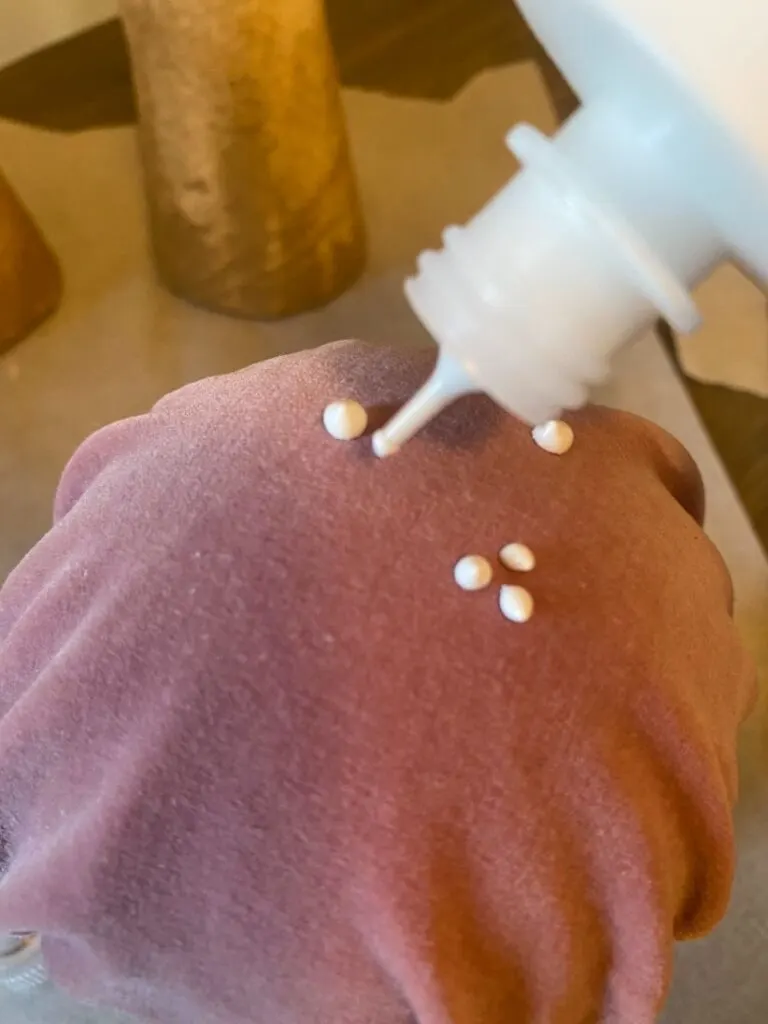
Allow this to dry for a few minutes. Once the paint dries, take your white puff paint and apply small dots around the top of your mushroom cap to give it a more whimsical look.

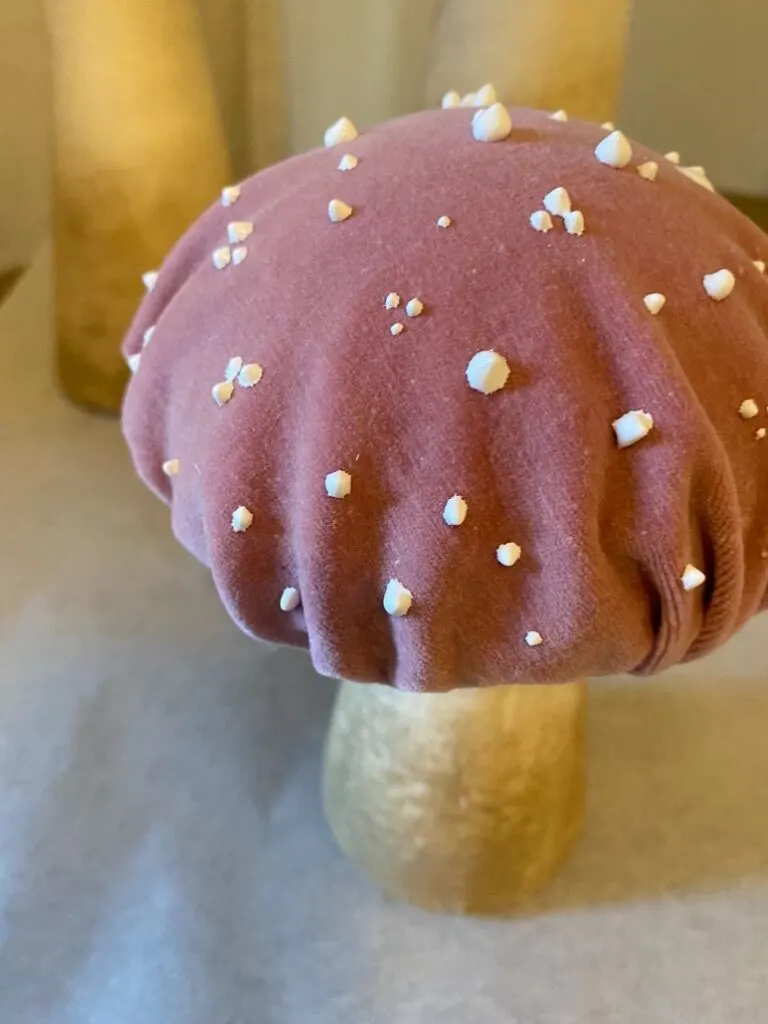
Allow this to dry overnight. Voila! Enjoy your whimsical spring mushrooms.
Here are some other creative DIY projects you may enjoy:
- DIY Fairy Garden Nightlight Craft Project
- Farmhouse Inspired DIY Plant Holder [Repurposing Craft Project]
- How to Make A Spring Tulip Wreath – Easy DIY
Make Your Own Beautiful Living Succulent Wreath Centerpiece! Complete video course by Jeannine Romero now available through Skillshare.