

- Free Video Tutorial – Gratitude Farmhouse Decor Craft - July 25, 2023
- DIY Dollar Tree Bird Feeder Craft - July 4, 2023
- Embroidery Hoop Organizational Wall Art - February 28, 2023
Here is a home storage idea that is a design-on-a-dime gem. This fast and easy project creates a modern home storage solution with a splash of style.
Are you ready to transform and upcycle an old piece of furniture to a new use without a lot of steps? This can introduce you to furniture redoing or upcycling without the intimidation.
A user-friendly version with no fancy skills or major tools required.


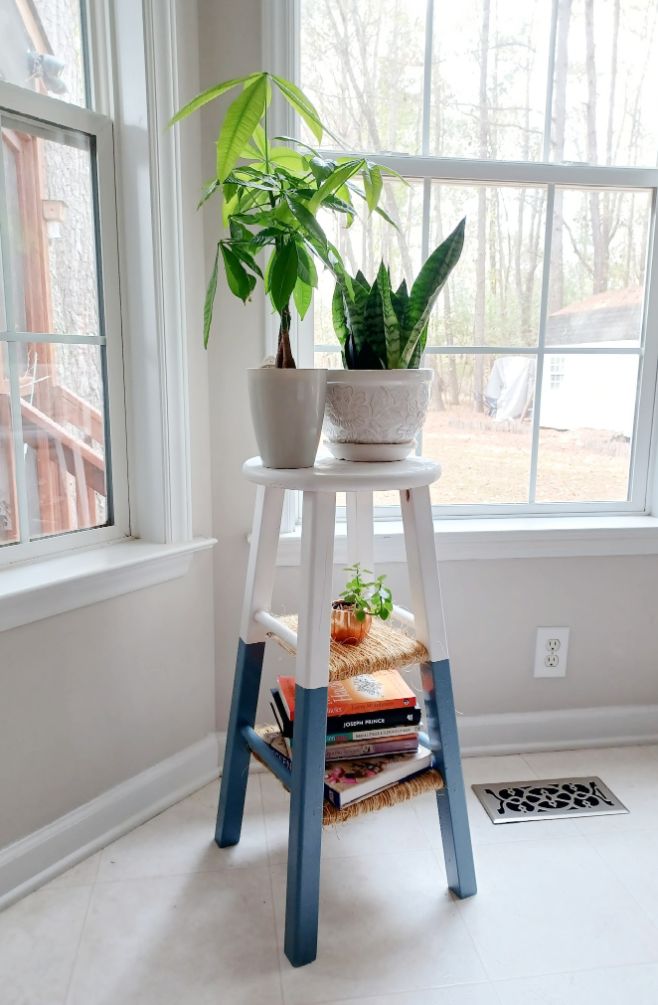
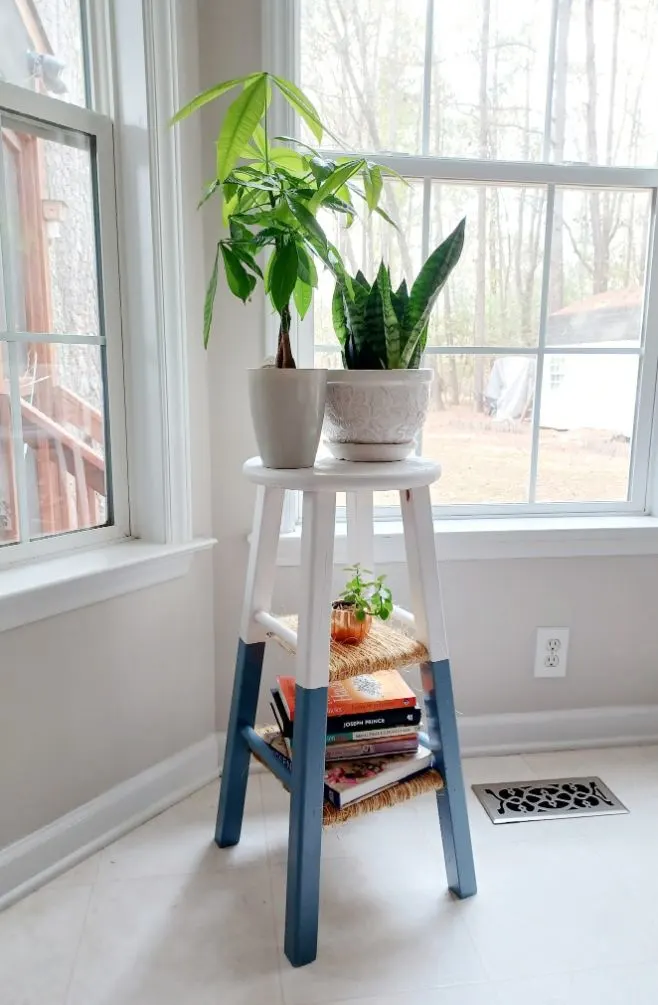
The possibilities with this stool to shelf makeover are endless. It could be a plant stand, shelf, or a side table for example.
The concept of repurpose upcycling itself is an endless bank of ideas on any type of furniture and to prove it I added a bonus quilt stand makeover to the project to turn it into a shelf as well.
You will see that at the end of the article. I almost added in an old chair but I was short on weekend spare time so I kept it to these two for now.
Thankfully this project is easy on the budget and easy on the time.
Supplies Needed
- An old bar stool or other piece of wooden furniture that could be turned into a twine shelf.
- Stapler gun and staples (link to Amazon
- Scissors
- Painters tape
- Rust – Oleum 2x Ultra Cover Paint & Primer in the colors you want (link to Amazon)


Step one
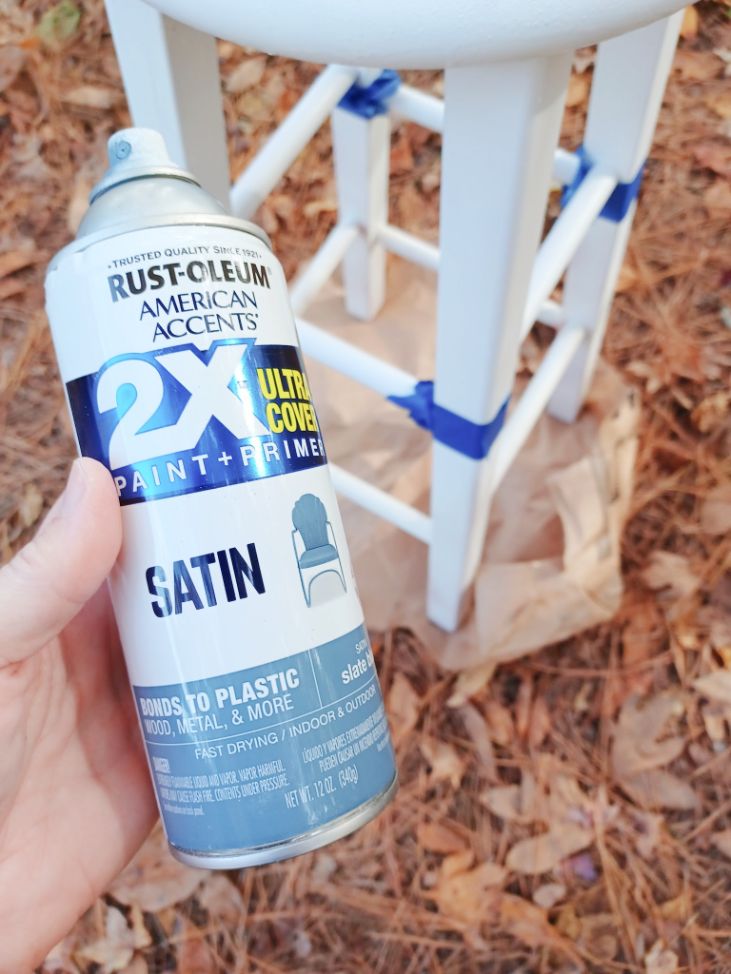
Spray paint your stool.
No sanding required. That is why I love this Rust-Oleum 2x Ultra Cover Paint & Primer. It is so easy.
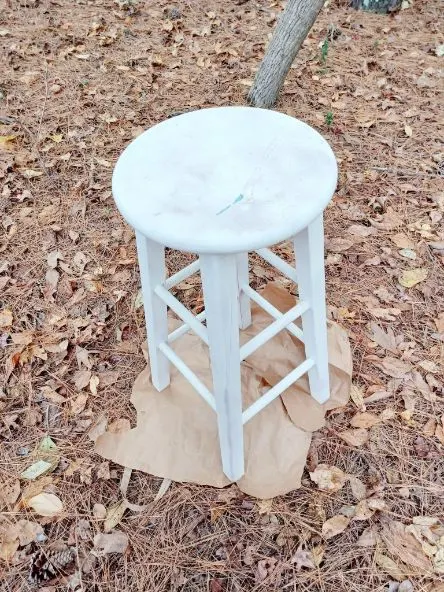
I found this stool being given away for free. It was not looking good.
It looks better pre-painting in the picture than it did in real life up close. I could have sanded it but I really did not want to. I like quick and instant crafting.
You will see in a lot of my crafts this is my go to paint because it covers so much better than other spray paints I have tried.

OPTIONAL
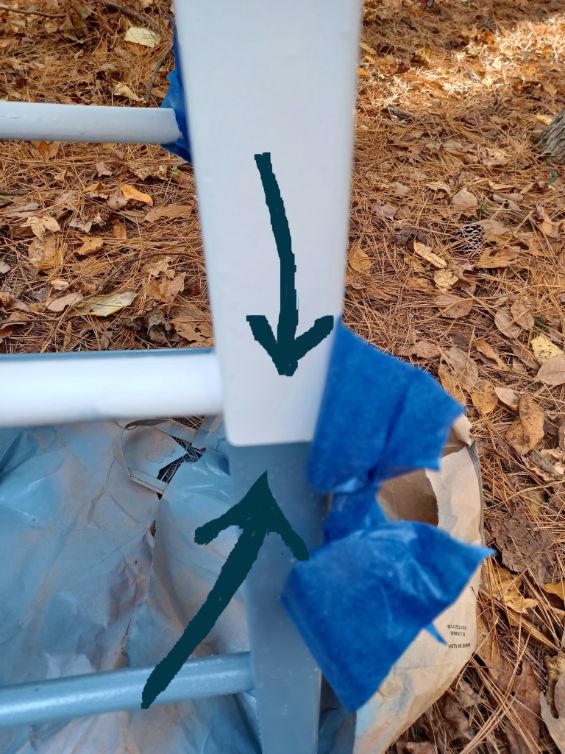
If you want two colors on your stool (or other piece of furniture you might be doing this method with) you need to first tape where you want the line of difference to start.

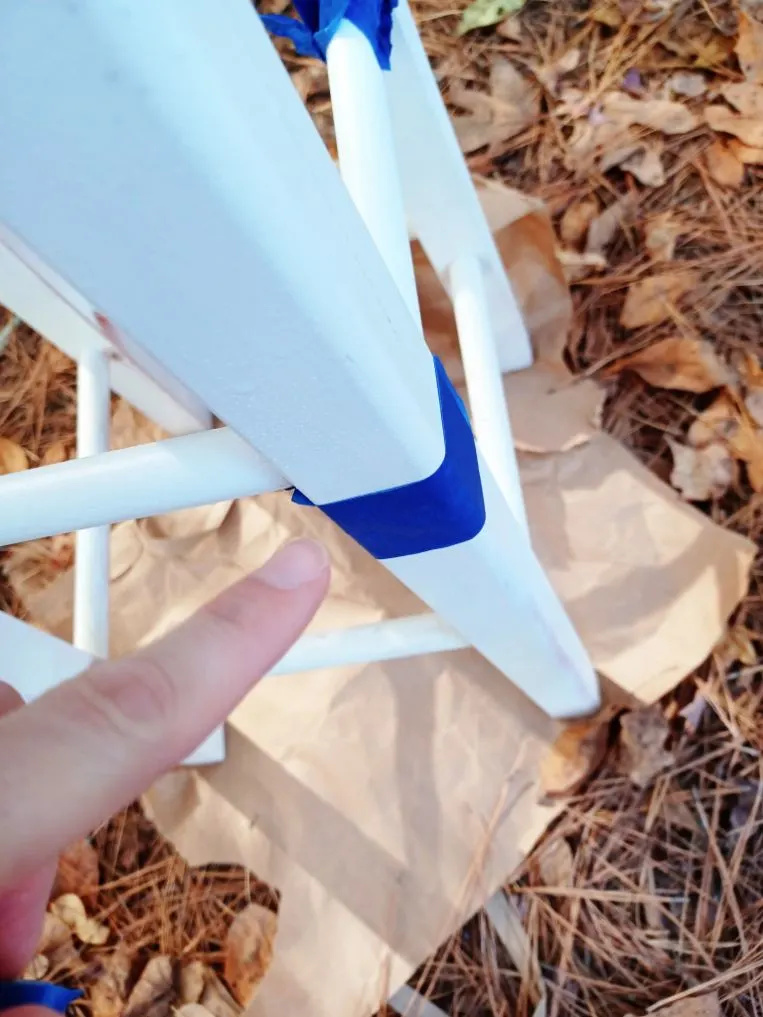

I spray painted the top part of my stool white first after taping my line. I did not want the whole stool the same color. I wanted a little more character so I chose the satin slate blue for the bottom half.
Now note that when you place your painter’s tape to create a line, you will need to move it to cover your new paint on the half you just did once it dries before you start painting the over half.
It will create a clean easy line. Of course once complete do not forget to remove the tape.

Step two
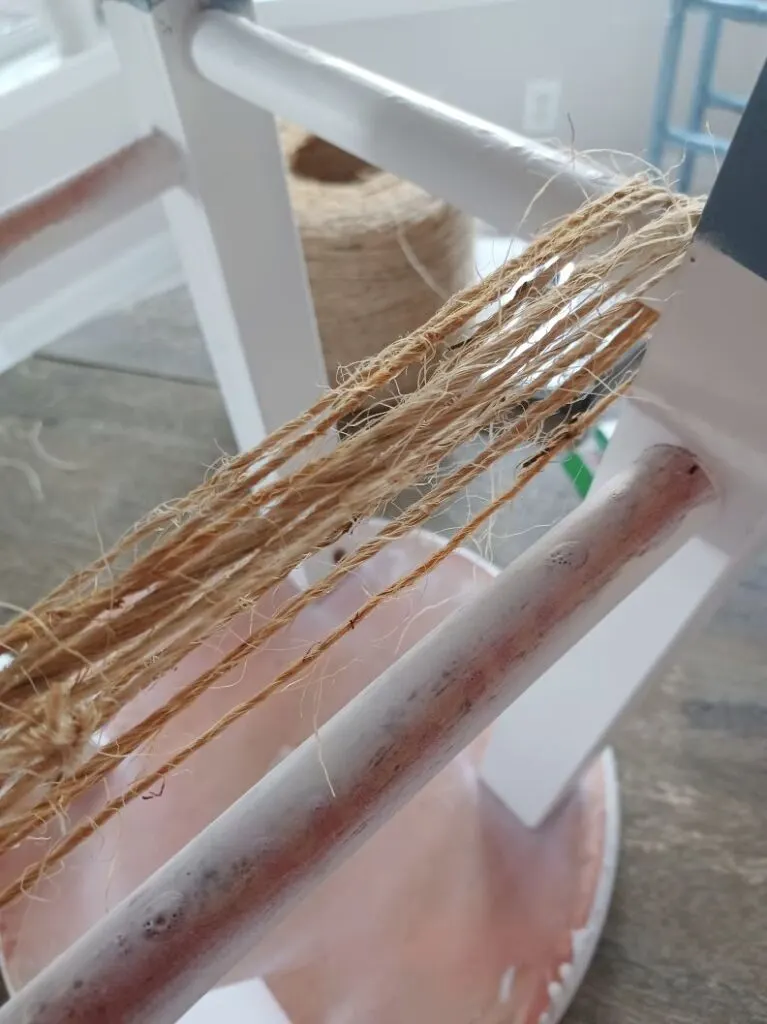
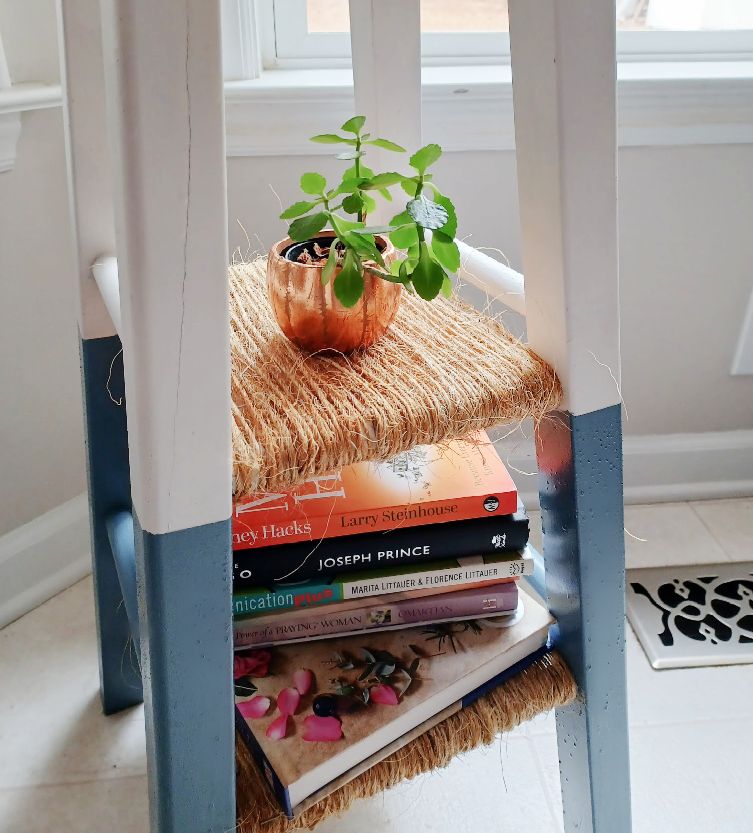
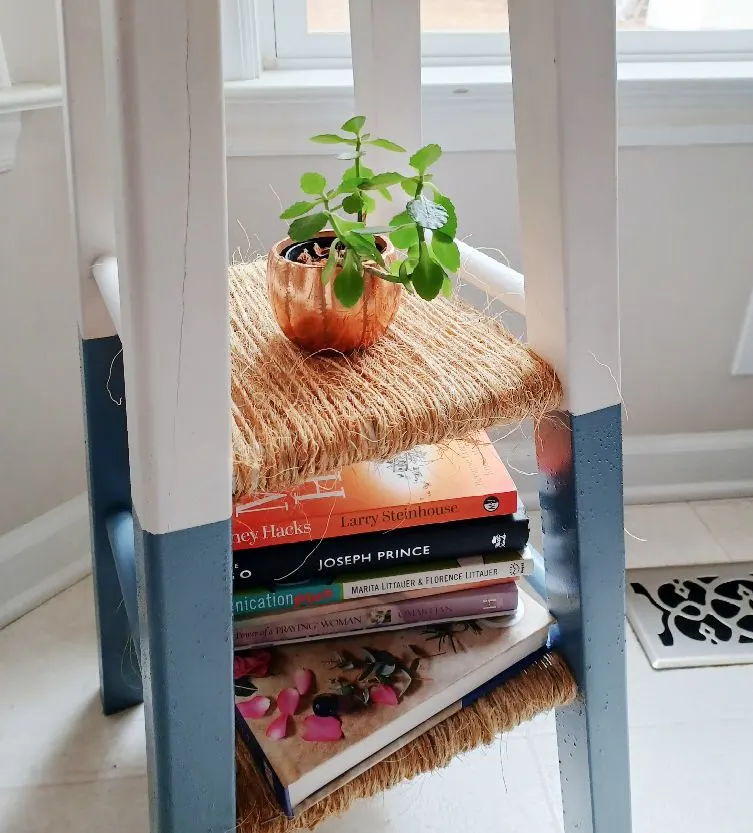
Turn your stool over and take your twine and start to wrap it around the support rods under the stool where you will want shelves.
I start off by stapling the starting piece to hold it while you wind. If you have a big spool like I had, you can wrap some on a small book to use while you make the shelf. Or you can wind up the twine into a ball first to make it easier to work with.
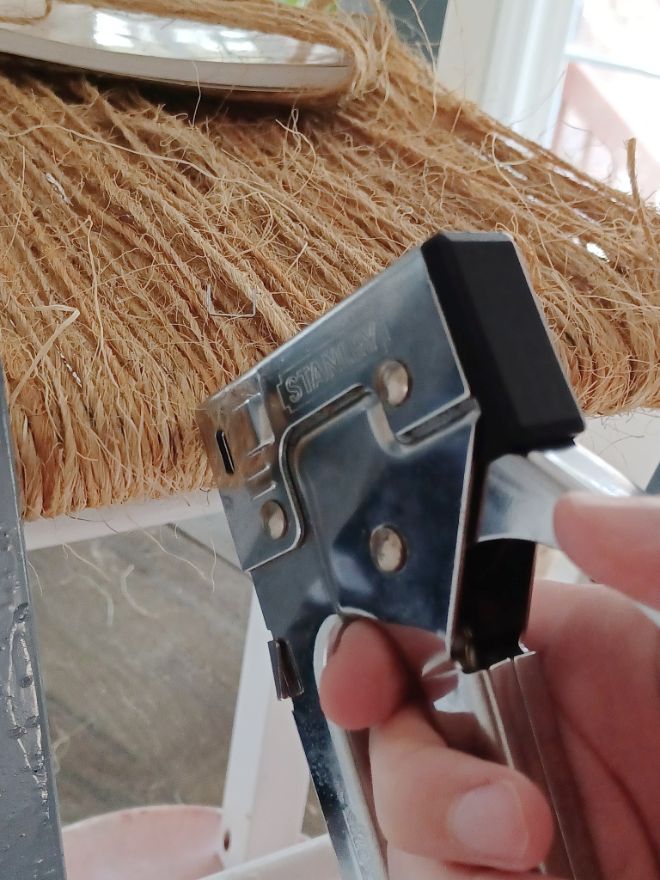
Believe it or not these twine shelves are really sturdy. As you wind your twine around support rods, secure your twine with your staples in locations you can not see on that underside.
If you leave your staples visible it really takes away from the simple beauty of the project. Make sure to place enough of them to hold it strong.


This stool looks so much better and has become a functional piece of home decor. I needed a place to put my plants and this was perfect.
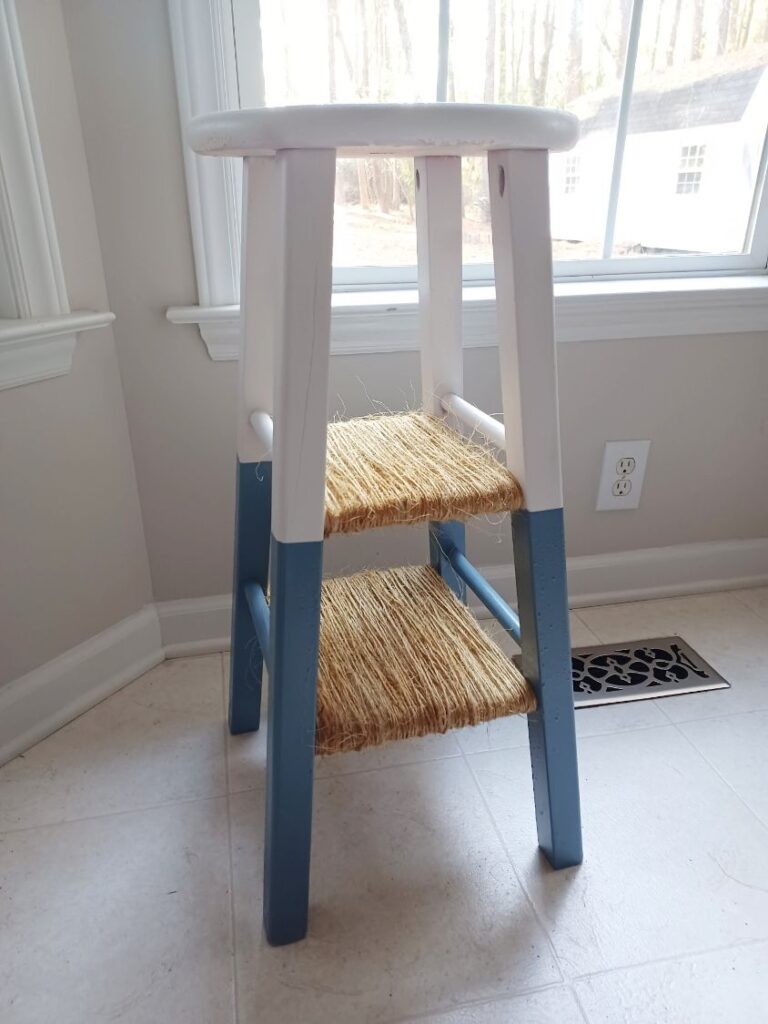

This little shelf is so incredibly sturdy. If secured well, the shelves can hold the weight of books!
You may also be interested in some of our other DIY craft projects:
- DIY Floral Monogram Letters – Simple Step-By-Step Guide
- Farmhouse Inspired DIY Plant Holder [Repurposing Craft Project]
- DIY Fairy Garden Nightlight Craft Project
Make Your Own Beautiful Living Succulent Wreath Centerpiece! Complete video course by Jeannine Romero now available through Skillshare.