

- Free Video Tutorial – Gratitude Farmhouse Decor Craft - July 25, 2023
- DIY Dollar Tree Bird Feeder Craft - July 4, 2023
- Embroidery Hoop Organizational Wall Art - February 28, 2023
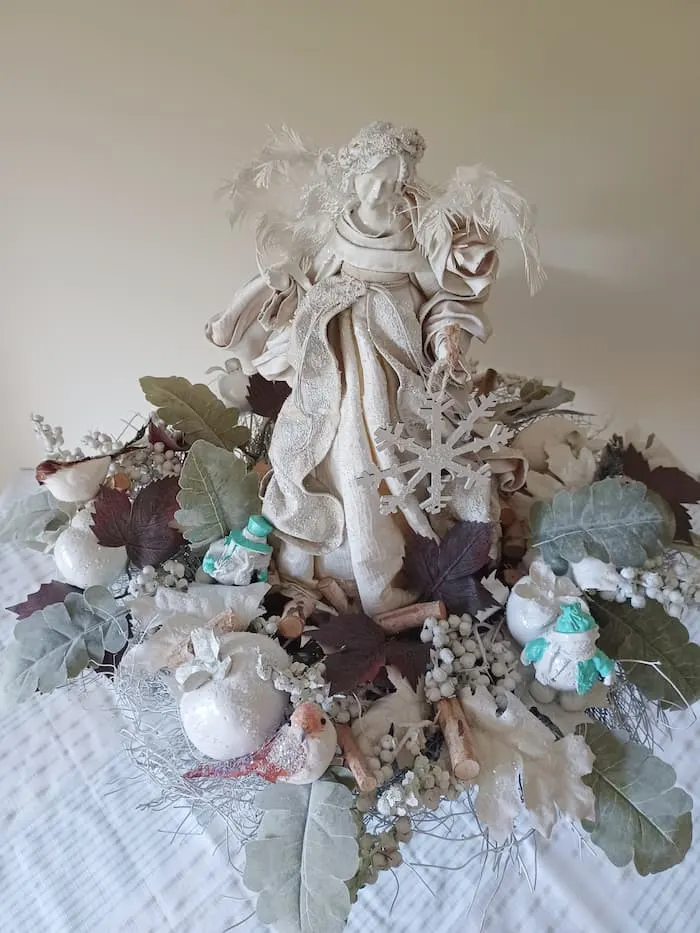
Here’s a fun and creative way to repurpose that old snow angel topper and other holiday decorations! This DIY project is pretty simple and makes use of items you may already have.
It’s a great way to get a little extra life out of decorations that are past their prime.

I wanted to make something quick and simple yet beautiful to donate to a charity fundraiser. It needed to be winter themed. Winter is such an amazing way to end the year and bring in the new year.
Winter can be breathtaking, with its full beauty on display after a freshly fallen snow. In this centerpiece, it brings tribute to just that!

This project involves using old holiday supplies you may already have that you may want to recycle. I had a few things that once I put thought into it, I came up with this centerpiece.
I had to purchase a few things to bring it together but not a lot. Chances are it is possible you may have everything you already need to make this or something similar.
I absolutely love recycling and the challenge of remaking something I no longer want into something else brand new, just like the hope a new year’s snow brings! Now let’s see what you need.
If you do not have some of these items you could potentially pick them up at your local thrift store. The paints we will link below.
Some of what I thought I wanted I ended up disregarding during the creative process. With any craft project you do, give yourself the freedom to do the same to make it what you like. Crafts are a great stress reliever and should be enjoyable to do!


Supplies Needed
- An old wreath (I used an old fall wreath)
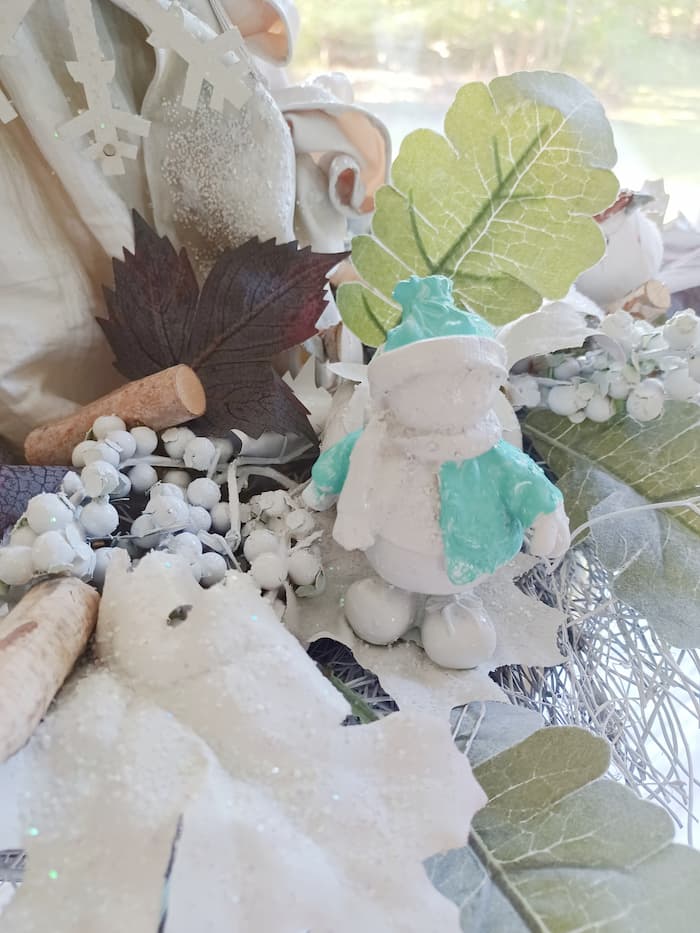
- An old angel topper or an old snowman
- A Halloween or Easter bucket (This is optional if you want it tall)
- An old bowl with a base (This is optional if you want it tall)
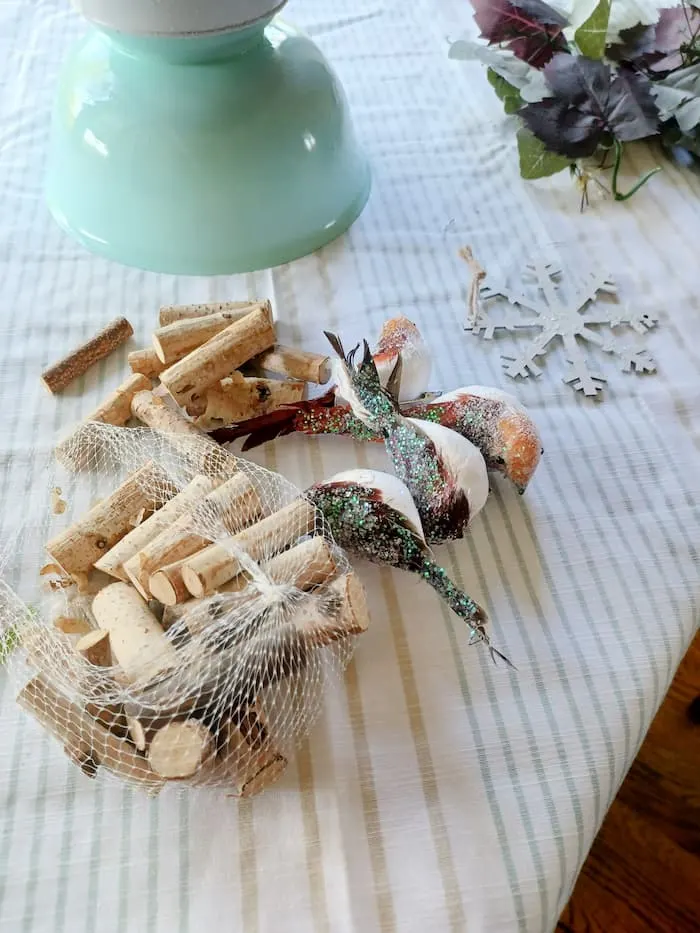
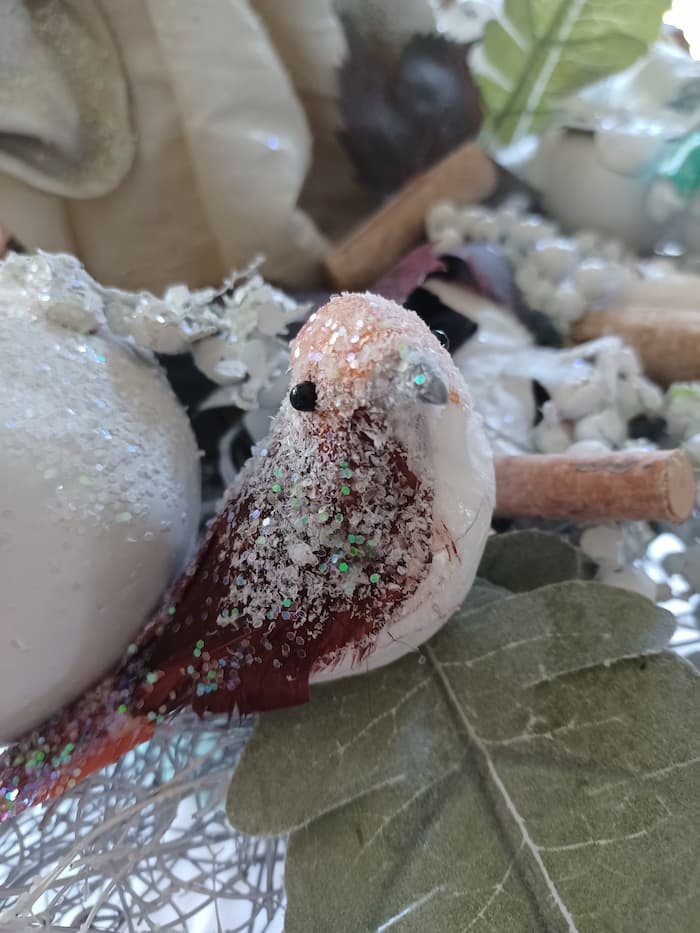
- Some winter birds
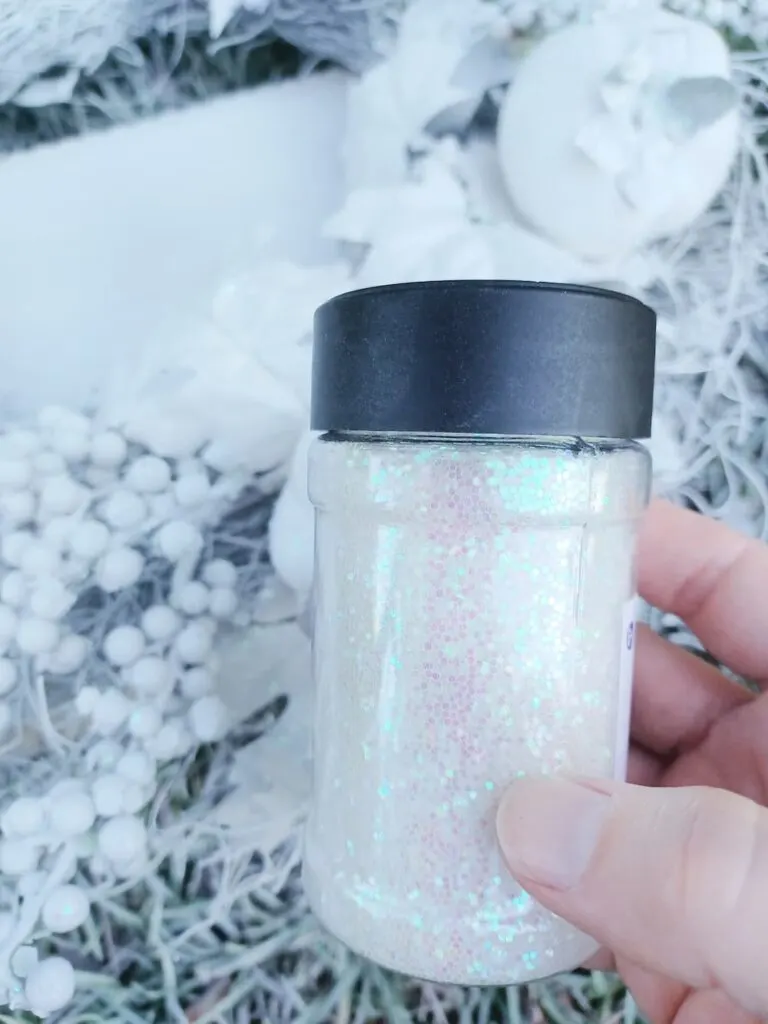
- White or clear shimmery glitter
- Rust-Oleum American Accents Spray paints (link to Amazon) in the colors you choose. You will need at least one white for the snow look.
- Apple Barrel acrylic paint (link to Amazon) in the colors you choose.
- Accents you desire
- A large Dollar Tree serving platter, you can recycle the one from the How To Make a Haunted House Tabletop Scene post
- A paint brush
- Glue
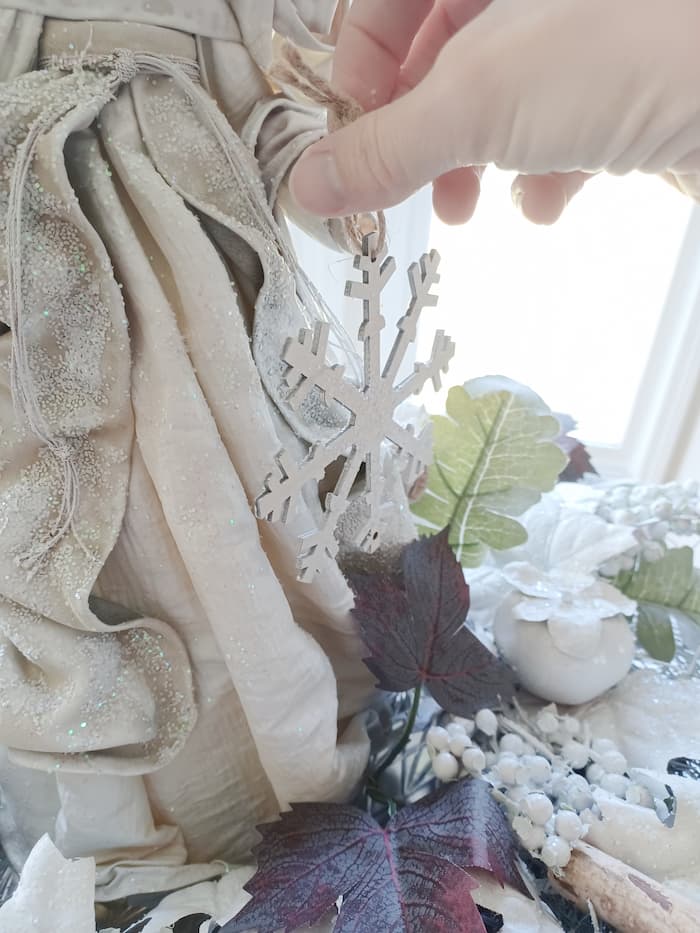
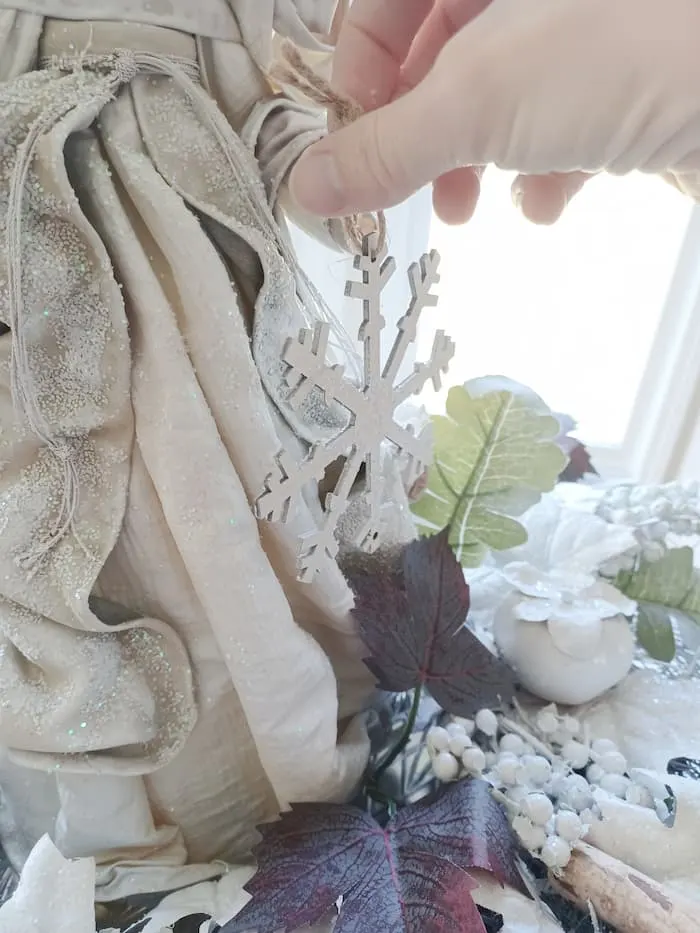
- Wooden snowflake from the Dollar Tree
Step 1
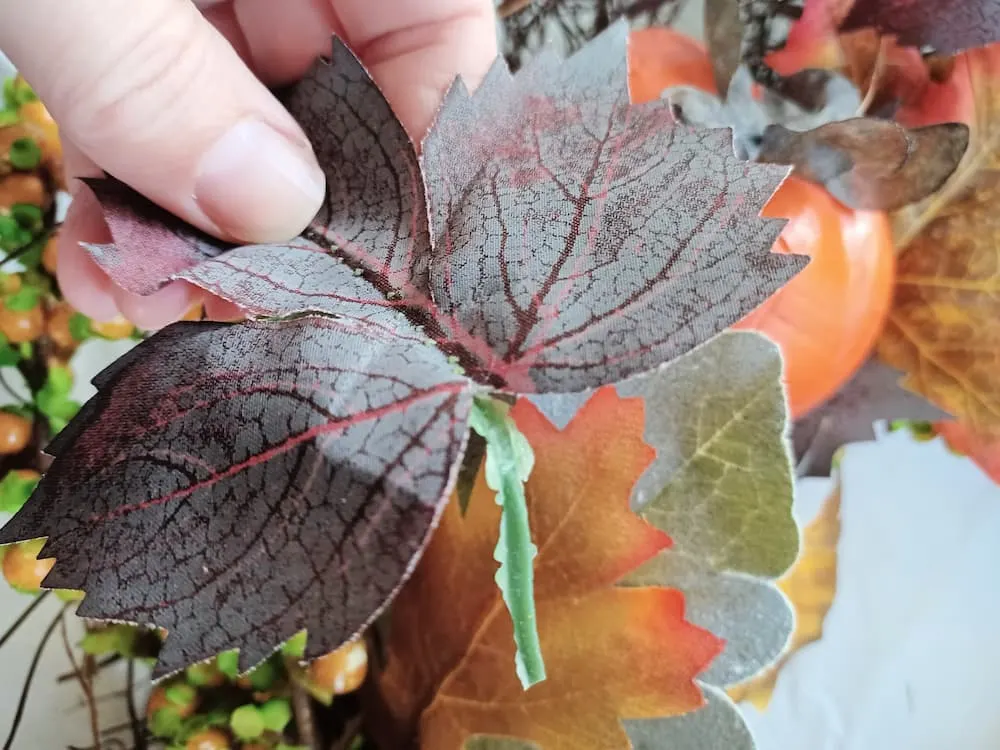
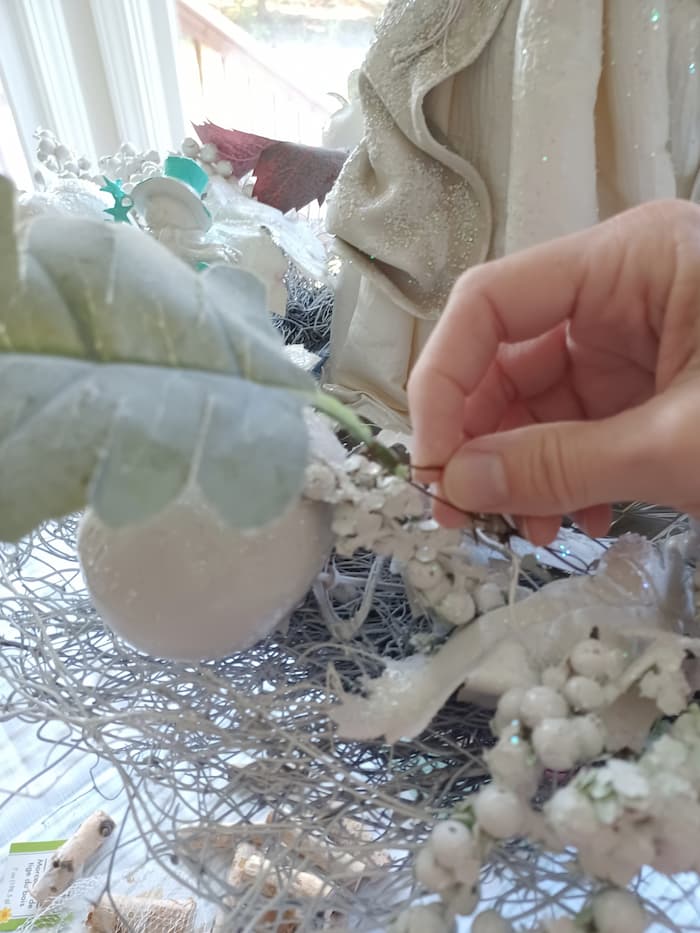
Remove from the old wreath any leaves or anything that may be in it you do not want to be white once you paint it like snow. I thought some of these leaves would look good to add back in later so I took them out and set them aside.

Step 2
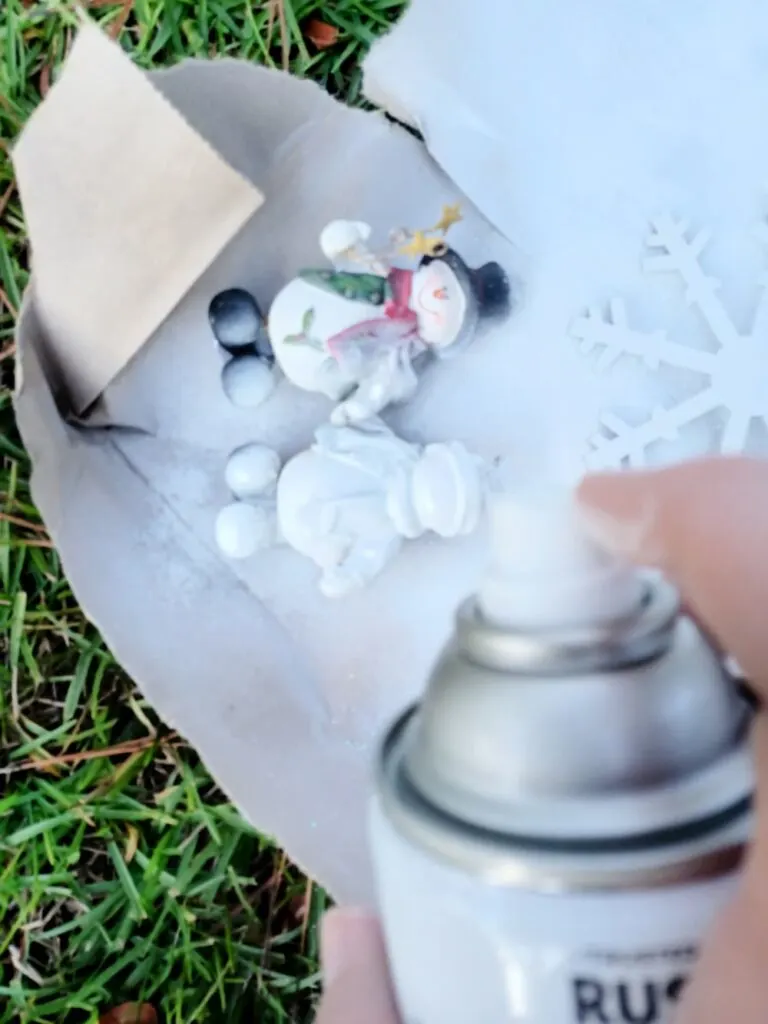
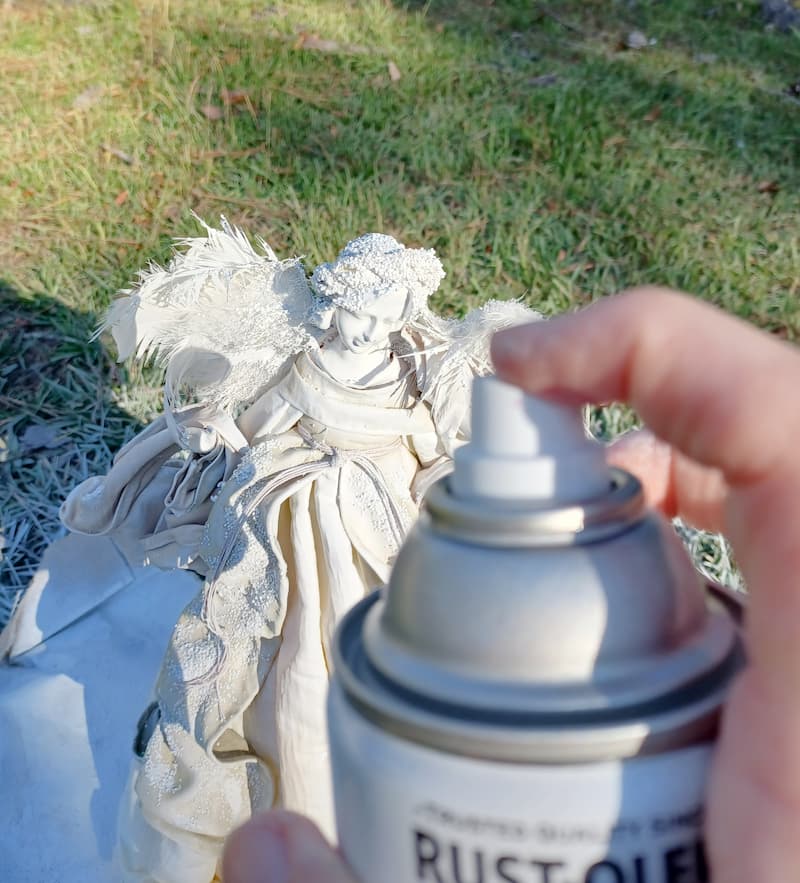
Gather everything you want to spray paint in this step of the project. Start with painting everything you want to paint with the white paint to give the snow white effect.

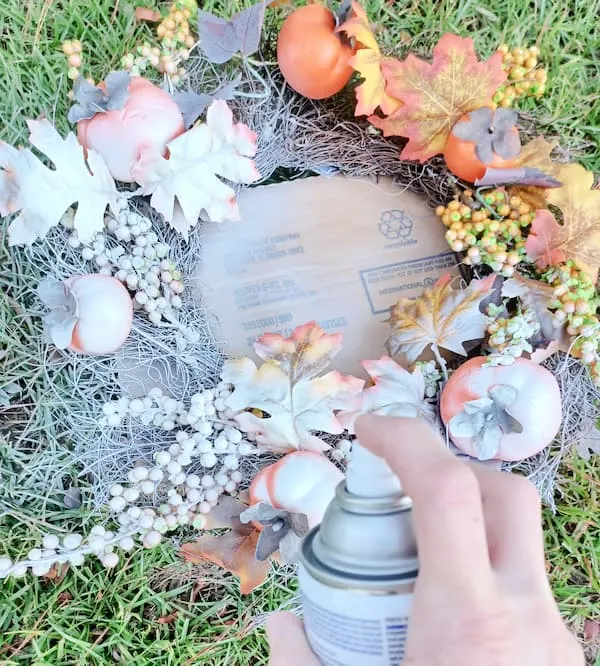
While the paint is still wet this would be a great time to sprinkle your shimmery glitter in places you want it to glisten like snow. At first I thought about using glue but the dried paint holds it well.

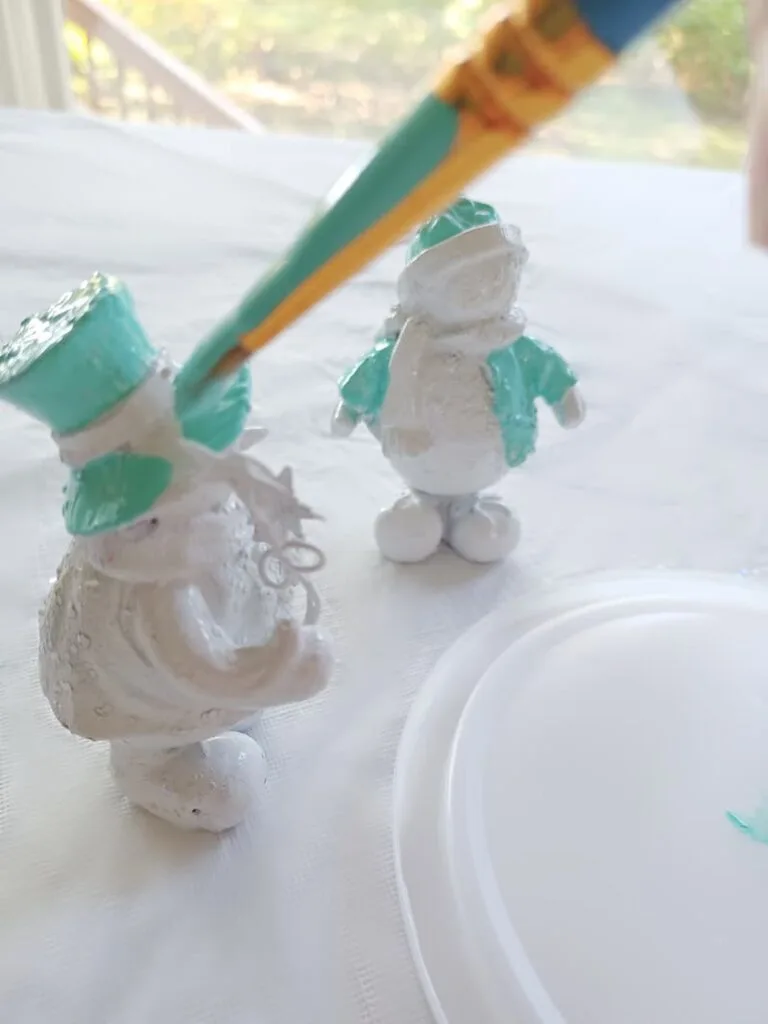
I painted the Christmas snowmen and wooden snowflake white also, as well as adding the shimmer to them. The snowmen needed to become less Christmas-themed and simply more winter themed.

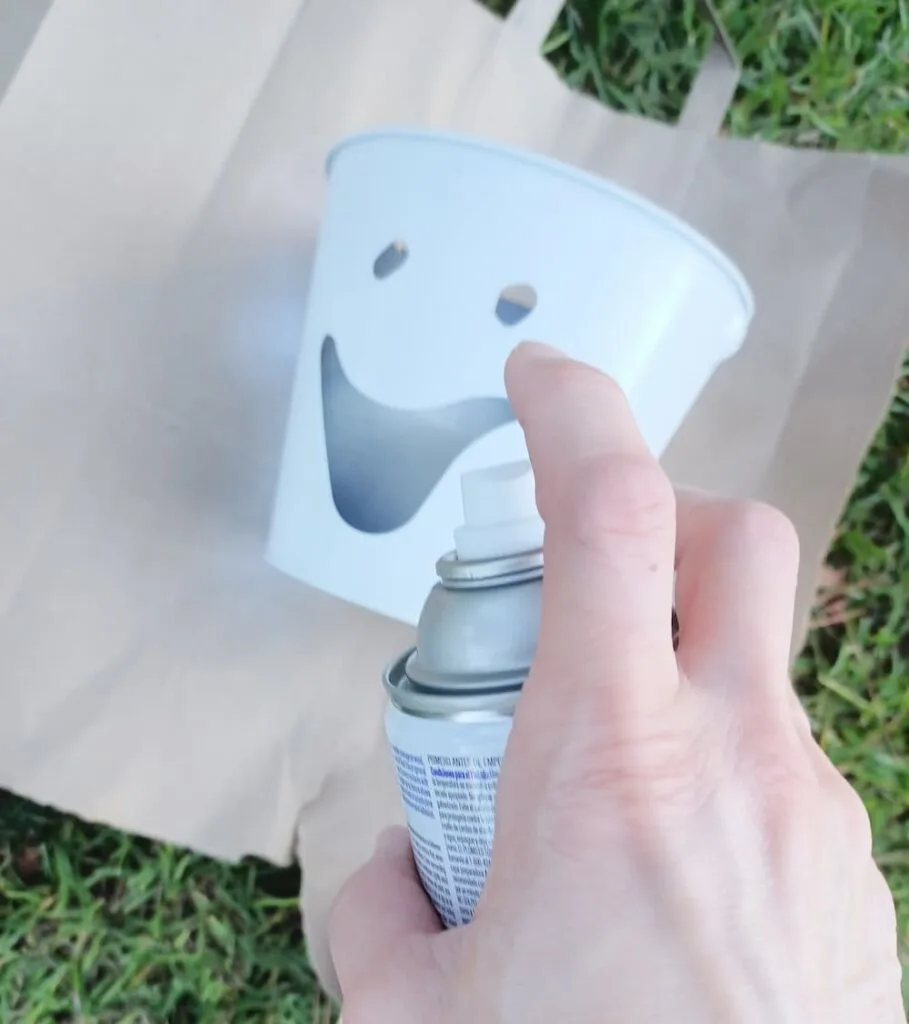
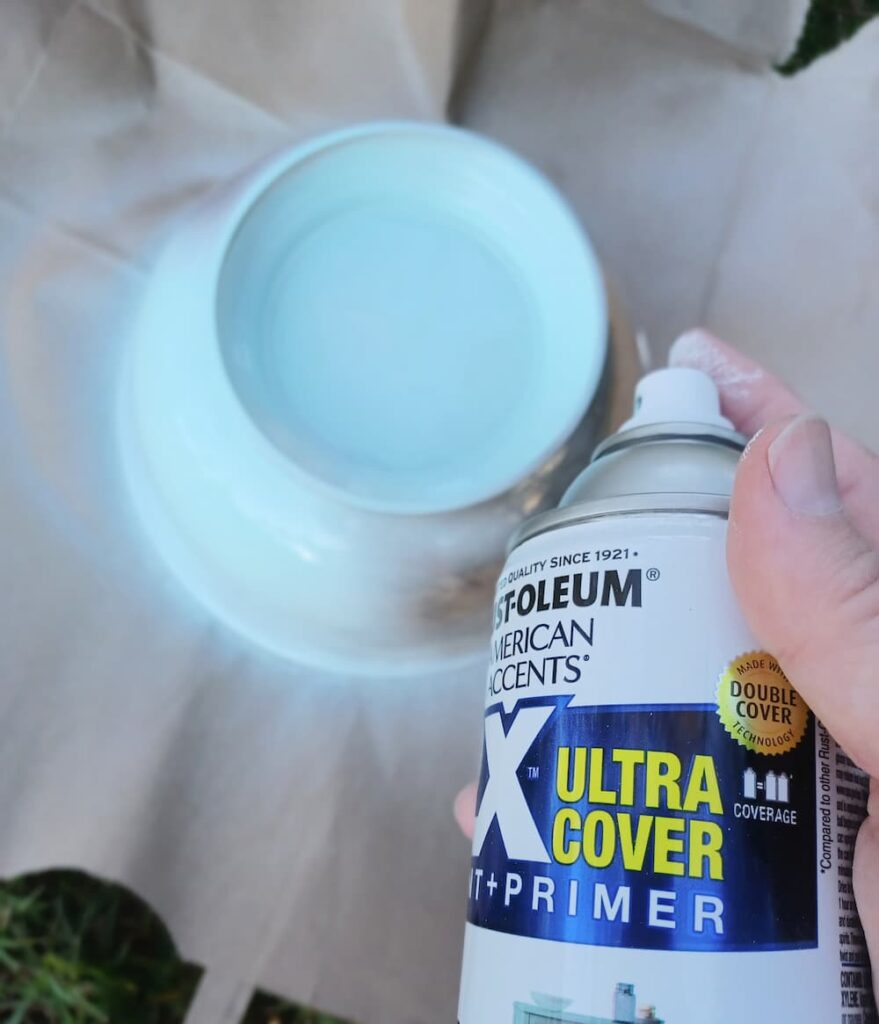
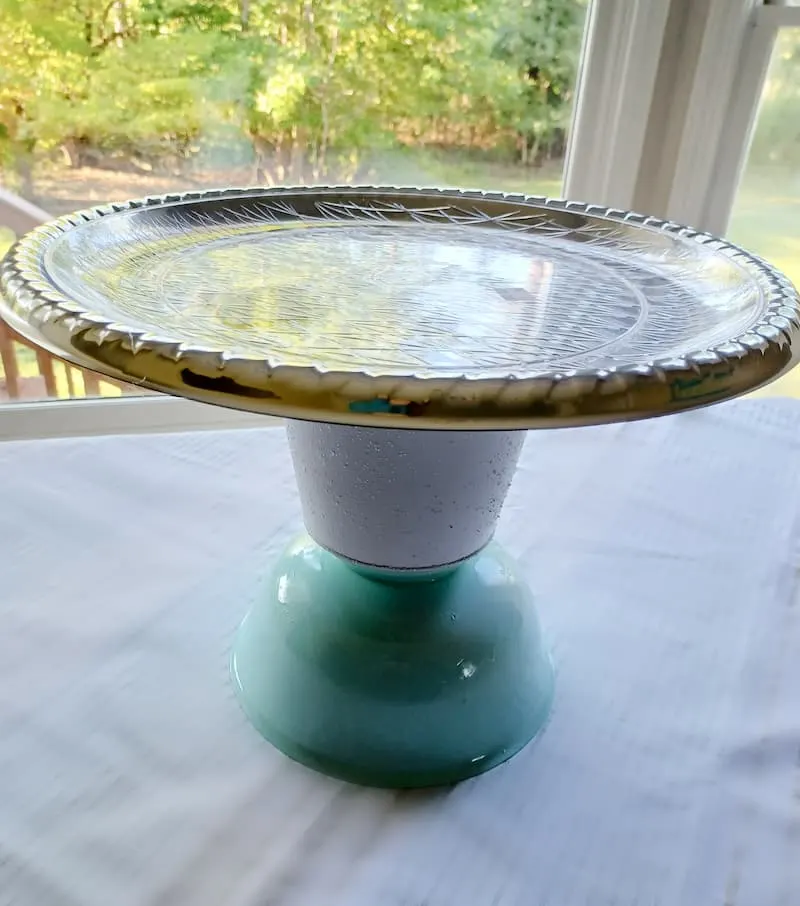
The Halloween bucket was originally a ghost but I could also see it as a snowman face which is perfect. I gave it a touch up of white paint and some glitter as well. I also painted the bowl a sea glass color.


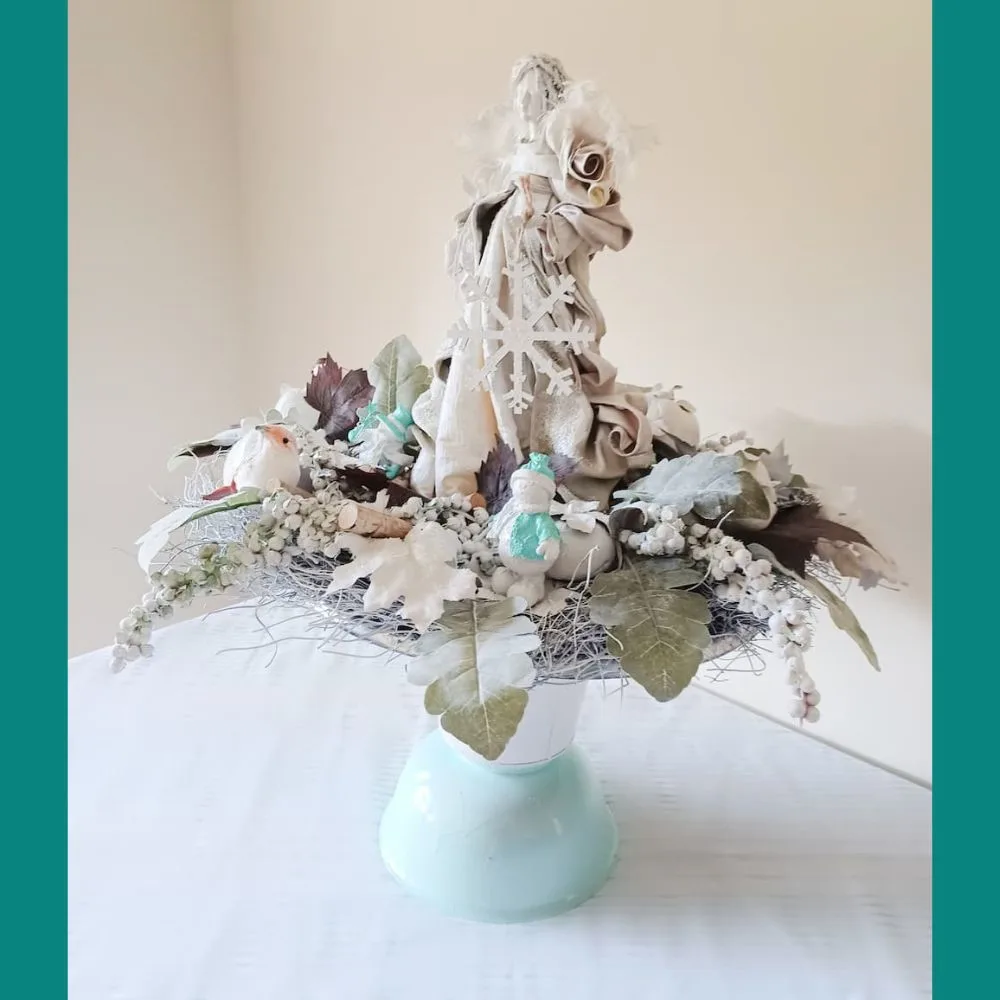
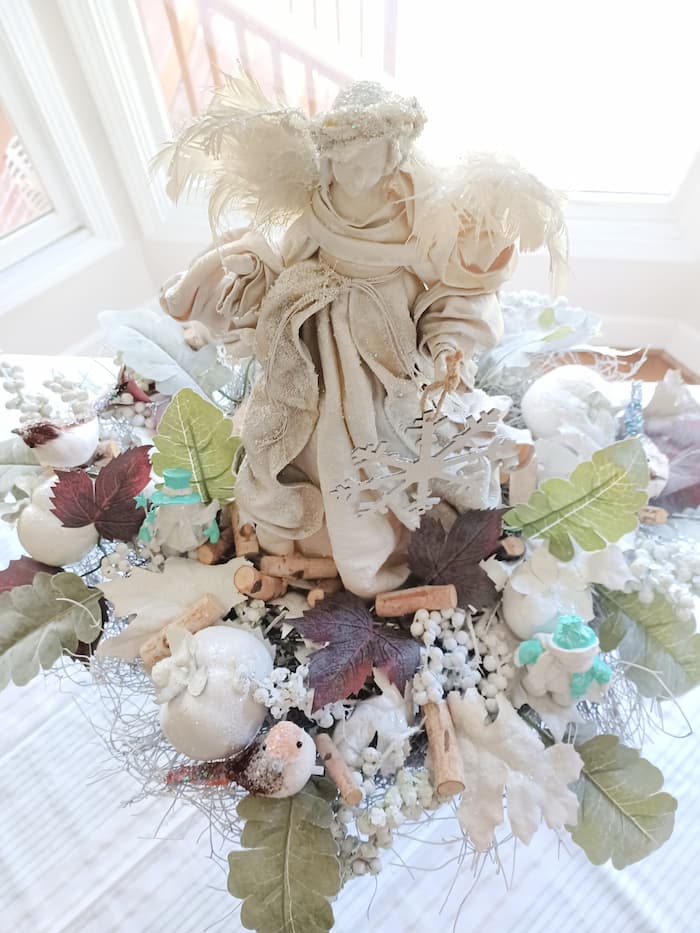
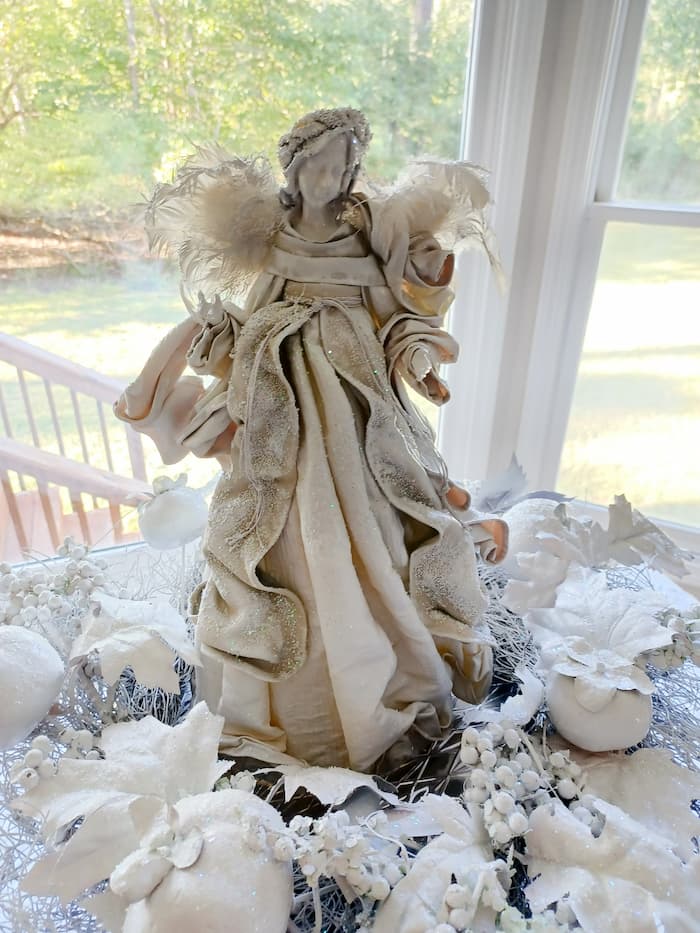
Originally I thought of leaving the angel as she was but decided not to. I painted her white adding shimmery sprinkles all over in key places to give her more of a snow angel look.

Step 3
Paint and glue glitter to your accents you would like.
I took the snowmen and added some simple color to a few places to give them some pop once the base layer of spray paint dried.

Step 4
Put together your pieces.
Start with putting your stand together. Mine fit together perfectly. The bowl and bucket’s lips fit so well it really locked themselves in place. For me there was no glue needed so I could recycle these pieces later.
Also if you do not want a stand you do not have to make that. I wanted to show you both ways. When I donate it to the fundraiser I will be giving the stand.
Next put your platter on top. I used the one we recycled and one I bought for 50 cents from the Thrift. I did this because the Dollar Tree serving platter is kind flimsy the other clear plastic platter reinforced it.

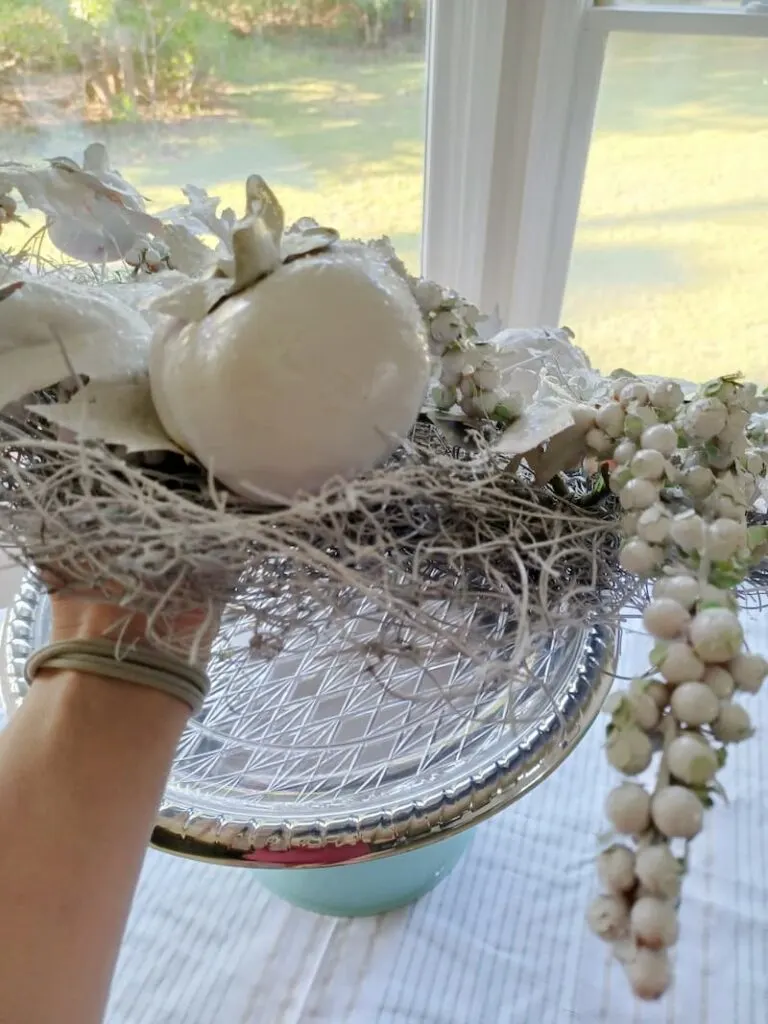
Place your wreath laying on top of the platter.

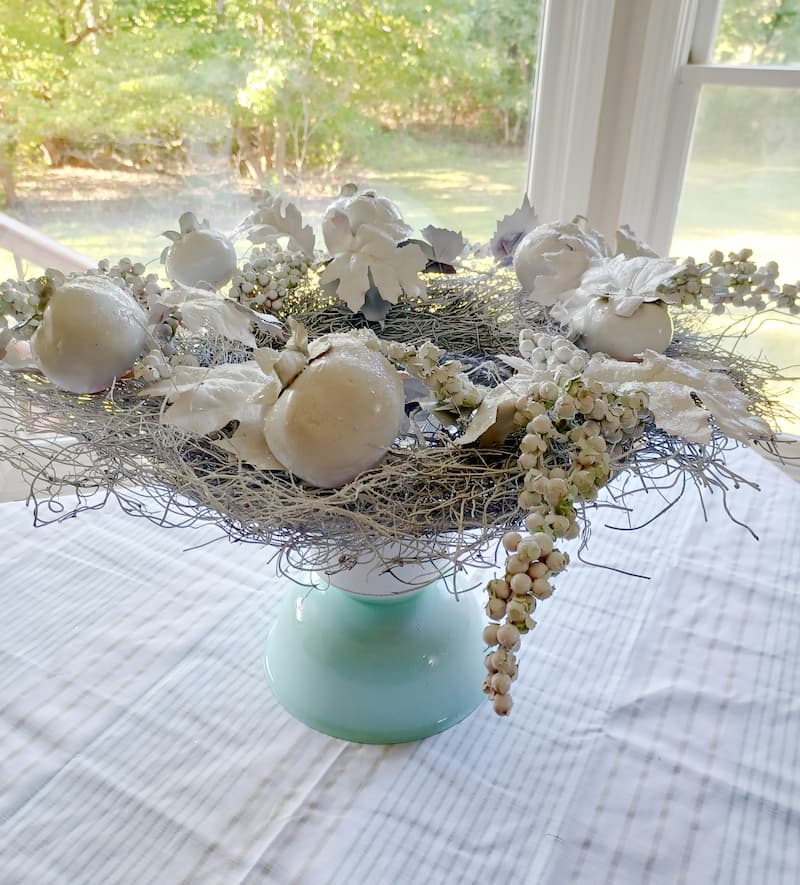

Place your angel or snowman in the center. There should be no need to glue. It will stay in place.

Step 5
Add in the extras.

This is when I added back in the leaves I set aside earlier.

It is so much fun adding in the extras. This bird was easy, no glue needed. They had little clips on the bottom. I got the birds from Hobby Lobby.


And that is it! Enjoy your Recycled Holiday Winter Snow Angel Centerpiece. This is inexpensive to make. Consider making an extra centerpiece to cheer someone up who may be suffering from winter blues. May your new year be all you dream of!

Other holiday crafts you may enjoy:
- DIY Christmas Cards: Super-Simple Craft Project
- 3 Easy DIY Christmas Craft Ideas With Jar Lids
- Colorful DIY Christmas Decorations – Merry & Bright!
Make Your Own Beautiful Living Succulent Wreath Centerpiece! Complete video course by Jeannine Romero now available through Skillshare.